基于CNN 对车牌数字进行识别,(二)
文章目录
- 序言
- 识别方案
-
- 方案1
- 方案2
- 选择方案:
- 准备数据
-
- 数据的准备
- 读取数据集
- 构建神经网络
- 进行训练
- 查看模型的准确度
- 优化
- 测试效果
- 进行车牌字符预测
-
- 实测
- 总结
- 下一章
- 完整代码:
-
- 数据处理
- 神经网络
- 训练
- 查看效果
- 预测方法
- 运行
序言
识别方案
- 有两种识别字符的方案
方案1
- 运用模板匹配,opencv自带的template进行匹配。
- 缺点:对特殊的字符样式可能无法识别,只能识别较为规则的字符
- 优点: 不需要太多的特征数据集即可识别大部分字符
方案2
- 运用卷积神经网络训练一个神经系统进行识别
- 缺点: 需要大量的训练数据, 对训练数据要求较高
- 优点: 能识别各种不标准的车牌特征
选择方案:
- 本文中将以第二种方案进行识别
准备数据
数据集下载
数据的准备
读取数据集
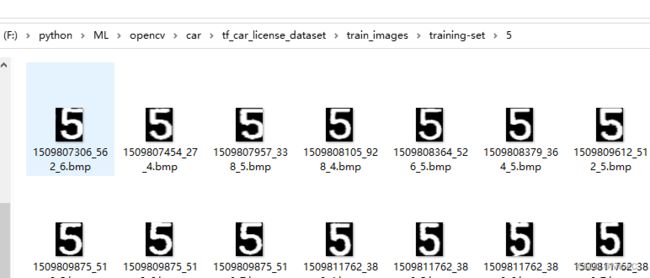
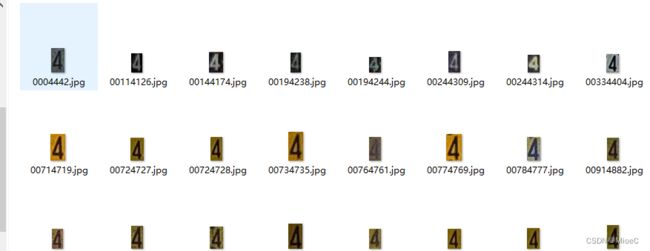
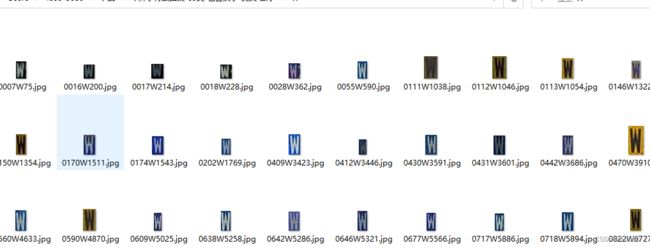
- 数据较少, 所以需要做一些变换,增加泛化。
# 读取文件
from keras.preprocessing.image import ImageDataGenerator

train_gen = ImageDataGenerator(rescale=1/255.0, horizontal_flip=True, rotation_range=30, vertical_flip=True, featurewise_center=True, width_shift_range=12, height_shift_range=12)
valid_gen = ImageDataGenerator(rescale=1/255.0, horizontal_flip=True, rotation_range=30, vertical_flip=True, featurewise_center=True, width_shift_range=12, height_shift_range=12)
test_gen = ImageDataGenerator(rescale= 1/ 255.0)

train_img_gen = train_gen.flow_from_directory('./tf_car_license_dataset/train_images/training-set/', target_size=(32, 32), batch_size=32, color_mode='grayscale')
valid_img_gen = train_gen.flow_from_directory('./tf_car_license_dataset/train_images/validation-set/', target_size=(32, 32), batch_size=32, color_mode='grayscale')
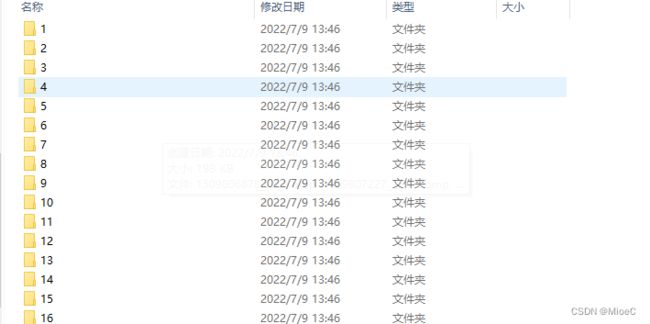
- 一共有四十个类目
构建神经网络
- 这里运用了两层的卷积神经网络,并进行两次池化操作,最后用全连接层进行分类,优化函数选择adam 损失函数用交叉熵损失函数。
- 这里
# 构建神经网络
model = keras.Sequential([
    keras.layers.Conv2D(32, (3, 3), 1, padding='same', activation="relu", input_shape = (32, 32, 1)),
    keras.layers.MaxPool2D(2, 2),
    keras.layers.Conv2D(64, (3, 3), 1, activation='relu'),
    keras.layers.MaxPool2D(2, 2),
    keras.layers.Flatten(),
    keras.layers.Dense(128, activation='relu'),
    keras.layers.Dense(40, activation='softmax')
])
model.compile(optimizer='adam', loss = keras.losses.categorical_crossentropy, metrics=['acc'])
model.summary()
进行训练
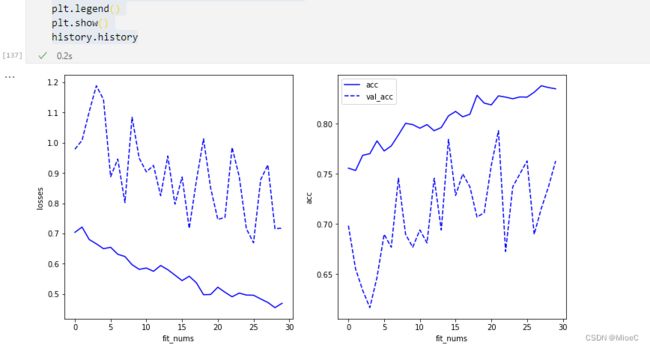
history = model.fit(train_img_gen, validation_data = valid_img_gen, epochs=30, batch_size=128)
查看模型的准确度
import matplotlib.pyplot as plt
losses = history.history['loss']
val_losses = history.history['val_loss']
acc = history.history['acc']
val_acc = history.history['val_acc']
plt.figure(figsize=(12, 6))
plt.subplot(121)
plt.xlabel('fit_nums')
plt.ylabel('losses')
plt.plot(losses,'b-')
plt.plot(val_losses,'b--')
plt.subplot(122)
plt.xlabel('fit_nums')
plt.ylabel('acc')
plt.plot(acc, 'b-', label='acc')
plt.plot(val_acc, 'b--', label = 'val_acc')
plt.legend()
plt.show()
history.history
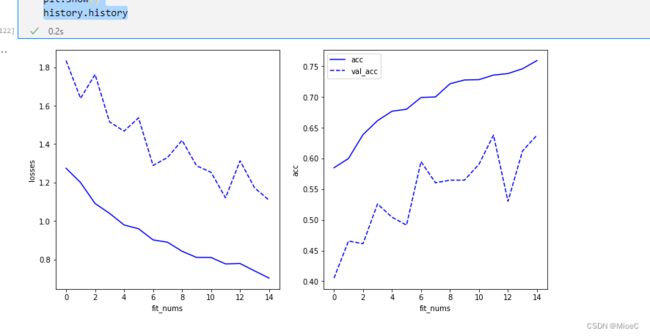
可以看到, 训练的效果在不断增强,不过准确率不是很好,还有过拟合的风险,后面优化下。
优化
- 实验下预测效果。
测试效果
运用PIL的Image
from PIL import Image

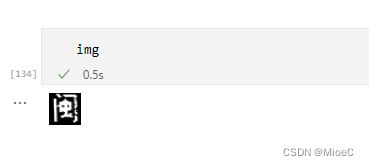
img = Image.open('./tf_car_license_dataset/test_images/1.bmp')
img = img.resize((32, 32))
# 这里变成输入的格式(count, size,size, 层数)
img_arr = np.array(img).reshape((1, 32, 32, 1))
注意: 因为我们训练时输入的是灰度图像,没有三通道的,所以之前的图片需要特殊处理成灰度图在进行输入
model.predict(img_arr)

可以看到,这里输出了,one-hot的编码数组,接下来只需要取最大值就可以了
template = ['0','1','2','3','4','5','6','7','8','9',
            'A','B','C','D','E','F','G','H','J','K','L','M','N','P','Q','R','S','T','U','V','W','X','Y','Z',
            '京','闽','粤','苏','沪','浙']
template[np.argmax(model.predict(img_arr))]
‘闽’
进行车牌字符预测
def test_img(path):
    img = Image.open(path).convert("L")
    img = img.resize((32, 32))
    img_arr = np.array(img).reshape((1, 32, 32, 1))
    template = ['0','1','2','3','4','5','6','7','8','9',
            'A','B','C','D','E','F','G','H','J','K','L','M','N','P','Q','R','S','T','U','V','W','X','Y','Z',
            '京','闽','粤','苏','沪','浙']
    return template[np.argmax(model.predict(img_arr))]
    # return model.predict(img_arr)
这里直接返回预测的字符
实测
import os
out = ""
for path in os.listdir('./split/'):
    out += test_img('./split/' + path)

print(out)
- 可以看到预测效果不太好
总结
- 测试效果不怎么好,数据集太少了,无法拟合不同的图片,接下来进行神经网络优化,提升下泛化能力。
- 如果有更多的数据集,我们可以训练出精度很高的神经网络,但基本的实现思路就是这样子,
下一章
接下来我将用模板匹配的方式进行效果预测,看看会不会有更好的结果
完整代码:
数据处理
import tensorflow.keras as keras
import numpy as np
# 读取文件
from keras.preprocessing.image import ImageDataGenerator

train_gen = ImageDataGenerator(rescale=1/255.0, horizontal_flip=True, rotation_range=30, vertical_flip=True, featurewise_center=True, width_shift_range=12, height_shift_range=12)
valid_gen = ImageDataGenerator(rescale=1/255.0, horizontal_flip=True, rotation_range=30, vertical_flip=True, featurewise_center=True, width_shift_range=12, height_shift_range=12)
test_gen = ImageDataGenerator(rescale= 1/ 255.0)

train_img_gen = train_gen.flow_from_directory('./tf_car_license_dataset/train_images/training-set/', target_size=(32, 32), batch_size=32, color_mode='grayscale')
valid_img_gen = train_gen.flow_from_directory('./tf_car_license_dataset/train_images/validation-set/', target_size=(32, 32), batch_size=32, color_mode='grayscale')
神经网络
# 构建神经网络
model = keras.Sequential([
    keras.layers.Conv2D(32, (3, 3), 1, padding='same', activation="relu", input_shape = (32, 32, 1)),
    keras.layers.MaxPool2D(2, 2),
    keras.layers.Conv2D(64, (3, 3), 1, activation='relu'),
    keras.layers.MaxPool2D(2, 2),
    keras.layers.Flatten(),
    keras.layers.Dense(128, activation='relu'),
    keras.layers.Dense(40, activation='softmax')
])
model.compile(optimizer='adam', loss = keras.losses.categorical_crossentropy, metrics=['acc'])
model.summary()
训练
history = model.fit(train_img_gen, validation_data = valid_img_gen, epochs=30, batch_size=128)
查看效果
import matplotlib.pyplot as plt
losses = history.history['loss']
val_losses = history.history['val_loss']
acc = history.history['acc']
val_acc = history.history['val_acc']
plt.figure(figsize=(12, 6))
plt.subplot(121)
plt.xlabel('fit_nums')
plt.ylabel('losses')
plt.plot(losses,'b-')
plt.plot(val_losses,'b--')
plt.subplot(122)
plt.xlabel('fit_nums')
plt.ylabel('acc')
plt.plot(acc, 'b-', label='acc')
plt.plot(val_acc, 'b--', label = 'val_acc')
plt.legend()
plt.show()
history.history
预测方法
def test_img(path):
    img = Image.open(path).convert("L")
    img = img.resize((32, 32))
    img_arr = np.array(img).reshape((1, 32, 32, 1))
    template = ['0','1','2','3','4','5','6','7','8','9',
            'A','B','C','D','E','F','G','H','J','K','L','M','N','P','Q','R','S','T','U','V','W','X','Y','Z',
            '京','闽','粤','苏','沪','浙']
    return template[np.argmax(model.predict(img_arr))]
    # return model.predict(img_arr)
运行
import os
out = ""
for path in os.listdir('./split/'):
    out += test_img('./split/' + path)

print(out)


