《微信小程序开发》 页面导航最强详解 | 如何对小程序页面进行跳转?
《微信小程序开发》 页面导航最强详解 | 如何对小程序页面进行跳转?
文章目录
- 《微信小程序开发》 页面导航最强详解 | 如何对小程序页面进行跳转?
-
- 一、微信小程序导航
- 二、命名式导航与编程式导航对应表
- 三、命名式导航
- 四、编程式导航
- 五、路由传参
- 六、页面栈
- 代码托管
- 参考资料
- 相关博客
一、微信小程序导航
小程序能够在不同的页面进行跳转切换,路由起到了至关重要的作用,所有页面的路由全部由小程序框架进行管理,要想开发好小程序,路由可谓是一门必修课。
在使用方面上区分,小程序的路由和Vue类似,分为 命名式导航 和 编程式导航 两种,只不过路由的切换方式、传参方式等有所不同。同时微信小程序的导航跟 uni-app 十分相似,学会原生的微信小程序,相信对于使用 uni-app 是没有问题的。
在本文演示代码中,tabbar 页面配置如下, 其余页面均为非 tabbar 页面。
  "tabBar": {
    "list": [
      {
        "pagePath": "pages/index/index",
        "text": "主页",
        "iconPath": "./image/homepage.png",
        "selectedIconPath": "./image/homepage-sel.png"
      },
      {
        "pagePath": "pages/about/index",
        "text": "关于",
        "iconPath": "./image/category.png",
        "selectedIconPath": "./image/category-sel.png"
      }
    ]
  }
本文包含的内容有:命名式导航,编程式导航,路由传参,页面栈。
二、命名式导航与编程式导航对应表
1、在开始讲解之前,我觉得有必要将此对应表先列出来:
- ①这样有助于阅读后面的内容时能够回来查询弥补。
- ②作为复习作用,在往后打开此文章能够一目了然的作为一个备忘表。
| 跳转方式(open-type) | 编程式对应 | To tabBar 页面 | 说明 | 最低版本 |
|---|---|---|---|---|
| navigate | wx.navigateTo |
❌ | 保留当前页面,跳转到应用内的某个页面,但是不能跳到 tabbar 页面。 | 兼容 |
| redirect | wx.redirectTo |
❌ | 关闭当前页面,跳转到应用内的某个页面。但是不允许跳转到 tabbar 页面。 | 兼容 |
| switchTab | wx.switchTab |
✅ | 跳转到 tabBar 页面,并关闭其他所有非 tabBar 页面。 | 兼容 |
| reLaunch | wx.reLaunch |
✅ | 关闭所有页面,打开到应用内的某个页面。 | 1.1.0 |
| navigateBack | wx.navigateBack |
不能在 tabBar 页面中使用❗ | 关闭当前页面,返回上一页面或多级页面。 | 1.1.0 |
| exit | wx.exitMiniProgram |
退出小程序,target="miniProgram"时生效 | 2.1.0 |
2、一些管理路由Api:
- getCurrentPages(): 获取当前页面栈。数组中第一个元素为首页,最后一个元素为当前页面。小程序中页面栈最多十层。
showPages() { console.log(getCurrentPages()); } // -> [Ra] - Router对象: 页面路由器对象。可以通过
this.pageRouter或this.router获得当前页面或自定义组件的路由器对象。
页面路由器有switchTab、reLaunch、redirectTo、navigateTo、navigateBack五个方法,与wx对象向同名的五个方法switchTab、reLaunch、redirectTo、navigateTo、navigateBack功能相同。不同的是,使用Router对象进行页面跳转,相对路径永远相对于this指代的页面或自定义组件。showRout() { console.log(this.pageRouter); console.log(this.router); // -> true console.log(this.pageRouter === this.router); }
三、命名式导航
1、基本语法
使用 navigator 组件进行跳转,可以理解成 HTML 中的 标签。url 属性填入路由地址,更改 open-type 属性实现不同的跳转方式。
<navigator open-type="switchTab" url="../index/index">主页navigator>
可以配合 button 组件进行使用
<navigator open-type="switchTab" url="../index/index">
    <button type="primary" class="btn">主页button>
navigator>
2、navigate 跳转方式
保留当前页面,跳转到应用内的某个页面,但是不能跳到 tabbar 页面,一般用来跳转到详情页、支付页等。
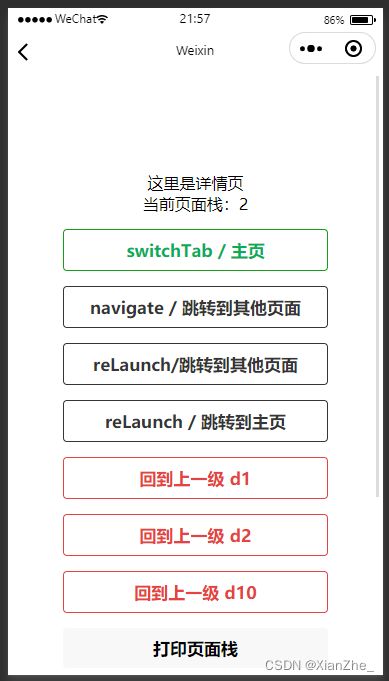
保留当前页面就是在页面栈中保留了上一页面指向,注意观察下方图示,页面栈从数量1变成了2。
<navigator open-type="navigate" url="../detail/index">
  <button type="primary" class="btn">navigate / 跳转到详情页button>
navigator>
| 跳转前 | 跳转后 |
|---|---|
 |
 |
倘若非要跳转到 tabbar 页面,那么点击之后是没有效果的。
3、redirect 跳转方式
关闭当前页面,跳转到应用内的某个页面。 但是不允许跳转到 tabbar 页面。
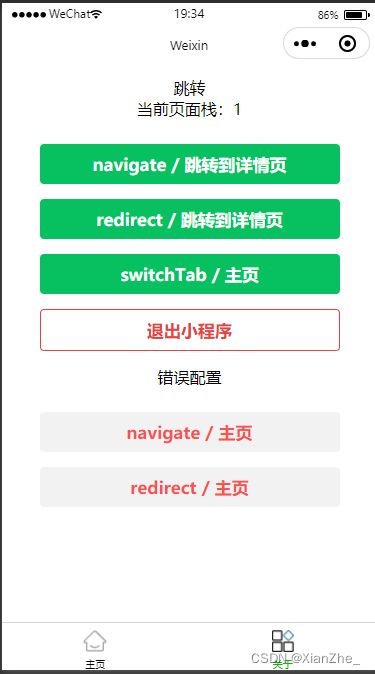
注意观察下方图示,可以发现两点:
- 对比
navigate跳转方式,使用redirect跳转方式后页面栈数为1,始终指向当前页面。 - 在详情页中,左上角不再是回退按钮,更改为了主页按钮,证明跳转前的页面已被关闭,页面栈中已移除。
<navigator open-type="redirect" url="../detail/index">
  <button type="primary" class="btn">redirect / 跳转到详情页button>
navigator>
| 跳转前 | 跳转后 |
|---|---|
 |
 |
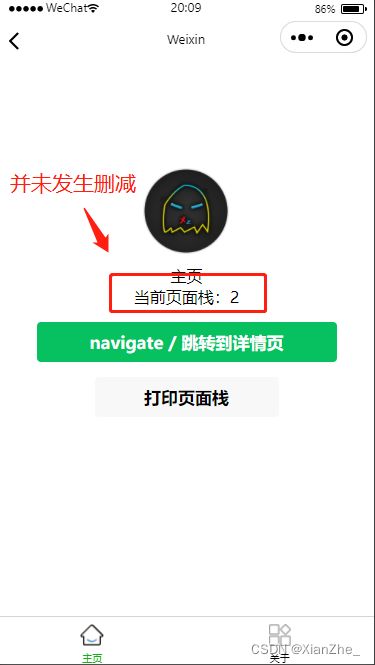
但实际上 redirect 是可以跳转到 tabbar 页面,但会给页面栈造成意料之外的影响。
打印出跳转前和跳转后的页面栈,看看两者之间的区别:
- 可以看到跳转之后的页面栈数并未发生改变,但透过页面栈元素的
route属性可以发现,详情页其实已经被删除。相对的,页面栈居然存在多个同样的 tarBar 页面。 - 带着这个意料之外的页面栈,再次来到详情页,跳转回到主页时,抛出
Expected updated data but get first rendering data异常,且页面栈元素被重置。
鉴于对页面栈的影响,且官方并不推荐使用,所以伙伴们还是别用这个方式跳转到tabbar页面为妙。
<navigator open-type="redirect" url="../index/index">
  <button type="warn" class="btn">redirect / 主页button>
navigator>
| 跳转前 | 跳转后 |
|---|---|
 |
 |
 |
 |
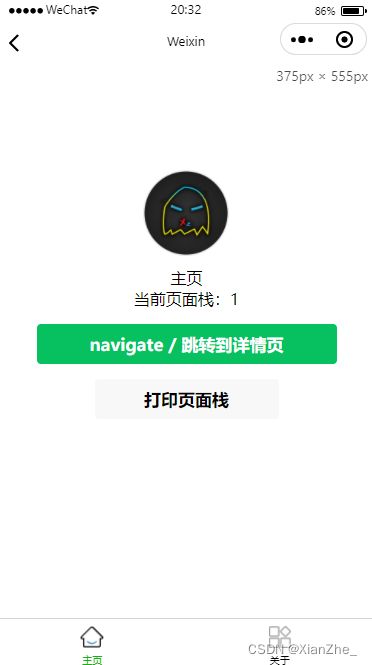
4、switchTab 跳转方式
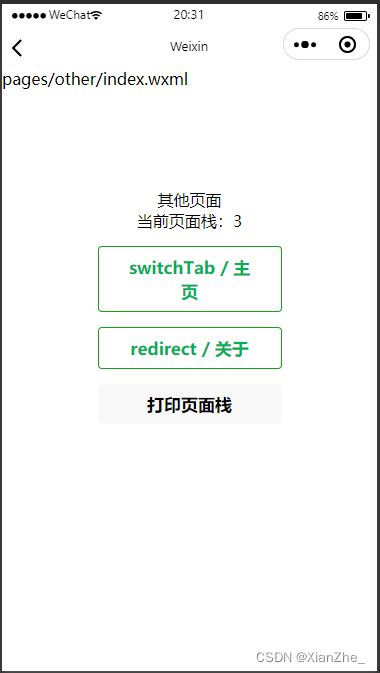
跳转到 tabBar 页面,使用此跳转方式会关闭其他所有非 tabBar 页面。
在下面的示例图中,使用后switchTab 跳转方式跳转后,页面栈中只剩下当前页面元素。
<navigator open-type="switchTab" url="../index/index">
  <button type="primary" class="btn">switchTab / 主页button>
navigator>
| 跳转前 | 跳转后 |
|---|---|
 |
 |
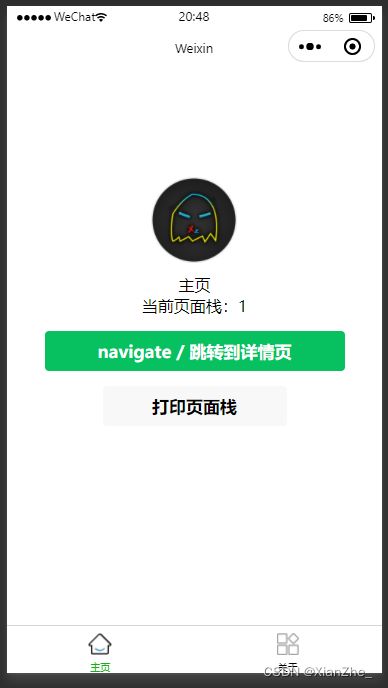
5、reLaunch 跳转方式
关闭所有页面,打开到应用内的某个页面。
就用法而已,reLaunch 跳转方式与 switchTab 跳转方式类似,不同的在于switchTab 是专门为 tabBar 页面设计的,只能跳转到 tabBar 页面,而 reLaunch 跳转到哪都行。
<navigator open-type="reLaunch" url="../other/index">
  <button plain class="btn">reLaunch/跳转到其他页面button>
navigator>
| 跳转前 | 跳转后 |
|---|---|
 |
 |
 |
 |
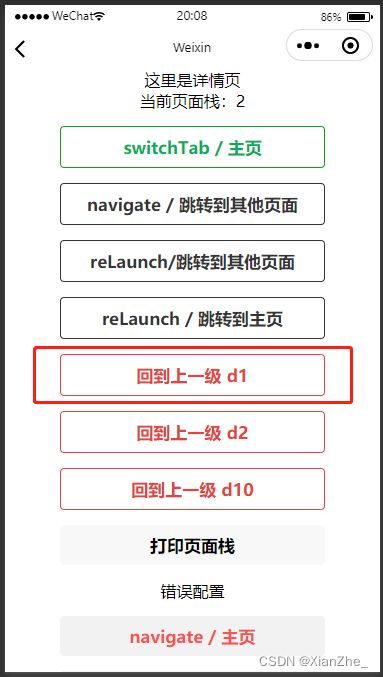
6、navigateBack 跳转方式
关闭当前页面,返回上一页面或多级页面,需要配合 delta 属性进行使用。
使用 navigateBack 时,需要注意以下几点:
- 页面栈最多十层,也就是说最多能返回九级页面,注意把握页面栈大小。
- 如果 delta 大于已有页面数,则跳转到栈中的第一个页面(首页)。
navigateBack不能在 tabbar 页面中使用,会不起作用。
<navigator open-type="navigateBack" delta="1">
  <button type="warn" plain class="btn">回到上一级 d1button>
navigator>
<navigator open-type="navigateBack" delta="2">
  <button type="warn" plain class="btn">回到上一级 d2button>
navigator>
<navigator open-type="navigateBack" delta="10">
  <button type="warn" plain class="btn">回到上一级 d10button>
navigator>
| 跳转前 | 跳转后 |
|---|---|
 |
 |
7、exit 退出小程序
exit 只能在手机上才有效果,开发者工具上是没用的,要注意将 target 设为miniProgram。
<navigator open-type="exit" target="miniProgram">
  <button type="warn" plain class="btn">退出小程序button>
navigator>
四、编程式导航
与声明式导航不同的是,编程式导航主要是靠JS代码实现,调用 wx. Api 进行跳转,其作用和声明式导航是一样的。
关于每个不同跳转方式的区别,在 三、命名式导航 中已经充分的讲解,这里不过多叙述,只演示写法。
声明式导航和编程式导航只是写法不同,同时编程式的写法大同小异,下面的演示重复性会很高,已经知道写法的伙伴们可以跳着看。
1、wx.navigateTo
保留当前页面,跳转到应用内的某个页面,但是不能跳到 tabbar 页面,一般用来跳转到详情页、支付页等。
<button type="primary" style="margin-top: 30rpx;" class="btn" bindtap="toDetailEvent">navigate / 跳转到详情页button>
async toDetailEvent() {
  wx.navigateTo({
    // 需要跳转的应用内非 tabBar 的页面的路径
    url: '/pages/detail/index',
    // 接口调用成功的回调函数
    success: (res) => {},
    // 接口调用失败的回调函数
    fail: (res) => {},
    // 接口调用结束的回调函数(调用成功、失败都会执行)
    complete: (res) => {},
  })
},
| 跳转前 | 跳转后 |
|---|---|
 |
 |
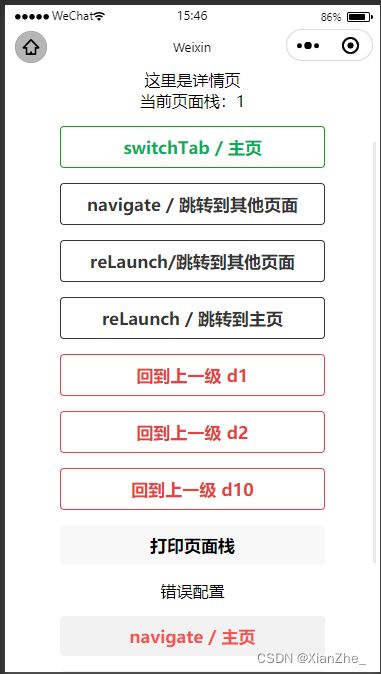
2、wx.redirectTo
关闭当前页面,跳转到应用内的某个页面。 但是不允许跳转到 tabbar 页面。
<button type="primary" class="btn" bindtap="toDetailByRedirectEvent">redirect / 跳转到详情页button>
async toDetailByRedirectEvent() {
  wx.redirectTo({
    // 需要跳转的应用内非 tabBar 的页面的路径
    url: '/pages/detail/index',
    // 接口调用成功的回调函数
    success: (res) => {},
    // 接口调用失败的回调函数
    fail: (res) => {},
    // 接口调用结束的回调函数(调用成功、失败都会执行)
    complete: (res) => {},
  })
},
| 跳转前 | 跳转后 |
|---|---|
 |
 |
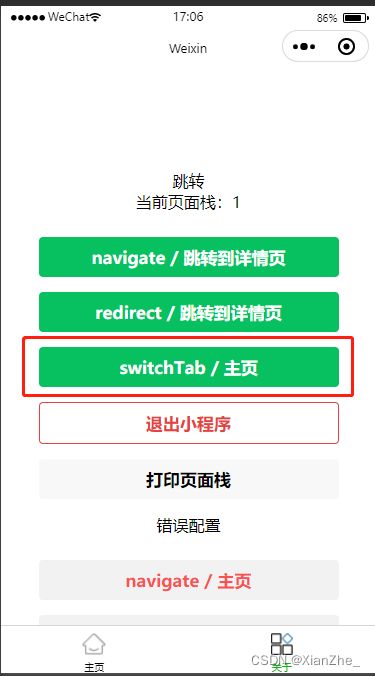
3、wx.switchTab
跳转到 tabBar 页面,并关闭其他所有非 tabBar 页面。
<button type="primary" class="btn" bindtap="toIndexByswitchTabEvent">switchTab / 主页button>
async toIndexByswitchTabEvent() {
  wx.switchTab({
    // 需要跳转的 tabBar 页面的路径
    url: '/pages/index/index',
    // 接口调用成功的回调函数
    success: (res) => {},
    // 接口调用失败的回调函数
    fail: (res) => {},
    // 接口调用结束的回调函数(调用成功、失败都会执行)
    complete: (res) => {},
  })
},
| 跳转前 | 跳转后 |
|---|---|
 |
 |
4、wx.reLaunch
关闭所有页面,打开到应用内的某个页面。
<button plain class="btn" bindtap="toOtherByreLaunchEvent">reLaunch/跳转到其他页面button>
async toOtherByreLaunchEvent() {
  wx.reLaunch({
    // 关闭所有页面,打开到应用内的某个页面
    url: "/pages/other/index",
    // 接口调用成功的回调函数
    success: (res) => {},
    // 接口调用失败的回调函数
    fail: (res) => {},
    // 接口调用结束的回调函数(调用成功、失败都会执行)
    complete: (res) => {},
  });
},
5、wx.navigateBack
关闭当前页面,返回上一页面或多级页面。
<button type="warn" plain class="btn" bindtap="navigateBackEvent">回到上一级 d1button>
async navigateBackEvent() {
  wx.navigateBack({
    // 返回的页面数,如果 delta 大于现有页面数,则返回到首页。
    delta: 1,
    // 接口调用成功的回调函数
    success: (res) => {},
    // 接口调用失败的回调函数
    fail: (res) => {},
    // 接口调用结束的回调函数(调用成功、失败都会执行)
    complete: (res) => {},
  });
},
6、wx.exitMiniProgram
退出当前小程序。
使用编程式退出有个好处,能够在退出之前做一些收尾操作,如清除缓存、关闭程序任务等。
<button type="warn" plain class="btn" bindtap="exitMiniProgram">退出小程序button>
exitMiniProgram() {
  wx.exitMiniProgram({
    // 接口调用成功的回调函数
    success: (res) => {
      // 以同步的方式清理本地数据缓存
      wx.clearStorageSync();
      console.log("缓存清理成功");
    },
    // 接口调用失败的回调函数
    fail: (res) => {},
    // 接口调用结束的回调函数(调用成功、失败都会执行)
    complete: (res) => {},
  });
},
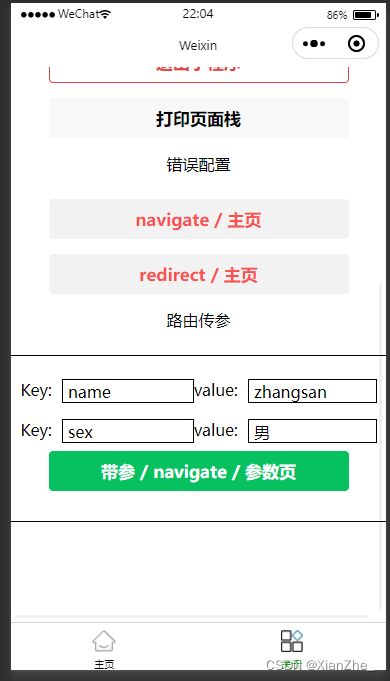
五、路由传参
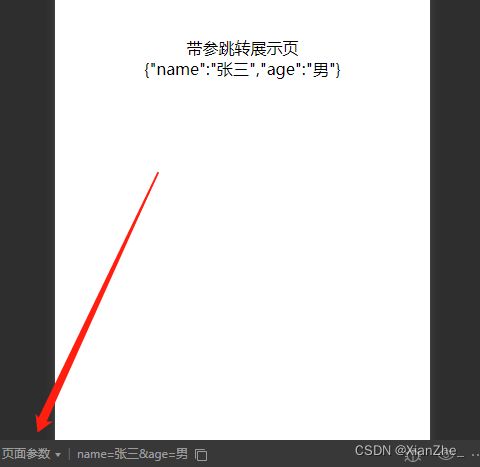
页面跳转的时候还支持传参,只需要在路径后加上参数即可,写法与HTTP GET请求一样。参数与路径之间使用 ? 分隔,参数键与参数值用 = 相连,不同参数用 & 分隔;如 ‘path?key=value&key2=value2’。
传入的参数在页面生命周期 onLoad(options) 方法中的 options 参数以对象的形式接收。
注意,并不是所有跳转方式都支持传参。
| 跳转方式 | 支持传参 |
|---|---|
| navigate | ✅ |
| redirect | ✅ |
| switchTab | ❌ |
| reLaunch | ✅ |
| navigateBack | ❌ |
| exit | ❌ |
演示代码
  <text>路由传参text>
  <view class="btns params-list">
    <view class="params-item">
      <label>
        <text>Key:text>
        <input class="inp-key" bindinput="inputEvent" data-id="k1">input>
      label>
      <label>
        <text>value:text>
        <input class="inp-value" bindinput="inputEvent" data-id="v1">input>
      label>
    view>
    <view class="params-item">
      <label>
        <text>Key:text>
        <input class="inp-key" bindinput="inputEvent" data-id="k2">input>
      label>
      <label>
        <text>value:text>
        <input class="inp-value" bindinput="inputEvent" data-id="v2">input>
      label>
    view>
    <button type="primary" class="btn" bindtap="toParamsByNavigate">带参 / navigate / 参数页button>
  view>
toParamsByNavigate() {
  const {k1, v1, k2, v2} = this.data.params;
  const url = `/pages/params/index?${k1}=${v1}&${k2}=${v2}`
  wx.navigateTo({
    url,
  })
},
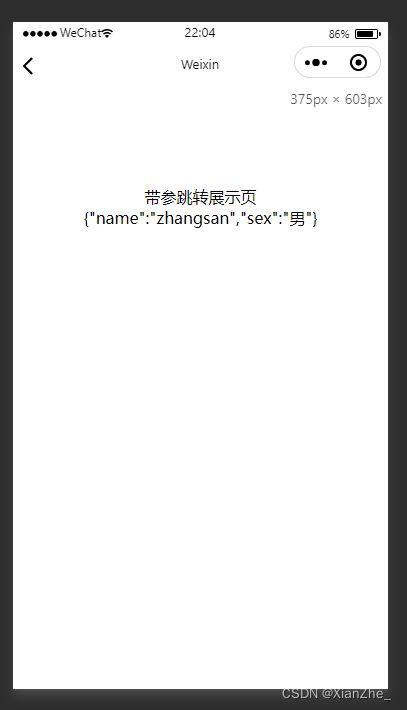
参数展示页
<view class="container">
  <view>带参跳转展示页view>
  <view>{{params}}view>
view>
Page({
  /**
   * 页面的初始数据
   */
  data: {
    params: ""
  },

  /**
   * 生命周期函数--监听页面加载
   */
  onLoad(options) {
    this.setData({
      params: JSON.stringify(options)
    })
  },
})
| 跳转前 | 跳转后 |
|---|---|
 |
 |
六、页面栈
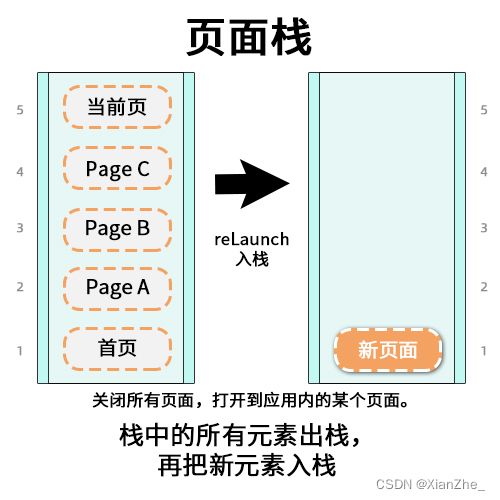
小程序中页面栈最多十层,这意味着能存放十条页面记录,但一般来说也用不上这么多就是了。使用 getCurrentPages() Api能够获取到当前页面栈。栈中第一个元素为首页,最后一个元素为当前页面。
既让说是栈了,那么页面栈也应遵循先进后出的原则,但这个栈有些特殊,根据跳转方式的不同,栈的操作也会有所不同,但母庸置疑的是其就是一个标准的栈。
在使用 navigateBack 跳转方式进行后退时,栈中页面会出栈
在使用 reLaunch 跳转方式进行跳转时,栈中的所有页面出栈,再重新入栈新页面
栈涉及到一些算法性知识,这里只是简略的讲解了一下,感兴趣的小伙伴可以自行去查阅相关知识 >>> 数据结构之队列与栈
代码托管
本文中所有的演示代码,需要的可以自行下载
- Gitee: 微信小程序路由管理详解
- GitHub:
参考资料
- 维基百科:
- 微信小程序
- 官方文档:
- 微信小程序 getCurrentPages()
- 微信小程序 Router对象
- 微信小程序 navigator组件
相关博客
- Vue 使用props为路由组件传参『详解』
- JavaScript 各声明var、let、const方式区别『详解』
