学习【瑞吉外卖⑥】SpringBoot单体项目_手机验证码登录业务开发
- 视频:【黑马程序员】Java 项目实战《瑞吉外卖》,轻松掌握 SpringBoot + MybatisPlus 开发核心技术
- 资料:2022 最新版 Java学习 路线图>第 5 阶段一 企业级项目实战>7.黑马程序员 瑞吉外卖平台实战开发(提取码:dor4)
- 本文章发布在CSDN上,一是方便博主自己线上阅览,二是巩固自己所学知识。
- 博客内容主要参考上述视频和资料,视频中出现的 PPT 内容大体也为本文所录。
- 若文章内容或图片失效,请留言反馈。部分素材来自网络,若不小心影响到您的利益,请联系博主删除。
文章目录
- 【强调】
- 0.总目录
- 1.短信发送
-
- 1.1.短信服务介绍
- 1.2.阿里云短信服务
-
- 1.2.1.简单介绍
- 1.2.2.设置短信签名
- 1.3.代码开发
- 2.手机验证码登录
-
- 2.1.需求分析
- 2.2.数据模型
- 2.3.梳理交互过程
- 2.4.准备工作
- 2.5.代码开发
- 2.6.前端资料问题
- 3.最终效果
上一篇:学习【瑞吉外卖⑤】SpringBoot单体项目:https://blog.csdn.net/yanzhaohanwei/article/details/125194124
【强调】
- 视频中对于
手机验证码登录的功能,所使用的是阿里云短信服务。- 但是当前对于个人用户而言,难以申请到短信验证登录的服务。
- 对于接下来的
1.短信发送、2.手机验证码登录只会介绍大概过程,并附上相关代码。- 关于
阿里云短信服务,本博客这里的演示只是模拟该功能而已。- 就
设置短信签名那里,只需了解即可。
0.总目录
- 学习【瑞吉外卖①】SpringBoot单体项目
- 软件开发流程、瑞吉外卖项目介绍、环境搭建、后台登录功能、后台退出功能
- 学习【瑞吉外卖②】SpringBoot单体项目(后台)
- 完善登录功能、 新增员工功能、员工信息分页查询功能、启用 / 禁用员工账号功能、编辑员工信息功能
- 学习【瑞吉外卖③】SpringBoot单体项目(后台)
- 公共字段自动填充功能、新增分类功能、分类信息分页查询功能、删除分类功能、修改分类功能
- 学习【瑞吉外卖④】SpringBoot单体项目(后台)
- 文件上传下载功能、新增菜品功能、菜品信息分页查询功能、修改菜品功能
- 其他功能:删除菜品(单个 / 批量)功能、停售 / 启售菜品(单个 / 批量)功能。
- 学习【瑞吉外卖⑤】SpringBoot单体项目(后台)
- 新增套餐功能、套餐分页查询功能、删除套餐功能(单个 / 批量)
- 其他功能:停售 / 启售(批量 / 单个)套餐功能、修改套餐功能
- 学习【瑞吉外卖⑥】SpringBoot单体项目(移动端)
- 手机验证码登录功能(短信发送、手机验证码登录)
- 学习【瑞吉外卖⑦】SpringBoot单体项目(移动端)
- 用户地址簿功能:增删改查功能,设置、查看默认地址功能。
- 菜品展示功能(套餐展示功能也包含在其中)
- 购物车功能:购物车中增加/减少 套餐/菜品的功能,菜品/套餐 在购物车中的展示功能,购物车中 菜品/套餐 清空的功能
- 订单功能:用户下单功能、用户查看订单功能、用户再来一单功能。
- 用户登出功能
- 学习【瑞吉外卖⑧】SpringBoot单体项目(后台)
- 订单展示功能、订单状态修改功能
1.短信发送
1.1.短信服务介绍
目前市面上有很多第三方提供的短信服务。
这些第三方短信服务会和三大运营商(移动、联通、电信)对接,我们需要注册成为会员并且按照提供的开发文档调用才可以发送短信。
需要说明的是,这些短信服务一般都是收费服务。
常用短信服务:阿里云、华为云、腾讯云、京东、梦网、乐信
1.2.阿里云短信服务
1.2.1.简单介绍
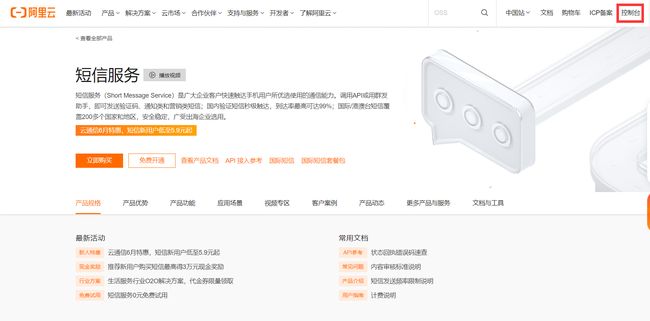
阿里云短信服务(Short Message Service)是广大企业客户快速触达手机用户所优选使用的通信能力。
调用 API 或用群发助手,即可发送验证码、通知类和营销类短信;国内验证短信秒级触达,到达率最高可达99%;
国际 / 港澳台短信覆盖 200 多个国家和地区,安全稳定,广受出海企业选用。
应用场景:验证码、短信通知、推广短信
想了解更多详情,还请访问 阿里云官网
1.2.2.设置短信签名
1.2.2.设置短信签名这里仅需了解即可,当前申请个人用户的短信签名过程相当繁琐,不建议申请。
- 短信签名 是短信发送者的署名,表示发送方的身份。
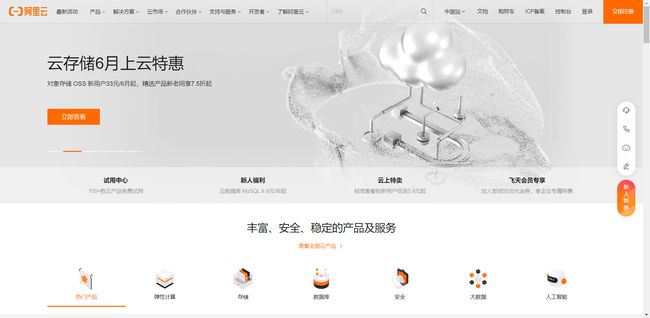
- 在进行下面操作时,请先注册一个 阿里云 的账号,并实名认证。
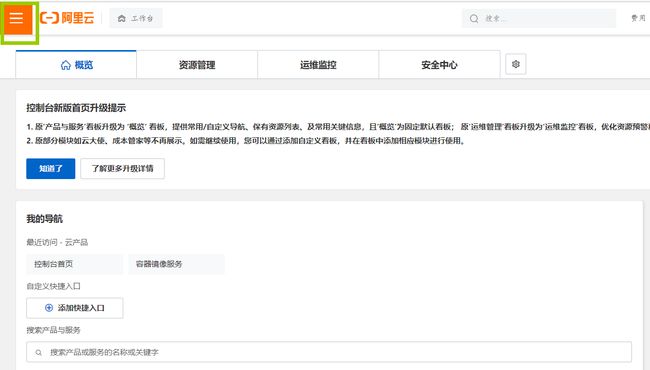
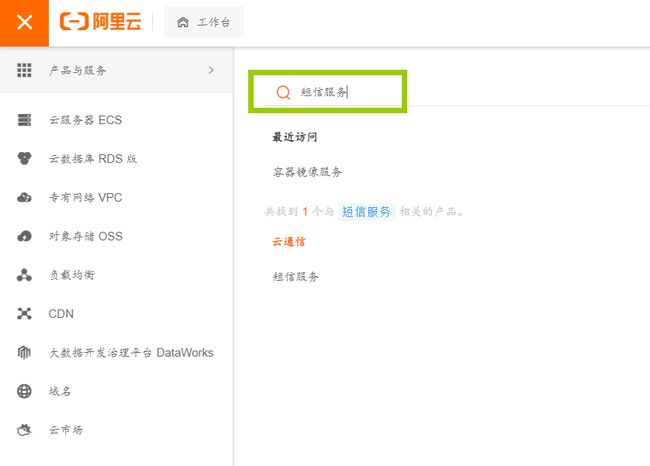
- 此处直接搜索“短信服务”,点击下方出现的“短信服务”即可。
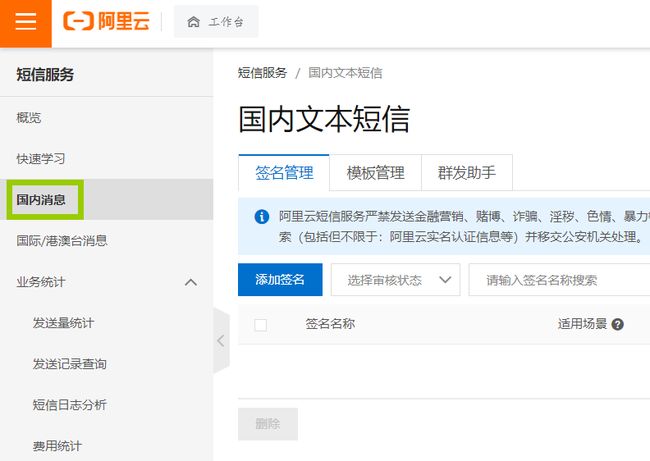
- 此时选择“国内消息”
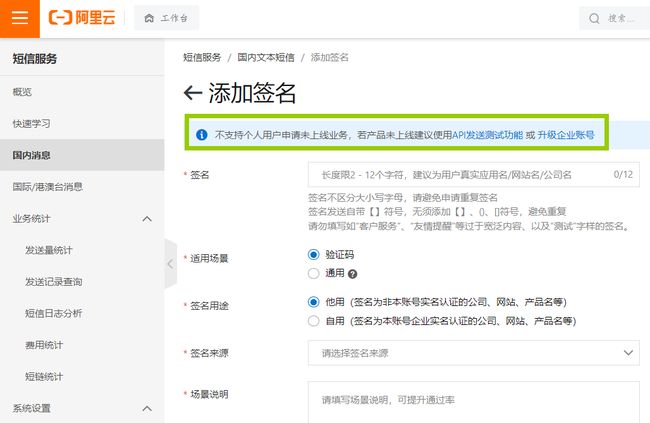
- 鉴于目前个人签名申请过程相当繁琐,故这里只需要了解一下即可。
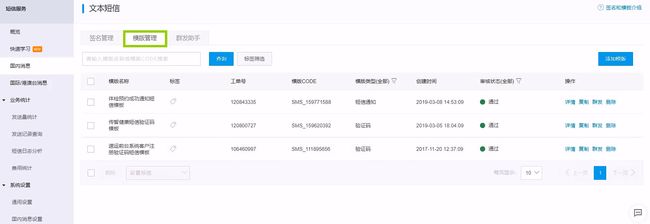
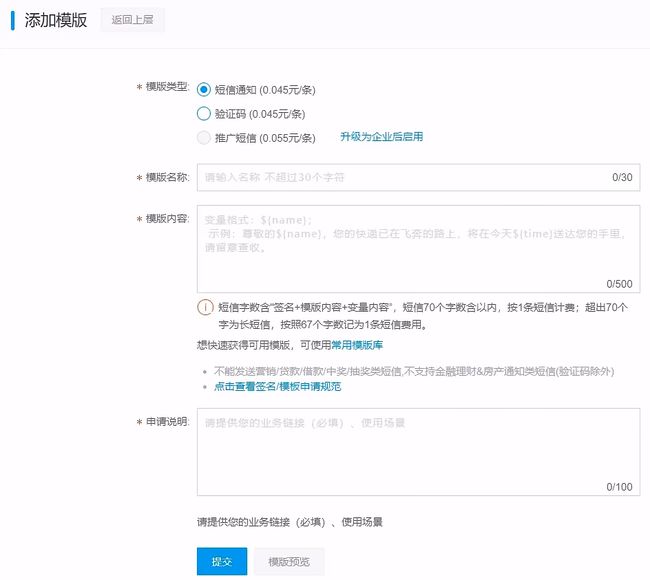
- 此处为“模板管理”,申请过程依旧繁琐,故只需稍做了解。
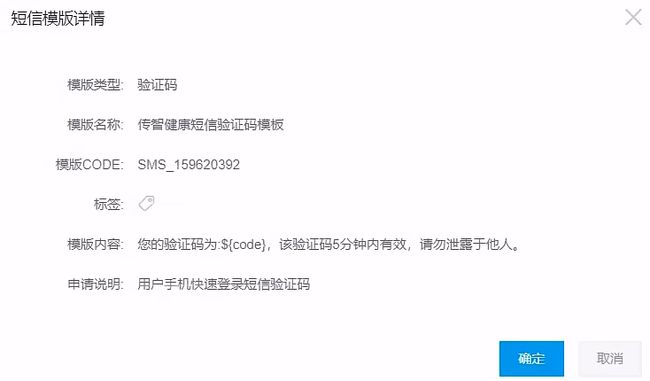
- 短信模板 包含短信发送内容、场景、变量信息。
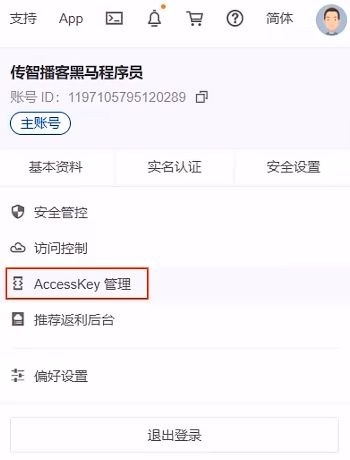
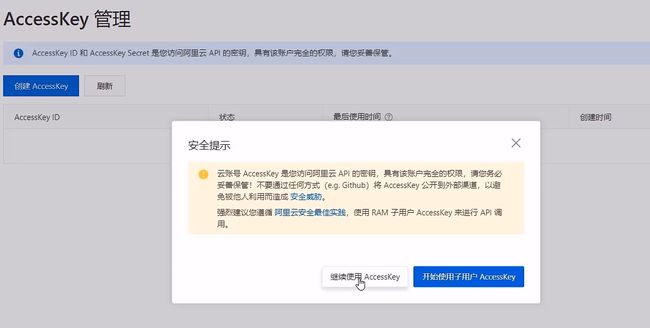
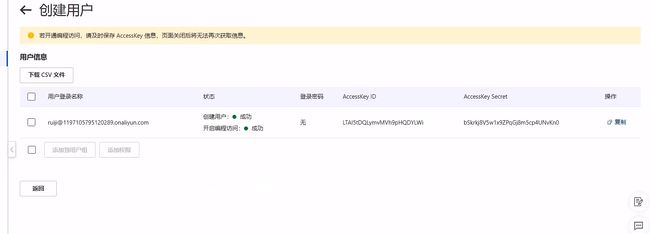
- 鉴于 “AccessKey” 的权限太大,一般推荐使用 “子用户 AccessKey”。
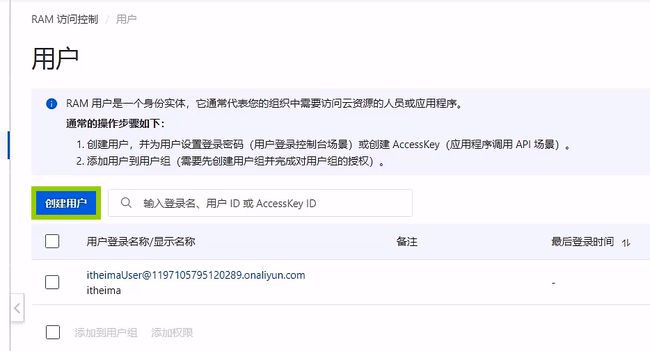
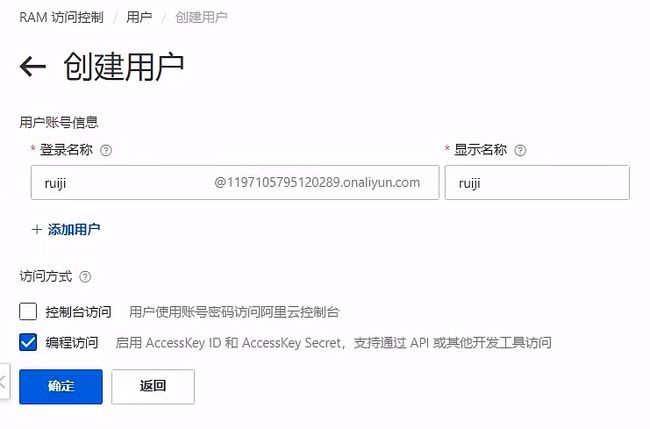
- 使用 “子用户 AccessKey” 时,一般需要我们先创建一个用户
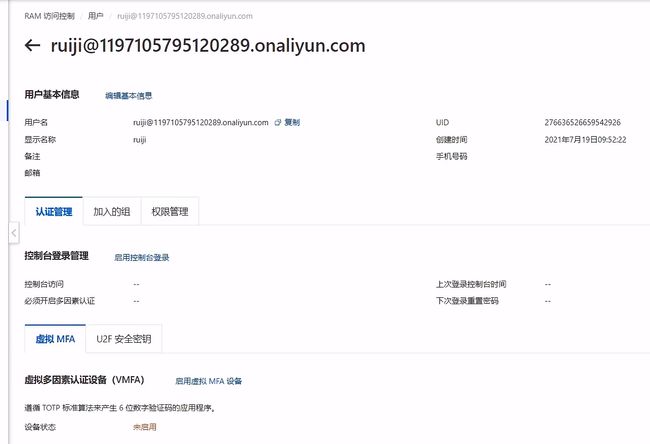
- 上面创建了的用户的详情。
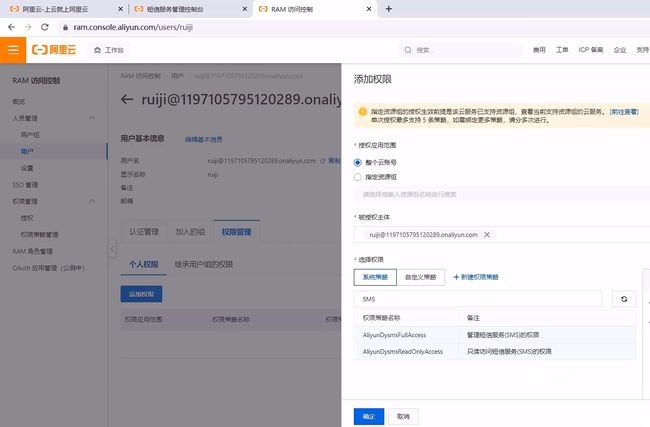
- 此处可对新创建的用户设置权限,这里我们选择“SMS”。
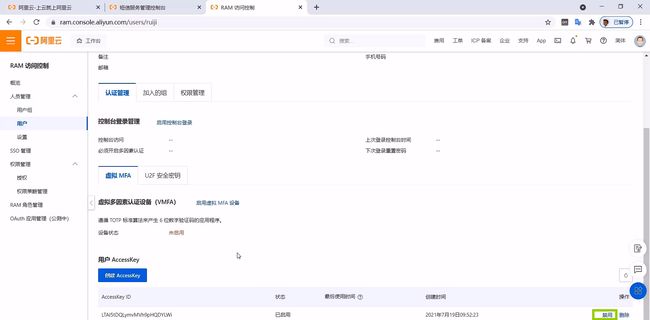
- 倘若 “AccessKey” 泄露出去,我们也可以禁用该 “AccessKey” 来及时止损。
1.3.代码开发
- 在短信服务的帮助文档里,有相当详细的介绍,具体编写请参考帮助文档里。
- 导入 maven 依赖
<dependency>
  <groupId>com.aliyungroupId>
  <artifactId>aliyun-java-sdk-coreartifactId>
  <version>4.5.16version>
dependency>
<dependency>
    <groupId>com.aliyungroupId>
    <artifactId>aliyun-java-sdk-dysmsapiartifactId>
    <version>1.1.0version>
dependency>
- 调用API
package com.itheima.reggie.utils;

import com.aliyuncs.DefaultAcsClient;
import com.aliyuncs.IAcsClient;
import com.aliyuncs.dysmsapi.model.v20170525.SendSmsRequest;
import com.aliyuncs.dysmsapi.model.v20170525.SendSmsResponse;
import com.aliyuncs.exceptions.ClientException;
import com.aliyuncs.profile.DefaultProfile;

/**
 * 短信发送工具类
 */
public class SMSUtils {
    /**
     * 发送短信
     *
     * @param signName     签名
     * @param templateCode 模板
     * @param phoneNumbers 手机号
     * @param param        参数
     */
    public static void sendMessage(String signName, String templateCode, String phoneNumbers, String param) {
        DefaultProfile profile = DefaultProfile.getProfile("cn-hangzhou", "", "");
        IAcsClient client = new DefaultAcsClient(profile);

        SendSmsRequest request = new SendSmsRequest();
        request.setSysRegionId("cn-hangzhou");
        request.setPhoneNumbers(phoneNumbers);
        request.setSignName(signName);
        request.setTemplateCode(templateCode);
        request.setTemplateParam("{\"code\":\"" + param + "\"}");
        try {
            SendSmsResponse response = client.getAcsResponse(request);
            System.out.println("短信发送成功");
        } catch (ClientException e) {
            e.printStackTrace();
        }
    }
}
2.手机验证码登录
2.1.需求分析
- 为了方便用户登录,移动端通常都会提供通过手机验证码登录的功能。
- 手机验证码登录的优点
- 方便快捷,无需注册,直接登录
- 使用短信验证码作为登录凭证,无需记忆密码
- 安全
- 登录流程
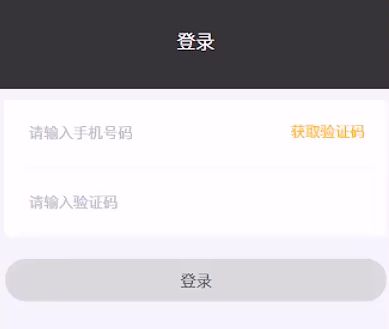
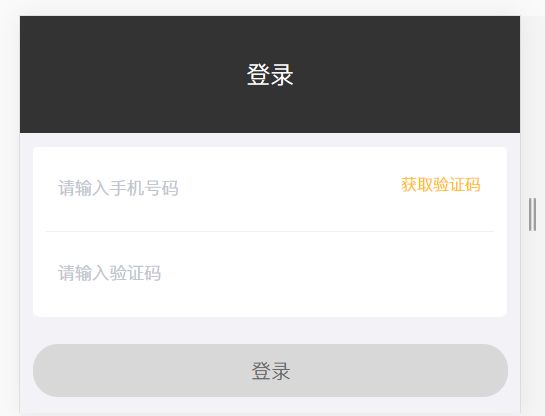
- 输入手机号–>获取验证码–>输入验证码–>点击登录–>登录成功
注意:通过手机验证码登录,手机号是区分不同用户的标识。
2.2.数据模型
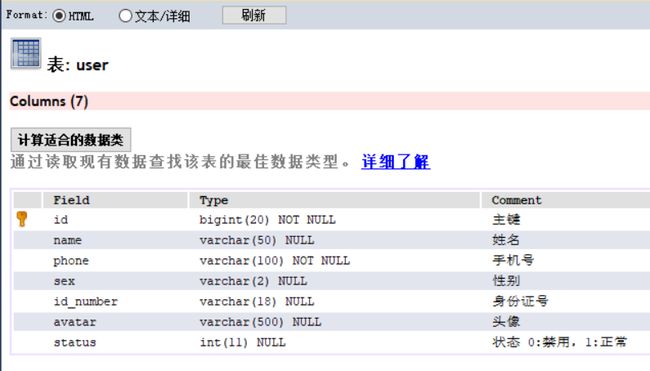
- user 表(用户表)
2.3.梳理交互过程
在开发代码之前,需要梳理一下登录时前端页面和服务端的交互过程:
- 在登录页面(
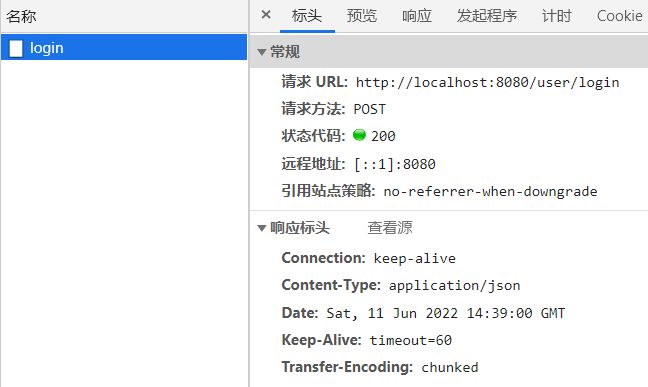
front/page/login.html)输入手机号,点击 “获取验证码” 按钮,页面发送 ajax 请求,在服务端调用短信服务 API 给指定手机号发送验证码短信。 - 在登录页面输入验证码,点击 “登录” 按钮,发送 ajax 请求,在服务端处理登录请求。
开发手机验证码登录功能,其实就是在服务端编写代码去处理前端页面发送的这 2 次请求。
2.4.准备工作
- 实体类 User
- Mapper 接口 UserMapper
- 业务层接口 UserService
- 业务层实现类 UserServicelmpl
- 工具类 SMSutils、ValidateCodeutils
- 控制层 UserController
- 实体类 User
com/itheima/reggie/entity/User.java
package com.itheima.reggie.entity;

import lombok.Data;

import java.io.Serializable;

/**
 * 用户信息
 */
@Data
public class User implements Serializable {
    private static final long serialVersionUID = 1L;

    private Long id;

    //姓名
    private String name;

    //手机号
    private String phone;

    //性别 0 女 1 男
    private String sex;

    //身份证号
    private String idNumber;

    //头像
    private String avatar;

    //状态 0:禁用,1:正常
    private Integer status;
}
- Mapper 接口 UserMapper
com/itheima/reggie/mapper/UserMapper.java
package com.itheima.reggie.mapper;

import com.baomidou.mybatisplus.core.mapper.BaseMapper;
import com.itheima.reggie.entity.User;
import org.apache.ibatis.annotations.Mapper;

@Mapper
public interface UserMapper extends BaseMapper<User> {}
- 业务层接口 UserService
com/itheima/reggie/service/UserService.java
package com.itheima.reggie.service;

import com.baomidou.mybatisplus.extension.service.IService;
import com.itheima.reggie.entity.User;

public interface UserService extends IService<User> {}
- 业务层实现类 UserServicelmpl
com/itheima/reggie/service/impl/UserServiceImpl.java
package com.itheima.reggie.service.impl;

import com.baomidou.mybatisplus.extension.service.impl.ServiceImpl;
import com.itheima.reggie.entity.User;
import com.itheima.reggie.mapper.UserMapper;
import com.itheima.reggie.service.UserService;
import org.springframework.stereotype.Service;

@Service
public class UserServiceImpl extends ServiceImpl<UserMapper, User> implements UserService {}
- 工具类 SMSutils
com/itheima/reggie/utils/SMSUtils.java
package com.itheima.reggie.utils;

import com.aliyuncs.DefaultAcsClient;
import com.aliyuncs.IAcsClient;
import com.aliyuncs.dysmsapi.model.v20170525.SendSmsRequest;
import com.aliyuncs.dysmsapi.model.v20170525.SendSmsResponse;
import com.aliyuncs.exceptions.ClientException;
import com.aliyuncs.profile.DefaultProfile;

/**
 * 短信发送工具类
 */
public class SMSUtils {
    /**
     * 发送短信
     *
     * @param signName     签名
     * @param templateCode 模板
     * @param phoneNumbers 手机号
     * @param param        参数
     */
    public static void sendMessage(String signName, String templateCode, String phoneNumbers, String param) {
        DefaultProfile profile = DefaultProfile.getProfile("cn-hangzhou", "", "");
        IAcsClient client = new DefaultAcsClient(profile);

        SendSmsRequest request = new SendSmsRequest();
        request.setSysRegionId("cn-hangzhou");
        request.setPhoneNumbers(phoneNumbers);
        request.setSignName(signName);
        request.setTemplateCode(templateCode);
        request.setTemplateParam("{\"code\":\"" + param + "\"}");
        try {
            SendSmsResponse response = client.getAcsResponse(request);
            System.out.println("短信发送成功");
        } catch (ClientException e) {
            e.printStackTrace();
        }
    }
}
- 工具类 ValidateCodeutils
com/itheima/reggie/utils/ValidateCodeUtils.java
package com.itheima.reggie.utils;

import java.util.Random;

/**
 * 随机生成验证码工具类
 */
public class ValidateCodeUtils {
    /**
     * 随机生成验证码
     *
     * @param length 长度为4位或者6位
     * @return
     */
    public static Integer generateValidateCode(int length) {
        Integer code = null;
        if (length == 4) {
            code = new Random().nextInt(9999);//生成随机数,最大为9999
            if (code < 1000) {
                code = code + 1000;//保证随机数为4位数字
            }
        } else if (length == 6) {
            code = new Random().nextInt(999999);//生成随机数,最大为999999
            if (code < 100000) {
                code = code + 100000;//保证随机数为6位数字
            }
        } else {
            throw new RuntimeException("只能生成4位或6位数字验证码");
        }
        return code;
    }

    /**
     * 随机生成指定长度字符串验证码
     *
     * @param length 长度
     * @return
     */
    public static String generateValidateCode4String(int length) {
        Random rdm = new Random();
        String hash1 = Integer.toHexString(rdm.nextInt());
        String capstr = hash1.substring(0, length);
        return capstr;
    }
}
- 控制层 UserController
com/itheima/reggie/controller/UserController.java
package com.itheima.reggie.controller;

import com.itheima.reggie.service.UserService;
import lombok.extern.slf4j.Slf4j;
import org.springframework.beans.factory.annotation.Autowired;
import org.springframework.web.bind.annotation.RequestMapping;
import org.springframework.web.bind.annotation.RestController;

@RestController
@RequestMapping("/user")
@Slf4j
public class UserController {
    @Autowired
    private UserService userService;
}
2.5.代码开发
前面我们已经完成了 LogincheckFilter 过滤器的开发,此过滤器用于检查用户的登录状态。
我们在进行手机验证码登录时,发送的请求需要在此过滤器处理时直接放行。
com/itheima/reggie/filter/LoginCheckFilter.java
//定义不需要处理的请求路径
String[] urls = new String[]{
        "/employee/login",
        "/employee/logout",
        "/backend/**",
        "/front/**",
        "/common/**",
        "/user/sendMsg",//移动端发送短信
        "/user/login"//移动端登录
};
- 在 LoginCheckFilter 过滤器中扩展逻辑,判断移动端用户登录的状态
com/itheima/reggie/filter/LoginCheckFilter.java
//4.2.判断登录状态,如果已登录,则直接放行
if (request.getSession().getAttribute("user") != null) {
    log.info("用户已登录,用户id为:{}", request.getSession().getAttribute("user"));

    Long userId= (Long) request.getSession().getAttribute("user");

    BaseContext.setCurrentId(userId);

    filterChain.doFilter(request, response);

    return;
}
- 手机验证码登录:发送验证码短信
com/itheima/reggie/controller/UserController.java
/**
 * 发送手机短信验证码
 *
 * @param user
 * @return
 */
@PostMapping("/sendMsg")
public R<String> sendMsg(@RequestBody User user, HttpSession session) {
    //获取手机号
    String phone = user.getPhone();

    if (StringUtils.isNotEmpty(phone)) {
        //生成随机的 4 位验证码
        String code = ValidateCodeUtils.generateValidateCode(4).toString();

        log.info("code={}", code);

        //调用阿里云提供的短信服务 API 完成发送短信
        //SMSUtils.sendMessage("瑞吉外卖","",phone,code);

        //需要将生成的验证码保存到 Session
        session.setAttribute(phone, code);

        return R.success("手机验证码短信发送成功");
    }

    return R.error("短信发送失败");
}
- 手机验证码登录:登录校验
因为 user 类中没有 code 属性,故这里使用 map 接收数据。
当然,这里也可以使用之前 DTO 的方式来封装数据。
com/itheima/reggie/controller/UserController.java
/**
 * 移动端用户登录
 *
 * @param map
 * @param session
 * @return
 */
@PostMapping("/login")
public R<User> login(@RequestBody Map map, HttpSession session) {
    log.info(map.toString());

    //获取手机号
    String phone = map.get("phone").toString();

    //获取验证码
    String code = map.get("code").toString();

    //从 Session中获取保存的验证码
    Object codeInSession = session.getAttribute(phone);

    //进行验证码的比对(页面提交的验证码和 Session 中保存的验证码比对)
    if (codeInSession != null && codeInSession.equals(code)) {

        /* 如果能够比对成功,说明登录成功 */

        LambdaQueryWrapper<User> queryWrapper = new LambdaQueryWrapper<User>();
        queryWrapper.eq(User::getPhone, phone);

        User user = userService.getOne(queryWrapper);

        if (user == null) {
            //判断当前手机号对应的用户是否为新用户,如果是新用户就自动完成注册
            user = new User();
            user.setPhone(phone);
            user.setStatus(1);
            userService.save(user);
        }

        session.setAttribute("user", user.getId());
        return R.success(user);
    }
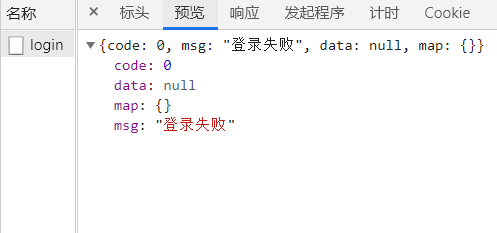
    return R.error("登录失败");
}
这里的验证码实际上是由控制台模拟打印出来的,而非阿里云的短信验证服务。
2022-06-12 00:13:36.379 INFO 19724 --- [nio-8080-exec-4] c.i.reggie.controller.UserController : code=2901
2.6.前端资料问题
- 此外,这里有两个坑,官方给的前端的资料(login.js、login.html)是有所缺失的,我们需要添加并修改一些代码。
文件 login.js 的位置是 resources 目录下的 front/api/login.js
function sendMsgApi(data) {
    return $axios({
        'url': '/user/sendMsg',
        'method': 'post',
        data
    })
}
文件 login.html 的位置是 resources 目录下的 front/page/login.html
getCode(){
    this.form.code = ''
    const regex = /^(13[0-9]{9})|(15[0-9]{9})|(17[0-9]{9})|(18[0-9]{9})|(19[0-9]{9})$/;
    if (regex.test(this.form.phone)) {
        this.msgFlag = false
        /************************************************************************/
        //this.form.code = (Math.random()*1000000).toFixed(0) // 需要注释掉的代码
        /************************************************************************/
        sendMsgApi({phone:this.form.phone})  // 需要添加的代码
        /************************************************************************/
    }else{
        this.msgFlag = true
    }
},
async btnLogin(){
    if(this.form.phone && this.form.code){
        this.loading = true
        /*********************************************************************/
        //const res = await loginApi({phone:this.form.phone})//需要修改的原代码
        const res = await loginApi(this.form)//修改后的代码
        /*********************************************************************/
        this.loading = false
        if(res.code === 1){
            sessionStorage.setItem("userPhone",this.form.phone)
            window.requestAnimationFrame(()=>{
                window.location.href= '/front/index.html'
            })
        }else{
            this.$notify({ type:'warning', message:res.msg});
        }
    }else{
        this.$notify({ type:'warning', message:'请输入手机号码'});
    }
}
3.最终效果
localhost:8080/front/page/login.html
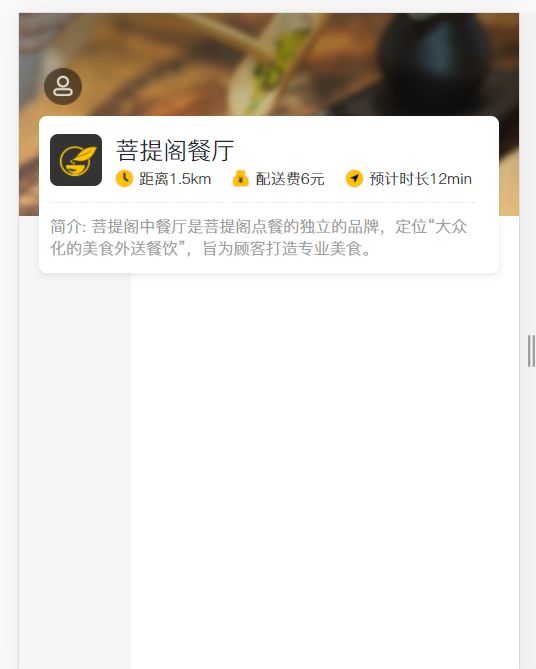
localhost:8080/front/index.html
事实上我们也可以通过腾讯云发送短信或者采用QQ邮箱验证发送的方式来实现上述的功能。
这里推荐一篇博客《SpringBoot项目实现qq邮箱验证码登录》供各位参考。
我个人比较懒,要是邮箱验证的话,还需要改一些前端 … … 太麻烦了,就不想多事了。就这么凑活着吧。
下一篇:学习【瑞吉外卖⑦】SpringBoot单体项目:https://blog.csdn.net/yanzhaohanwei/article/details/125245214
