【Kubernetes】我的Kubernetes学习笔记-20220412
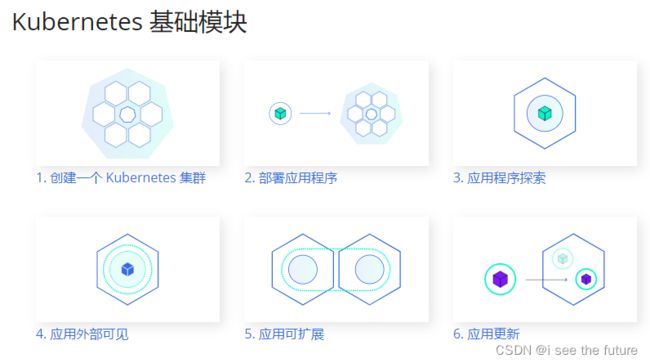
1A.Kubernetes 基础模块
https://kubernetes.io/zh/docs/tutorials/kubernetes-basics/
1B.使用 Minikube 创建集群
目标:使用在线终端开启一个 Kubernetes 集群。
https://kubernetes.io/zh/docs/tutorials/kubernetes-basics/create-cluster/cluster-intro/

- 查看minikube版本
minikube version
- 启动minikube
minikube start
- 查看kubectl版本
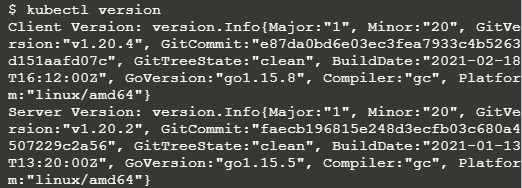
kubectl version
- 查看cluster
kubectl cluster-info
- To view the nodes in the cluster
kubectl get nodes
1C.部署应用程序
目标:使用 kubectl 在 Kubernetes 上部署第一个应用
https://kubernetes.io/zh/docs/tutorials/kubernetes-basics/deploy-app/deploy-intro/
Deployment作为Pod的控制器,可以对Pod进行创建、滚动升级等常见操作。

Step 1: kubectl basics
- 查看node :To view the nodes in the cluster, run the kubectl get nodes command:
kubectl get nodes
Step 2: Deploy our app
- 创建部署kubectl create deployment
searched for a suitable node where an instance of the application could be run (we have only 1 available node)
scheduled the application to run on that Node
configured the cluster to reschedule the instance on a new Node when needed
kubectl create deployment kubernetes-bootcamp --image=gcr.io/google-samples/kubernetes-bootcamp:v1
![]()
- 罗列部署get deployments
kubectl get deployments
- 查看应用View our app
We now have a connection between our host (the online terminal) and the Kubernetes cluster. The proxy enables direct access to the API from these terminals.
echo -e "\n\n\n\e[92mStarting Proxy. After starting it will not output a response. Please click the first Terminal Tab\n";
kubectl proxy
- 访问应用View our app
curl http://localhost:8001/version
![]()
If Port 8001 is not accessible, ensure that the kubectl proxy started above is running.
- 获取Pod name
export POD_NAME=$(kubectl get pods -o go-template --template '{{range .items}}{{.metadata.name}}{{"\n"}}{{end}}')
echo Name of the Pod: $POD_NAME
- 继续访问应用View our app
curl http://localhost:8001/api/v1/namespaces/default/pods/$POD_NAME/
1D. 应用程序探索
https://kubernetes.io/zh/docs/tutorials/kubernetes-basics/explore/explore-intro/
目的:对已部署的应用故障排除。
最常见的操作可以使用以下 kubectl 命令完成:
kubectl get - 列出资源
kubectl describe - 显示有关资源的详细信息
kubectl logs - 打印 pod 和其中容器的日志
kubectl exec - 在 pod 中的容器上执行命令

Step 1: Check application configuration(获取pods:kubectl get pods)
- 查看node :To view the nodes in the cluster, run the kubectl get nodes command:
kubectl get nodes
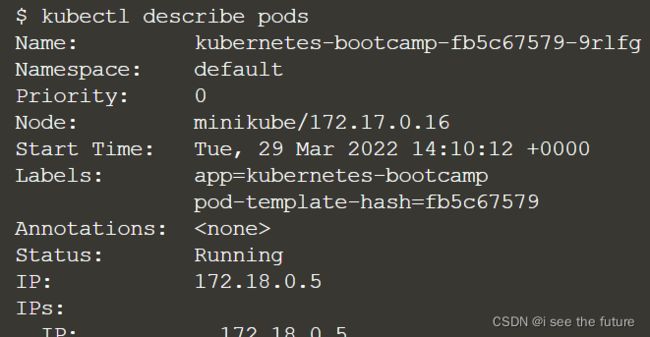
Step 2: Show the app in the terminal(了解pods详情)
kubectl describe pods
Step 3: View the container logs(获取日志kubectl logs)
kubectl logs $POD_NAME
Step 4: Executing command on the container(在pods的container里面运行exec)
- Let’s list the environment variables(罗列环境变量)
kubectl exec $POD_NAME -- env
- Next let’s start a bash session in the Pod’s container:(启动bash)
kubectl exec -ti $POD_NAME -- bash
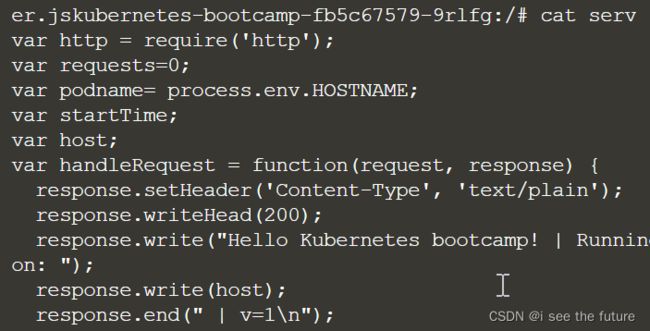
- The source code of the app is in the server.js file:(获取文件内容)
cat server.js
- To close your container connection type exit.
exit
1E. 应用外部可见
目标:在 Kubernetes 集群外用 Service 暴露应用
https://kubernetes.io/zh/docs/tutorials/kubernetes-basics/expose/expose-intro/
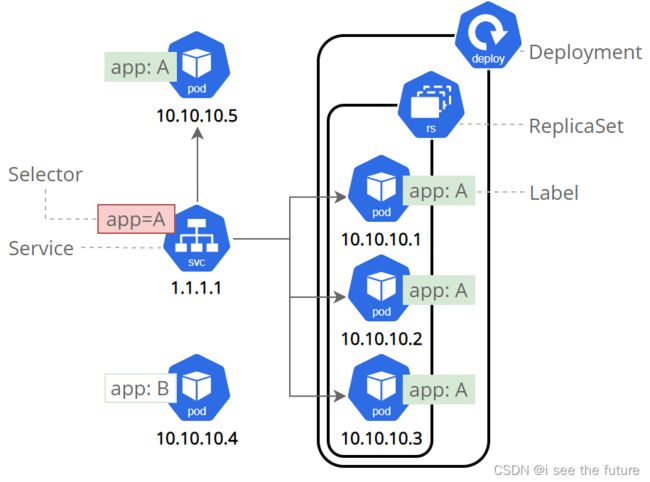
尽管每个 Pod 都有一个唯一的 IP 地址,但是如果没有 Service ,这些 IP 不会暴露在集群外部。Service 允许您的应用程序接收流量。Service 也可以用在 ServiceSpec 标记type的方式暴露。
1)ClusterIP (默认) - 在集群的内部 IP 上公开 Service 。这种类型使得 Service 只能从集群内访问。
2)NodePort - 使用 NAT 在集群中每个选定 Node 的相同端口上公开 Service 。使用< NodeIP >:< NodePort > 从集群外部访问 Service。是 ClusterIP 的超集。
3)LoadBalancer - 在当前云中创建一个外部负载均衡器(如果支持的话),并为 Service 分配一个固定的外部IP。是 NodePort 的超集。
4)ExternalName - 通过返回带有该名称的 CNAME 记录,使用任意名称(由 spec 中的externalName指定)公开 Service。不使用代理。这种类型需要kube-dns的v1.7或更高版本。
Step 1: Create a new service(创建服务)
- 罗列服务list the current Services from our cluster
kubectl get services
- 创建新的服务来暴露应用 to create a new service and expose it to external traffic we’ll use the expose command with NodePort as parameter (minikube does not support the LoadBalancer option yet).
kubectl expose deployment/kubernetes-bootcamp --type="NodePort" --port 8080
- 找出端口 To find out what port was opened externally (by the NodePort option) we’ll run the describe service command:
kubectl describe services/kubernetes-bootcamp
- 保存端口变量值 Create an environment variable called NODE_PORT that has the value of the Node port assigned
export NODE_PORT=$(kubectl get services/kubernetes-bootcamp -o go-template='{{(index .spec.ports 0).nodePort}}')
echo NODE_PORT=$NODE_PORT
- 查看暴露的应用 Now we can test that the app is exposed outside of the cluster using curl, the IP of the Node and the externally exposed port.
curl $(minikube ip):$NODE_PORT
Step 2: Using labels(运用标签)
- 用label去查询 Let’s use this label to query our list of Pods.
kubectl get pods -l app=kubernetes-bootcamp
- 用label去查询 You can do the same to list the existing services
kubectl get services -l app=kubernetes-bootcamp
- 保存pod的名字到环境变量 Get the name of the Pod and store it in the POD_NAME environment variable:
export POD_NAME=$(kubectl get pods -o go-template --template '{{range .items}}{{.metadata.name}}{{"\n"}}{{end}}')
echo Name of the Pod: $POD_NAME
![]()
- 应用新的标签 To apply a new label we use the label command followed by the object type, object name and the new label:
kubectl label pods $POD_NAME version=v1
![]()
kubectl describe pods $POD_NAME
kubectl get pods -l version=v1
Step 3: Deleting a service(删除服务)
- 删除服务 To delete Services you can use the delete service command. Labels can be used also here:
kubectl delete service -l app=kubernetes-bootcamp
- 确认删除 Confirm that the service is gone:
kubectl get services
- 确认路由不再暴露To confirm that route is not exposed anymore you can curl the previously exposed IP and port:
curl $(minikube ip):$NODE_PORT
- 应用仍然在跑 This proves that the app is not reachable anymore from outside of the cluster. You can confirm that the app is still running with a curl inside the pod:
kubectl exec -ti $POD_NAME -- curl localhost:8080
![]()
kubectl exec -ti $POD_NAME bash
1F. 应用可扩展(略)
目标:用 kubectl 扩缩应用程序
https://kubernetes.io/zh/docs/tutorials/kubernetes-basics/scale/scale-intro/
在之前的模块中,我们创建了一个 Deployment,然后通过 Service让其可以开放访问。Deployment 仅为跑这个应用程序创建了一个 Pod。 当流量增加时,我们需要扩容应用程序满足用户需求。扩缩是通过改变 Deployment 中的副本数量来实现的。

Step 1: Scaling a deployment
Step 2: Load Balancing
Step 3: Scale Down
1G. 应用更新(略)
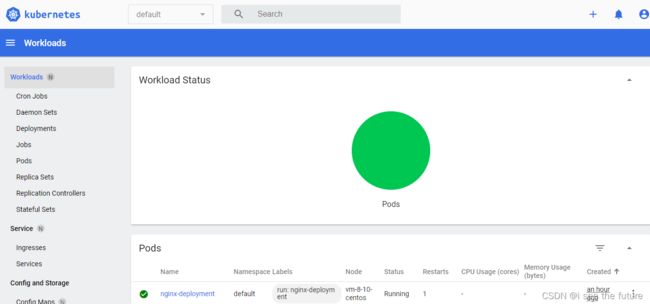
2.部署nginx应用
kubectl run nginx-deployment --image=nginx:1.7.9 --replicas=2

kubectl describe pod nginx-deployment

3.查看远端计算机的文件夹
4.【Kubenetes】Windows 系统通过 WinSCP 上传文件到 Linux 轻量应用服务器
https://blog.csdn.net/m0_46629123/article/details/124001320
5.【5分钟玩转Lighthouse】带你尝鲜轻量 Kubernetes 发行版 K3s
https://blog.csdn.net/m0_46629123/article/details/124002294
6.上传yml档到虚拟主机,然后部署应用
yml档案可参考https://cloud.tencent.com/developer/article/1847421
部署应用kubectl create -f wordpress.yml
查看应用kubectl get pods
7A. Lab 1: Single Container Pod
https://blog.csdn.net/weixin_40274679/article/details/107887678
Pods that run a single container. The “one-container-per-Pod” model is the most common Kubernetes use case; in this case, you can think of a Pod as a wrapper around a single container, and Kubernetes manages the Pods rather than the containers directly.
mywebsite-pod.yml (pod)
apiVersion: v1
kind: Pod
metadata:
  name: mywebsite-pod
  labels:
    app: Lab1
spec:
  containers:
    - name: web
      image: nginx:latest
      resources:
        requests:
          cpu: 100m
          memory: 128Mi
        limits:
          cpu: 250m
          memory: 256Mi
      ports:
        - containerPort: 80
          name: mywebsite-port
          protocol: TCP
- kubectl describe pod mywebsite-pod2
[lighthouse@VM-8-10-centos ~]$ kubectl  describe pod mywebsite-pod2
Name:         mywebsite-pod2
Namespace:    default
Priority:     0
Node:         vm-8-10-centos/10.0.8.10
Start Time:   Mon, 11 Apr 2022 20:51:23 +0800
Labels:       app=Lab1
Annotations:  <none>
Status:       Running
IP:           10.42.0.11
IPs:
  IP:  10.42.0.11
Containers:
  web:
    Container ID:   containerd://fabf4726d078a431af2e9c4bbdc188033e7f424686b2b222b42688899132d820
    Image:          nginx:latest
    Image ID:       docker.io/library/nginx@sha256:2275af0f20d71b293916f1958f8497f987b8d8fd8113df54635f2a5915002bf1
    Port:           80/TCP
    Host Port:      0/TCP
    State:          Running
      Started:      Mon, 11 Apr 2022 20:51:40 +0800
    Ready:          True
    Restart Count:  0
    Limits:
      cpu:     250m
      memory:  256Mi
    Requests:
      cpu:        100m
      memory:     128Mi
    Environment:  <none>
    Mounts:
      /var/run/secrets/kubernetes.io/serviceaccount from default-token-fw4gh (ro)
Conditions:
  Type              Status
  Initialized       True
  Ready             True
  ContainersReady   True
  PodScheduled      True
Volumes:
  default-token-fw4gh:
    Type:        Secret (a volume populated by a Secret)
    SecretName:  default-token-fw4gh
    Optional:    false
QoS Class:       Burstable
Node-Selectors:  <none>
Tolerations:     node.kubernetes.io/not-ready:NoExecute op=Exists for 300s
                 node.kubernetes.io/unreachable:NoExecute op=Exists for 300s
Events:
  Type    Reason     Age    From               Message
  ----    ------     ----   ----               -------
  Normal  Scheduled  4m16s  default-scheduler  Successfully assigned default/mywebsite-pod2 to vm-8-10-centos
  Normal  Pulling    4m16s  kubelet            Pulling image "nginx:latest"
  Normal  Pulled     4m     kubelet            Successfully pulled image "nginx:latest" in 15.947986655s
  Normal  Created    4m     kubelet            Created container web
  Normal  Started    4m     kubelet            Started container web
- curl 10.42.0.11
[lighthouse@VM-8-10-centos ~]$ curl 10.42.0.11
<!DOCTYPE html>
<html>
<head>
<title>Welcome to nginx!</title>
<style>
html { color-scheme: light dark; }
body { width: 35em; margin: 0 auto;
font-family: Tahoma, Verdana, Arial, sans-serif; }
</style>
</head>
<body>
<h1>Welcome to nginx!</h1>
<p>If you see this page, the nginx web server is successfully installed and
working. Further configuration is required.</p>

<p>For online documentation and support please refer to
<a href="http://nginx.org/">nginx.org</a>.<br/>
Commercial support is available at
<a href="http://nginx.com/">nginx.com</a>.</p>

<p><em>Thank you for using nginx.</em></p>
</body>
</html>
mywebsite-svc.yml (NodePort)
apiVersion: v1
kind: Service
metadata:
  name: mywebsite-svc
  labels:
    app: Lab1
spec:
  type: NodePort
  ports:
   - port: 8080
     targetPort: 80
     protocol: TCP
  selector:
    app: Lab1
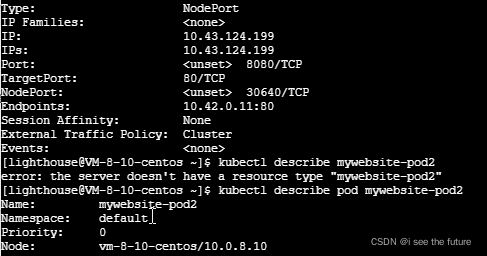
- kubectl describe svc mywebsite-svc
[lighthouse@VM-8-10-centos ~]$ kubectl describe svc mywebsite-svc
Name:                     mywebsite-svc
Namespace:                default
Labels:                   app=Lab1
Annotations:              <none>
Selector:                 app=Lab1
Type:                     NodePort
IP Families:              <none>
IP:                       10.43.124.199
IPs:                      10.43.124.199
Port:                     <unset>  8080/TCP
TargetPort:               80/TCP
NodePort:                 <unset>  30640/TCP
Endpoints:                10.42.0.11:80
Session Affinity:         None
External Traffic Policy:  Cluster
Events:                   <none>
Service Type - NodePort外部访问需通过 < NodeIP >:< NodePort >
内网IP< NodeIP > 10.0.8.10
NodePort< NodePort > 30640
7B.Lab 2: Multi-Container Pod
Pods that run multiple containers that need to work together. A Pod might encapsulate an application composed of multiple co-located containers that are tightly coupled and need to share resources. These co-located containers might form a single cohesive unit of service–one container serving files from a shared volume to the public, while a separate “sidecar” container refreshes or updates those files. The Pod wraps these containers and storage resources together as a single manageable entity. The Kubernetes Blog has some additional information on Pod use cases.
kubectl create -f db-pod.yml -f db-svc.yml -f web-pod.yml -f web-svc.yml
db-pod.yml 生成数据库
apiVersion: v1
kind: Pod
metadata:
  name: db-pod
  labels:
    app: Lab2-db
spec:
  containers:
    - name: mysql
      image: mysql:5.7
      resources:
        requests:
          cpu: 250m
          memory: 256Mi
        limits:
          cpu: 500m
          memory: 512Mi
      ports:
        - containerPort: 3306
          name: mysql-port
          protocol: TCP
      env:
        -
          name: "MYSQL_ROOT_PASSWORD"
          value: "password"
db-svc.ymal(clusterIP)
 apiVersion: v1
kind: Service
metadata:
  name: mysql
spec:
  # type: LoadBalancer
  ports:
  - port: 3306
    name: mysql-port
    targetPort: 3306
    protocol: TCP
  selector:
    app: Lab2-db
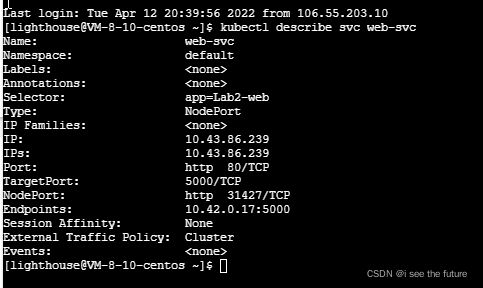
web-svc.yml (NodePort)
apiVersion: v1
kind: Service
metadata:
  name: web-svc
spec:
  type: NodePort
  ports:
   - port: 80
     name: http
     targetPort: 5000
     protocol: TCP
  selector:
    app: Lab2-web
PS: LoadBalancer: 在使用一个集群内部IP地址和在NodePort上开放一个服务之外,向云提供商申请一个负载均衡器,会让流量转发到这个在每个节点上以< NodeIP >:NodePort的形式开放的服务上。LoadBalancer可以隐藏IP地址。
链接

web-pod.yml(发布pod)
apiVersion: v1
kind: Pod
metadata:
  name: web-pod
  labels:
    app: Lab2-web
spec:
  containers:
    - name: redis
      image: redis
      resources:
        requests:
          cpu: 100m
          memory: 128Mi
        limits:
          cpu: 250m
          memory: 256Mi
      ports:
        - containerPort: 6379
          name: redis-port
          protocol: TCP
    - name: python
      image: seasonzhang/py-red-sql
      resources:
        requests:
          cpu: 100m
          memory: 128Mi
        limits:
          cpu: 250m
          memory: 256Mi
      env:
        - name: "REDIS_HOST"
          value: "localhost"
      ports:
        - containerPort: 5000
          name: python-port
          protocol: TCP
7C.Lab 3: Create an Ingress to access Web Service(在Lab2基础上做)
web-ingress.yml(ingress先放弃)
apiVersion: extensions/v1beta1
kind: Ingress
metadata:
  name: web-ingress
spec:
  rules:
  - host: web-ingress.8801112.10.34.4.101.xip.io
    http:
      paths:
      - backend:
          serviceName: web-svc
          servicePort: 5000
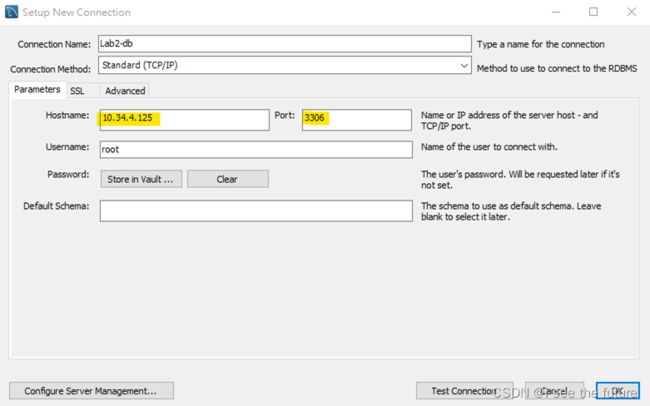
db-svc.yml(使用LoadBalancer,理论可以从外部访问mysql,因为我是腾讯云所以无法访问)
apiVersion: v1
kind: Service
metadata:
  name: mysql
spec:
  type: LoadBalancer
  ports:
  - port: 3306
    name: mysql-port
    targetPort: 3306
    protocol: TCP
  selector:
    app: Lab2-db
7D.Lab 4(1): Scaling and Managing Deployment
hello-world.yml :deployment发布,自动带有3个副本。
apiVersion: apps/v1
kind: Deployment
metadata:
  name: hello-dp
spec:
  replicas: 3
  selector:
    matchLabels:
      app: hello-world
  template:
    metadata:
      labels:
        app: hello-world
    spec:
      containers:
      - name: hello
        image: nginx
        imagePullPolicy: Always
        resources:
          requests:
            cpu: 100m
            memory: 128Mi
          limits:
            cpu: 250m
            memory: 256Mi
        ports:
        - containerPort: 3000
---
apiVersion: v1
kind: Service
metadata:
  name: hello-svc
spec:
  type: NodePort
  ports:
   - port: 80
     name: http
     targetPort: 3000
     protocol: TCP
  selector:
    app: hello-world
副本数量到从默认3个扩充5个
kubectl scale deployment hello-dp --replicas 5
image从V1更新到V2
#更新image版本
kubectl set image deployment hello-dp hello=nginx
#查看更新状态
kubectl rollout status deploy/hello-dp
#暂停更新
kubectl rollout pause deploy/hello-dp
#回复
kubectl rollout resume deploy/hello-dp
#查看更新历史
kubectl rollout history deploy/hello-dp
#撤销
kubectl rollout undo deploy/hello-dp
![]()
7D.Lab 4(2): Horizontal Pod Autoscaler
hello-hpa.yml (透过Deployment自动扩大副本)
apiVersion: autoscaling/v1
kind: HorizontalPodAutoscaler
metadata:
  name: hello-hpa
spec:
  scaleTargetRef:
    apiVersion: apps/v1
    kind: Deployment
    name: hello-dp
  minReplicas: 3
  maxReplicas: 10
  targetCPUUtilizationPercentage: 50
7E.Lab 5: Persist data using Dynamic Volume Provisioning(动态挂volume,storageClassName建议用default值)
介绍PVC
介绍PVC
有两种方式配置PV:静态的或动态的。以下示范的是动态的。
Lab介绍
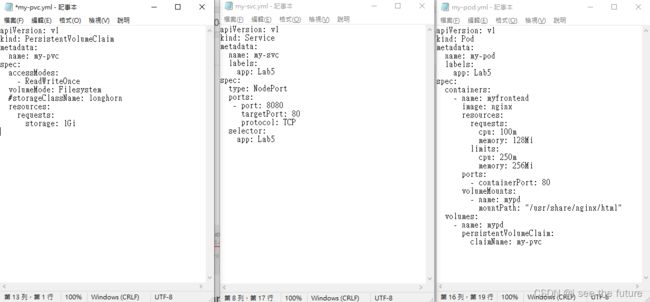
my-pvc.yml(建立PVC,#storageClassName: longhorn,使用default值)
apiVersion: v1
kind: PersistentVolumeClaim
metadata:
  name: my-pvc
spec:
  accessModes:
    - ReadWriteOnce
  volumeMode: Filesystem
  #storageClassName: longhorn
  resources:
    requests:
      storage: 1Gi
my-svc.yml(建立SVC以便验证)
apiVersion: v1
kind: Service
metadata:
  name: my-svc
  labels:
    app: Lab5
spec:
  type: NodePort
  ports:
   - port: 8080
     targetPort: 80
     protocol: TCP
  selector:
    app: Lab5
my-pod.yml(挂靠PVC)
apiVersion: v1
kind: Pod
metadata:
  name: my-pod
  labels:
    app: Lab5
spec:
  containers:
    - name: myfrontend
      image: nginx
      resources:
        requests:
          cpu: 100m
          memory: 128Mi
        limits:
          cpu: 250m
          memory: 256Mi
      ports:
        - containerPort: 80
      volumeMounts:
        - name: mypd
          mountPath: "/usr/share/nginx/html"
  volumes:
    - name: mypd
      persistentVolumeClaim:
        claimName: my-pvc
实验过程(pod删除后,PVC保存原来的信息,新的pod启动后,还可以读取到。)
整体效果:pod删除后,PVC保存原来的信息,新的pod启动后,还可以读取到。
- my-pod启动后,进去sh(kubectl exec -it my-pod sh)
- 修改nginx的html(echo ‘Hello from Kubernetes storage’ > /usr/share/nginx/html/index.html )
- curl 10.0.8.10:30281,显示刚刚修改的内容

- 删除my-pod(kubectl delete pod my-pod)后,查不到my-pod

- 重新启动my-pod(kubectl create -f my-pod.yml)

7F.Lab 6: Manage App Settings and Env Vars using ConfigMap
看11.configMap介绍即可
7G.Lab 7: Manage App Settings using Secret
看12.secret介绍即可
8A. 我用K8S部署的第一个应用(NodePort只能内网访问)
效果:用内网IP加端口curl 10.0.8.10:32247就可以访问应用。目前用公网IP无法访问,正在debug。

chengjisihan-svc.yml
apiVersion: v1
kind: Service
metadata:
  name: chengjisihan-svc
  labels:
    app: chengji-Lab1
spec:
  type: NodePort
  ports:
   - port: 8000
     targetPort: 8000
     protocol: TCP
  selector:
    app: chengji-Lab1
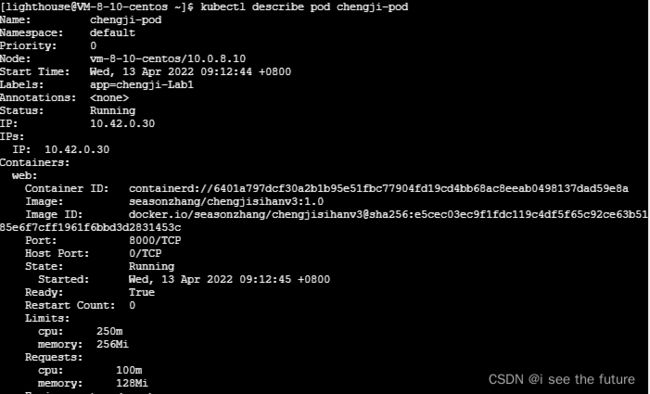
chengjisihan-pod.yml
apiVersion: v1
kind: Pod
metadata:
  name: chengji-pod
  labels:
    app: chengji-Lab1
spec:
  containers:
    - name: web
      image: seasonzhang/chengjisihanv3:1.0
      resources:
        requests:
          cpu: 100m
          memory: 128Mi
        limits:
          cpu: 250m
          memory: 256Mi
      ports:
        - containerPort: 8000
          name: chengji-pod
          protocol: TCP
8B. 我用K8S部署的第一个应用(LoadBalancer可以外网访问)
https://blog.csdn.net/m0_46629123/article/details/124144199
跟13A差不多,只是NodePort换成了LoadBalancer。
以下4种方式都可以访问应用:
1.浏览器输入106.52.14.84:8000
2.curl 106.52.14.84:8000
3.curl 10.0.8.10:8000
4.curl 10.0.8.10:32247

chengjisihan-svc.yml
apiVersion: v1
kind: Service
metadata:
  name: chengjisihan-svc
  labels:
    app: chengji-Lab1
spec:
  #type: NodePort
  type: LoadBalancer
  ports:
   - port: 8000
     targetPort: 8000
     protocol: TCP
  selector:
    app: chengji-Lab1
chengjisihan-pod.yml
apiVersion: v1
kind: Pod
metadata:
  name: chengji-pod
  labels:
    app: chengji-Lab1
spec:
  containers:
    - name: web
      image: seasonzhang/chengjisihanv3:1.0
      resources:
        requests:
          cpu: 100m
          memory: 128Mi
        limits:
          cpu: 250m
          memory: 256Mi
      ports:
        - containerPort: 8000
          name: chengji-pod
          protocol: TCP
9A. 挂emptyDir(说白了,没啥用)
https://blog.csdn.net/watermelonbig/article/details/84108424
emptyDir Volume对于容器来说是持久的,对于Pod则不是。当Pod从节点删除时,Volume的内容也会被删除。但如果只是容器被销毁而Pod还在,则Volume不受影响。也就是说:emptyDir Volume的生命周期与Pod一致。
apiVersion: v1
kind: Pod
metadata:
  name: test-pod
spec:
  containers:
  - image: busybox
    name: test-emptydir
    command: [ "sleep", "3600" ]
    volumeMounts:
    - mountPath: /data
      name: data-volume
  volumes:
  - name: data-volume
    emptyDir: {}
# kubectl describe pod test-pod
Name:         test-pod
Namespace:    default
Node:         kube-node2/172.16.10.102
......
    Environment:    >
    Mounts:
      /data from data-volume (rw)
......
Volumes:
  data-volume:
    Type:    EmptyDir (a temporary directory that shares a pod's lifetime)
    Medium:
......
9B(1). pod挂hostPath(在使用hostPath volume卷时,即便pod已经被删除了,volume卷中的数据还在!)
hostPath允许挂载Node上的文件系统到Pod里面去。如果Pod有需要使用Node上的文件,可以使用hostPath。
hostPath volume
apiVersion: v1
kind: Pod
metadata:
  name: test-pod2
spec:
  containers:
  - image: busybox
    name: test-hostpath
    command: [ "sleep", "3600" ]
    volumeMounts:
    - mountPath: /test-data
      name: test-volume
  volumes:
  - name: test-volume
    hostPath:
      # directory location on host
      path: /data
      # this field is optional
      type: Directory
- 查看下pod创建结果,观察volumes部分:
# kubectl describe pod test-pod2
Name:         test-pod2
Namespace:    default
Node:         kube-node2/172.16.10.102
......
    Mounts:
      /test-data from test-volume (rw)
......
Volumes:
  test-volume:
    Type:          HostPath (bare host directory volume)
    Path:          /data
    HostPathType:  Directory
......
- 我们登录到容器中,进入挂载的/test-data目录中,创建个测试文件。
echo 'testtesttest' > /test-data/test.log
我们把该pod删除掉,再看看node节点上的hostPath使用的目录与数据会有什么变化。
kubectl delete pod test-pod2
9B(2). pod挂hostPath给我的应用
- yaml档案
apiVersion: v1
kind: Pod
metadata:
  name: chengji-pod4
  labels:
    app: chengji-pod4
spec:
  containers:
    - name: chengji4
      image: seasonzhang/chengjisihanv3:2.0
      resources:
        requests:
          cpu: 100m
          memory: 128Mi
        limits:
          cpu: 250m
          memory: 256Mi
      ports:
       - containerPort: 8000
         name: chengji-pod4
         protocol: TCP
      volumeMounts:
        - name: mypd4
          mountPath: /code/package/file
  volumes:
  - name: mypd4
    hostPath:
      # directory location on host
      path: /data
      # this field is optional
      type: Directory
---
apiVersion: v1
kind: Service
metadata:
  name: chengji-svc4
  labels:
    app: chengji-pod4
spec:
  #type: NodePort
  type: LoadBalancer
  ports:
   - port: 8334
     #name: http
     targetPort: 8000
     protocol: TCP
  selector:
    app: chengji-pod4
---
9B(3).pod挂hostPath给我的应用(SQLite无法读取)
- yaml档案
apiVersion: v1
kind: Pod
metadata:
  name: chengji-pod5
  labels:
    app: chengji-pod5
spec:
  containers:
    - name: chengji5
      image: seasonzhang/chengjisihanv3:2.0
      resources:
        requests:
          cpu: 100m
          memory: 128Mi
        limits:
          cpu: 250m
          memory: 256Mi
      ports:
       - containerPort: 8000
         name: chengji-pod5
         protocol: TCP
      volumeMounts:
        - name: mypd5
          mountPath: /code/package/SQL
  volumes:
  - name: mypd5
    hostPath:
      # directory location on host
      path: /data
      # this field is optional
      type: Directory
---
apiVersion: v1
kind: Service
metadata:
  name: chengji-svc5
  labels:
    app: chengji-pod5
spec:
  #type: NodePort
  type: LoadBalancer
  ports:
   - port: 8335
     #name: http
     targetPort: 8000
     protocol: TCP
  selector:
    app: chengji-pod5
---
9B(4).deploy挂hostPath给我的应用(成功在副本里面保存volume)
- chengjisihan-deploy-hostPath-svc.yml
apiVersion: apps/v1
kind: Deployment
metadata:
  name: chengji-dp6
spec:
  replicas: 3
  selector:
    matchLabels:
      app: chengji-pod6
  template:
    metadata:
      labels:
        app: chengji-pod6
    spec:
      containers:
      - name: chengji6
        image: seasonzhang/chengjisihanv3:2.0
        imagePullPolicy: Always
        resources:
          requests:
            cpu: 100m
            memory: 128Mi
          limits:
            cpu: 250m
            memory: 256Mi
        ports:
        - containerPort: 8000
          name: chengji-pod6
          protocol: TCP
        volumeMounts:
        - name: mypd6
          mountPath: /code/package/file
      volumes:
      - name: mypd6
        hostPath:
          # directory location on host
          path: /data
          # this field is optional
          type: Directory
---
apiVersion: v1
kind: Service
metadata:
  name: chengji-svc6
spec:
  #type: NodePort
  type: LoadBalancer
  ports:
   - port: 8336
     #name: http
     targetPort: 8000
     protocol: TCP
  selector:
    app: chengji-pod6
9C. 外部Storage Provider(说白了,我没有外部储存空间,没啥用)
要在Pod中使用ESB volume,必须先在AWS中创建,然后通过volume-id引用。

9D. 我的应用建立PV-PVC(待补充)
PersistentVolume(PV)是外部存储系统中的一块存储空间,由管理员创建和维护。与Volume一样,PV具有持久性,生命周期独立于Pod。
PersistentVolumeClaim(PVC)是对PV的申请(Claim)。PVC通常由普通用户创建和维护。需要为Pod分配存储资源时,用户可以创建一个PVC,指明存储资源的容量大小和访问模式(比如只读)等信息,Kubernetes会查找并提供满足条件的PV。
9E. 一个数据库的例子(待补充)
9F. PV动态供给无法和deploy结合(未成功,SQLite未能读取)
类似于7E.lab 5
我可以起PVC,但是SQLite好像保存不成功,所有的记录都被清空了。
tips:我好像PVC没有绑成功,因为还是pending状态。看看如何debug。
yaml档案
apiVersion: apps/v1
kind: Deployment
metadata:
  name: chengji-dp3
spec:
  replicas: 1
  selector:
    matchLabels:
      app: chengji-pod3
  template:
    metadata:
      labels:
        app: chengji-pod3
    spec:
      containers:
      - name: chengji3
        image: seasonzhang/chengjisihanv3:2.0
        imagePullPolicy: Always
        resources:
          requests:
            cpu: 100m
            memory: 128Mi
          limits:
            cpu: 250m
            memory: 256Mi
        ports:
        - containerPort: 8000
          name: chengji-pod3
          protocol: TCP
        volumeMounts:
        - name: mypd3
          mountPath: "/code/package/SQL"
      volumes:
       - name: mypd3
         persistentVolumeClaim:
         claimName: my-pvc3
---
apiVersion: v1
kind: Service
metadata:
  name: chengji-svc3
  labels:
    app: chengji-pod3
spec:
  #type: NodePort
  type: LoadBalancer
  ports:
   - port: 8331
     #name: http
     targetPort: 8000
     protocol: TCP
  selector:
    app: chengji-pod3
---
apiVersion: v1
kind: PersistentVolumeClaim
metadata:
  name: my-pvc3
spec:
  accessModes:
    - ReadWriteOnce
  volumeMode: Filesystem
  #storageClassName: longhorn
  resources:
    requests:
      storage: 1Gi
9G. PV动态供给可以和pod结合(成功,txt能读取)
结论就是我目前只能做到自动PVC和pod结合,无法与deploy结合。
类似于7E.lab 5
PVC绑pod路径下的文件是ok的。
效果:重启pod时,1.txt可以保留。
pod-yaml档案
apiVersion: v1
kind: Pod
metadata:
  name: chengji-pod3
  labels:
    app: chengji-pod3
spec:
  containers:
    - name: chengji3
      image: seasonzhang/chengjisihanv3:2.0
      resources:
        requests:
          cpu: 100m
          memory: 128Mi
        limits:
          cpu: 250m
          memory: 256Mi
      ports:
       - containerPort: 8000
         name: chengji-pod3
         protocol: TCP
      volumeMounts:
        - name: mypd3
          mountPath: "/code/package/SQL/"
  volumes:
    - name: mypd3
      persistentVolumeClaim:
        claimName: my-pvc3
---
apiVersion: v1
kind: Service
metadata:
  name: chengji-svc3
  labels:
    app: chengji-pod3
spec:
  #type: NodePort
  type: LoadBalancer
  ports:
   - port: 8331
     #name: http
     targetPort: 8000
     protocol: TCP
  selector:
    app: chengji-pod3
---
apiVersion: v1
kind: PersistentVolumeClaim
metadata:
  name: my-pvc3
spec:
  accessModes:
    - ReadWriteOnce
  volumeMode: Filesystem
  #storageClassName: longhorn
  resources:
    requests:
      storage: 1Gi
进入pod内部echo
echo ‘Hello from Kubernetes storage’ > /code/package/SQL/1.txt
检查
把pod删掉,然后用yaml档案再起一个,你会发现1.txt仍然存在。

9H. 可将需保存资料cp到持久卷,然后从hostPath取出。
进入pod内部,复制start.sh到持久卷SQL
回到虚拟主机host,访问/data/来读出start.sh
9J.Alex老师对于无法读取DB的看法
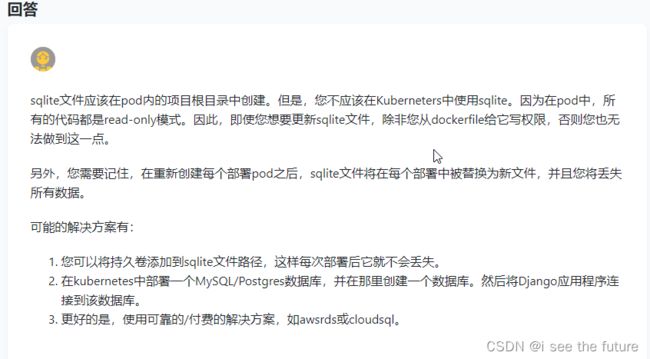
Season Zhang:alex老师,我发现我的pod的PVC如果包含SQLite,django就无法读取SQLite了。PVC倒是可以保存我新增的文件,如TXT。
Alex Lu:無法連到Database的原因是因為將Web AP拆成兩個Container之後, web 的connection string仍然用server=(local), 應該要改成Database所在的container name, 課件裡面應該有提到, 所以你的問題與PVC無關
9K. SQLite可保存至hostPath
参考https://blog.csdn.net/m0_46629123/article/details/124810972

步骤1:应用启动时,会将数据从持久卷同步到应用中。因为hostpath: /data为空,故第一次部署时,数据库是空的。
步骤2:应用启动后,数据会从应用同步到持久卷。故在部署后的应用网站上传数据后,数据会同步到hostpath: /data。

步骤3:应用关闭后,数据会保存在持久卷中。
步骤4:将重启pod或deployment后,持久卷会重复步骤1-----应用启动时,会将数据从持久卷同步到应用中。
9M. SQLite可保存至PVC
Docker:如何将sqlite数据库更改持久保存到db文件?https://qa.1r1g.com/sf/ask/3230348761/?lastactivity
https://blog.csdn.net/m0_46629123/article/details/124810972
效果:deployment的pod重新启动后,PVC的SQLite可以持久化保存数据。
步骤:PVC
步骤1:建立PVC。
步骤2:第一次启动应用时,先拷贝cp SQLite到/data,用/data挂PVC来初始化PVC的值。不要将应用的SQLite直接挂PVC。
步骤3:PVC有初始值后,再将SQLite的文件夹来跟PVC对应。所以第二次回去应用,将原来/data挂PVC取消掉,改为SQLite挂PVC。
步骤4:应用关闭和重启后,数据会保存在持久卷中。
截图待更新
10.K8S yaml档中image写法
https://blog.csdn.net/m0_46629123/article/details/124144654
标准写法:复制docker pull nginx:stable-alpine-perl,去掉docker pull
https://hub.docker.com/_/nginx?tab=tags

tag注意事项:
- 官方image可以省略tag(latest)
image: nginx
- 官方image指定版本
image: nginx:stable-alpine-perl
- 私有image需要带上tag
image: seasonzhang/chengjisihanv3:1.0
11. configMap介绍
ConfigMap支持四种创建方式:
(1)通过–from-literal
kubectl create configmap myconfigmap --from-literal=name=season --from-literal=password=123456
(2)通过–from-file
(3)通过–from-env-file(类似–from-file)
- env-file.properties
name=season
password=123456
(4)通过YAML配置文件
kind: ConfigMap
apiVersion: v1
metadata:
  name: myconfigmap2
  namespace: default
data:
  name: season
  password: '123456'
ConfigMap查看方式:
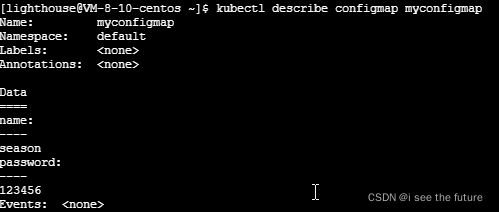
(1)kubectl get configmap
(2)kubectl describe configmap myconfigmap
ConfigMap挂靠方式:
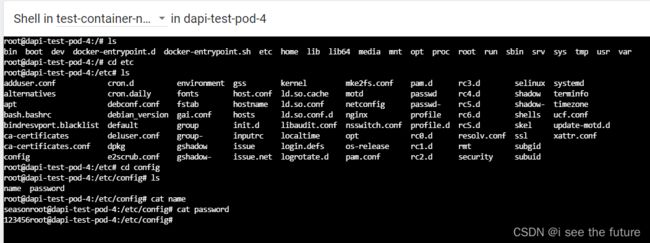
(1)Volume方式
- pod-configmap-yaml-volume.yaml
apiVersion: v1
kind: Pod
metadata:
  name: dapi-test-pod-4
spec:
  containers:
    - name: test-container-nginx
      image: nginx
      volumeMounts:
      - name: config-volume
        mountPath: /etc/config
  volumes:
    - name: config-volume
      configMap:
        name: myconfigmap
        itmes:
        - key:name
          path:myApp/name

  restartPolicy: Never
(2)环境变量方式
- pod-configmap-env-variable.yaml
apiVersion: v1
kind: Pod
metadata:
  name: dapi-test-pod
spec:
  containers:
    - name: test-container
      image: nginx
      env:
        - name: CONFIGMAP_NAME
          valueFrom:
            configMapKeyRef:
              name: myconfigmap2
              key: name
        - name: CONFIGMAP_PASSWORD
          valueFrom:
            configMapKeyRef:
              name: myconfigmap2
              key: password
  restartPolicy: Never
12. secret介绍
secret支持四种创建方式:
(1)通过–from-literal
kubectl create configmap myconfigmap --from-literal=name=season --from-literal=password=123456
(2)通过–from-file
(3)通过–from-env-file(类似–from-file)
- env-file.properties
name=season
password=123456
(4)通过YAML配置文件
kind: Secret
apiVersion: v1
metadata:
  name: mysecret2
  namespace: default
data:
  name: c2Vhc29u
  password: MTIzNDU2
  #name: season
  #password: '123456'
secret查看方式:
(1)kubectl get secret
(2)kubectl describe secret mysecret
secret挂靠方式:
(1)Volume方式
- pod-secret-yaml-volume.yaml
apiVersion: v1
kind: Pod
metadata:
  name: secretpod
spec:
  containers:
    - name: test-container-nginx
      image: nginx
      volumeMounts:
        - name: secrets
          mountPath: /app/secrets
          readOnly: true
  volumes:
    - name: secrets
      secret:
        secretName: mysecret2
(2)环境变量方式
- pod-secret-env-variable.yaml
apiVersion: v1
kind: Pod
metadata:
  name: secret-test
spec:
  containers:
    - name: secret-test
      image: nginx
      env:
        - name: SECRET_NAME
          valueFrom:
            secretKeyRef:
              name: mysecret2
              key: name
        - name: SECRET_PASSWORD
          valueFrom:
            secretKeyRef:
              name: mysecret2
              key: password
  restartPolicy: Never


