KubeSphere - 搭建 nacos 集群
一、KubeSphere - 搭建 nacos 集群
上篇文章我们实验了通过 KubeSphere 在 k8s 集群中搭建 elasticsearch 集群 及 可视化工具 kibana,本篇文章我们一起实验下 通过 KubeSphere 在 k8s 集群中搭建 nacos 集群,下面是上篇文章的地址:
https://blog.csdn.net/qq_43692950/article/details/122834930
在实验开始前,请确保已经安装完成了k8s 及 kubesphere 环境:
![]()
这里我们搭建的nacos 主要将数据存储在了mysql中,因此在实验前要提前安装好mysql服务。可以参考下面我的博客:
上面我创建了一个是headless的服务,在k8s 内部可以提供一个稳定的DNS 域名,一个是nodeport ,提供了一个外围的释放端口方便对mysql 进行操作。这里我的DNS为:mysql.test-project。
我们要搭建 naocs:2.0.3 版本的集群,在开始前最好下载下官方的安装包,其中的配制文件及SQL文件我们可以直接获取修改就可以了,下载地址:
https://github.com/alibaba/nacos/releases/tag/2.0.3
其中config 下的文件就是我们下面需要使用到的:

首先在数据库中创建一个nacos_config数据库,并执行config 目录下的 nacos-mysql.sql:
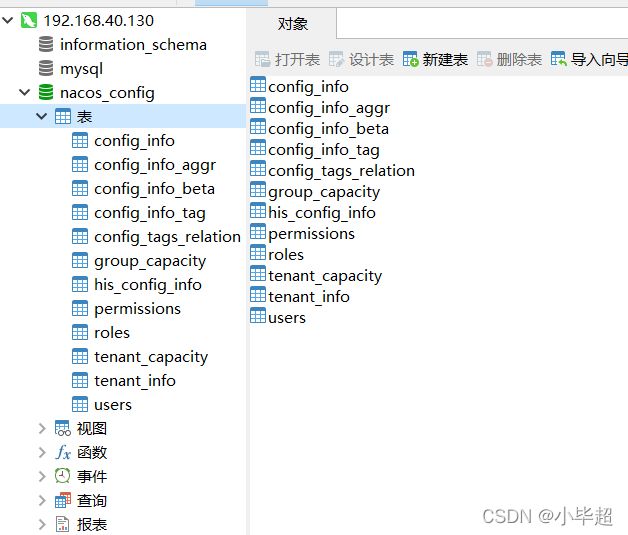
二、创建 application.properties、cluster.conf 配制字典
修改config 目录下的 application.properties 文件,指定存储模式为mysql,并指定mysql的链接:

在kubesphere 中创建一个配制字典:

下一步后,添加数据,键为:application.properties,值就将上面的文件内容复制进去即可:
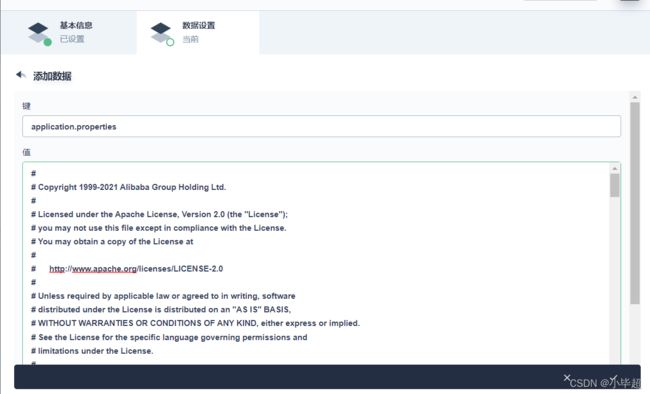
然后再添加一个数据,键为:cluster.conf,下面我们将服务名称和容器名称都指定为nacos,版本为 v1 版本,所以值可以写入以下内容:
nacos-v1-0.nacos.test-project.svc.cluster.local:8848
nacos-v1-1.nacos.test-project.svc.cluster.local:8848
nacos-v1-2.nacos.test-project.svc.cluster.local:8848
三、创建 nacos 服务
选择创建有状态服务:

服务名称指定为nacos :
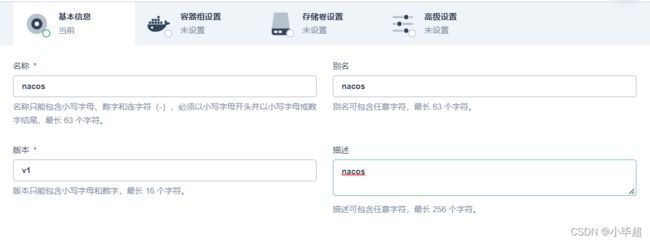
容器数指定为 3:
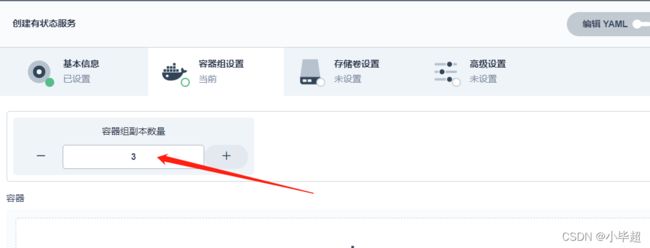
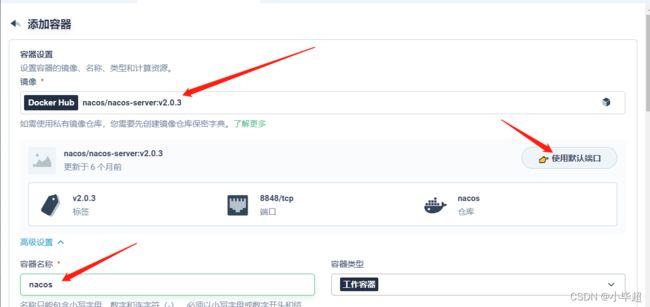
下面镜像使用 nacos/nacos-server:v2.0.3 版本,并使用默认端口:
下面环境变量指定下JVM的大小,根据自己服务器的大小来定,这里只要设了JVM_XMS、JVM_XMX、JVM_XMN:

然后下一步,然后挂载上面创建的两个配制文件:

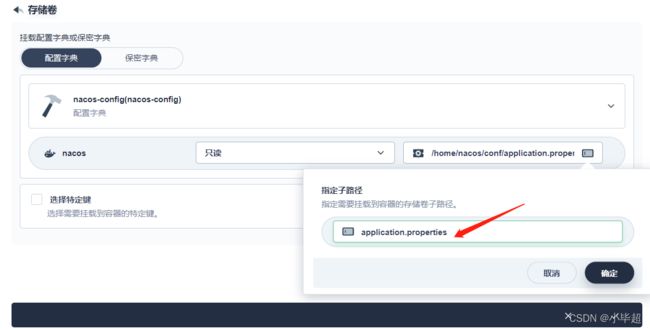
其中 application.properties 挂载到:/home/nacos/conf/application.properties,
cluster.conf 挂载到:/home/nacos/conf/cluster.conf。
这里都要指定下子路径,不然该路径下的其他文件就找不到了:
指定特定键:
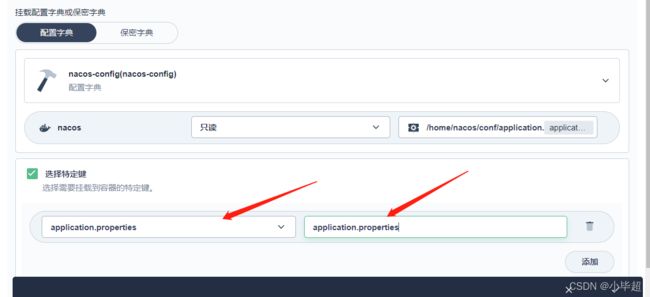
下面同理配制 cluster.conf:
下面点击下一步,创建。
点击服务进去详情即可看到创建的容器:
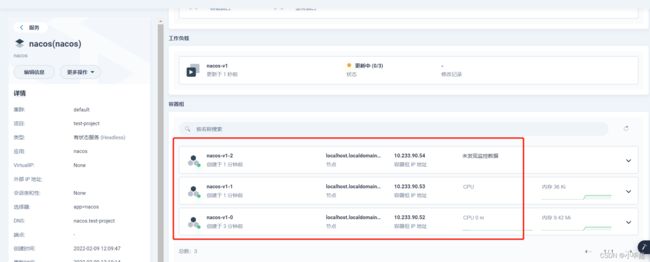
随便进入一个nacos的日志,可以看到集群已经初始化了。

四、为 nacos 创建一个 NodePort的服务
现在nacos只能再k8s集群中才能访问,在集群中我可以通过 headless进行负载访问,也可以再搭建一个nginx,不过这些都不能让我们在外面访问,所以这里还要再创建一个 nodeport 的服务,可以在外面访问到 nacos。
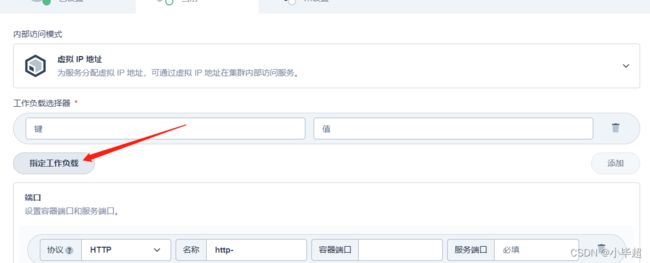
选择指定工作负载:

为服务起个名称:

然后这里指定工作负载:
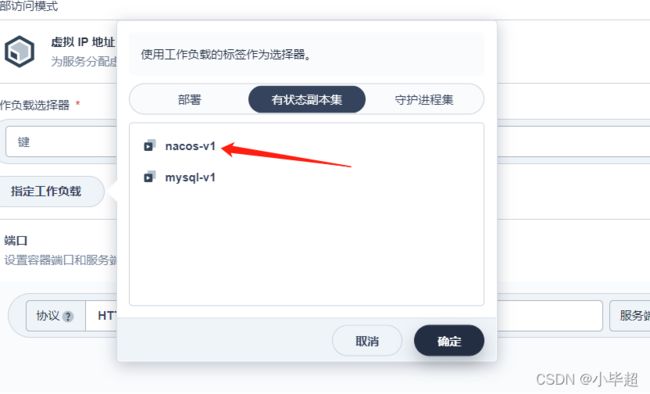
然后选择刚才创建的nacos服务:
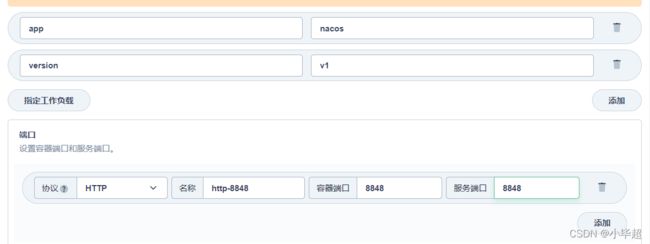
端口我们选择 8848 端口:
然后下一步,选择外部访问,NodePort 模式:

最后创建,点击该服务进入详情,即可看到释放的端口:
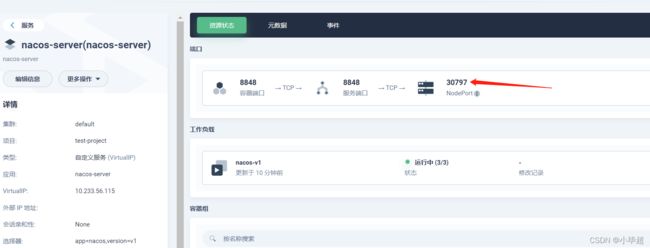
下面在浏览器访问:http://192.168.40.130:30797/nacos
喜欢的小伙伴可以关注我的个人微信公众号,获取更多学习资料!


