uni-app开发小程序实用技巧
uni-app开发小程序实用技巧
uni-app 是一个使用 Vue.js (opens new window)开发所有前端应用的框架,开发者编写一套代码,可发布到iOS、Android、Web(响应式)、以及各种小程序(微信/支付宝/百度/头条/飞书/QQ/快手/钉钉/淘宝)、快应用等多个平台。
vue-cli创建uni项目
全局安装vue-cli
npm install -g @vue/cli@4
使用Vue3/Vite版
npx degit dcloudio/uni-preset-vue#vite my-vue3-project
配置eslint
.eslintrc.js
module.exports = {
  root: true,
  env: {
    node: true
  },
  extends: [
    'plugin:vue/vue3-essential',
    '@vue/standard'
  ],
  parserOptions: {
    parser: 'babel-eslint'
  },
  rules: {
    'no-console': process.env.NODE_ENV === 'production' ? 'warn' : 'off',
    'no-debugger': process.env.NODE_ENV === 'production' ? 'warn' : 'off',
    //关闭组件命名规则
    "vue/multi-word-component-names": "off",
  }
}
配置request
https://www.quanzhan.co/luch-request
安装luch-request
npm i -S luch-request
根目录创建vue.config.js
module.exports = {
  transpileDependencies: ['luch-request']
}
使用
import Request from 'luch-request'

// 将实例化当axios用就行
export const axios = new Request()
使用iconfont
从iconfont下载压缩包到本地,解压后保留iconfont.css,修改iconfont.css中地址,然后地址前加上https://at.alicdn.com
@font-face {
  font-family: 'iconfont';
  /* Project id 2667731 */
  src: url('https://at.alicdn.com/t/font_2667731_zq18s4xyfkej.woff2?t=1649751472791') format('woff2'),
    url('https://at.alicdn.com/t/font_2667731_zq18s4xykfej.woff?t=1649751472791') format('woff'),
    url('https://at.alicdn.com/t/font_2667731_zq18s4xyfkej.ttf?t=1649751472791') format('truetype');
}
将iconfont.css引入到App.vue中,便可以使用iconfont了
@import "@/styles/iconfont.css";
二次封装uni再导出
因为使用eslint,直接使用uni的话会报lint错误,我们不妨从一个文件出口导出uni,那样还能二次拦截一次
/src/utils/uni.js
// eslint-disable-next-line
const uniGlobal = uni || window.uni

// 可以在uniGlobal复写属性
uniGlobal.log = function () {
  console.log(...arguments)
}

export default uniGlobal
在vue文件中使用
import uni from '@/utils/uni'

export default {
  mounted() {
    uni.log('---uni console')
  }
}
每个页面都需要存在的组件
比如封装的showConfirm,每个页面都需要,如果每个页面都要在template中引入一次会很麻烦,可以使用slot来解决这个痛点
/src/components/RootLayout.vue
就可以将AAA、BBB等组件放进到每个页面中,就不需要每个页面去引入
在页面使用RootLayout
页面1
统一的下拉加载
onReachBottom尽管在components中能使用,但是还是需要在page的钩子中存在,函数里都可以不写逻辑,但是得在page的钩子中存在
/src/components/MoreLoading.vue
加载中
/src/components/Loadmore.vue
使用
富文本实用技巧
重写富文本样式用标签不行的,因为小程序中rich-text会把整个富文本内容加到nodes上,并不会生成标签
- 一、重写富文本标签样式
1、使用正则给标签加上类名,然后再写这些类名的样式,再引入到App.vue
export const editorHtmlLabel = [
'h1',
'h2',
'h3',
'h4',
'strong',
'p',
'a',
'table',
'thead',
'tbody',
'th',
'tr',
'td',
'img'
]
export function replaceClass (str = '') {
const regStr = `(${editorHtmlLabel.map(item => `<${item}`).join('|')})`
return str.replace(new RegExp(regStr, 'gi'), function (t) {
return `${t} class="editor-${t.slice(1)}" `
})
.replace(/|<\/a> /g, '') // 小程序打开外链条件严苛,看需求是否需要屏蔽链接
}
/src/styles/editor.less
.editor-content {
  font-family: 'PingFang SC';
  color: #2F3033;
  font-size: 30rpx;
  word-break: break-all;

  .editor-h1 {
    color: #232426;
    font-size: 34rpx;
    font-weight: bold;
    margin-bottom: 30rpx;
  }

  .editor-h2 {
    color: #232426;
    font-size: 32rpx;
    font-weight: bold;
    margin-bottom: 28rpx;
  }

  .editor-h3 {
    color: #232426;
    font-size: 30rpx;
    margin-bottom: 24rpx;
  }

  .editor-h4 {
    color: #232426;
    font-size: 28rpx;
    margin-bottom: 22rpx;
  }

  .editor-strong {
    display: inline-block;
    margin: 10rpx 0 4rpx 0;
  }

  .editor-p {
    margin-bottom: 16rpx;
  }

  .editor-a {
    color: inherit;
  }

  .editor-img-container {
    max-width: 100%;
    overflow-x: auto;
  }

  .editor-img {
    max-width: 100%;
  }

  .editor-table {
    border-collapse: collapse;

    .editor-tr {

      &:first-child {
        .editor-td {
          border-top: 1px solid #666;
        }
      }

      .editor-td {
        border-right: 1px solid #666;
        border-bottom: 1px solid #666;

        &:first-child {
          border-left: 1px solid #666;
        }
      }
    }
  }
}
引入到App.vue中
@import "@/styles/editor.css";
使用replaceClass函数生成标签的class名
- 二、富文本多行文本溢出效果
文本和富文本结合的这种,css控制的文本溢出效果会在ios上失效,这种情况我们要把样式加在富文本上
需要再外层再套一层div,并写上style
export function replaceSearchText (str = '', searchText = '', maxLine = 2) {
  const reg = new RegExp(searchText, 'i')
  const result = str.replace(reg, function (t) {
    return `${t}`
  })
  let style = ''
  if (maxLine) {
    style = `style="overflow: hidden;text-overflow: ellipsis;display: -webkit-box;-webkit-line-clamp: ${maxLine};-webkit-box-orient: vertical;word-break: break-all;"`
  }
  return `${style}>${result}`
}
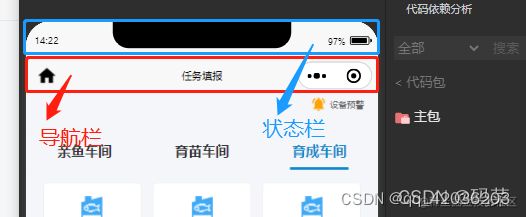
自定义nav-bar
https://blog.csdn.net/weixin_45278509/article/details/123275848
mounted () {
  // #ifdef MP-WEIXIN
  // 获取胶囊位置,就能设置nav-bar的属性 paddingTop: `${btnInfo.top}px`   标题的height、lineHeight:btnInfo.height
  // eslint-disable-next-line
  const btnInfo = wx.getMenuButtonBoundingClientRect()
  this.btnInfo = btnInfo
  // #endif
}
自定义tab-bar
https://www.jianshu.com/p/18d8c7ad7da4
用户授权新方式
自 2022 年 10 月 25 日 24 时后(以下统称 “生效期” ),用户头像昵称获取规则将进行如下调整:
wx.getUserProfile 接口将被收回;wx.getUserInfo 接口获取用户昵称头像将被收回;
新的获取用户头像和昵称的方式采用下方自定义的模式:
https://developers.weixin.qq.com/miniprogram/dev/framework/open-ability/userProfile.html
兼容低版本
https://developers.weixin.qq.com/miniprogram/dev/framework/compatibility.html
小程序的功能不断的增加,但是旧版本的微信客户端并不支持新功能,所以在使用这些新能力的时候需要做兼容。
ios可以横向滑动
加上下面css能解决大部分的问题
page {
  width: 100%;
  overflow-x: hidden;
}
但是还有这种可能,就是使用了padding,但是没有用box-sizing,也会出现ios上可以横向拖动
.container {
  padding: 40rpx;
  box-sizing: border-box;
}
使用命令直接上传
https://developers.weixin.qq.com/miniprogram/dev/devtools/ci.html
https://www.jianshu.com/p/8c595ac792e3
1、微信小程序编译模块安装
npm i miniprogram-ci -D
2、小程序微信管理后台设置
小程序后台开发设置里面启用小程序代码上传,下载密匙文件放到项目里,添加ip白名单,此处是公网白名单,公网白名单查询链接
3、在package.json 的 “scripts”: 自定义编译命令
"upload": "npm run build:mp-weixin && node autoUpload.js",
4、创建autoUpload.js 放在 package.json同级目录
const ci = require('miniprogram-ci')
const shelljs = require('shelljs')
const path = require('path')
const mainfest = require('./src/manifest.json')

const targetFile = path.resolve(__dirname, './package.json')
const packagejson = require(targetFile)
const currentVersion = packagejson.version
const versionArr = currentVersion.split('.')
const [mainVersion, subVersion, phaseVersion] = versionArr

// 默认版本号
const newVersion = `${mainVersion}.${subVersion}.${Number(phaseVersion) + 1}`

async function upload () {
  const project = new ci.Project({
    appid: mainfest['mp-weixin'].appid, // appid
    type: 'miniProgram',
    projectPath: path.resolve(__dirname, './dist/build/mp-weixin'), // 项目路径
    privateKeyPath: path.resolve(__dirname, `./private.${mainfest['mp-weixin'].appid}.key`), // 小程序后台的上传密匙
    ignores: ['node_modules/**/*']
  })

  ci.upload({
    project,
    version: newVersion,
    desc: mainfest.description,
    setting: {
      es6: true, // es6 转 es5
      es7: true, // 增强编译
      disableUseStrict: true,
      autoPrefixWXSS: true, // 上传时样式自动补全
      minifyJS: true,
      minifyWXML: true,
      minifyWXSS: true
    },
    onProgressUpdate: console.log
  }).then(res => {
    console.log(res)
    console.log(`上传成功,appId==${mainfest['mp-weixin'].appid},版本号==${newVersion}`)
    shelljs.sed('-i', `"version": "${currentVersion}"`, `"version": "${newVersion}"`, path.resolve(__dirname, './package.json')) // 同步更新项目中的版本号
  }).catch(error => {
    console.log(`上传失败,appId==${mainfest['mp-weixin'].appid},版本号==${newVersion}`)
    throw error
  })
};

upload()
坑点:manifest.json 里面默认有注释,应该删除所有注释,不然会报json转换错误
5、运行 npm upload ,如开发者工具未登陆 则需要登陆,成功后的图片如下:
