Python中的图形绘制——3D绘图
在 matplotlib 中可以轻松绘制 3D 图形。 接下来讨论一些重要且常用的 3D 图。
1 画点代码
from mpl_toolkits.mplot3d import axes3d
import matplotlib.pyplot as plt
from matplotlib import style
import numpy as np


# setting a custom style to use
style.use('ggplot')


# create a new figure for plotting
fig = plt.figure()


# create a new subplot on our figure
# and set projection as 3d
ax1 = fig.add_subplot(111, projection='3d')
ax1.scatter(x, y, z, c = 'm', marker = 'o')


# defining x, y, z co-ordinates
x = np.random.randint(0, 10, size = 20)
y = np.random.randint(0, 10, size = 20)
z = np.random.randint(0, 10, size = 20)


# plotting the points on subplot


# setting labels for the axes
ax1.set_xlabel('x-axis')
ax1.set_ylabel('y-axis')
ax1.set_zlabel('z-axis')


# function to show the plot
plt.show()
2 输出
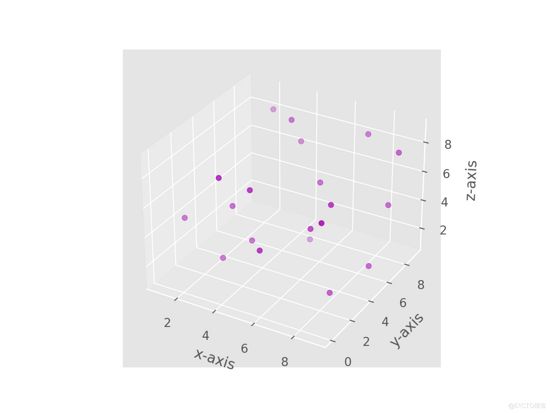
上述程序的输出将为您提供一个可以旋转或放大绘图的窗口。 这是屏幕截图:
现在让我们试着理解这段代码的一些要点。
from mpl_toolkits.mplot3d import axes3d
1)这是在 3-D 空间上绘图所需的模块。
ax1 = fig.add_subplot(111, projection='3d')
2)在图形上创建一个子图并将投影参数设置为 3d。
ax1.scatter(x, y, z, c = 'm', marker = 'o')
3)使用 .scatter() 函数来绘制 XYZ 平面中的点。
3 画线代码
# importing required modules
from mpl_toolkits.mplot3d import axes3d
import matplotlib.pyplot as plt
from matplotlib import style
import numpy as np


# setting a custom style to use
style.use('ggplot')


# create a new figure for plotting
fig = plt.figure()


# create a new subplot on our figure
ax1 = fig.add_subplot(111, projection='3d')


# defining x, y, z co-ordinates
x = np.random.randint(0, 10, size = 5)
y = np.random.randint(0, 10, size = 5)
z = np.random.randint(0, 10, size = (5, 5))


# plotting the points on subplot
ax1.plot_wireframe(x,y,z)


# setting the labels
ax1.set_xlabel('x-axis')
ax1.set_ylabel('y-axis')
ax1.set_zlabel('z-axis')


plt.show()
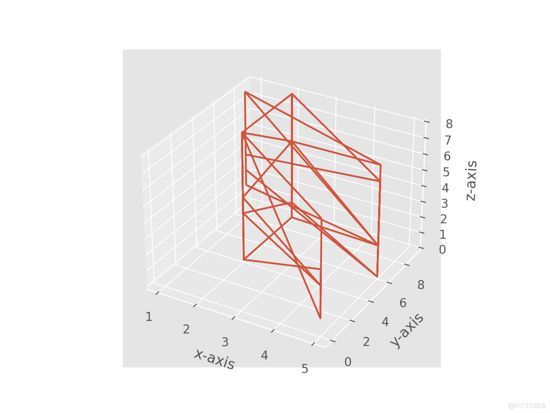
4 输出
5 代码的部分解释
1)该程序与前一个程序的主要区别在于:
ax1.plot_wireframe(x,y,z)
2)使用 .plot_wireframe() 方法可以在给定的一组 3-D 点上绘制线条。
6 画条形图代码
# importing required modules
from mpl_toolkits.mplot3d import axes3d
import matplotlib.pyplot as plt
from matplotlib import style
import numpy as np


# setting a custom style to use
style.use('ggplot')


# create a new figure for plotting
fig = plt.figure()


# create a new subplot on our figure
ax1 = fig.add_subplot(111, projection='3d')


# defining x, y, z co-ordinates for bar position
x = [1,2,3,4,5,6,7,8,9,10]
y = [4,3,1,6,5,3,7,5,3,7]
z = np.zeros(10)


# size of bars
dx = np.ones(10)              # length along x-axis
dy = np.ones(10)              # length along y-axs
dz = [1,3,4,2,6,7,5,5,10,9]   # height of bar


# setting color scheme
color = []
for h in dz:
    if h > 5:
        color.append('r')
    else:
        color.append('b')


# plotting the bars
ax1.bar3d(x, y, z, dx, dy, dz, color = color)


# setting axes labels
ax1.set_xlabel('x-axis')
ax1.set_ylabel('y-axis')
ax1.set_zlabel('z-axis')


plt.show()
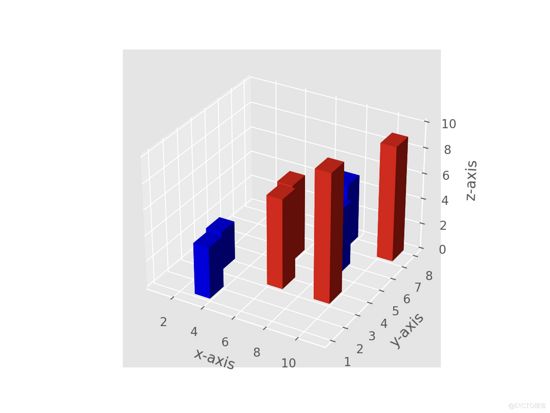
7 输出
8 代码的部分解释
下面解释代码中的关键部分:
x = [1,2,3,4,5,6,7,8,9,10]
y = [4,3,1,6,5,3,7,5,3,7]
z = np.zeros(10)
1)定义柱的基本位置。 设置 z = 0 意味着所有条形都从 XY 平面开始。
dx = np.ones(10)              # length along x-axis
dy = np.ones(10)              # length along y-axs
dz = [1,3,4,2,6,7,5,5,10,9]   # height of bar
2)dx, dy, dz 表示条的大小。 把他看成一个长方体,那么dx、dy、dz分别是它沿x、y、z轴的展开。
for h in dz:
    if h > 5:
        color.append('r')
    else:
        color.append('b')
3)将每个条的颜色设置为一个列表。 颜色方案对于高度大于 5 的条形为红色,否则为蓝色。
ax1.bar3d(x, y, z, dx, dy, dz, color = color)
4)最终使用 .bar3d() 函数绘制了条形图。
9 画曲线代码
# importing required modules
from mpl_toolkits.mplot3d import axes3d
import matplotlib.pyplot as plt
from matplotlib import style
import numpy as np


# setting a custom style to use
style.use('ggplot')


# create a new figure for plotting
fig = plt.figure()


# create a new subplot on our figure
ax1 = fig.add_subplot(111, projection='3d')


# get points for a mesh grid
u, v = np.mgrid[0:2*np.pi:200j, 0:np.pi:100j]


# setting x, y, z co-ordinates
x=np.cos(u)*np.sin(v)
y=np.sin(u)*np.sin(v)
z=np.cos(v)


# plotting the curve
ax1.plot_wireframe(x, y, z, rstride = 5, cstride = 5, linewidth = 1)


plt.show()
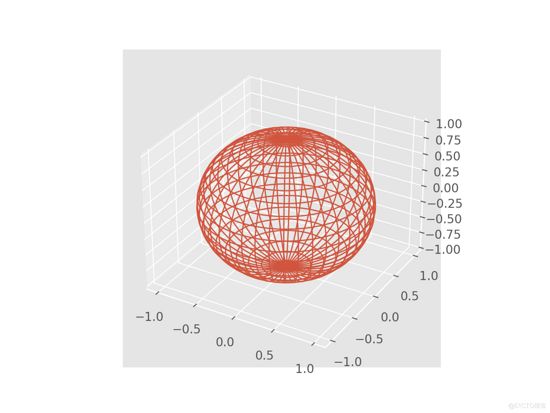
10 输出
11 代码的部分解释
以上代码绘制了一个网格状的球体,下面是部分关键代码的解释:
u, v = np.mgrid[0:2*np.pi:200j, 0:np.pi:100j]
1)使用 np.mgrid 来获取点,以便创建网格
x=np.cos(u)*np.sin(v)
y=np.sin(u)*np.sin(v)
z=np.cos(v)
2)球体的参数方程。
ax1.plot_wireframe(x, y, z, rstride = 5, cstride = 5, linewidth = 1)
3)再次使用 .plot_wireframe() 方法。 rstride 和 cstride 参数可用于设置网格必须有多密集。
dx = np.ones(10)              # length along x-axis
dy = np.ones(10)              # length along y-axs
dz = [1,3,4,2,6,7,5,5,10,9]   # height of bar


