WPF 自定义路由事件
WPF中的路由事件 as U know,和以前Windows消息事件区别不再多讲,这篇博文中,将首先回顾下WPF内置的路由事件的用法,然后在此基础上自定义一个路由事件。
1.WPF内置路由事件
WPF中的大多数事件都是路由事件,WPF有3中路由策略:

具体不多讲,单需要注意的是WPF路由事件是沿着VIsualTree传递的。VisualTree与LogicalTree的区别在于:LogicalTree的叶子节点是构成用户界面的控件(xaml紧密相关),而VisualTree要连控件中的细微结构也算上。VisualTree是LogicalTree的扩展。
reference: Understanding the Visual Tree and Logical Tree in WPF
下面给出一个使用WPF内置路由事件的例子:
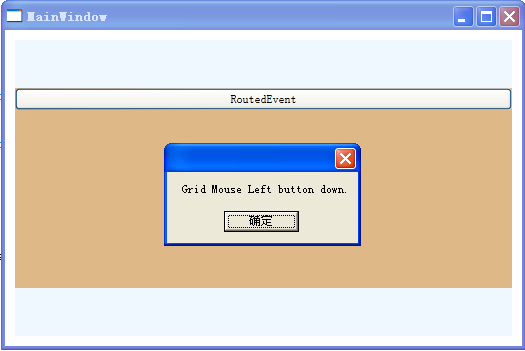
<Window x:Class="WPFRoutedEvent.MainWindow"

        xmlns="http://schemas.microsoft.com/winfx/2006/xaml/presentation"

        xmlns:x="http://schemas.microsoft.com/winfx/2006/xaml"

        Title="MainWindow" Height="350" Width="525" >

    <Grid x:Name="Grid1" Margin="10" Background="AliceBlue"  MouseLeftButtonDown="Grid1_MouseLeftButtonDown">

        <StackPanel Background="BurlyWood" Height="200" x:Name="StackPanel1" Button.Click="ButtonInStackPanel_Click"  MouseLeftButtonDown="StackPanel1_MouseLeftButtonDown">

            <Button x:Name="Button1" Content="RoutedEvent" Click="Button1_Click" />

        </StackPanel>

    </Grid>

</Window>
 View Code

using System.Windows;

using System.Windows.Controls;

using System.Windows.Input;


namespace WPFRoutedEvent

{

    /// <summary>

    /// MainWindow.xaml 的交互逻辑

    /// </summary>

    public partial class MainWindow : Window

    {

        public MainWindow()

        {

            InitializeComponent();

            //Grid订阅Button的Click事件

            Grid1.AddHandler(Button.ClickEvent, new RoutedEventHandler(ButtonInGrid_Click));

        }


        private void Button1_Click(object sender, RoutedEventArgs e)

        {

            MessageBox.Show("Button  Clicked.");

            //

            //e.Handled = true;

        }


        private void ButtonInStackPanel_Click(object sender, RoutedEventArgs e)

        {

            MessageBox.Show("StackPanel Clicked.");

        }


        private void ButtonInGrid_Click(object sender, RoutedEventArgs e)

        {

            MessageBox.Show("Grid Clicked.");

        }


        private void Grid1_MouseLeftButtonDown(object sender, MouseButtonEventArgs e)

        {

            MessageBox.Show("Grid Mouse Left button down.");

        }


        private void StackPanel1_MouseLeftButtonDown(object sender, MouseButtonEventArgs e)

        {

            MessageBox.Show("StackPanel Mouse Left button down.");

        }

    }

}
Button的Click事件是一个路由事件,分别在StackPanel中和Grid中订阅这个事件并进行相应的处理,分别用xaml代码和C#代码如下:
Click="Button1_Click"
Button.Click="ButtonInStackPanel_Click"
Grid1.AddHandler(Button.ClickEvent, new RoutedEventHandler(ButtonInGrid_Click));
StackPanel的MouseLeftButtonDown也是一个路由事件,也可以叫“附加事件”。其实“附加事件”也是路由事件,只是个文字游戏,为什么还要另外起个名字呢?原来路由事件的宿主都是那些拥有可视化实体的界面元素;而附加事件则不具备显示在用户界面上的能力。
常见的附加事件有:
Binding类:SourceUpdated事件、TargetUpdated事件。
Mouse类:MouseEnter事件、MouseLeave事件、MouseDown事件、MouseUp事件等。
Keyboard类:KeyDown事件、KeyUp事件等。
Grid和StackPanel中均如下订阅:
MouseLeftButtonDown="StackPanel1_MouseLeftButtonDown"
程序运行如下:
2.自定义路由事件
前面DebugLZQ写过一篇博文,内容是关于自定义CLR事件的,参考:.NET自定义事件小结。下面来自定义一个WPF路由事件,各位博友可以比较下两者的异同。
创建自定义路由事件大体可以分为三个步骤:
(1)声明并注册路由事件
(2)为路由事件添加CLR事件包装
(3)创建可以激发路由事件的方法
下面我们自定义一个WPF路由事件,我们给事件携带个参数,为此需要创建一个RoutedEventArgs类的派生类。如下:
using System;

using System.Windows;


namespace MyRoutedEvent

{

    //事件参数

    class ReportTimeRoutedEventArgs:RoutedEventArgs

    {

        public ReportTimeRoutedEventArgs(RoutedEvent routedEvent, object source) : base(routedEvent, source) { }


        public DateTime ClickTime { get; set; }

    }

}
然后,创建一个Button类的派生类并按前面的步骤为其添加路由事件:
using System;

using System.Windows.Controls;

using System.Windows;


namespace MyRoutedEvent

{

    class TimeButton:Button

    {

        //声明和注册路由事件\

        public static readonly RoutedEvent ReportTimeRoutedEvent =

            EventManager.RegisterRoutedEvent("ReportTime", RoutingStrategy.Bubble, typeof(EventHandler<ReportTimeRoutedEventArgs>), typeof(TimeButton));

        //CLR事件包装

        public event RoutedEventHandler ReportTime

        {

            add { this.AddHandler(ReportTimeRoutedEvent, value); }

            remove { this.RemoveHandler(ReportTimeRoutedEvent, value); }

        }

        //激发路由事件,借用Click事件的激发方法


        protected override void OnClick()

        {

            base.OnClick();//保证Button原有功能正常使用,Click事件被激发


            ReportTimeRoutedEventArgs args = new ReportTimeRoutedEventArgs(ReportTimeRoutedEvent, this);

            args.ClickTime = DateTime.Now;

            this.RaiseEvent(args);//UIElement及其派生类

        }


    }

}
下面是程序界面的XAML代码,看下如何消费这个路由事件:
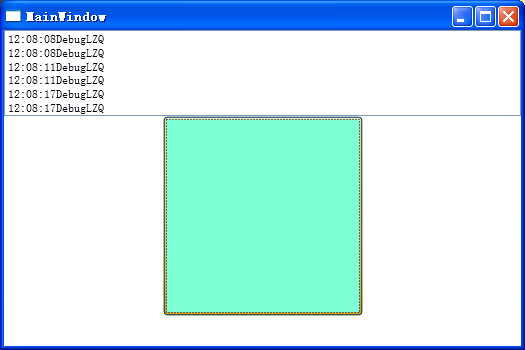
<Window x:Class="MyRoutedEvent.MainWindow"

        xmlns="http://schemas.microsoft.com/winfx/2006/xaml/presentation"

        xmlns:x="http://schemas.microsoft.com/winfx/2006/xaml"

        xmlns:local="clr-namespace:MyRoutedEvent"

        Title="MainWindow" Height="350" Width="525">

    <Grid x:Name="grid1" local:TimeButton.ReportTime="TimeButton_ReportTime"><!---->

        <Grid x:Name="grid2">

            <Grid x:Name="grid3">

                <StackPanel x:Name="stackPanel1">

                    <ListBox x:Name="listBox1"/>

                    <local:TimeButton Width="200" Height="200" Background="Aquamarine" ReportTime="TimeButton_ReportTime" /><!---->

                </StackPanel>

            </Grid>

        </Grid>

    </Grid>

</Window>
事件处理的后台代码如下:
using System.Windows;


namespace MyRoutedEvent

{

    /// <summary>

    /// MainWindow.xaml 的交互逻辑

    /// </summary>

    public partial class MainWindow : Window

    {

        public MainWindow()

        {

            InitializeComponent();

        }


        private void TimeButton_ReportTime(object sender, ReportTimeRoutedEventArgs e)//注意参数

        {

            listBox1.Items.Add(e.ClickTime.ToLongTimeString()+"DebugLZQ");

        }

    }

}
程序运行效果如下:
小结:UIElement类是路由事件和附加事件的分水岭,因为从UIElement类开始才具备了再界面上显示的能力,也因为RaiseEvent、AddHandler和RemoveHandler这些方法也定义在UIElement类中。附加事件也只能算是路由事件的一种用法而不是一个新的概念,其本质还是路由事件。