Python趣味操作推荐
今天整理知识点,发现又多了几个有趣的操作,其中一些还比较实用,因此更新一篇博客~
1. cowsay
import cowsay
print(cowsay.trex('鸡'))
cowsay.daemon('美')
'''
除此之外还有很多
beavis, cheese, daemon, cow, dragon, ghostbusters, kitty, meow, milk, pig,
stegosaurus, stimpy, trex, turkey, turtle, tux。
'''2. 内置游戏
pip install freegamesimport os
# 查看所有游戏名称
os.system('python -m freegames list')
# 运行指定游戏
os.system('python -m freegames.snake')有很多游戏可以玩,基本上只要操作上下左右或者空格键就可以了
3. 文本转语音
import pyttsx3
engine = pyttsx3.init()
engine.say('You are so handsome!')
engine.runAndWait()
这样我们就能听见来自电脑的夸奖了。
3. \r妙用
import time

total = 132 # 可以用os获取文件大小
for i in range(1, 101):
    time.sleep(0.3)
print(f'\r共{total}MB,已下载{i}MB,{int(i / total * 100)}%。', end='')![]()
4. faker
生成随机伪信息。
import random

from openpyxl import workbook
from faker import Faker

wb = workbook.Workbook()
sheet = wb.worksheets[0]
sheet.title = 'pd练习'

li = ['序号', '姓名', '年龄', '性别', '健康程度', '国家']
di = {'中国': 'zh_CN', '美国': 'en_US', '法国': 'fr_FR', '日本': 'ja_JP'}

with open('new_message.xlsx', mode='w', encoding='utf-8') as f:
    for num, item in enumerate(li, 1):
        sheet.cell(1, num).value = item

    for num, i in enumerate(range(2, 502), 1):
        country = random.choice(['中国', '美国', '法国', '日本'])
        gender = random.choice(['男', '女'])

        fk = Faker(locale=di[country])
        sheet.cell(i, 1).value = num
        sheet.cell(i, 2).value = fk.name_male() if gender == '男' else fk.name_female()
        sheet.cell(i, 3).value = random.randint(14, 66)
        sheet.cell(i, 4).value = gender
        sheet.cell(i, 5).value = round(random.random(), 2)
        sheet.cell(i, 6).value = country

wb.save('new_message.xlsx')![]()
此外faker还有很多很多可以生成的东西,感兴趣的朋友可以去自行查找。
5. 日历
import calendar
year =int(input("请输入年份:"))
month = int(input("请输入月份:"))
print(calendar.month(year,month))
6. 词云生成
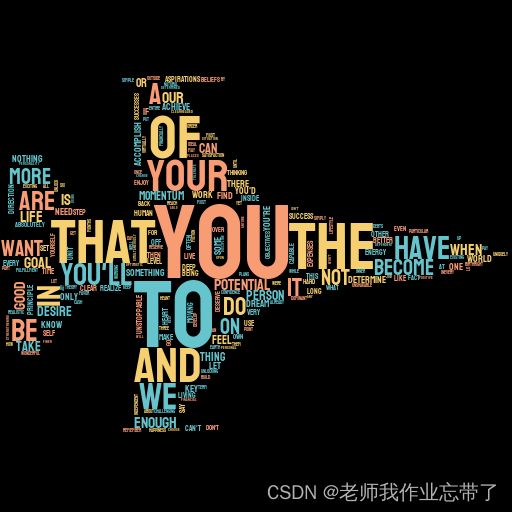
想不要通过一个文本一张图片得到这样的图片:
当时我看见第一张图片十分眼熟,但总是想不起在哪见过......
不过觉得还是比较有意思,特和大家分享一下!
词云生成方式1:
在开始前我们需要准备一个文本,用于生成图片中的单词。
1. 安装词云库 stylecloud
这个库是一位大数据数据分析者Max Woolf做的,基于wordcloud,算是优化改良版。操作简单,直接调用。
pip insall stylecloud 2. 导入stylecloud;
使用stylecloud.gen_stylecloud()结合自己的文本文件和想要生成的 icon图标(点我) 生成图片。
注:上面这个地址连接我默认调成了5.0版本,新版本6.0的icon还无法识别。
import stylecloud
stylecloud.gen_stylecloud(file_path='./data/text.txt',icon_name="fas fa-dragon",output_name='dragon.png')
其中,stylecloud参数如下
def gen_stylecloud(text=None,
                   file_path=None,  # 文本文件路径
                   size=512,  # 大小(长宽)
                   icon_name='fas fa-flag',  # icon样式
                   palette='cartocolors.qualitative.Bold_5',
                   # 调色板。[default: cartocolors.qualitative.Bold_6]
                   colors=None,
                   background_color="white",  # 背景颜色
                   max_font_size=200,  # stylecloud 中的最大字号
                   max_words=2000,  # stylecloud 可包含的最大单词数
                   stopwords=True,  # 布尔值,筛除常见禁用词.
                   custom_stopwords=STOPWORDS,
                   icon_dir='.temp',
                   output_name='stylecloud.png',  # stylecloud 的输出文本名
                   gradient=None,  # 梯度方向
                   font_path=os.path.join(STATIC_PATH, 'Staatliches-Regular.ttf'),  # 字体
                   random_state=None,  # 单词和颜色的随机状态
                   collocations=True,
                   invert_mask=False,
                   pro_icon_path=None,
                   pro_css_path=None):
比如我们加入几个参数,改变词的颜色和背景:
stylecloud.gen_stylecloud(file_path='./data/text.txt',icon_name="fas fa-dragon",colors='red',
                          background_color='black',
                          output_name='dragon.png')
stylecloud.gen_stylecloud(file_path='./data/text.txt',
icon_name='fas fa-fighter-jet',
palette='cartocolors.qualitative.Pastel_3',
background_color='black',
output_name='jet.png',
collocations=False,
custom_stopwords=['kind']
)注:想要显示中文的话需要提前去百度上搜索一种自己喜欢的中文字体下载下来,然后通过参数font_path导入路径。
词云生成方法2:
本次我们需要一个文本文件和一张白色背景图。
pip install wordcloud import matplotlib.pyplot as plt
from wordcloud import WordCloud
f = open('./data/text.txt','r',encoding='utf-8').read()
'''
width、height、margin可以设置图片属性
generate 对文本进行自动分词,但对中文支持不好
可以设置font_path参数来设置字体集
background_color 背景颜色,默认颜色为黑色.
'''
wordcloud = WordCloud(background_color="white",width=1000, height=860, margin=2).generate(f)
plt.imshow(wordcloud)
plt.axis("off")
plt.show()
wordcloud.to_file('./data/xx.jpg')# 保存图片进阶操作:
import numpy as np
import matplotlib.pyplot as plt
from os import path
from PIL import Image
from wordcloud import WordCloud, STOPWORDS, ImageColorGenerator


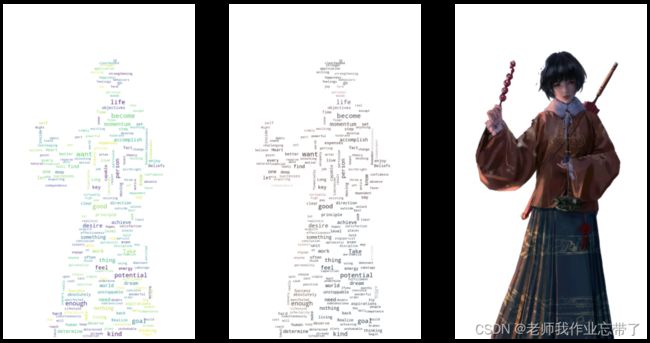
text = open('./data/text.txt','r',encoding='utf-8').read()

img = np.array(Image.open('./data/xxpp.jpg'))

# 禁用词
stopwords = set(STOPWORDS)
stopwords.add("xx")

# 通过 mask 参数设置词云形状
wc = WordCloud(background_color="white", max_words=2000, mask=img,
               stopwords=stopwords, max_font_size=40, random_state=42)
wc.generate(text)

image_colors = ImageColorGenerator(img)


plt.figure(figsize = (16,9))
plt.subplot(131)
plt.imshow(wc, interpolation="bilinear")
plt.axis("off")

plt.subplot(132)
plt.imshow(wc.recolor(color_func=image_colors), interpolation="bilinear")
plt.axis("off")

plt.subplot(133)
plt.imshow(img, cmap=plt.cm.gray, interpolation="bilinear")
plt.axis("off")
plt.show()
当然也可以加入参数进行描边:
from wordcloud import WordCloud, ImageColorGenerator
from PIL import Image
import matplotlib.pyplot as plt
import numpy as np
# create a mask based on the image we wish to include
my_mask = np.array(Image.open('./data/ccc01.jpg'))
# create a wordcloud
wc = WordCloud(background_color='white',
                   mask=my_mask,
                   collocations=False,
                   width=500,
                   height=400,
                   contour_width=1,
                   contour_color='black')

with open('./data/text.txt',encoding='utf-8') as txt_file:
    texto = txt_file.read()
wc.generate(texto)
image_colors = ImageColorGenerator(my_mask)
wc.recolor(color_func=image_colors)

plt.figure(figsize=(20, 10))
plt.imshow(wc, interpolation='bilinear')
plt.axis('off')
wc.to_file('wordcloud01.png')
plt.show()


