Elasticsearch:使用向量搜索来查询及比较文字 - NLP text embedding
Elastic Stack 机器学习功能可以生成嵌入(embeddings),你可以使用它在非结构化文本中搜索或比较不同的文本片段。传统上,我们在搜索文本的时候,更加倾向于把文字进行分词,然后再对 token 进行比对:
在上面,我们在文字中完全或部分匹配分词后的 token,从而完成我们的文字搜索。随着机器学习的出现,我们甚至可以直接在文字中直接使用 “问-答” 这样的方式进行搜索,比如:
在这种情况下,它不仅限于对文字的 token 匹配,它可以对语义进行匹配,比如,在上面,我们可以查询问题 “How fast should my internet be?”。我们可以使用 Elasticsearch 所提供的 vector search 来实现。
在我之前的文章中,我已经写了几篇关于 NLP 的文章。如果你想了解更多,请参阅文章 “Elastic:开发者上手指南” 中的 “NLP - 自然语言处理”。有关目前被支持的三方 NLP 模型,你可以在地址找到。在那里,你可以找到一个比较完整的被支持的 NLP 模型的列表。
在今天的展示中,我将使用最新的 Elastic Stack 8.3 来进行展示。
什么是 text embedding?
文本嵌入(text embedding)是一项产生称为嵌入的文本数学表示的任务。 机器学习模型将文本转换为数值数组(也称为向量)。 具有相似含义的内容片段具有相似的表示。 这意味着可以通过使用数学相似性函数来确定不同的文本片段在语义上是否相似、不同甚至相反。
此任务仅负责生成嵌入。 创建嵌入时,可以将其存储在 dense_vector 字段中并在搜索时使用。 例如,你可以在 k-nearest (kNN) 搜索中使用这些向量来实现语义搜索功能。
以下是生成文本嵌入的示例:
{
    docs: [{"text_field": "The quick brown fox jumps over the lazy dog."}]
}
...
该任务返回以下结果:
...
{
    "predicted_value": [0.293478, -0.23845, ..., 1.34589e2, 0.119376]
    ...
}
...
安装
Elasticsearch 及 Kibana
如果你还没有安装好自己的 Elastic Stack,请参考如下的文章来安装 Elasticsearch 及 Kibana:
- 如何在 Linux,MacOS 及 Windows 上进行安装 Elasticsearch
-
Elastic:使用 Docker 安装 Elastic Stack 8.0 并开始使用
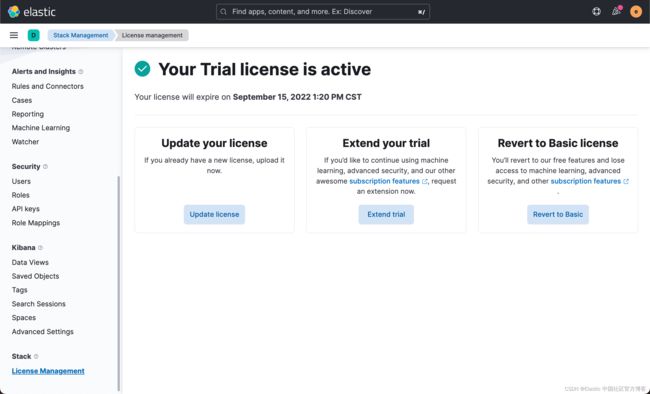
由于我们需要使用到机器学习,我们在本地安装时,必须启动白金版试用功能:
Eland
可以使用 Pip 从 PyPI 安装 Eland:
python -m pip install eland也可以使用 Conda 从 Conda Forge 安装 Eland:
conda install -c conda-forge eland希望在不安装 Eland 的情况下使用它的用户,为了只运行可用的脚本,可以构建 Docker 容器:
git clone https://github.com/elastic/eland
cd eland
docker build -t elastic/eland .
Eland 将 Hugging Face 转换器模型到其 TorchScript 表示的转换和分块过程封装在一个 Python 方法中; 因此,这是推荐的导入方法。
- 安装 Eland Python 客户端。
- 运行 eland_import_hub_model 脚本。 例如:
eland_import_hub_model --url  \
--hub-model-id elastic/distilbert-base-cased-finetuned-conll03-english \
--task-type ner - 指定 URL 以访问你的集群。 例如,https://
: @ : 。 - 在 Hugging Face 模型中心中指定模型的标识符。
- 指定 NLP 任务的类型。 支持的值为 fill_mask、ner、text_classification、text_embedding 和 zero_shot_classification。
写入数据到 Elasticsearch
我们首先到如下的地址克隆如下的项目:
git clone https://github.com/liu-xiao-guo/nlp-webinar等我们下载完上面的仓库文件后,我们可以发现有如下的几个文件:
$ pwd
/Users/liuxg/data/nlp-webinar
$ ls
README.md                 console-commands.txt
blogs.json                eland-docker-commands.txt
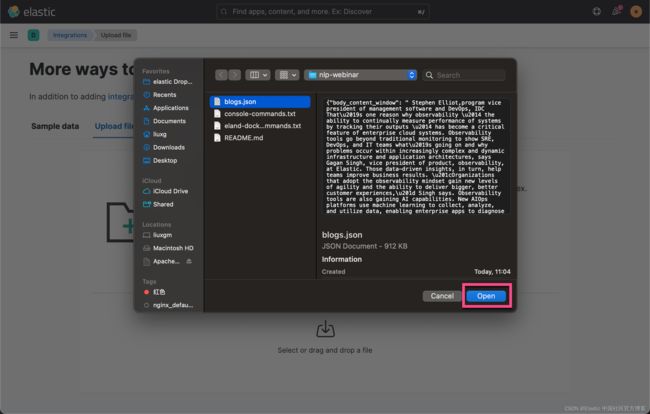
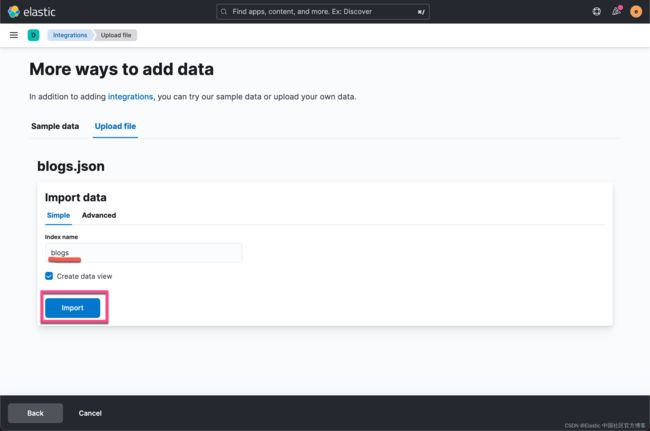
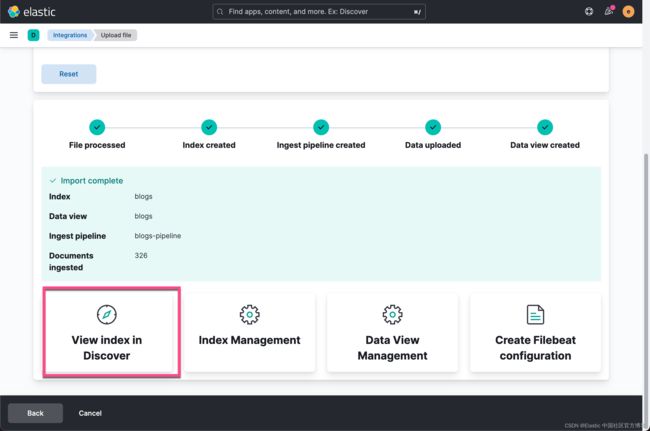
其中的 blogs.json 是我们想要写入到 Elasticsearch 中的文档。这个文档包含 Elastic Blog: Stories, Tutorials, Releases | Elastic Blog 的博客网站里的文档。我们使用如下的方法来摄入:
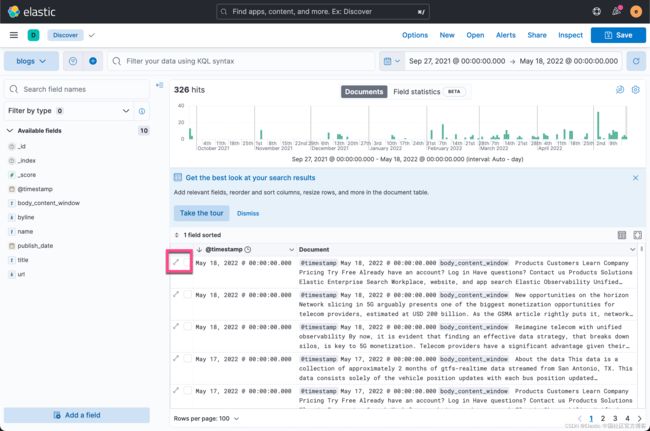
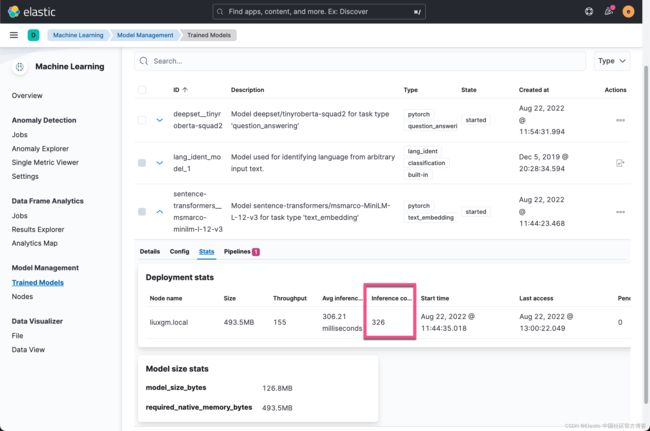
从上面,我们可以看到共有326篇博客文章。点击上面的扩展图标:
我们可以在 body_content_window 里查看到该文章的所有内容。
上传 NLP 模型
接下来我们来上传模型。我们使用如下的命令:
docker run -it --rm elastic/eland \
    eland_import_hub_model \
      --url https://elastic:[email protected]:9200/ \
      --hub-model-id sentence-transformers/msmarco-MiniLM-L-12-v3 \
      --task-type text_embedding \
      --insecure \
      —-start
说明:
- https://elastic:[email protected]:9200/ 是我们的 Elasticsearch 的访问地址。其中 QfpoidDGfAfixQEikZW_ 是超级用户 elastic 的密码。在你的部署中,你需要根据自己的安装来进行修改
- sentence-transformers/msmarco-MiniLM-L-12-v3 是在 huggingface.co 上可以找到的模型。
我们甚至可以在网页上进行一些测试。
- task-type 是 text_embedding
- --insecure:由于我们使用的是自签名的 Elasticsearch 部署,所以,我们可以使用这个选项来进行上传
如果你不想使用 --insecure 来上传,或者你有自己的证书,那么你可以使用如下的方式来进行上传:
docker run -it \
     -v /Users/liuxg/elastic/elasticsearch-8.3.3/config/certs/http_ca.crt:/usr/share/http_ca.crt \
     --rm elastic/eland \
     eland_import_hub_model \
        --url https://elastic:[email protected]:9200/ \
        --hub-model-id sentence-transformers/msmarco-MiniLM-L-12-v3 \
        --task-type text_embedding \
        --ca-cert /usr/share/http_ca.crt
        --start
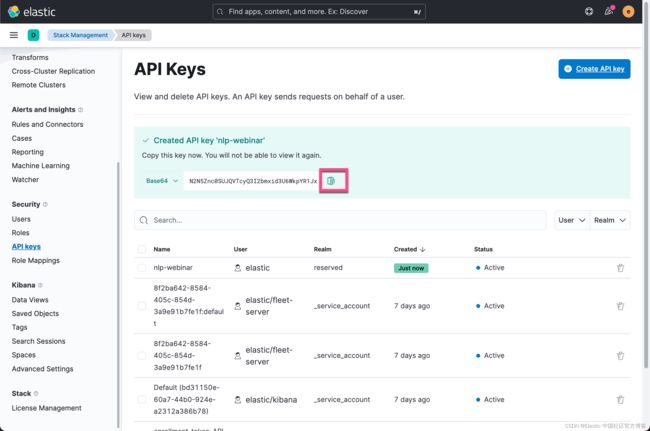
你也可以使用 API key 来进行上传。我们可以使用如下的步骤:
docker run -it --rm elastic/eland \
    eland_import_hub_model \
      --url https://192.168.0.3:9200/ \
      --es-api-key N2N5Znc0SUJQVTcyQ3I2bmxid3U6WkpYR1JxX3JTdlNUajlXWk5vX2xZUQ== \
      --hub-model-id sentence-transformers/msmarco-MiniLM-L-12-v3 \
      --task-type text_embedding \
      --insecure \
      --start
从上面的输出中,我们可以看到模型已经成功地上传到 Elasticsearch 中了。
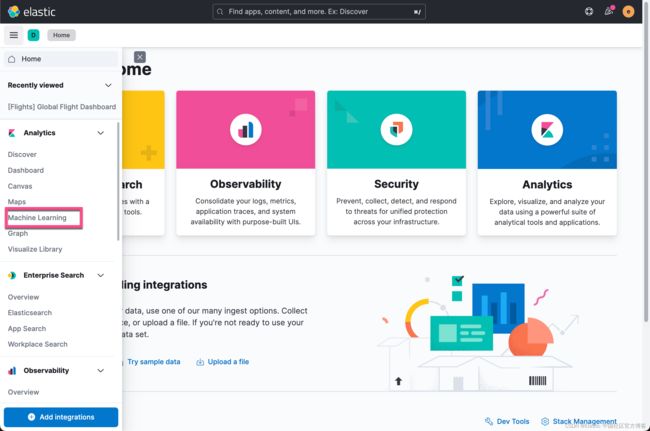
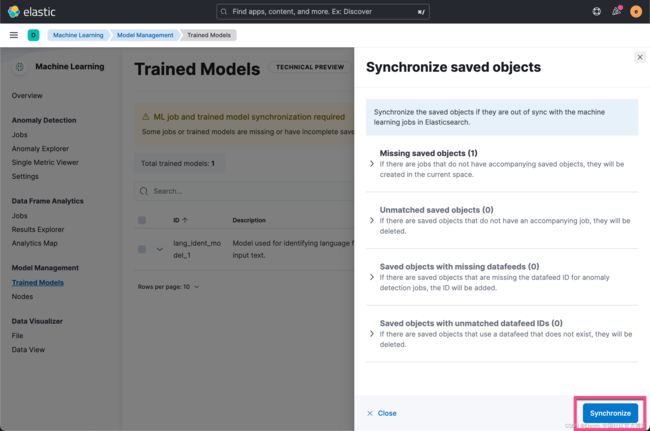
我们可以打开 Kibana 并进行查看:
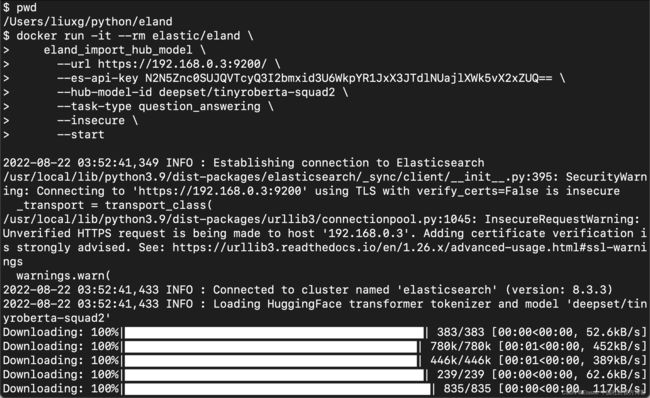
按照同样的步骤,我们来上传另外一个模型 question_answering:
docker run -it --rm elastic/eland \
    eland_import_hub_model \
      --url https://192.168.0.3:9200/ \
      --es-api-key N2N5Znc0SUJQVTcyQ3I2bmxid3U6WkpYR1JxX3JTdlNUajlXWk5vX2xZUQ== \
      --hub-model-id deepset/tinyroberta-squad2 \
      --task-type question_answering \
      --insecure \
      --start
至此,我们成功地上传了需要的模型。
使用模型
我们接下来创建 ingest pipeline 并使用模型。我们先创建一个 ingest pipeline:
# text embedding ingest  pipeline with inference model
PUT _ingest/pipeline/text-embeddings
{
  "description": "Text embedding pipeline",
  "processors": [
    {
      "inference": {
        "model_id": "sentence-transformers__msmarco-minilm-l-12-v3",
        "target_field": "text_embedding",
        "field_map": {
          "body_content_window": "text_field"
        }
      }
    }
  ],
  "on_failure": [
    {
      "set": {
        "description": "Index document to 'failed-'",
        "field": "_index",
        "value": "failed-{{{_index}}}"
      }
    },
    {
      "set": {
        "description": "Set error message",
        "field": "ingest.failure",
        "value": "{{_ingest.on_failure_message}}"
      }
    }
  ]
}
我们接下来创建如下的一个索引:
# template mapping for dense vector field
PUT blogs-with-embeddings
{
  "mappings": {
    "properties": {
      "text_embedding.predicted_value": {
        "type": "dense_vector",
        "dims": 384,
        "index": true,
        "similarity": "l2_norm"
      }
    }
  }
}
请注意这里的 dims 为384。它是和 sentence-transformers/msmarco-MiniLM-L-12-v3 · Hugging Face 中定义的维度大小是一致的。
接下来,我们使用 reindex 把之前的 blogs 写入到另外一个索引中:
# Reindex to use text embedding pipeline - returns
POST _reindex?wait_for_completion=false
{
  "source": {
    "index": "blogs"
  },
  "dest": {
    "index": "blogs-with-embeddings",
    "pipeline": "text-embeddings"
  }
}
在上面,我们定义了 pipeline 从而在 reindex 的过程中,它可以使用上面定义的 infererence 处理器。上面的命令将返回一个 taskid:
{
  "task" : "ViiAKJJMSEmig9qtGfb34g:635573"
}
我们可以通过如下的方式来查看 task 的进度:
GET _tasks/ViiAKJJMSEmig9qtGfb34g:635573我们可以到机器学习的界面去查看进度:
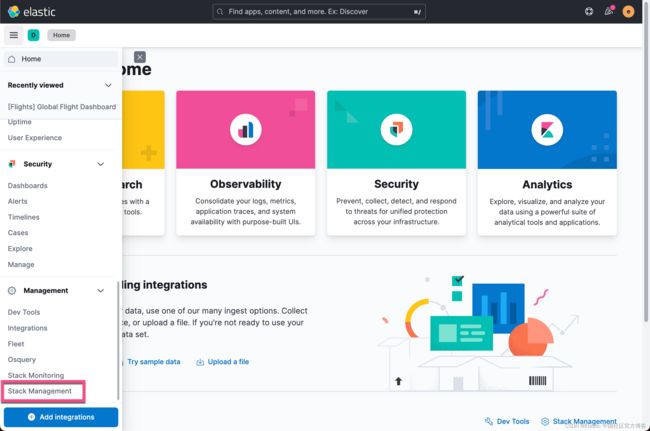
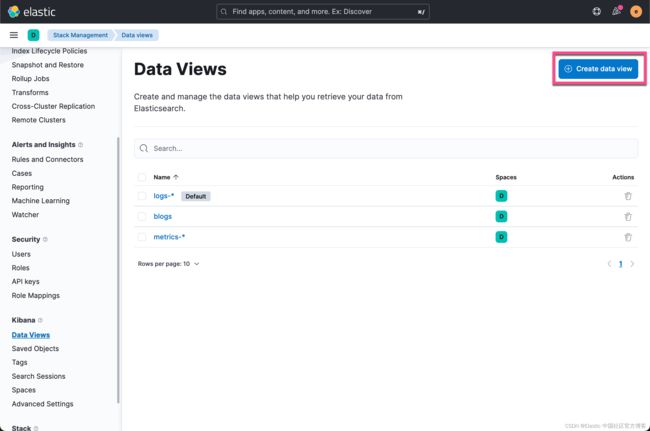
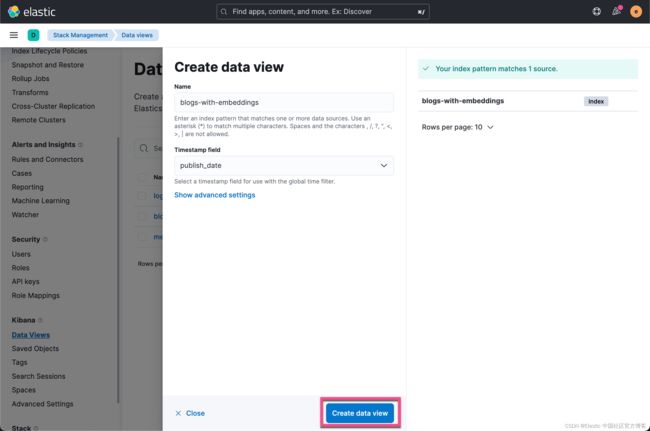
接下来,我们为新的索引 blogs-with-embeddings 创建一个 data view:
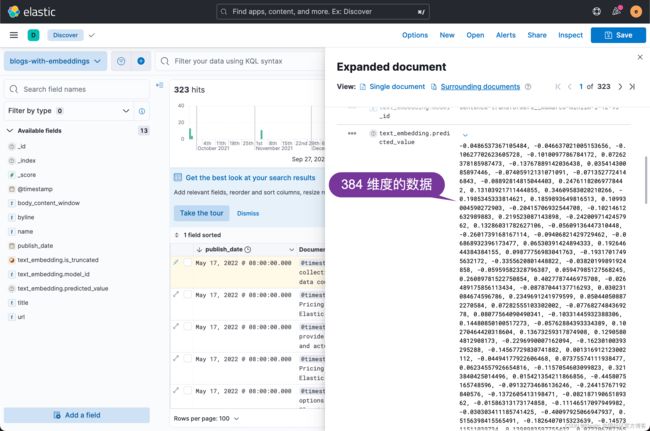
我们接下来去 Discover 来查看这个索引:
我们接下来使用这个最新创建的索引来进行一些搜索:
POST _ml/trained_models/sentence-transformers__msmarco-minilm-l-12-v3/deployment/_infer
{
  "docs": [{"text_field": "Find anomalies in location data"}]
}
上面的命令将返回如下的数据:
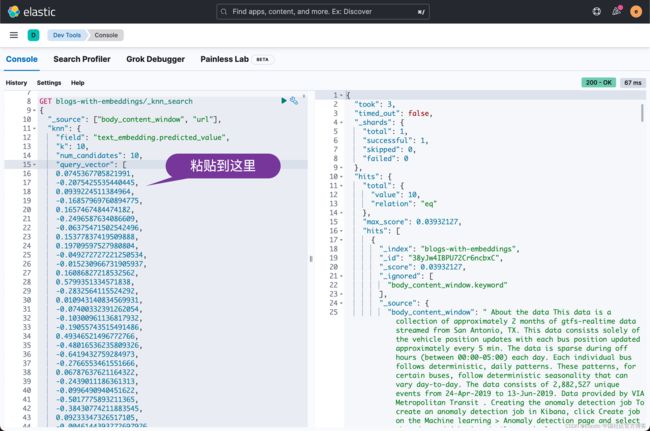
上面的 predicted_value 是一个384 维的向量。之后,我们将生成的密集向量(dense vector)插入到 _knn_search 中,如下所示:
GET blogs-with-embeddings/_knn_search
{
  "_source": ["body_content_window", "url"],
  "knn": {
    "field": "text_embedding.predicted_value",
    "k": 5,
    "num_candidates": 10,
    "query_vector": [
    0.0745367705821991,
    -0.2075425535440445,
    0.0939224511384964,
    -0.16857969760894775,
    0.1657467484474182,
       …
    ]
  }
}
我们可以查看一下上面搜索到的第一个文章的内容:
"_source": {
"body_content_window": " About the data This data is a collection of approximately 2 months of gtfs-realtime data streamed from San Antonio, TX. This data consists solely of the vehicle position updates with each bus position updated approximately every 5 min. The data is sparse during off hours (between 00:00-05:00) each day. Each individual bus follows deterministic, daily patterns. These patterns, for certain buses, follow deterministic seasonality that can vary day-to-day. The data consists of 2,882,527 unique events from 24-Apr-2019 to 13-Jun-2019. Data provided by VIA Metropolitan Transit . Creating the anomaly detection job To create an anomaly detection job in Kibana, click Create job on the Machine learning > Anomaly detection page and select the advanced job wizard. Alternatively, use the create anomaly detection jobs API . Use the lat_long function in a detector in your anomaly detection job for the pos field (a geo-point field) and set the by field to vehicle.id. This detects anomalies where the geographic location (pos) of a vehicle (a bus, in this case) is unusual for that particular bus (vehicle.id) . An anomaly might indicate a problem or unforeseen delay. You should then also select vehicle.id as an influencer for this job. For more information regarding influencers, see the documentation . Once you’ve created the job and it has produced some results, you can navigate to Elastic Maps to view them. Mapping anomalies by location in Elastic Maps Navigate to Elastic Maps and select Create Map, then select Add Layer. You should see the ML Anomalies layer card option which you can now select. You can now select from a list of jobs - only jobs with geo location data in the results will be in this list. Once you have a job selected, notice - in the screenshots below - that you can choose between a few layer options: ‘Actual’ , ‘Typical’ , and ‘Actual to typical’ . The ‘Actual’ layer is displayed by default until another is selected. This layer displays the actual geographical position of the associated entity on the map. As shown in the expanded legend in the above screenshot, the points are colored according to the severity level of the anomaly - this is determined by the record score of the anomaly.",
从上面的内容中,我们可以看到 anomaly, Maps, Elastic Maps, geo 等字眼:
显然这个搜索不是基于我们常见的 token 匹配的那种搜索,而是基于语义的的搜索。
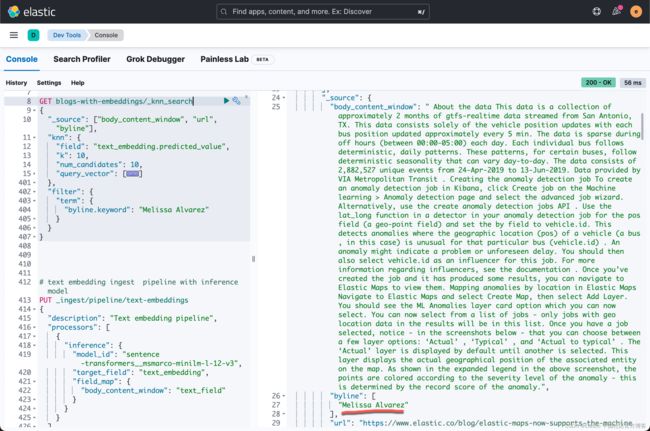
我们可以对搜索添加一个过滤器:
GET blogs-with-embeddings/_knn_search
{
  "_source": ["body_content_window", "url", "byline"],
  "knn": {
    "field": "text_embedding.predicted_value",
    "k": 10,
    "num_candidates": 10,
    "query_vector": [
    0.0745367705821991,
    -0.2075425535440445,
    0.0939224511384964,
    -0.16857969760894775,
    ...
    ]
  },
  "filter": {
    "term": {
      "byline.keyword": "Melissa Alvarez"
    }
  }
}
上面的搜索结果为:
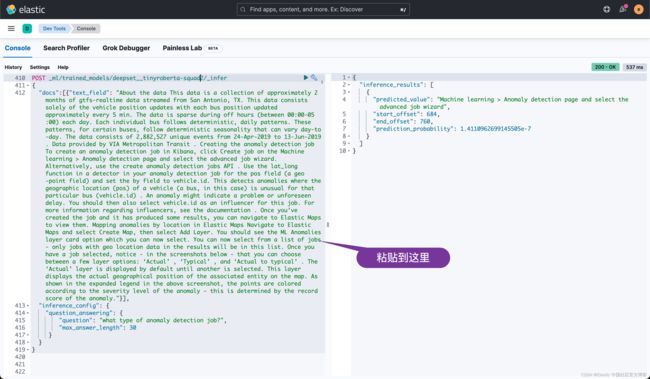
接下来,我们使用 question-answer 模型来对我们的文字进行提问。我们把上图中的 body_content_window 的内容拷贝下来并粘贴到如下的命令中:
#question/answering example
POST _ml/trained_models/deepset__tinyroberta-squad2/_infer
{
  "docs":[{"text_field": "TEXT"}],
  "inference_config": {
    "question_answering": {
        "question": "what type of anomaly detection job?",
        "max_answer_length": 30
     }
  }
}
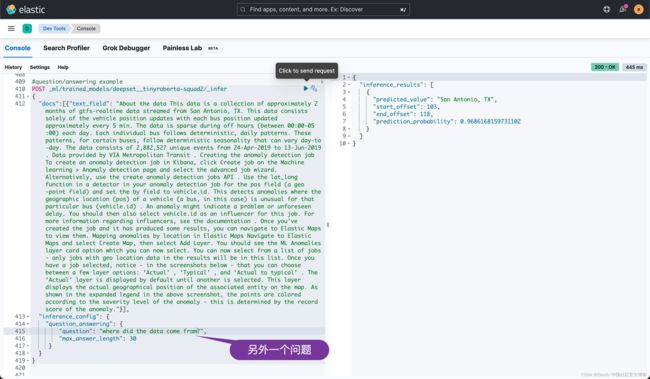
在上面的右边显示了问题的回答:
Machine learning > Anomaly detection page and select the advanced job wizard我们也可以使用如下的一个简单的例子来进行展示:
POST _ml/trained_models/deepset__tinyroberta-squad2/_infer
{
  "docs":[{ "text_field": "My name is Xiaoguo, Liu and I live in Beijing"}],
  "inference_config": {
    "question_answering": {
      "question": "Where do I live?"
    }
  }
}
你可以看到如下的结果:
{
  "inference_results": [
    {
      "predicted_value": "in Beijing",
      "start_offset": 35,
      "end_offset": 45,
      "prediction_probability": 0.0027769953663940796
    }
  ]
}
如果你想创建一个有 Web 界面的应用来进行测试,你可以参考链接 https://github.com/liu-xiao-guo/flask-elastic-nlp。请详细参考其中的 README.md 文件。最终我们将看到如下的 UI:
这里就不再累述了。


