【机器学习小记】【风格迁移】deeplearning.ai course4 4th week programming(tensorflow2)
特殊应用-风格迁移
- 神经风格转换NST(Neural Style Transfer)
- 迁移学习
-
- 加载模型
- 建立有多输出的模型
- 加载模型
-
- 在VGG19中挑选风格层和内容层的输出
- 构建模型
- 定义风格矩阵
- 定义损失函数
- 加载图片
- 正则化
- 主函数
- 组合1
- 组合2
- 代码
目标:
	1. 使用预训练好的模型vgg19,进行图片风格迁移
	修改【参考文章】的代码,使用tensorflow2实现
参考自:
1.【中英】【吴恩达课后编程作业】Course 4 -卷积神经网络 - 第四周作业
2.Tensorflow2.0之神经风格迁移
3. Tensorflow2.0之tf.keras.applacations迁移学习
4. Tensorflow2.0如何在网络中规定多个输出
5. 吴恩达Coursera深度学习课程 deeplearning.ai (4-4) 人脸识别和神经风格转换–编程作业
神经风格转换NST(Neural Style Transfer)
它合并两个图像,使用【内容图像】和【风格图像】生成【合并之后的图像】
迁移学习
使用预训练好的卷积网络,并在此基础之上进行构建。使用在不同任务上训练的网络并将其应用于新任务的想法称为迁移学习。
这里使用keras自带的VGG-19。这个模型已经在非常大的ImageNet数据库上进行了训练,因此学会了识别各种低级特征(浅层)和高级特征(深层)。
加载模型
vgg = tf.keras.applications.VGG19(include_top=False, weights="imagenet")
vgg.summary()
include_top:是否保留顶层的所有全连接网络
weights:None代表随机初始化,"imagenet"代表加载预训练权重
input_tensor:
input_shpae:可选,仅当include_top=False有效,应为长为3的tuple,指明输入图片的shape,图片的【宽高】必须大于71,如(150,150,3)
classes:可选,图片分类的类别,仅当include_top=True并且不加载预训练权重可用。
vgg.trainable = False 表示不对vgg中的参数进行训练。
建立有多输出的模型
selected_layers = ['block1_conv1',
                'block2_conv1',
                'block3_conv1',
                'block4_conv1',
                'block5_conv1']
model = tf.keras.Model([vgg.input], outputs)
这样,所有一层输出,就包含了之前选择的层的输出
加载模型
在VGG19中挑选风格层和内容层的输出
多挑选几个可以起到平均的作用
def vgg_layers(layer_names):
    """
    选择需要输出的层
    参数:
    	layer_names --挑选作为输出的层
    返回:
    	model --带有多输出的模型
    """
    vgg = tf.keras.applications.VGG19(include_top=False, weights="imagenet")
    vgg.trainable = False

    outputs = [vgg.get_layer(name).output for name in layer_names]

    # 建立有多输出的模型
    model = tf.keras.Model([vgg.input], outputs)

    return model
构建模型
class StyleContentModel(tf.keras.models.Model):
    def get_config(self):
        pass

    def __init__(self, style_layers, content_layers):
        super(StyleContentModel, self).__init__()
        # 修改后带有指定输出层的vgg模型
        self.vgg = vgg_layers(style_layers + content_layers)
        self.style_layers = style_layers
        self.content_layers = content_layers
        # 选择风格层输出 的个数
        self.num_style_layers = len(style_layers)
        # 不训练
        self.vgg.trainable = False

    def call(self, inputs, training=None, mask=None):
        """Expects float input in [0,1]"""
        inputs = inputs * 255.0
        # 输出预处理
        preprocess_input = tf.keras.applications.vgg19.preprocess_input(inputs)
        # 得到输出
        outputs = self.vgg(preprocess_input)

        # 从输出中分离得到【风格层输出】和【内容层输出】
        style_outputs, content_outputs = outputs[:self.num_style_layers], outputs[self.num_style_layers:]

        # 对【内容层输出】进行预处理,转化成【风格矩阵】的形式
        style_outputs = [gram_matrix(style_output) for style_output in style_outputs]

        # 将【内容层输出】分离成字典的形式
        content_dict = {
            content_name: value for content_name, value in zip(self.content_layers, content_outputs)
        }

        # 将【风格层输出】分离成字典的形式
        style_dict = {
            style_name: value for style_name, value in zip(self.style_layers, style_outputs)
        }

        return {'content': content_dict, 'style': style_dict}
定义风格矩阵
G r a m _ m a t r i x ( A ) = A A T Gram\_matrix(A) = AA^T Gram_matrix(A)=AAT
def gram_matrix(input_tensor):
    """
    矩阵A的风格矩阵为AA^T
    """
    result = tf.linalg.einsum('bijc,bijd->bcd', input_tensor, input_tensor)
    input_shape = tf.shape(input_tensor)
    num_locations = tf.cast(input_shape[1]*input_shape[2], tf.float32)
    # 除以宽*高,避免风格矩阵的值过大
    return result / num_locations
定义损失函数
J ( G ) = α J c o n t e n t ( C , G ) + β J s t y l e ( S , G ) J(G) = \alpha J_{content}(C,G) + \beta J_{style}(S,G) J(G)=αJcontent(C,G)+βJstyle(S,G)
因为损失函数的数值过大,
这里,取 α = 10000 β = 0.01 \alpha = 10000~~\beta = 0.01 α=10000 β=0.01。
J c o n t e n t ( C , G ) = 1 n m ∑ j m ∑ i n ( C i l − G i l ) 2 J_{content}(C,G) = {1\over nm}\sum_j^m\sum_i^n(C_i^l-G_i^l)^2 Jcontent(C,G)=nm1j∑mi∑n(Cil−Gil)2
其中 i i i表示矩阵中的每个元素, l l l表示不同层的输出。
J s t y l e ( S , G ) = 1 n m ∑ j m ∑ i n ( S i l − G i l ) 2 J_{style}(S,G) = {1\over nm}\sum_j^m\sum_i^n(S_i^l-G_i^l)^2 Jstyle(S,G)=nm1j∑mi∑n(Sil−Gil)2
其中S为风格矩阵Gram_martrix(S), i i i表示矩阵中的每个元素, l l l表示不同层的输出。
def style_content_loss2(outputs, target, num_style_layers, num_content_layers):
    """
    计算损失
    参数:
        output -- 经过模型之后的输出。使用【内容图片】进行一步步迭代。
        target -- 需要接近的目标。又分为【内容】和【风格】两部分。
                    分别是【内容图片】和【风格图片】的输出。
        num_style_layers -- 【风格层输出】的数量
        num_content_layers -- 【内容层输出】的数量
    """
    style_outputs = outputs["style"]
    content_outputs = outputs["content"]

    style_target = target["style"]
    content_target = target["content"]

    # 计算风格损失
    style_loss = tf.add_n([tf.reduce_mean((style_outputs[name]-style_target[name])**2)
                           for name in style_outputs.keys()])
    style_loss /= num_style_layers

    # 计算内容损失
    content_loss = tf.add_n([tf.reduce_mean((content_outputs[name]-content_target[name])**2)
                             for name in content_outputs.keys()])
    content_loss /= num_content_layers

    # 计算总损失
    loss = total_cost(content_loss, style_loss,alpha=1e4,beta=1e-2)
    return loss

def total_cost(J_content, J_style, alpha=1e1, beta=1e2):
    """
    计算总的损失函数
    参数:
    J_content -- 内容损失
    J_style -- 风格损失
    alpha -- 超参数,内容损失的权重
    beta -- 超参数,风格损失的权重
    返回:
    J -- 总损失
    """
    J = alpha * J_content + beta * J_style
    return J
加载图片
加载图片的最大的一维为256(太大了运行不了,会爆内存)
def load_img(path_to_img):
    """
    加载图片
    """
    # 图片的最大的一维
    max_dim = 256
    img = tf.io.read_file(path_to_img)
    img = tf.image.decode_image(img, channels=3)
    img = tf.image.convert_image_dtype(img, tf.float32)

    shape = tf.cast(tf.shape(img)[:-1], tf.float32)
    long_dim = max(shape)
    scale = max_dim / long_dim

    new_shape = tf.cast(shape * scale, tf.int32)

    img = tf.image.resize(img, new_shape)
    img = img[tf.newaxis, :]
    return img
正则化
def high_pass_x_y(image):
    x_var = image[:, :, 1:, :] - image[:, :, :-1, :]
    y_var = image[:, 1:, :, :] - image[:, :-1, :, :]

    return x_var, y_var


def total_variation_loss(image):
    x_deltas, y_deltas = high_pass_x_y(image)
    return tf.reduce_mean(x_deltas ** 2) + tf.reduce_mean(y_deltas ** 2)
主函数
def main1(epochs=5, steps_per_epoch=100):
    # 开始时间
    start_time = time.perf_counter()

    # 选择vgg模型的输出层
    content_layers = ["block5_conv2"]
    style_layers = [
        "block1_conv1",
        "block2_conv1",
        "block3_conv1",
        "block4_conv1",
        "block5_conv1"
    ]
    # 计算选择了几个输出
    num_style_layers = len(style_layers)
    num_content_layers = len(content_layers)

    # 提取出带有指定输出vgg模型
    extractor = StyleContentModel(style_layers, content_layers)

    # 加载内容图片和风格图片
    content_image = load_img("images/cat.jpg")
    style_image = load_img("images/monet.jpg")

    # 先运行一次,得到编码过后的【目标风格】和【目标内容】
    style_targets = extractor(style_image)["style"]
    content_targets = extractor(content_image)["content"]

    targets = {
        "style": style_targets,
        "content": content_targets
    }

    # 将【内容图片】作为模型的输入
    image = tf.Variable(content_image)

    # 定义优化器Adam
    opt = tf.optimizers.Adam(learning_rate=0.02)
    # 损失函数的权重
    # style_weight = 1e-2
    # content_weight = 1e4
    total_variation_weight = 1e8

    costs = []
    step = 0
    for n in range(epochs):
        for m in range(steps_per_epoch):
            step += 1
            with tf.GradientTape() as tape:
                outputs = extractor(image)
                loss = style_content_loss2(outputs, targets, num_style_layers, num_content_layers)
                # 正则化偏差
                loss += total_variation_weight * total_variation_loss(image)
            # 对输入image 进行更新
            grads = tape.gradient(loss, image)
            opt.apply_gradients(grads_and_vars=[(grads,image)])
            # 使image在0-1之间
            image.assign(tf.clip_by_value(image, clip_value_min=0.0, clip_value_max=1.0))

            # 记录损失
            costs.append(loss)
            print(f"step{step}--loss:{loss}")
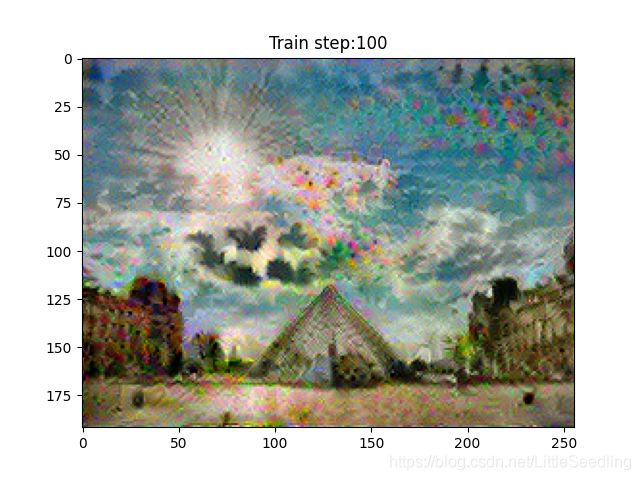
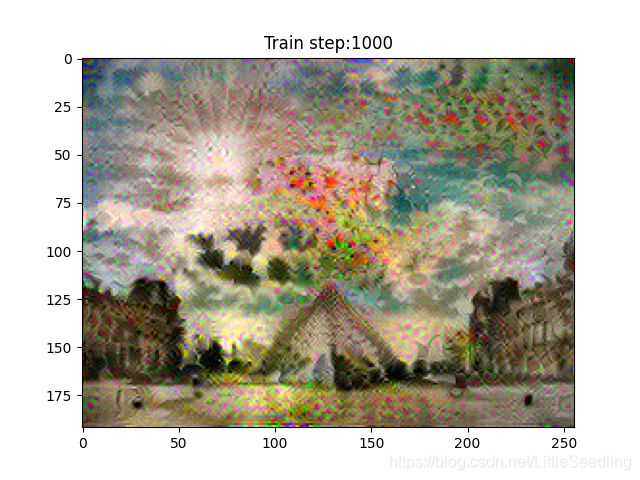
        imshow2(image.read_value())
        plt.title("Train step:{}".format(step))
        plt.show()

    plt.plot(np.squeeze(costs))
    plt.ylabel("cost")
    plt.xlabel("iterations")
    plt.title("learning rate="+str(0.02))
    plt.show()

    # 结束时间
    end_time = time.perf_counter()

    # 消耗时间
    minium = end_time - start_time
    # 打印总消耗时间
    print("执行了:" + str(int(minium / 60)) + "分" + str(int(minium % 60)) + "秒")
组合1
=
组合2
+
step1--loss:206808352.0
step2--loss:138015312.0
step3--loss:76444464.0
step4--loss:55079300.0
step5--loss:52182004.0
step6--loss:52179800.0
step7--loss:49280824.0
step8--loss:45222588.0
step9--loss:40886236.0
step10--loss:37080472.0
step11--loss:33747848.0
step12--loss:31121796.0
step13--loss:29348120.0
step14--loss:27991062.0
step15--loss:26776242.0
step16--loss:25650356.0
step17--loss:24728126.0
step18--loss:23919458.0
...
step99--loss:8370326.0
step100--loss:8396298.0
step101--loss:8440048.0
...
step499--loss:5766706.5
step500--loss:5699691.5
执行了:14分32秒
代码
tensorflow2.3
python3.8.5
import time
import os
import sys
import scipy.io
import scipy.misc
import matplotlib.pyplot as plt
from matplotlib.pyplot import imshow
from PIL import Image
import nst_utils
import numpy as np
import tensorflow as tf
from PIL import Image, ImageDraw, ImageFont

# 不使用GPU
os.environ["CUDA_VISIBLE_DEVICES"] = "-1"
"""
使用的模型,是VGG网络的19层版本,已经在非常大的ImageNet数据库上进行了训练,学会了识别各种低级特征和高级特征
"""


def load_my_model():
    # model = nst_utils.load_vgg_model("pretrained-model/imagenet-vgg-verydeep-19.mat")
    vgg = tf.keras.applications.VGG19(include_top=False, weights="imagenet")
    vgg.summary()


def gram_matrix(input_tensor):
    """
    矩阵A的风格矩阵为AA^T
    """
    result = tf.linalg.einsum('bijc,bijd->bcd', input_tensor, input_tensor)
    input_shape = tf.shape(input_tensor)
    num_locations = tf.cast(input_shape[1]*input_shape[2], tf.float32)
    # 除以宽*高,避免风格矩阵的值过大
    return result / num_locations


# tf.random.set_seed(1)
# A = tf.random.normal([3,2*1],mean=1,stddev=4)
# GA = gram_matrix(A)
# print("GA ="+str(GA))

def total_cost(J_content, J_style, alpha=1e1, beta=1e2):
    """
    计算总的损失函数
    参数:
    J_content -- 内容损失
    J_style -- 风格损失
    alpha -- 超参数,内容损失的权重
    beta -- 超参数,风格损失的权重
    返回:
    J -- 总损失
    """
    J = alpha * J_content + beta * J_style
    return J


# np.random.seed(3)
# J_content = np.random.randn()
# J_style = np.random.randn()
# J = total_cost(J_content,J_style)
# print("J=" + str(J))

def load_img(path_to_img):
    """
    加载图片
    """
    # 图片的最大的一维
    max_dim = 256
    img = tf.io.read_file(path_to_img)
    img = tf.image.decode_image(img, channels=3)
    img = tf.image.convert_image_dtype(img, tf.float32)

    shape = tf.cast(tf.shape(img)[:-1], tf.float32)
    long_dim = max(shape)
    scale = max_dim / long_dim

    new_shape = tf.cast(shape * scale, tf.int32)

    img = tf.image.resize(img, new_shape)
    img = img[tf.newaxis, :]
    return img


def vgg_layers(layer_names):
    """
    选择需要输出的层
    参数:
    layer_names --挑选作为输出的层
    返回:
    model --带有多输出的模型
    """
    vgg = tf.keras.applications.VGG19(include_top=False, weights="imagenet")
    vgg.trainable = False

    outputs = [vgg.get_layer(name).output for name in layer_names]

    # 建立有多输出的模型
    model = tf.keras.Model([vgg.input], outputs)

    return model


class StyleContentModel(tf.keras.models.Model):
    def get_config(self):
        pass

    def __init__(self, style_layers, content_layers):
        super(StyleContentModel, self).__init__()
        # 修改后带有指定输出层的vgg模型
        self.vgg = vgg_layers(style_layers + content_layers)
        self.style_layers = style_layers
        self.content_layers = content_layers
        # 选择风格层输出 的个数
        self.num_style_layers = len(style_layers)
        # 不训练
        self.vgg.trainable = False

    def call(self, inputs, training=None, mask=None):
        """Expects float input in [0,1]"""
        inputs = inputs * 255.0
        # 输出预处理
        preprocess_input = tf.keras.applications.vgg19.preprocess_input(inputs)
        # 得到输出
        outputs = self.vgg(preprocess_input)

        # 从输出中分离得到【风格层输出】和【内容层输出】
        style_outputs, content_outputs = outputs[:self.num_style_layers], outputs[self.num_style_layers:]

        # 对【内容层输出】进行预处理,转化成【风格矩阵】的形式
        style_outputs = [gram_matrix(style_output) for style_output in style_outputs]

        # 将【内容层输出】分离成字典的形式
        content_dict = {
            content_name: value for content_name, value in zip(self.content_layers, content_outputs)
        }

        # 将【风格层输出】分离成字典的形式
        style_dict = {
            style_name: value for style_name, value in zip(self.style_layers, style_outputs)
        }

        return {'content': content_dict, 'style': style_dict}

def style_content_loss(outputs, target, num_style_layers, num_content_layers):
    """
    计算损失
    参数:
        output -- 经过模型之后的输出。使用【内容图片】进行一步步迭代。
        target -- 需要接近的目标。又分为【内容】和【风格】两部分。
                    分别是【内容图片】和【风格图片】的输出。
        num_style_layers -- 【风格层输出】的数量
        num_content_layers -- 【内容层输出】的数量
    """
    style_outputs = outputs["style"]
    content_outputs = outputs["content"]

    style_target = target["style"]
    content_target = target["content"]

    # 计算风格损失
    style_loss = tf.add_n([tf.reduce_mean((style_outputs[name]-style_target[name])**2)
                           for name in style_outputs.keys()])
    style_loss /= num_style_layers

    # 计算内容损失
    content_loss = tf.add_n([tf.reduce_mean((content_outputs[name]-content_target[name])**2)
                             for name in content_outputs.keys()])
    content_loss /= num_content_layers

    # 计算总损失
    loss = total_cost(content_loss, style_loss,alpha=1e4,beta=1e-2)
    return loss

# 绘图函数
def imshow2(image, title=None):
    if len(image.shape) > 3:
        image = tf.squeeze(image, axis=0)

    plt.imshow(image)
    if title:
        plt.title(title)


def main1(epochs=5, steps_per_epoch=100):
    # 开始时间
    start_time = time.perf_counter()

    # 选择vgg模型的输出层
    content_layers = ["block5_conv2"]
    style_layers = [
        "block1_conv1",
        "block2_conv1",
        "block3_conv1",
        "block4_conv1",
        "block5_conv1"
    ]
    # 计算选择了几个输出
    num_style_layers = len(style_layers)
    num_content_layers = len(content_layers)

    # 提取出带有指定输出vgg模型
    extractor = StyleContentModel(style_layers, content_layers)

    # 加载内容图片和风格图片
    content_image = load_img("images/cat.jpg")
    style_image = load_img("images/monet.jpg")

    # 先运行一次,得到编码过后的【目标风格】和【目标内容】
    style_targets = extractor(style_image)["style"]
    content_targets = extractor(content_image)["content"]

    targets = {
        "style": style_targets,
        "content": content_targets
    }

    # 将【内容图片】作为模型的输入
    image = tf.Variable(content_image)

    # 定义优化器Adam
    opt = tf.optimizers.Adam(learning_rate=0.02)
    # 损失函数的权重
    # style_weight = 1e-2
    # content_weight = 1e4
    total_variation_weight = 1e8

    costs = []
    step = 0
    for n in range(epochs):
        for m in range(steps_per_epoch):
            step += 1
            with tf.GradientTape() as tape:
                outputs = extractor(image)
                loss = style_content_loss(outputs, targets, num_style_layers, num_content_layers)
                # 正则化偏差
                loss += total_variation_weight * total_variation_loss(image)
            # 对输入image 进行更新
            grads = tape.gradient(loss, image)
            opt.apply_gradients(grads_and_vars=[(grads,image)])
            # 使image在0-1之间
            image.assign(tf.clip_by_value(image, clip_value_min=0.0, clip_value_max=1.0))

            # 记录损失
            costs.append(loss)
            print(f"step{step}--loss:{loss}")
        imshow2(image.read_value())
        plt.title("Train step:{}".format(step))
        plt.show()

    plt.plot(np.squeeze(costs))
    plt.ylabel("cost")
    plt.xlabel("iterations")
    plt.title("learning rate="+str(0.02))
    plt.show()

    # 结束时间
    end_time = time.perf_counter()

    # 消耗时间
    minium = end_time - start_time
    # 打印总消耗时间
    print("执行了:" + str(int(minium / 60)) + "分" + str(int(minium % 60)) + "秒")


def high_pass_x_y(image):
    x_var = image[:, :, 1:, :] - image[:, :, :-1, :]
    y_var = image[:, 1:, :, :] - image[:, :-1, :, :]

    return x_var, y_var


def total_variation_loss(image):
    x_deltas, y_deltas = high_pass_x_y(image)
    return tf.reduce_mean(x_deltas ** 2) + tf.reduce_mean(y_deltas ** 2)


def main():
    # load_my_model()
    main1()

if __name__ == '__main__':
    main()


