怎么写一个vue-element ui组件? 以时间组件el-date-picker为例
怎么写一个vue组件?以时间组件为例
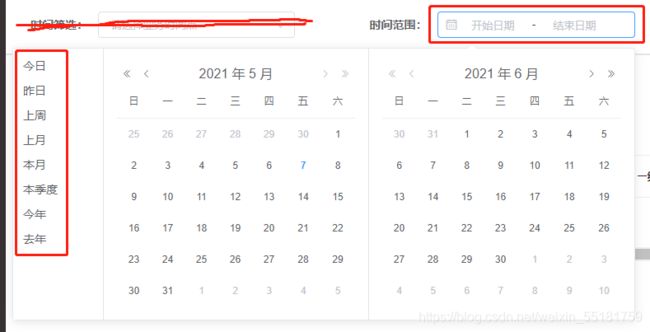
基于element-ui之上二次封装一个时间组件,样式如下图(红线画下去的与本组件无关):
代码:vue部分
<template>
 <div>
  <el-col :span="6">
   <el-form-item label="时间范围:">
       <el-date-picker
        v-model="queryInfo.dateRange"
        type="daterange"
        align="right"
        unlink-panels
        size="small"
        range-separator="-"
        start-placeholder="开始日期"
        end-placeholder="结束日期"
        @change="getDateRangeDataListAfterQuery"
        :picker-options="pickerOption"
        style="width: 240px;"
       >el-date-picker>
      el-form-item>
    el-col>
  div>
template>
代码:js部分
export default {
  name: 'searchBar',
  props: {
    queryInfo: {
      type: Object,//传的是对象还是字符串请根据实际修改
      default: function() {
        return {}
      }
    }
  },
  data() {
    information: this.queryInfo, //主要负责查询数据数据载体
    pickerOption: {
    //shortcuts为快捷选项,可以根据自己需求修改,我为了方便都写下来了一般用不了这么多
        shortcuts: [
          {
            text: "今日",
            onClick(picker) {
              const end = new Date();
              const start = new Date();
              picker.$emit("pick", [start, end]);
            },
          },
          {
            text: "昨日",
            onClick(picker) {
              const end = new Date();
              const start = new Date();
              start.setTime(start.getTime() - 3600 * 1000 * 24);
              end.setTime(end.getTime() - 3600 * 1000 * 24);
              picker.$emit("pick", [start, end]);
            },
          },
          {
            text: "上周",
            onClick(picker) {
              const oDate = new Date();
              oDate.setTime(oDate.getTime() - 3600 * 1000 * 24 * 7);

              var day = oDate.getDay();
              if (day == 0) {
                day = 7;
              }
              var start = new Date(),
                end = new Date();
              if (day == 1) {
                start.setDate(oDate.getDate());
                end.setDate(oDate.getDate() + 6);
              } else {
                start.setTime(oDate.getTime() - 3600 * 1000 * 24 * (day - 1));
                end.setTime(oDate.getTime() + 3600 * 1000 * 24 * (6 - day + 1));
              }

              picker.$emit("pick", [start, end]);
            },
          },
          {
            text: "上月",
            onClick(picker) {
              const oDate = new Date();
              var year = oDate.getFullYear();
              var month = oDate.getMonth();
              var start, end;
              if (month == 0) {
                year--;
                start = new Date(year, 11, 1);
                end = new Date(year, 11, 31);
              } else {
                start = new Date(year, month - 1, 1);
                end = new Date(year, month, 0);
              }

              picker.$emit("pick", [start, end]);
            },
          },
          {
            text: "本月",
            onClick(picker) {
              const end = new Date();
              const start = new Date();
              start.setDate(1);
              picker.$emit("pick", [start, end]);
            },
          },
          {
            text: "本季度",
            onClick(picker) {
              var oDate = new Date();

              var thisYear = oDate.getFullYear();
              var thisMonth = oDate.getMonth() + 1;

              var n = Math.ceil(thisMonth / 3); // 季度

              var Month = n * 3 - 1;

              var start = new Date(thisYear, Month - 2, 1);
              var end = new Date();

              picker.$emit("pick", [start, end]);
            },
          },
          {
            text: "今年",
            onClick(picker) {
              const end = new Date();
              const start = new Date();
              start.setMonth(0);
              start.setDate(1);
              picker.$emit("pick", [start, end]);
            },
          },
          {
            text: "去年",
            onClick(picker) {
              const end = new Date();
              const start = new Date();
              start.setFullYear(start.getFullYear() - 1);
              start.setMonth(0);
              start.setDate(1);
              console.log("start.getFullYear",start.getFullYear())
              end.setFullYear(end.getFullYear() - 1);
              end.setMonth(11);
              end.setDate(31);
              picker.$emit("pick", [start, end]);
            },
          },
        ],
      },
    },
  methods: {
    //时间范围数据改变时触发
    getDateRangeDataListAfterQuery: function (val) {
        //moment为外部组件,引入方法我没有写在代码中,请自行引入后使用
        this.information.startdate = moment(val[0]).format('YYYY-MM-DD 0:0:0')//因为默认没有时分秒,筛选会出现问题所以这里加入时分秒并且写死了
        this.information.enddate = moment(val[1]).format('YYYY-MM-DD 23:59:59')//通上
        this.$emit("update:queryInfo", this.information);
        this.$emit("queryInfo", this.information);
    },
  },
组件就写完了,information.startdate和information.enddate就是组件传出的数据.
下面演示组件具体如何使用.
在项目中vue代码:
<search-bar :queryInfo.sync="使用组件的页面的数据载体,例queryInfo" @queryInfo="查询后台的接口,例getListAfterQuery">search-bar>
在项目中js代码:
 getListAfterQuery: function () {
    this.$http.post('/api/shengshi_stu_management/findByEntityQuery',this.queryInfo)
    .then((response) => {
         this.dataList = response.data.data.records;
         this.total = response.data.data.total;
    })
 },
好了,如果有相关问题欢迎一起讨论学习