Mac下的UI自动化测试 (二)
下面讲一下Sikuli的重要概念,就是region,所谓region就是Sikuli在进行图像识别的时候的一个区域,默认是整个屏幕。
当然,如果region选得太大的话,并且UI上存在相似的控件,那么就会造成图像识别的错误。而且region选得过大也会使得代码运行速度下降。
我在实际应用中,region选的是屏幕中间的工作区域,也就是除了最上方的global menu 和 system tray区域,和下方的dock区域,并且在被测程序启动后,将其最大化,以占满中间的工作区,防止其他应用的UI干扰测试运行。
下面的代码就是根据AppleScript获取当前屏幕大小,与dock大小,然后用这些值构造Region对象:
from sikuli import *
import helper

# Get width and heigth of screen by applescripts
width_of_screen = helper.get_bounds_of_screen()[0]
height_of_screen = helper.get_bounds_of_screen()[1]

# Height of top menu bar
height_of_top_menu_bar = 24

# Get height of dock by applescripts
height_of_dock = helper.get_height_of_dock()

# Region of screen, without top menu bar and dock
region = Region(0, height_of_top_menu_bar, width_of_screen,
                height_of_screen - height_of_top_menu_bar - height_of_dock)
print "region size is ({0}, {1}, {2}, {3})".format(region.x, region.y, region.w, region.h)
其中get_bounds_of_screen获取屏幕大小,使用的是下面的AppleScript:
tell app "Finder" to get bounds of window of desktop
获取dock的高度get_height_of_height_of_dock使用的是这个AppleScript:
tell application "System Events" to tell process "Dock"
    set dock_dimensions to size in list 1
    set dock_height to item 2 of dock_dimensions
end tell
然后计算出工作区大小,构造region对象:
region = Region(0, height_of_top_menu_bar, width_of_screen,
                height_of_screen - height_of_top_menu_bar - height_of_dock)
当然测试system tray的功能也是必不可少的,那么就需要再准备一个对应最上方global menu区域的region:
# Height of top menu bar
height_of_top_menu_bar = 24

# Region for top menu bar region
top_menu_bar_region = Region(
    0, 0, helper.get_bounds_of_screen()[0], height_of_top_menu_bar)
region构造完成之后,就可以使用它来进行click,doubleclick,drag&drop的操作了,传递的参数就是一个截图:
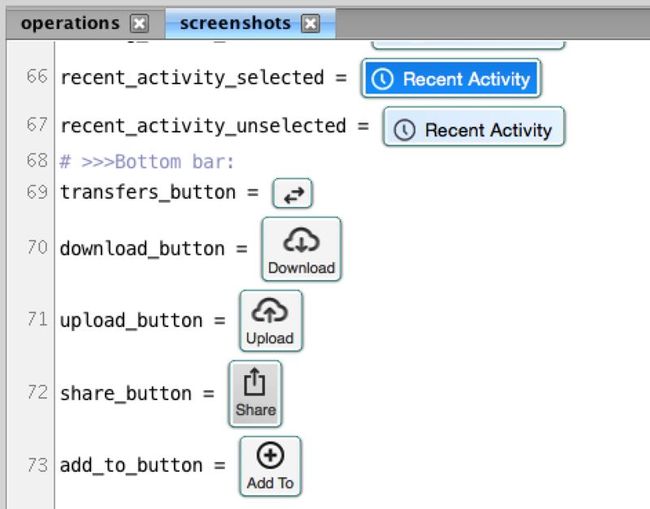
在我的实际应用中,是将所有的截图都放到一个统一的screenshots的sikuli文件中,其他模块再去导入它:
这样的好处是它就像一个描述UI的ID,Name或者是父子关系的一个xml文件一样,当有UI变化的时候,不必牵连到其他模块的修改,只需将screenshots模块中对应的image更改即可。
另外,sikuli的图像识别是有一个相似度的,如果不满意,可以在sikuli IDE上点击图片进行修改:
下面的红色高亮表示的就是识别到得区域:
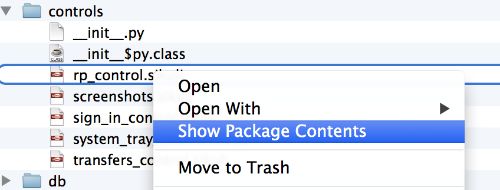
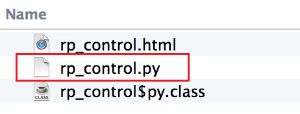
由于sikuli的IDE的功能简单,稳定性差,我在实际工作中是不会使用它来coding的,当你需要一个sikuli文件时,打开sikuli的IDE并new一个空文件并保存,这个文件就可以通过右键的“show package contents”打开它,看到它就是一个包含py文件和html文件的一个文件夹:
其中html文件的内容才是sikuli IDE中显示的内容,但是实际运行时与这个html没关系,使用的是py文件编译后的java字节码文件。
所以我们可以用任何编辑器编辑py文件,而不管html文件是什么内容,除非你想用这个IDE来方便的截图与修改图像匹配度。
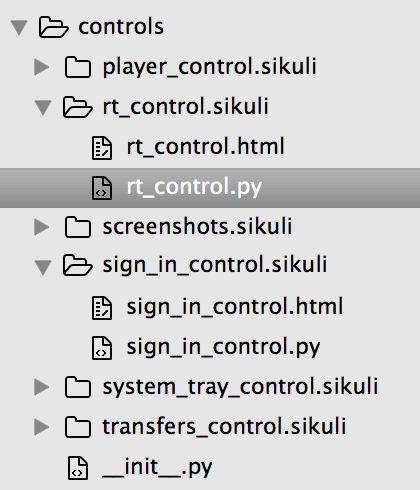
下面的截图是我用sublime text打开的一个项目,可以看到sikuli文件就是一个文件夹:
下面是一些我常用的AppleScript脚本:
1. 最大化(非全屏)一个app,需要用到dock的高度:
tell application "Finder"
    set screenResolution to bounds of window of desktop
end tell

set screenWidth to item 3 of screenResolution
set screenHeight to item 4 of screenResolution

tell application "System Events" to tell process "Dock"
    set dock_dimensions to size in list 1
    set dock_height to item 2 of dock_dimensions
end tell

tell application "System Events" to tell process "RealTimes"
    activate
    set position of window 1 to {0, 24}
    set size of window 1 to {screenWidth, screenHeight - dock_height - 24}
end tell
2. 通过AppleScript将Finder定位到一个路径上去,并且将Finder窗口放到屏幕工作区域的右半边:
#! /usr/bin/osascript

on run(arguments)
    set myDocumentFolder to POSIX path of (first item of arguments)

    tell application "Finder"
        close every window
        activate
        make new Finder window
        set toolbar visible of the front Finder window to false
        set statusbar visible of the front Finder window to false
        set the current view of front Finder window to icon view
        set the target of the front Finder window to (POSIX file myDocumentFolder)
        set screenResolution to bounds of window of desktop
    end tell

    set screenWidth to item 3 of screenResolution
    set screenHeight to item 4 of screenResolution

    tell application "System Events" to tell process "Dock"
        set dock_dimensions to size in list 1
        set dock_height to item 2 of dock_dimensions
    end tell

    tell application "Finder"
        activate
        set frontmost to true
        set bounds of the front Finder window to {screenWidth / 2, 24, screenWidth, screenHeight - dock_height}
    end tell
end run
当要从一个Finder中选择一个文件拖放到某个App中的时候,这个脚本就很有用了。


