2021-05-02-fabric浏览器搭建
title: fabric浏览器搭建
date: 2021-05-02 10:38:23
categories:
- Hyperledger Fabric
tags: - Hyperledger Fabric
- 浏览器
fabric浏览器
Hyperledger Explorer是一个简单,强大,易于使用,维护良好的开源实用程序,可浏览底层区块链网络上的活动。用户可以在MacOS和Ubuntu上配置和构建Hyperledger Explorer。
先要保证你之前的项目已启动
搭建目录结构
1、$GOPATH/src目录下创建edu-explorer文件夹
2、edu-explorer文件夹下创建以下目录结构
docker-compose.yaml
config.json
connection-profile/test-network.json
organizations/ordererOrganizations/     第3、4解决
organizations/peerOrganizations/
3、复制自己的项目中crypto-config 文件夹 到edu-explorer文件中
cp -r cp -r $GOPATH/src/education/conf/crypto-config ../edu-explorer
4、改名 把crypto-config改成organizations 保持跟官方目录结构一样
mv crypto-config organizations
官方给出的文件内容
复制以下内容到相应文件中去
docker-compose.yaml
# SPDX-License-Identifier: Apache-2.0
version: '2.1'

volumes:
  pgdata:
  walletstore:

networks:
  mynetwork.com:
    external:
      name: net_test

services:

  explorerdb.mynetwork.com:
    image: hyperledger/explorer-db:latest
    container_name: explorerdb.mynetwork.com
    hostname: explorerdb.mynetwork.com
    environment:
      - DATABASE_DATABASE=fabricexplorer
      - DATABASE_USERNAME=hppoc
      - DATABASE_PASSWORD=password
    healthcheck:
      test: "pg_isready -h localhost -p 5432 -q -U postgres"
      interval: 30s
      timeout: 10s
      retries: 5
    volumes:
      - pgdata:/var/lib/postgresql/data
    networks:
      - mynetwork.com

  explorer.mynetwork.com:
    image: hyperledger/explorer:latest
    container_name: explorer.mynetwork.com
    hostname: explorer.mynetwork.com
    environment:
      - DATABASE_HOST=explorerdb.mynetwork.com
      - DATABASE_DATABASE=fabricexplorer
      - DATABASE_USERNAME=hppoc
      - DATABASE_PASSWD=password
      - LOG_LEVEL_APP=debug
      - LOG_LEVEL_DB=debug
      - LOG_LEVEL_CONSOLE=info
      - LOG_CONSOLE_STDOUT=true
      - DISCOVERY_AS_LOCALHOST=false
    volumes:
      - ./examples/net1/config.json:/opt/explorer/app/platform/fabric/config.json
      - ./examples/net1/connection-profile:/opt/explorer/app/platform/fabric/connection-profile
      - /fabric-path/fabric-samples/test-network/organizations:/tmp/crypto
      - walletstore:/opt/explorer/wallet
    ports:
      - 8080:8080
    depends_on:
      explorerdb.mynetwork.com:
        condition: service_healthy
    networks:
      - mynetwork.com
org1-network.json
修改这个文件名 如果你有多个组织,要添加多个json文件 例如org2-network.json org3-network.json 全部放到connection-profile文件夹下
{
	"name": "test-network",
	"version": "1.0.0",
	"client": {
		"tlsEnable": true,
		"adminCredential": {
			"id": "exploreradmin",
			"password": "exploreradminpw"
		},
		"enableAuthentication": true,
		"organization": "Org1MSP",
		"connection": {
			"timeout": {
				"peer": {
					"endorser": "300"
				},
				"orderer": "300"
			}
		}
	},
	"channels": {
		"mychannel": {
			"peers": {
				"peer0.org1.example.com": {}
			}
		}
	},
	"organizations": {
		"Org1MSP": {
			"mspid": "Org1MSP",
			"adminPrivateKey": {
				"path": "/tmp/crypto/peerOrganizations/org1.example.com/users/[email protected]/msp/keystore/priv_sk"
			},
			"peers": ["peer0.org1.example.com"],
			"signedCert": {
				"path": "/tmp/crypto/peerOrganizations/org1.example.com/users/[email protected]/msp/signcerts/[email protected]"
			}
		}
	},
	"peers": {
		"peer0.org1.example.com": {
			"tlsCACerts": {
				"path": "/tmp/crypto/peerOrganizations/org1.example.com/peers/peer0.org1.example.com/tls/ca.crt"
			},
			"url": "grpcs://peer0.org1.example.com:7051"
		}
	}
}
config.json
{
	"network-configs": {
		"test-network": {
			"name": "Test Network",
			"profile": "./connection-profile/test-network.json"
		}
	},
	"license": "Apache-2.0"
}
修改文件
test-network.json
{
	"name": "org1-network",             //文件名
	"version": "1.0.0",
	"client": {
		"tlsEnable": true,
		"adminCredential": {
			"id": "admin",                  // 登录浏览器的账号 可自己设置
			"password": "dminpw"            //密码
		},
		"enableAuthentication": true,     // 是否开启免密登录到浏览器 false表示免密访问浏览器
		"organization": "Org1MSP",        //身份MSPID与configtx.yaml中ID对应
		"connection": {
			"timeout": {
				"peer": {
					"endorser": "300"
				},
				"orderer": "300"
			}
		}
	},
	"channels": {
		"mychannel": {                       //通道名
			"peers": {
				 "peer0.org1.example.com": {},   //节点
         "peer1.org1.example.com": {}
			}
		}
	},
	"organizations": {
		"Org1MSP": {                         //原配置 "Org1MSP" 身份MSPID
			"mspid": "Org1MSP",
			"adminPrivateKey": {
				"path": "/tmp/crypto/peerOrganizations/org1.example.com/users/[email protected]/msp/keystore/priv_sk"                           //org1的admin下的msp/keystore/下的证书,证书的名字必须以_sk结尾
			},
			"peers": ["peer0.org1.example.com"],
			"signedCert": {
				"path": "/tmp/crypto/peerOrganizations/org1.example.com/users/[email protected]/msp/signcerts/[email protected]"    //org1的admin下的msp/signcerts下的证书
			}
		}
	},
  "peers": {
    "peer0.org1.example.com": {
      "tlsCACerts": {
        "path": "/tmp/crypto/peerOrganizations/org1.example.com/peers/peer0.org1.example.com/tls/ca.crt"
      },
      "url": "grpcs://peer0.org1.example.com:7051"
    },
    "peer1.org1.example.com": {            //这里添加了peer2
      "tlsCACerts": {
        "path":    "/tmp/crypto/peerOrganizations/org1.example.com/peers/peer1.org1.example.com/tls/ca.crt"
                        // tls证书路径,也就是 tls-ca启动时生成的ca-cert.pem文件
      },
      "url": "grpcs://peer1.org1.example.com:9051"  //节点地址
    }
  }
}
config.json
{
  "network-configs": {
    "org1-network": {
      "name": "org1-network",
      "profile": "./connection-profile/org1-network.json"  //这个路径就指的上面的文件
    }//,
//    "org2-network": {       如果有组织二 这样添加
//      "name": "org2-network",
//      "profile": "./connection-profile/org2-network.json"
//    }
  },
  "license": "Apache-2.0"
}
docker-compose.yaml
# SPDX-License-Identifier: Apache-2.0
version: '2.1'

volumes:
  pgdata:
  walletstore:

networks:
  mynetwork.com:
    external:
      name: conf_test     //网络名称 改成自己的

services:

  explorerdb.mynetwork.com:
    image: hyperledger/explorer-db:latest
    container_name: explorerdb.mynetwork.com
    hostname: explorerdb.mynetwork.com
    environment:
      - DATABASE_DATABASE=fabricexplorer
      - DATABASE_USERNAME=hppoc
      - DATABASE_PASSWORD=password
    healthcheck:
      test: "pg_isready -h localhost -p 5432 -q -U postgres"
      interval: 30s
      timeout: 10s
      retries: 5
    volumes:
      - pgdata:/var/lib/postgresql/data
    networks:
      - mynetwork.com

  explorer.mynetwork.com:
    image: hyperledger/explorer:latest
    container_name: explorer.mynetwork.com
    hostname: explorer.mynetwork.com
    environment:
      - DATABASE_HOST=explorerdb.mynetwork.com
      - DATABASE_DATABASE=fabricexplorer
      - DATABASE_USERNAME=hppoc
      - DATABASE_PASSWD=password
      - LOG_LEVEL_APP=debug
      - LOG_LEVEL_DB=debug
      - LOG_LEVEL_CONSOLE=info
      - LOG_CONSOLE_STDOUT=true
      - DISCOVERY_AS_LOCALHOST=false //浏览器是否开启远程访问, true表示只有部署的机器可以访问
    volumes:  //挂载的目录
      - ./config.json:/opt/explorer/app/platform/fabric/config.json
      - ./connection-profile:/opt/explorer/app/platform/fabric/connection-profile
      - ./organizations:/tmp/crypto
      - walletstore:/opt/explorer/wallet
    ports:
      - 8080:8080
    depends_on:
      explorerdb.mynetwork.com:
        condition: service_healthy
    networks:
      - mynetwork.com
启动浏览器
edu-explorer文件命令行下输入
docker-compose up -d /第一次启动会自动拉去镜像 时间较长 连接好网络
如果出现错误请输入docker logs 容器ID 去查看具体原因
打开浏览器输入
http://127.0.0.1:8080
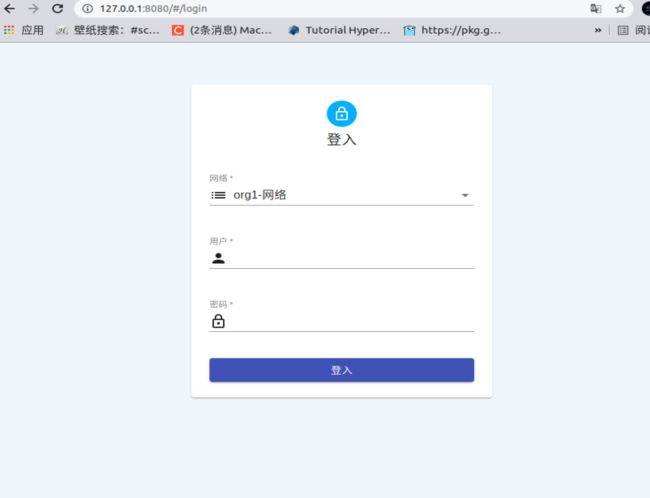
出现以下界面
输入账号和密码
admin   //刚才自己设置的
adminpw
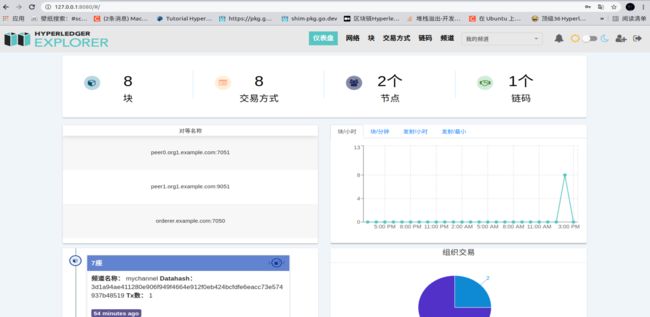
搞定

