1、利用函数绘图
函数原型:
1、直线
void line(Mat& img, Point pt1,Point pt2, const Scalar& color, int thickness=1, int lineType=8,int shift=0)
- img – 图像.
- pt1 – 起点.
- pt2 – 终点.
- color – 颜色.
- thickness – 线宽.
- lineType – 线型(4联通,8联通,反锯齿)
- shift – 坐标点小数点位数.
2、矩形
void rectangle(Mat& img,Point pt1, Pointpt2, const Scalar&color, intthickness=1,intlineType=8, intshift=0)
void rectangle(Mat& img,Rect rec, const Scalar&color, intthickness=1, intlineType=8,intshift=0 )
- img – 图像
- pt1 – 左上角
- pt2 – 右下角
- rec – 确定矩形的另一种方式,给左上角坐标和长宽
- color – 颜色
- thickness – 线宽
- lineType – 线型(4联通,8联通,反锯齿)
- shift –坐标点的小数点位数
3、椭圆
void ellipse(Mat& img, Point center,Size axes, double angle, double startAngle, double endAngle, const Scalar& color,int thickness=1, int lineType=8, int shift=0)
void ellipse(Mat& img, constRotatedRect& box, const Scalar& color, int thickness=1, int lineType=8)
- img – 椭圆所在图像.
- center – 椭圆中心.
- axes – 椭圆主轴一半的长度
- angle – 椭圆旋转角度
- startAngle – 椭圆弧起始角度
- endAngle –椭圆弧终止角度
- box – 指定椭圆中心和旋转角度的信息,通过 RotatedRect 或 CvBox2D. 这表示椭圆画在旋转矩形上(矩形是不可见的,只是指定了一个框而已)
- color – 颜色.
- thickness – 正值代表线宽,负值代表填充的椭圆
- lineType – 线型
- shift – 坐标的小数点位数
4、多边形
void polylines(Mat& img, const Point** pts, const int* npts, int ncontours, bool isClosed, const Scalar& color, int thickness=1, int lineType=8, int shift=0 )
void polylines(InputOutputArray img, InputArrayOfArrays pts, bool isClosed, const Scalar& color, int thickness=1, int lineType=8, int shift=0 )
- img – 所在图像.
- pts – 折线中拐点坐标指针.
- npts – 折线拐点个数指针.
- ncontours – 折线线段数量.
- isClosed – 折线是否闭合.
- color – 折线颜色.
- thickness – 折线宽度.
- lineType – 线型.
- shift – 顶点坐标小数点位数
五、文字
void putText(Mat& img, const string& text, Point org, int fontFace, double fontScale, Scalar color, int thickness=1, int lineType=8, bool bottomLeftOrigin=false )
- img – 显示文字所在图像.
- text – 待显示的文字.
- org – 文字在图像中的左下角 坐标.
- font – 字体结构体.
- fontFace – 字体类型, 可选择字体:FONT_HERSHEY_SIMPLEX, FONT_HERSHEY_PLAIN, FONT_HERSHEY_DUPLEX,FONT_HERSHEY_COMPLEX, FONT_HERSHEY_TRIPLEX, FONT_HERSHEY_COMPLEX_SMALL, FONT_HERSHEY_SCRIPT_SIMPLEX, orFONT_HERSHEY_SCRIPT_COMPLEX,以上所有类型都可以配合 FONT_HERSHEY_ITALIC使用,产生斜体效果。
- fontScale – 字体大小,该值和字体内置大小相乘得到字体大小
- color – 文本颜色
- thickness – 写字的线的粗细,类似于0.38的笔尖和0.5的笔尖
- lineType – 线型
- bottomLeftOrigin – true, 图像数据原点在左下角. Otherwise, 图像数据原点在左上角.
示例
#include
#include
#include
using namespace std;
using namespace cv;
int main()
{
Mat image(500,500,CV_8UC3,Scalar(255,255,255));
line(image,Point(0,0),Point(499,499),Scalar(0,255,0),5);
rectangle(image,Point(200,50),Point(300,150),Scalar(255,0,0),-1);
ellipse(image,RotatedRect(Point(100,200),Size(200,100),0),Scalar(0,0,255),3);
Point rook_points[1][20];
rook_points[0][3] = Point( 440, 100 );
rook_points[0][0] = Point(350, 100 );
rook_points[0][1] = Point( 370, 190 );
rook_points[0][2] = Point( 440, 290 );
const Point* ppt[1] = { rook_points[0] };
int npt[] = { 4 };
polylines(image,ppt,npt,1,1,Scalar(128,128,255),2,8,0);
putText(image,"OpenCV",Point(100.400),FONT_HERSHEY_SIMPLEX,3,Scalar(255,10,128),4,CV_AA);
namedWindow("image");
imshow("image",image);
waitKey(0);
return 0;
}

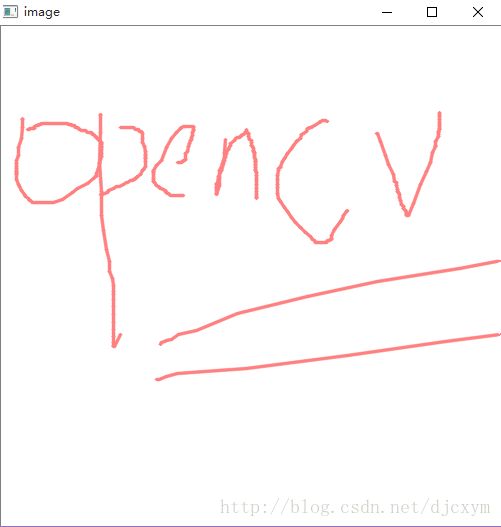
二、利用鼠标绘图
利用鼠标绘图主要是通过捕获鼠标事件完成,OpenCV提供了setMouseCallback函数用以设置鼠标事件的回调函数,在回调函数中通过判断不同的鼠标事件(鼠标按下,移动,释放等)做对应的操作。
示例
#include
#include
#include

using namespace std;
using namespace cv;

Mat image;
void drawWithMouse(int event,int x,int y,int flags,void *param);
int main()
{
    image = Mat(500,500,CV_8UC3,Scalar(255,255,255));
    namedWindow("image");
    imshow("image",image);
    setMouseCallback("image",drawWithMouse,0);
    waitKey(0);
    return 0;
}

void drawWithMouse(int event,int x,int y,int flags,void *param)
{
    static Point start;
    static bool mouseDown = false;
    if(event==CV_EVENT_LBUTTONDOWN)
    {
        start.x = x;
        start.y = y;
        mouseDown = true;
    }
    else if(mouseDown && event == CV_EVENT_MOUSEMOVE)
    {
        line(image,start,Point(x,y),Scalar(128,128,255),2,CV_AA);
        imshow("image",image);
        start.x = x;
        start.y = y;
    }
    else if(event == CV_EVENT_LBUTTONUP)
    {
        mouseDown = false;
    }
}


