bladex框架中双路由模块分析理解
1.路由
框架中的路由分两种,一种是页面中菜单的路由(后端路由),一种是不在页面菜单中的路由(前端路由)。
在页面菜单中的路由是指图中红框中的菜单中的路由

不在页面菜单中的路由为404、登录页、首页等不出现在菜单中的页面
1.添加/修改前端路由的操作
前端路由配置表路径:src\router\page\index.js(包含404、登录页、锁屏页等基础页面)
src\router\views\index.js(包含首页、个人信息等页面)
开发中需要添加前端路由时可以分类放在两个路由配置表中
2.添加/修改后端路由的操作
当需要添加/修改菜单里的页面时,直接在侧边栏的菜单管理里面添加/修改,如图
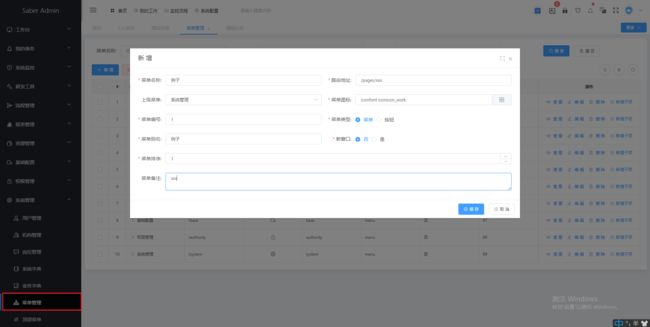
注:修改完成提示成功信息后,菜单栏中就会出现对应的菜单项,但是直接打开会跳到404,这个时候需要等待1-2分钟再重新进入对应页面就好了,
3.页面从后端获取菜单路由配置表
登录成功后进入如下页面
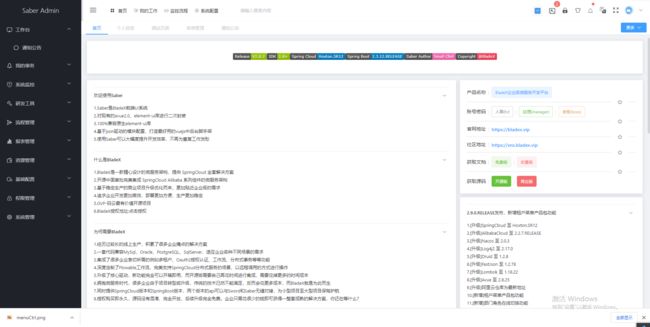
页面结构:
位置:src\page\index\index.vue
如果项目不需要顶栏、左侧导航栏等可以在对应标签上添加style="display:none"
在该vue文件中通过openMenu方法调取菜单路由,并且提供了一个点击顶部菜单后默认打开第一个菜单的方法,默认为注释状态,需要可以打开
//打开菜单
    openMenu(item = {}) {
      this.$store.dispatch("GetMenu", item.id).then((data) => {
        if (data.length !== 0) {
          this.$router.$avueRouter.formatRoutes(data, true);
        }
        //当点击顶部菜单后默认打开第一个菜单
        /*if (!this.validatenull(item)) {
            let itemActive = {},
              childItemActive = 0;
            if (item.path) {
              itemActive = item;
            } else {
              if (this.menu[childItemActive].length === 0) {
                itemActive = this.menu[childItemActive];
              } else {
                itemActive = this.menu[childItemActive].children[childItemActive];
              }
            }
            this.$store.commit('SET_MENU_ID', item);
            this.$router.push({
              path: this.$router.$avueRouter.getPath({
                name: (itemActive.label || itemActive.name),
                src: itemActive.path
              }, itemActive.meta)
            });
          }*/
      });
    },
在openMenu方法中调用了中GetMenu方法 位置:src\store\modules\user.js
GetMenu:
 //获取系统菜单
    GetMenu({commit, dispatch}, parentId) {
      return new Promise(resolve => {
        getMenu(parentId).then((res) => {
          const data = res.data.data
          let menu = deepClone(data);
          menu.forEach(ele => {
            addPath(ele, true);
          })
          commit('SET_MENU', menu);
          commit('SET_MENU_ALL', menu);
          dispatch('GetButtons');
          resolve(menu)
        })
      })
    },
其中getMenu在src\api\user.js
export const getMenu = () => request({
  url: '/api/blade-system/menu/routes',
  method: 'get'
});
由此获取菜单路由并存储在vuex中
注意:在添菜单管理配置菜单的路由时,如果该页面在菜单的第一层,不是包含子页面的菜单项,框架会自动在该页面的路径后面添加/index(通过GetMenu方法中的addPath方法添加的)。就是说如果页面在菜单第一层,则页面vue文件路径应为/pages/test/index.vue 在菜单管理中配置路由时,路径填写/pages/test 就好了。addPath方法:
function addPath(ele, first) {
  const menu = website.menu;
  const propsConfig = menu.props;
  const propsDefault = {
    label: propsConfig.label || 'name',
    path: propsConfig.path || 'path',
    icon: propsConfig.icon || 'icon',
    children: propsConfig.children || 'children'
  }
  const icon = ele[propsDefault.icon];
  ele[propsDefault.icon] = validatenull(icon) ? menu.iconDefault : icon;
  const isChild = ele[propsDefault.children] && ele[propsDefault.children].length !== 0;
  if (!isChild) ele[propsDefault.children] = [];
  if (!isChild && first && !isURL(ele[propsDefault.path])) {
    //在所有不包含子项且在菜单第一层的页面路径后添加/index
    ele[propsDefault.path] = ele[propsDefault.path] + '/index'
  } else {
    ele[propsDefault.children].forEach(child => {
      addPath(child);
    })
  }
}
4.修改首页的操作
要修改首页路由时需要先在src\config\website.js 的全局配置文件中找到firstPage对象,修改value为需要的页面路由,因为登录成功后,跳转的路径就来自这里:
fistPage: {
    label: "首页",
    value: "/pages/index",
    params: {},
    query: {},
    meta: {
      i18n: "dashboard"
    },
    group: [],
    close: false
  },
然后在src\router\page\index.js中写好路由配置
这样就完成首页路由的修改,如果不在路由配置表中配置路由,而是在菜单管理中配置的后端路由的话,登录后会跳转到404页面,这是由于后端的路由是在已经登录后为顶栏和左侧菜单请求的,在登录时并没有请求,所以搜索不到相应路由跳转到404,其跳转404的机制是在路由配置表中配置了如下路由:
{
    path: '*',
    redirect: '/404'
}
以后我有bladx相关问题在这里补充