springboot+Vue前后端分离项目配置整合
文章目录
- 一、所需环境
- 二、Vue
-
- 1、创建Vue项目
- 2、使用element组件
- 3、封装axios请求
- 4、运行vue项目
- 三、springboot
-
- 1、使用spring Initializr创建boot项目
- 2、引入mp和druid依赖
-
- 3、application.yml文件
- 4、准备controller
- 5、启动
- 四、springboot设置跨域访问
- 五、验证
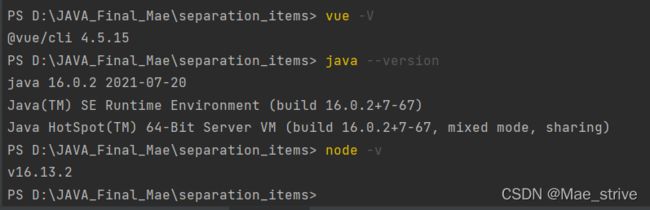
一、所需环境
JDK一般常用1.8
二、Vue
在idea终端或者cmd窗口中创建vue
下面使用idea终端方式

1、创建Vue项目
使用命令 vue craete 项目名

选择最后一个

根据自己的需要来就行(空格 来控制选择与否)

选择2.x


创建成功之后会出现Vue目录

2、使用element组件
首先进入项目中
cd 项目名
![]()
安装
npm i element-ui -S
![]()
之后会出现两个文件

打开package.json
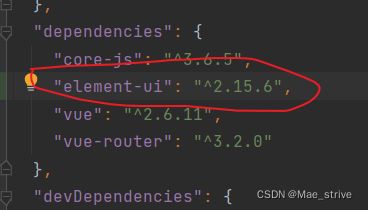
有这个说明安装成功
在vue中引用
在main.js中引入下面两个文件
import ElementUI from 'element-ui';
import 'element-ui/lib/theme-chalk/index.css';

Vue.use(ElementUI);
并在下面使用

3、封装axios请求
在src文件下新建utils中
引入request.js文件
import axios from 'axios'

const request = axios.create({
    baseURL: '/api',  // 注意!! 这里是全局统一加上了 '/api' 前缀,也就是说所有接口都会加上'/api'前缀在,页面里面写接口的时候就不要加 '/api'了,否则会出现2个'/api',类似 '/api/api/user'这样的报错,切记!!!
    timeout: 5000
})

// request 拦截器
// 可以自请求发送前对请求做一些处理
// 比如统一加token,对请求参数统一加密
request.interceptors.request.use(config => {
    config.headers['Content-Type'] = 'application/json;charset=utf-8';

    // config.headers['token'] = user.token;  // 设置请求头
    return config
}, error => {
    return Promise.reject(error)
});

// response 拦截器
// 可以在接口响应后统一处理结果
request.interceptors.response.use(
    response => {
        let res = response.data;
        // 如果是返回的文件
        if (response.config.responseType === 'blob') {
            return res
        }
        // 兼容服务端返回的字符串数据
        if (typeof res === 'string') {
            res = res ? JSON.parse(res) : res
        }
        return res;
    },
    error => {
        console.log('err' + error) // for debug
        return Promise.reject(error)
    }
)


export default request
在main.js中使用
Vue.prototype.request = request
在Home.vue中测试
<script>


export default {
  name: 'Home',
  components: {},
  methods: {
    load() {
        this.request.get("http://localhost:8090/test/demo").then(res=>{
            console.log(res);
        })
    }
  },
  created() {
    this.load();
  }
}
</script>
4、运行vue项目


或者在终端启动 npm run serve


三、springboot
1、使用spring Initializr创建boot项目

2、引入mp和druid依赖
<dependency>
    <groupId>com.baomidougroupId>
    <artifactId>mybatis-plus-boot-starterartifactId>
    <version>3.4.3version>
dependency>
<dependency>
    <groupId>com.alibabagroupId>
    <artifactId>druid-spring-boot-starterartifactId>
    <version>1.2.8version>
dependency>
3、application.yml文件
注意端口号设置为 8090 为了防止与vue的端口发生冲突
spring:
  datasource:
    # 使用德鲁伊数据库连接池
    druid:
      # 四要素
      driver-class-name: com.mysql.cj.jdbc.Driver
      url: jdbc:mysql://localhost:3306/demo?characterEncoding=utf-8&useSSL=false&serverTimezone=UTC&rewriteBatchedStatements=true
      username: root
      password: 123456
      # 初始化连接数
      initialSize: 5
      # 最小空闲连接数
      minIdle: 5
      # 最大连接数
      maxActive: 20
      # 最大等待连接时间
      maxWait: 60000
server:
  port: 8090
mybatis-plus:
  configuration:
    # 开启驼峰命名规则 a_b转aB
    map-underscore-to-camel-case: false
    # 打印日志
    log-impl: org.apache.ibatis.logging.stdout.StdOutImpl
  global-config:
    db-config:
      # 全局默认主键类型:自动增长(与数据库关联)
      id-type: auto
      # 表名前缀(所有表名一般前面都相同)
      tablePrefix: mae_
      # 默认删除字段属性名
      logicDeleteField: delField
      # 逻辑已删除值
      logic-delete-value: 1
      # 逻辑未删除值
      logic-not-delete-value: 0
  # mapper.xml文件路径
  mapper-locations: classpath*:/mapper/**/*.xml
4、准备controller
package com.atmae.springboot.controller;

import lombok.extern.slf4j.Slf4j;
import org.springframework.web.bind.annotation.GetMapping;
import org.springframework.web.bind.annotation.RequestMapping;
import org.springframework.web.bind.annotation.RequestParam;
import org.springframework.web.bind.annotation.RestController;

/**
 * @Author: Mae
 * @Date: 2022/2/11
 * @Time: 17:14
 * @Description:
 */
@Slf4j
@RestController
@RequestMapping("/test")
public class DemoController {

    @GetMapping("/demo")
    public String test(){
        log.info("success");
        return id;
    }
}
5、启动
四、springboot设置跨域访问
package com.atmae.springboot.config;

import org.springframework.context.annotation.Bean;
import org.springframework.context.annotation.Configuration;
import org.springframework.web.cors.CorsConfiguration;
import org.springframework.web.cors.UrlBasedCorsConfigurationSource;
import org.springframework.web.filter.CorsFilter;


/**
 * @Author: Mae
 * @Date: 2022/2/11
 * @Time: 15:14
 * @Description:
 */
@Configuration
public class CorsConfig {

    /** 当前跨域请求最大有效时长。这里默认1天*/
    private static final long MAX_AGE = 24 * 60 * 60;

    @Bean
    public CorsFilter corsFilter() {
        UrlBasedCorsConfigurationSource source = new UrlBasedCorsConfigurationSource();
        CorsConfiguration corsConfiguration = new CorsConfiguration();
        // 1 设置访问源地址
        corsConfiguration.addAllowedOrigin("*");
        // 2 设置访问源请求头
        corsConfiguration.addAllowedHeader("*");
        // 3 设置访问源请求方法
        corsConfiguration.addAllowedMethod("*");
        corsConfiguration.setMaxAge(MAX_AGE);
        // 4 对接口配置跨域设置
        source.registerCorsConfiguration("/**", corsConfiguration);
        return new CorsFilter(source);
    }

}
五、验证
去8080端口
状态码200通过
