一个简单的微服务项目带你上手spring cloud 全家桶
最近一个月,断断续续学习了spring cloud的主流微服务模块,然后实践了一个比较容易上手的微服务项目,现在做一个总结。
这个项目是在github上的一个比较经典的spring cloud易上手的项目,项目名叫spring-boot-cloud-master,项目的github链接会在文末给出。
一、Spring-boot-cloud-master项目创建:
1.1使用maven搭建项目
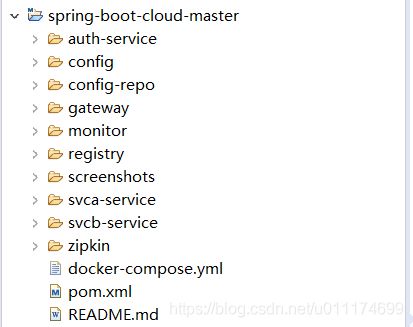
项目模块如下:
1.2 搭建父工程spring-boot-cloud-master,
项目类型为pom类型,父工程主要指定一些必要的依赖jar包。
父工程pom:
    4.0.0

    cn.zhangxd
    spring-boot-cloud
    1.0-SNAPSHOT
    pom
    ${project.artifactId}


        org.springframework.boot
        spring-boot-starter-parent
        1.5.6.RELEASE


        config
        registry
        gateway
        monitor
        auth-service
        svca-service
        svcb-service
        zipkin


        UTF-8
        1.8
        1.0.0
        spring-boot-cloud
        Dalston.SR4
        1.5.4


            org.springframework.boot
            spring-boot-starter-actuator


            org.springframework.boot
            spring-boot-starter-test
            test


                de.codecentric
                spring-boot-admin-server
                ${spring-boot-admin.version}


                de.codecentric
                spring-boot-admin-server-ui
                ${spring-boot-admin.version}


                de.codecentric
                spring-boot-admin-server-ui-hystrix
                ${spring-boot-admin.version}


                de.codecentric
                spring-boot-admin-server-ui-turbine
                ${spring-boot-admin.version}


                de.codecentric
                spring-boot-admin-server-ui-login
                ${spring-boot-admin.version}


                org.springframework.cloud
                spring-cloud-dependencies
                ${spring.cloud.version}
                pom
                import


                    org.springframework.boot
                    spring-boot-maven-plugin


                                repackage


                    com.spotify
                    docker-maven-plugin
                    ${docker.plugin.version}


                            package

                                build


                        ${docker.image.prefix}/${project.artifactId}
                        ${project.basedir}/


                                /
                                ${project.build.directory}
                                ${project.build.finalName}.jar
1.3 接下来依次在父工程基础上建立maven模块(module),
分别是rigistry(注册中心),monitor(监控中心:其实就是spring boot admin server),zipkin(微服务链路追踪,spring cloud sleuth),config(统一配置中心),gateway(网关,用的微服务第一代网关叫做zuul,不要被模块名迷惑了,用的并不是最新的spring cloud gateway),auth-service(认证服务,使用到spring cloud oauth2),还有svca-service(业务a),svcb-service(业务b).
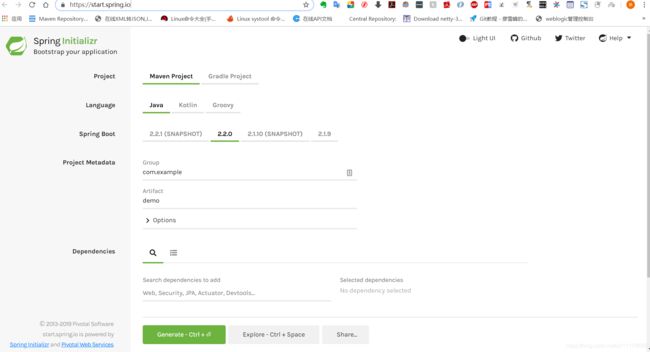
spring cloud 微服务主要使用就在于pom依赖的导入,以及配置文件,启动类,spring boot创建的启动类很固定,使用eclipse,不借助spring boot插件建spring cloud项目可能需要手动添加spring boot启动类,推荐使用idea创建spring cloud项目,利用spring initializer可以快速搭建spring boot项目,官网地址:https://start.spring.io/
创建好各个模块,接下来分析各个模块:
1.3.1 registry模块(注册中心)、
这个模块使用的是spring cloud eureka作为注册中心,注册中心还有其他选择,比如zookeeper,或者spring cloud alibaba nacos。
pom文件:
    4.0.0


        cn.zhangxd
        spring-boot-cloud
        1.0-SNAPSHOT


    registry
    1.0-SNAPSHOT
    jar
    ${project.artifactId}


            org.springframework.cloud
            spring-cloud-starter-eureka-server


            org.springframework.boot
            spring-boot-starter-security


        ${project.artifactId}


                org.springframework.boot
                spring-boot-maven-plugin


                com.spotify
                docker-maven-plugin
spring cloud项目的配置文件使用yaml格式,yaml格式的具体要求可以自行百度。
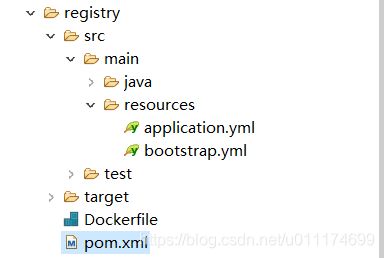
在resource目录下有两个yaml格式的配置文件,注意yaml格式的配置文件,后缀可以写成yaml或者yml。bootstrap.yml和application.yml这两个配置文件是有区别的,最主要的区别在于加载顺序上,启动spring boot程序后,会先加载bootstrap中的配置信息,然后才会加载application中的配置信息。注意,这里的bootstrap和前端框架的bootstrap单词虽然一样,但是并没有什么联系。
下边来看一下这两个配置文件中的配置信息:
bootstrap.yml
spring:
  application:
    name: registry
可以看到这里只配置了微服务模块的应用名(当然这是相对的,你甚至可以把所有的配置信息都放在bootstrap中,而不创建application配置文件,但是不建议这样,因为只用一个配置文件,会让配置信息显得臃肿)。
application.yml
server:
  port: 8761

eureka:
  instance:
    hostname: registry
    prefer-ip-address: true
  client:
    registerWithEureka: false
    fetchRegistry: false
    service-url:
      defaultZone: http://${security.user.name}:${security.user.password}@${eureka.instance.hostname}:${server.port}/eureka/

security:
  user:
    name: user
    password: password
application.yml文件中配置了该服务模块的端口号,以及注册中心eureka的服务地址,最下边的security是一个验证安全的配置,在访问该服务模块(注册中心)时需要验证用户名和密码。
现在已经配置好了第一个服务模块,其实这个时候已经可以访问注册中心eureka了。
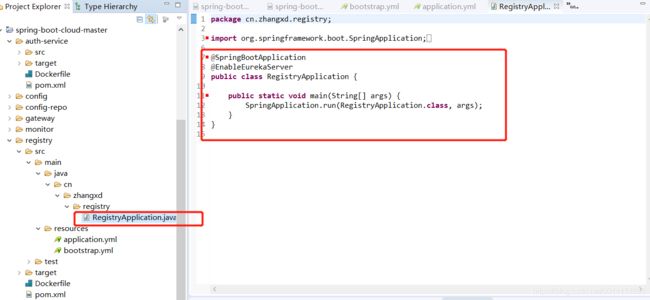
可以从RegistryApplication类启动微服务,该类中的两个注解@SpringBootApplication表示该程序是spring boot程序,该类SpringBoot程序入口和@EnableEurekaServer表示开启注册中心服务。
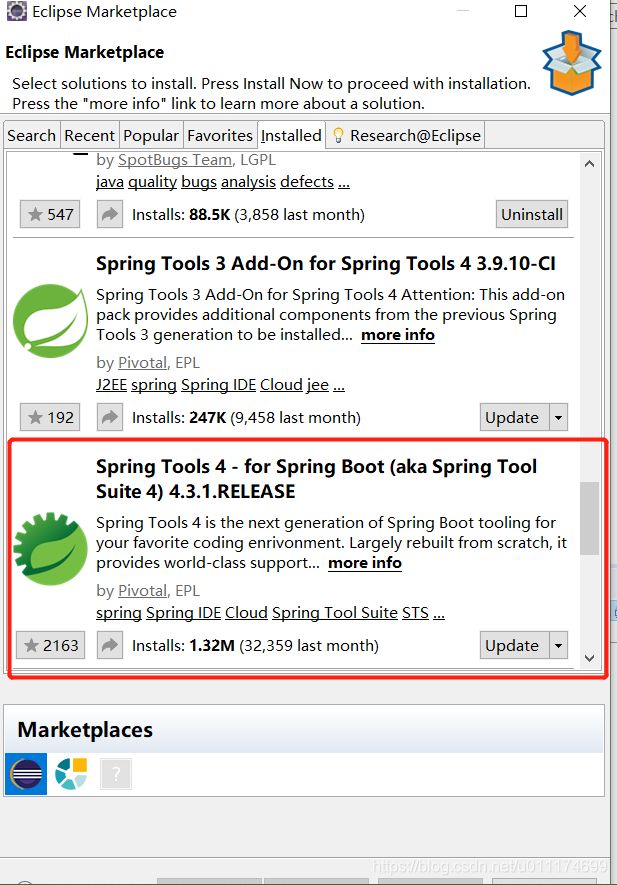
当然我不推荐这种方式,因为服务模块较多的时候不好管理,这里推荐使用eclipse的,在应用市场下载spring boot的插件:
安装成功后,在eclipse工具栏处会有一个图标:
这个工具就是spring boot dashboard,打开之后,它会把建立的spring boot项目全部加载进来,管理起来非常方便
 个人感觉这个插件比idea中管理spring boot项目方便,idea中需要手动设置开启spring boot dashboard。
OK,现在可以直接利用spring boot dashboard来启动registry(非常方便,启动之后会自动打开chrome浏览器访问,甚至不用自己手动输入url地址去访问)。
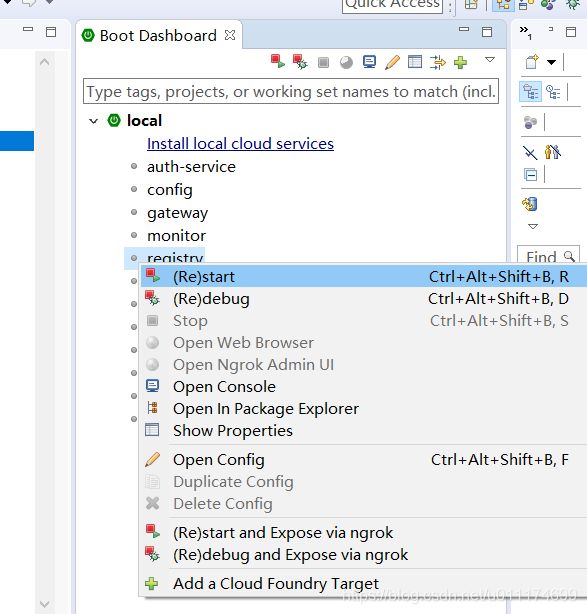
选中服务模块,右键start就可以了,就可以启动该服务模块了
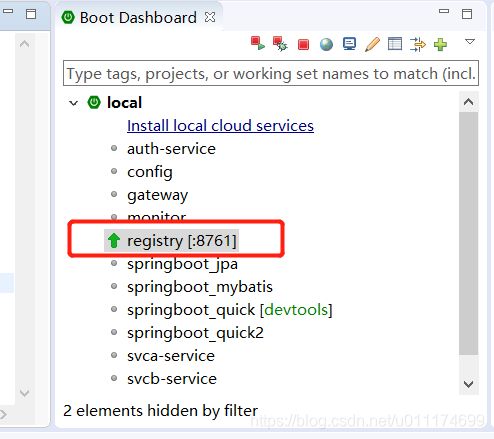
控制台打印的日志显示已经启动了eureka server,tomcat端口号8761,就是刚才配置文件中的server.port,管理工具中显示registry是绿色的指向上方的箭头(就是代表up),表示启动成功 。
接下来鼠标双击spring boot dashboard中的registry,会自动跳转到chrome浏览器页面:
 因为配置文件中配置的安全验证,所以会弹出登录提示,根据配置中的用户名和密码,填入即可,我们用之前配置的username:user,password:password,然后登录。注意,我们之前配置的eureka的地址用的是eureka.instance.hostname
浏览器中解析为了localhost,如果是在本地练习用,建议可以都改成localhost,不然后边启动其他模块,会报错误,找不到host
登录后,进入eureka管理界面:
1.3.2 monitor模块(监控中心)
pom文件:
    4.0.0


        cn.zhangxd
        spring-boot-cloud
        1.0-SNAPSHOT


    monitor
    1.0-SNAPSHOT
    jar
    ${project.artifactId}


            de.codecentric
            spring-boot-admin-server


            de.codecentric
            spring-boot-admin-server-ui


            de.codecentric
            spring-boot-admin-server-ui-login


            de.codecentric
            spring-boot-admin-server-ui-hystrix


            de.codecentric
            spring-boot-admin-server-ui-turbine


            org.springframework.cloud
            spring-cloud-starter-turbine-stream


                    netty-transport-native-epoll
                    io.netty


                    netty-codec-http
                    io.netty


            org.springframework.cloud
            spring-cloud-starter-stream-rabbit


            org.springframework.cloud
            spring-cloud-starter-eureka


            org.springframework.boot
            spring-boot-starter-security


        ${project.artifactId}


                org.springframework.boot
                spring-boot-maven-plugin


                com.spotify
                docker-maven-plugin
使用spring boot admin server来监控微服务的运行情况
相关配置文件:
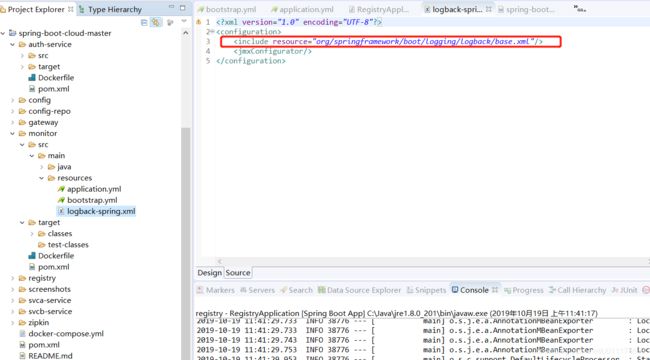
resource目录下有三个配置文件,这里多了一个配置日志的文件,即logback-spring.xml
打开logback-spring.xml
这里边配置文件使用了
				%d{yyyy-MM-dd HH:mm:ss.SSS}----------> [%thread] %-5level %logger{50} - %msg%n


				%d{yyyy-MM-dd HH:mm:ss.SSS}==========> [%thread] %-5level %logger{50} - %msg%n


		${LOG_HOME}/${appName}-ALL.log

			${LOG_HOME}/${appName}-%d{yyyy-MM-dd}-ALL-%i.log

			7

				100MB


			%d{yyyy-MM-dd HH:mm:ss.SSS} [%thread] ---------- [ %-5level ] [ %logger{50} : %line ] - %msg%n
或者参考我的另一篇博客配置logback :
log4j配置以及logback配置
接下来配置bootstrap.yml和application.yml
bootstrap.yml:
spring:
  application:
    name: monitor
application.yml:
logging:
  level:
    org.springframework.cloud.netflix.zuul.filters.post.SendErrorFilter: error

server:
  port: 8040

turbine:
  stream:
    port: 8041

eureka:
  instance:
    hostname: registry
    prefer-ip-address: true
    metadata-map:
      user.name: ${security.user.name}
      user.password: ${security.user.password}
  client:
    service-url:
      defaultZone: http://user:password@localhost:8761/eureka/

spring:
  rabbitmq:
    host: 127.0.0.1
    port: 5672
    virtual-host: /
    username: guest
    password: guest
  boot:
    admin:
      routes:
        endpoints: env,metrics,trace,dump,jolokia,info,configprops,trace,logfile,refresh,flyway,liquibase,heapdump,loggers,auditevents,hystrix.stream
      turbine:
        clusters: default
        location: http://monitor:${turbine.stream.port}

security:
  user:
    name: admin
    password: admin
查看启动类:
启动类中多了四个注解:
@EnableDiscoveryClient表示开启服务发现,表明该服务是eureka的客户端,可以向eureka服务端注册中心注册服务,并且发现其他注册的服务。
@EnableAdminServer表示开启adminserver服务
@EnableTurbineStream 表示开启turbinestream服务
里边有个内部类
注解@configuration表明这个类是个配置类
启动monitor服务:(和启动rigistry服务流程一样)
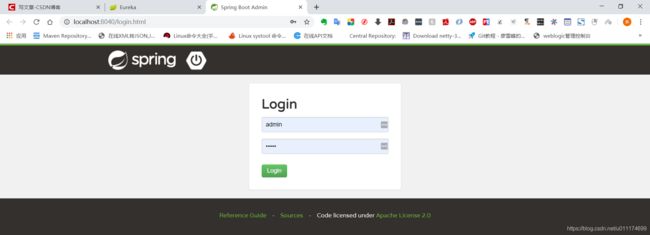
进入spring boot admin界面,这里也需要登录验证,用户名和密码都是:admin(使用的也是application.yml中配置的安全验证)
登录之后,进入管理页面:
可以看到管理页面中有一个应用monitor,实际上就是自己的模块,可以管理自己,状态是绿色的up,表示微服务运行正常
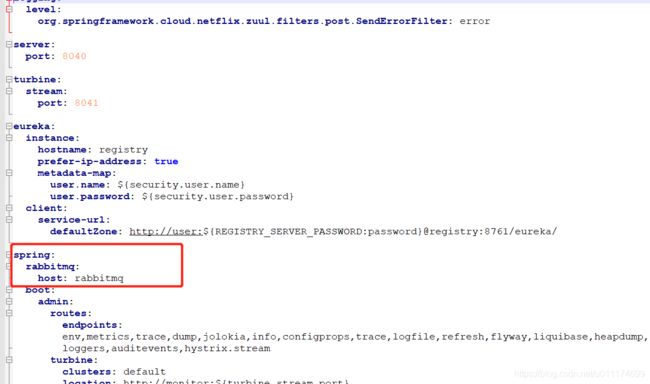
注意:你从github上download的下来的项目中是这样的:
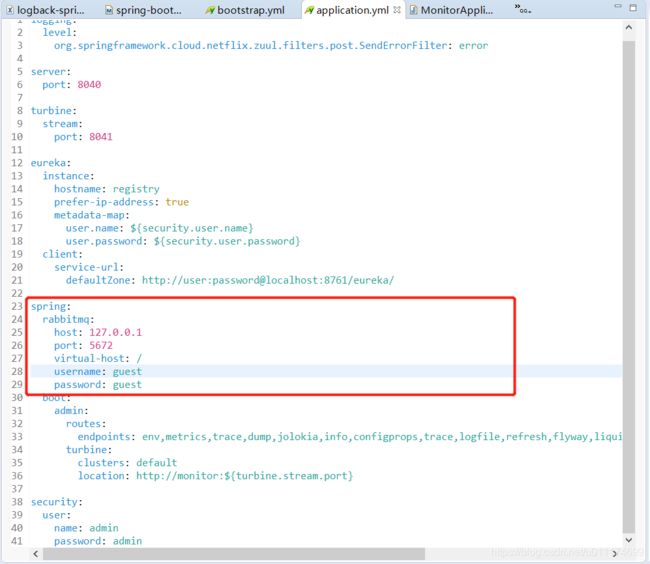
rabbitmq的配置需要改一下,不然启动后,管理界面的monitor服务会变成红色的down,点开detail提示就是找不到rabbitmq的host,你需要改成下边这样:
host:127.0.0.1就是你本机的ip,port:5672是rabbitmq的映射端口:
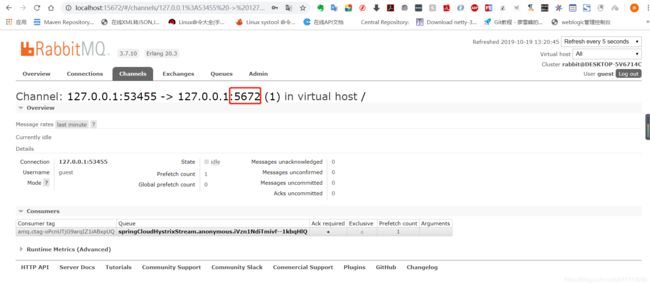
注意rabbitmq的可视化管理界面的端口号是15672,用户名和密码我用的初始的,都是guest
登录之后在connection和channels查看:(注:关于rabbitmq的使用可以参考我的这一篇博客消息队列RabbitMQ的使用,比较详尽的介绍)
1.3.3 zipkin模块(服务链路追踪)
pom文件:
    4.0.0


        cn.zhangxd
        spring-boot-cloud
        1.0-SNAPSHOT


    zipkin
    1.0-SNAPSHOT
    jar
    ${project.artifactId}


            org.springframework.cloud
            spring-cloud-sleuth-zipkin-stream


            org.springframework.cloud
            spring-cloud-starter-sleuth


            org.springframework.cloud
            spring-cloud-stream-binder-rabbit


            io.zipkin.java
            zipkin-autoconfigure-ui


            org.springframework.boot
            spring-boot-starter-security


        ${project.artifactId}


                org.springframework.boot
                spring-boot-maven-plugin


                com.spotify
                docker-maven-plugin
配置文件:
application.yml:
spring:
  application:
    name: zipkin
  rabbitmq:
    host: 127.0.0.1
    port: 5672
    virtual-host: /
    username: guest
    password: guest


server:
  port: 9411

security:
  user:
    name: admin
    password: ${ZIPKIN_SERVER_PASSWORD:admin}
启动类:
package cn.zhangxd.zipkin;

import org.springframework.boot.SpringApplication;
import org.springframework.boot.autoconfigure.SpringBootApplication;
import org.springframework.cloud.sleuth.zipkin.stream.EnableZipkinStreamServer;

/**
 * @author
 */
@SpringBootApplication
@EnableZipkinStreamServer
public class ZipkinApplication {

    public static void main(String[] args) {
        SpringApplication.run(ZipkinApplication.class, args);
    }

}
注解@EnableZipkinStreamServer开启zipkin服务
启动zipkin:
账号和密码是admin
登录后的界面:
1.3.4 config模块(spring cloud统一配置中心)
config模块用于统一管理各个服务模块的配置,配置中心还可以选用spring cloud alibaba nacos,或者携程的Apollo
pom文件:
    4.0.0


        cn.zhangxd
        spring-boot-cloud
        1.0-SNAPSHOT


    config
    1.0-SNAPSHOT
    jar
    ${project.artifactId}


            org.springframework.cloud
            spring-cloud-config-server


            org.springframework.cloud
            spring-cloud-config-monitor


            org.springframework.cloud
            spring-cloud-starter-stream-rabbit


            org.springframework.cloud
            spring-cloud-starter-eureka


            org.springframework.boot
            spring-boot-starter-security


        ${project.artifactId}


                org.springframework.boot
                spring-boot-maven-plugin


                com.spotify
                docker-maven-plugin
配置文件:
resource目录下的bootstrap.yml
spring:
  application:
    name: config
  profiles:
    active: native
注意:这个配置文件里边配置了profiles.active: native,表明配置文件从本地读取(一般情况下配置中心的配置文件是托管在git服务器上的,比较方便团队协作),如果没有Git服务器,可以托管到github上,这里演示本地配置,所以配置了profiles.active: native,如果在服务器上,不用配置profiles.active: native。
application.yml
server:
  port: 8888

eureka:
  instance:
    hostname: registry
    prefer-ip-address: true
    metadata-map:
      user.name: ${security.user.name}
      user.password: ${security.user.password}
  client:
    service-url:
      defaultZone: http://user:password@localhost:8761/eureka/

spring:
  cloud:
    config:
      server:
        native:
          search-locations: F:/workspaces/spring-boot-cloud-master/config-repo/

   rabbitmq:
    host: 127.0.0.1
    port: 5672
    virtual-host: /
    username: guest
    password: guest

security:
  user:
    name: user
    password: password

endpoints:
  refresh:
    enabled: true
search-locations是你放值配置文件的绝对路径
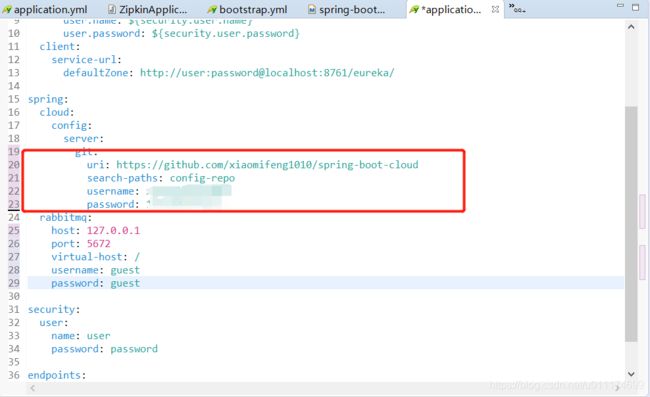
如果托管在github上,需要修改这个地方:
username和password分别对应你的github的用户名和密码
添加注解@EnableConfigServer开启配置中心服务
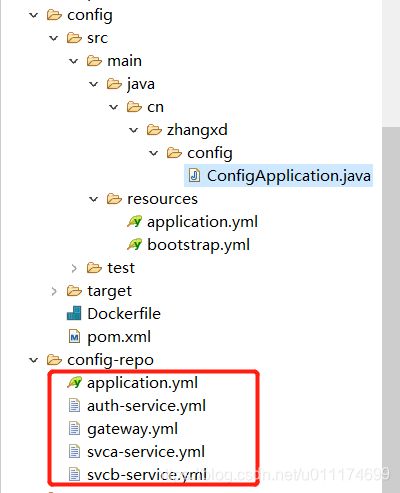
查看本地配置中心的配置文件:(就是github下载下来后位于config-repo目录下的几个配置文件)
本地位置:
其中application中的配置会影响下边几个具体几个服务模块的配置
applicaiton.yml:
eureka:
  instance:
    hostname: registry
    prefer-ip-address: true
  client:
    service-url:
      defaultZone: http://user:password@localhost:8761/eureka/

hystrix:
  command:
    default:
      execution:
        isolation:
          thread:
            timeoutInMilliseconds: 10000

ribbon:
  ReadTimeout: 5000
  ConnectTimeout: 5000

spring:
  rabbitmq:
    host: 127.0.0.1
    port: 5672
    virtual-host: /
    username: guest
    password: guest
  sleuth:
    sampler:
      percentage: 1
    integration:
      enabled: false
    scheduled:
      skip-pattern: "^org.*HystrixStreamTask$"

authserver:
    hostname: auth-service
    port: 5000
    contextPath: /uaa

security:
  oauth2:
    resource:
      user-info-uri: http://${authserver.hostname}:${authserver.port}${authserver.contextPath}/current
下边的几个配置文件会影响下边的几个模块:gateway、auth-service、svca-service和svcb-service
其实你可以把所有模块的具体配置都配置在配置中心统一管理,这里只把需要经常变动的配置文件放在配置中心管理
查看gateway.yml:
server:
  port: 8070

management:
  security:
    enabled: false

hystrix:
  command:
    default:
      execution:
        isolation:
          thread:
            timeoutInMilliseconds: 20000

ribbon:
  ReadTimeout: 10000
  ConnectTimeout: 10000

zuul:
  ignoredServices: '*'
  routes:
    auth-service:
      path: /uaa/**
      stripPrefix: false
      sensitiveHeaders:
    svca-service:
      path: /svca/**
      sensitiveHeaders:
    svcb-service:
      path: /svcb/**
      sensitiveHeaders:

eureka:
  instance:
    hostname: registry
    prefer-ip-address: true
    metadata-map:
      user.name: user
      user.password: password
  client:
    service-url:
      defaultZone: http://user:password@localhost:8761/eureka/
auth-service.yml:
server:
  context-path: /uaa
  port: 5000

management:
  security:
    enabled: false
  context-path: /mgmt

eureka:
  instance:
    health-check-url-path: ${server.context-path}${management.context-path}/health
    status-page-url-path: ${server.context-path}${management.context-path}/info
    metadata-map:
      management.context-path: ${server.context-path}${management.context-path}

spring:
  datasource:
    url: jdbc:h2:mem:user
    driver-class-name: org.h2.Driver
  jpa:
    show-sql: true
注意这里的spring数据源可以根据你自己使用的数据库灵活配置,如配置为MySQL数据源或者Oracle数据源
scva-service.yml:
server:
  port: 8099

name: xiaomifeng1010

eureka:
  instance:
    metadata-map:
      user.name: ${security.user.name}
      user.password: ${security.user.password}

security:
  user:
    name: user
    password: password
  oauth2:
    client:
      clientId: svca-service
      clientSecret: ${security.user.password}
      accessTokenUri: http://${authserver.hostname}:${authserver.port}${authserver.contextPath}/oauth/token
      grant-type: client_credentials
      scope: server
svcb-service.yml:
server:
  port: 8066

msg: Hello

eureka:
  instance:
    metadata-map:
      user.name: ${security.user.name}
      user.password: ${security.user.password}

security:
  user:
    name: user
    password: password
  oauth2:
    client:
      clientId: svcb-service
      clientSecret: ${security.user.password}
      accessTokenUri: http://${authserver.hostname}:${authserver.port}${authserver.contextPath}/oauth/token
      grant-type: client_credentials
      scope: server
查看启动类:
 添加了注解@EnableConfigServer,开启配置中心服务
1.3.5 gateway模块(网关服务)
网关服务的主要作用用于路由和一些条件和安全验证
pom文件:
    4.0.0


        cn.zhangxd
        spring-boot-cloud
        1.0-SNAPSHOT


    gateway
    1.0-SNAPSHOT
    jar
    ${project.artifactId}


            org.springframework.cloud
            spring-cloud-starter-zuul


            org.springframework.cloud
            spring-cloud-starter-config


            org.springframework.cloud
            spring-cloud-starter-eureka


            org.springframework.cloud
            spring-cloud-starter-bus-amqp


            org.springframework.cloud
            spring-cloud-netflix-hystrix-stream


            org.springframework.cloud
            spring-cloud-starter-sleuth


            org.springframework.cloud
            spring-cloud-sleuth-stream


            org.springframework.cloud
            spring-cloud-stream-binder-rabbit


            org.springframework.boot
            spring-boot-starter-aop


            org.springframework.retry
            spring-retry


            org.jolokia
            jolokia-core


        ${project.artifactId}


                org.springframework.boot
                spring-boot-maven-plugin


                com.spotify
                docker-maven-plugin
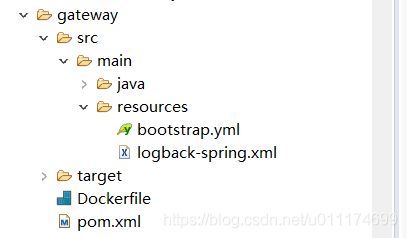
配置文件,这里resources目录下已经不用配application.yml文件了,因为具体配置已经放在了config配置中心管理了
bootstrap.yml:
spring:
  application:
    name: gateway
  cloud:
    config:
      uri: http://localhost:8888
      fail-fast: true
      username: user
      password: password
      retry:
        initial-interval: 2000
        max-interval: 10000
        multiplier: 2
        max-attempts: 10

ribbon:
  eureka:
    enabled: true
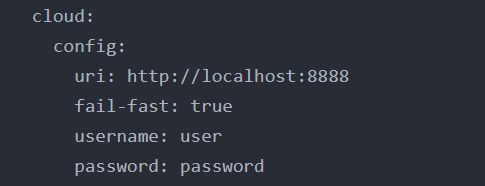
因此bootstrap.yml文件中需要制定config配置中心的访问地址,可以正确读取到配置中心的配置文件
而具体gateway的配置可以参照上边本地配置目录下的gateway.yml配置文件,里边配置了网关路由,拦截等。
查看启动类:
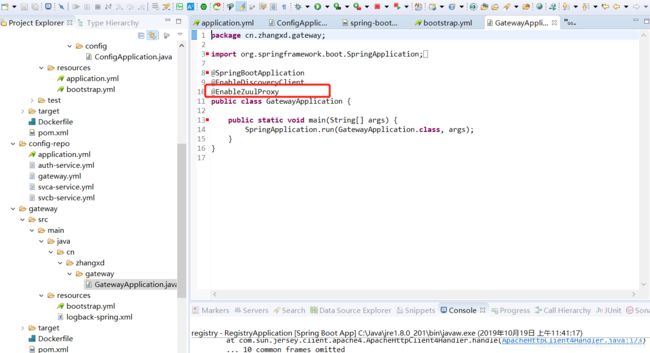
添加注解@EnableZuulProxy开启路由代理
开启路由代理,可以使用路由的ip地址和端口去访问其他的微服务,如monitor服务、svca-service服务,不用暴露monitor的服务器地址、svca-service服务器地址,比较安全。
1.3.6 auth-service模块(安全验证模块)
pom文件
    4.0.0


        cn.zhangxd
        spring-boot-cloud
        1.0-SNAPSHOT


    auth-service
    1.0-SNAPSHOT
    jar
    ${project.artifactId}


            org.springframework.boot
            spring-boot-starter-data-jpa


            com.h2database
            h2
            runtime


            org.springframework.cloud
            spring-cloud-starter-oauth2


            org.springframework.cloud
            spring-cloud-starter-eureka


            org.springframework.cloud
            spring-cloud-starter-sleuth


            org.springframework.cloud
            spring-cloud-sleuth-stream


            org.springframework.cloud
            spring-cloud-stream-binder-rabbit


            org.springframework.cloud
            spring-cloud-starter-config


            org.springframework.cloud
            spring-cloud-starter-bus-amqp


            org.springframework.cloud
            spring-cloud-starter-hystrix


            org.springframework.cloud
            spring-cloud-netflix-hystrix-stream


            org.springframework.cloud
            spring-cloud-starter-ribbon


            org.springframework.boot
            spring-boot-starter-aop


            org.springframework.retry
            spring-retry


            org.jolokia
            jolokia-core


        ${project.artifactId}


                org.springframework.boot
                spring-boot-maven-plugin


                com.spotify
                docker-maven-plugin
配置文件:
bootstrap.yml:
spring:
  application:
    name: auth-service
  cloud:
    config:
      uri: http://localhost:8888
      fail-fast: true
      username: user
      password: password
      retry:
        initial-interval: 2000
        max-interval: 10000
        multiplier: 2
        max-attempts: 10
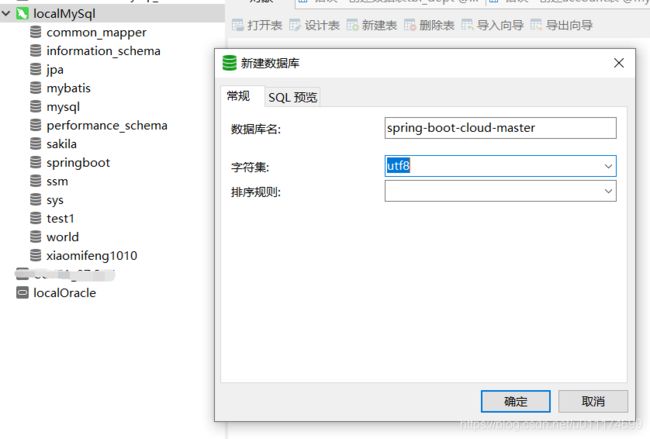
注意这里需要建立一个数据库和几个数据表,对,就是那个schema.sql文件,建表语句如下:(使用mysql数据库建库建表)
DROP TABLE IF EXISTS `oauth_access_token`;
CREATE TABLE `oauth_access_token` (
  `token_id` varchar(256) DEFAULT NULL,
  `token` blob,
  `authentication_id` varchar(256) DEFAULT NULL,
  `user_name` varchar(256) DEFAULT NULL,
  `client_id` varchar(256) DEFAULT NULL,
  `authentication` blob,
  `refresh_token` varchar(256) DEFAULT NULL
);

DROP TABLE IF EXISTS `oauth_client_details`;
CREATE TABLE `oauth_client_details` (
  `client_id` varchar(256) NOT NULL,
  `resource_ids` varchar(256) DEFAULT NULL,
  `client_secret` varchar(256) DEFAULT NULL,
  `scope` varchar(256) DEFAULT NULL,
  `authorized_grant_types` varchar(256) DEFAULT NULL,
  `web_server_redirect_uri` varchar(256) DEFAULT NULL,
  `authorities` varchar(256) DEFAULT NULL,
  `access_token_validity` int(11) DEFAULT NULL,
  `refresh_token_validity` int(11) DEFAULT NULL,
  `additional_information` varchar(4096) DEFAULT NULL,
  `autoapprove` varchar(256) DEFAULT NULL,
  PRIMARY KEY (`client_id`)
);

DROP TABLE IF EXISTS `oauth_refresh_token`;
CREATE TABLE `oauth_refresh_token` (
  `token_id` varchar(256) DEFAULT NULL,
  `token` blob,
  `authentication` blob
);

DROP TABLE IF EXISTS `users`;
CREATE TABLE `users` (
  `username` varchar(50) NOT NULL,
  `password` varchar(50) NOT NULL,
  `enabled` tinyint(1) NOT NULL,
  PRIMARY KEY (`username`)
);

DROP TABLE IF EXISTS `authorities`;
CREATE TABLE `authorities` (
  `username` varchar(50) NOT NULL,
  `authority` varchar(50) NOT NULL,
  UNIQUE KEY `ix_auth_username` (`username`,`authority`)
);
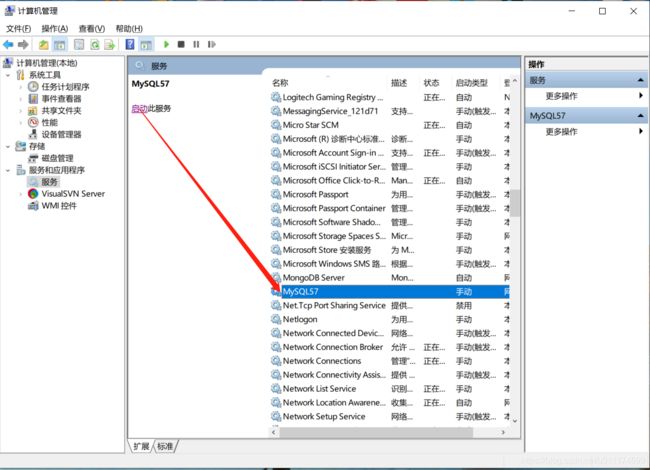
建库建表,先开启mysql服务
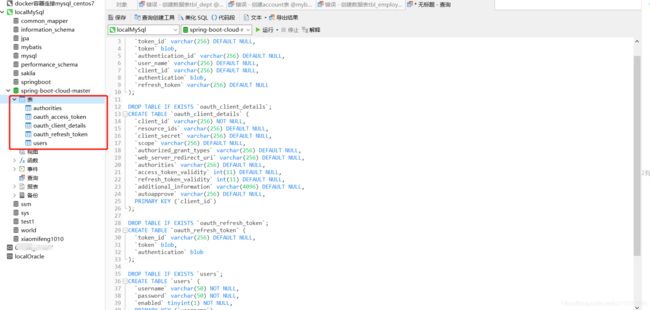
建库建表之后
建表sql语句,创建了五个数据表
注意按照mysql数据库配置相对应的数据源(就是配置jdbc)
查看启动类:(没什么特别)
其他两个项目svca-service和svcb-service就是具体的业务服务模块,你可以进行二次开发,替换成自己项目中的业务模块
1.3.7 启动所有模块
注意启动微服务所有模块的时候,把你电脑中的其他无关程序全部关掉,因为每个微服务模块都会独立启动一个java项目,使用jre,非常消耗内存。
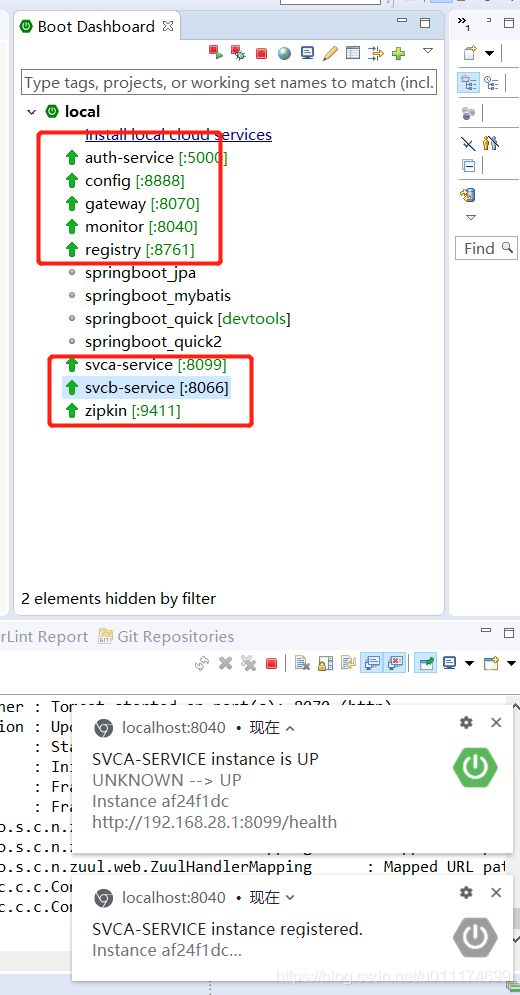
项目中的8个微服务模块全部启动成功,至于下边的提示弹窗,那是spring boot admin的提示:
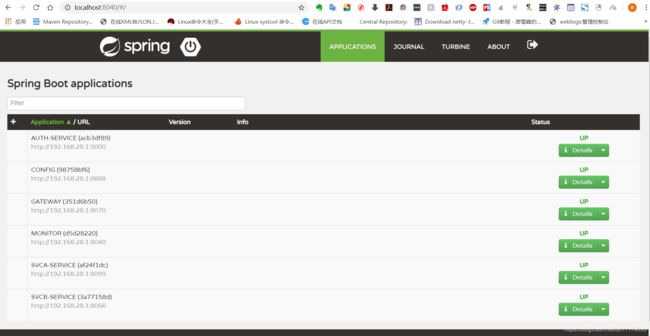
现在打开spring boot admin查看全部服务模块:
除了eureka和zipkin没在里边,其他模块全部是up状态(就是正常运行的状态)
查看一下eureka注册中心:
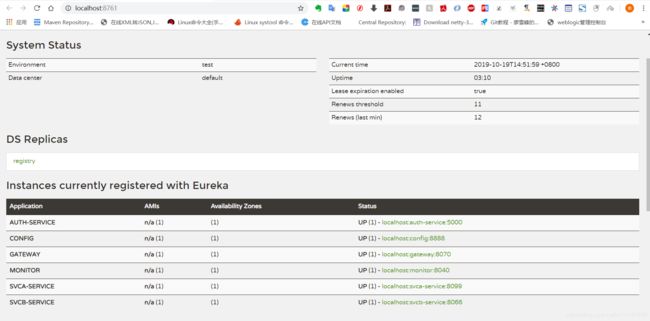 里边也是6个模块,没有eureka和zipkin,这是因为eureka没有注册自己,当需要eureka高可用,配置集群的时候,就需要eureka自己注册自己了,zipkin也没有也是因为zipkin没有向eureka注册中心注册自己。
查看一下rabbitmq管理界面:
已经有7个连接了。
现在来看看资源管理器,看看电脑内存的占用情况:
总内存占用了94%,其中eclipse程序占用了9G多,那些java开头的就是启动的微服务,相当耗用内存。
1.3.8 小结
通过这个相对简单的微服务项目,可以学习到eureka注册中心,ribbon组件(负载均衡),hystrix熔断器,feign(feign可以替代ribbon和hystrix,因为已经集成了ribbon和hystrix),spring cloud sleuth(zipkin)、spring boot admin server、spring cloud config(统一配置中心)、spring cloud oauth2、spring cloud bus(rabbitmq实现)、spring cloud turbine、spring boot security以及spring data集成redis和mongodb的使用等等。
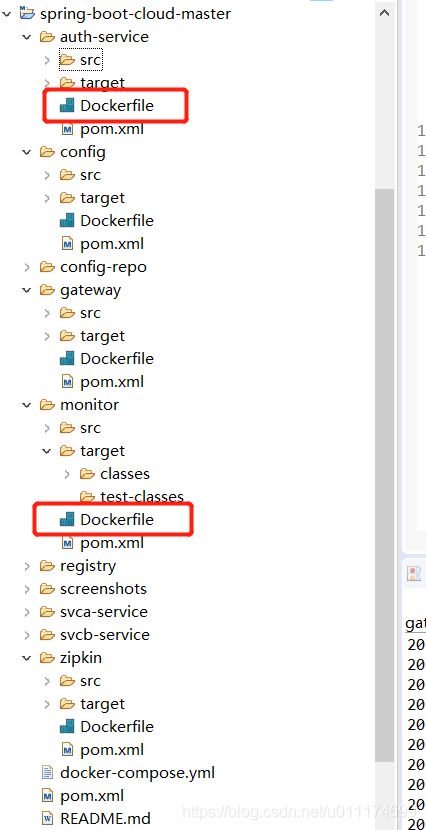
细心的你一定发现了这个微服务的每个模块都有一个Dockerfile文件:
这个Dockerfile是为了在docker容器中运行,用Dockerfile文件创建docker image(镜像)用的。关于微服务模块创建成docker镜像运行在docker容器中,就以后再开一篇博客总结一下,这个不错的微服务项目就总结到此
接下来给出这个优秀的开源项目的github地址:
https://github.com/xiaomifeng1010/spring-boot-cloud(这个是我已经fork过来的啦!嘿嘿)
