Camunda 实战练习:Demo搭建(四)
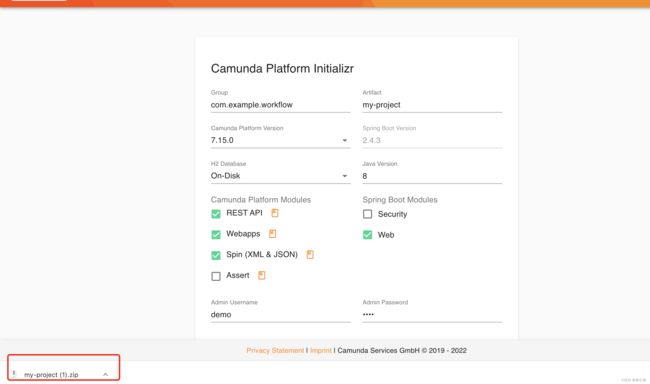
1.这次使用Camunda官方提供的网站创建Demo代码
首先打开Camunda 提供的demo地址:https://start.camunda.com/
详见下图:
这里Camunda 的版本我选择了 7.15.0 目前最高版本是 7.17.0;
java的版本 我也选用了 目前比较常用的 java 8
下面可以创建一个默认的用户:demo/demo

2.然后点击 这里的 GENERATE PROJECT 就会生成一个文件:
哦 对了你也可以该自己工程的名字:
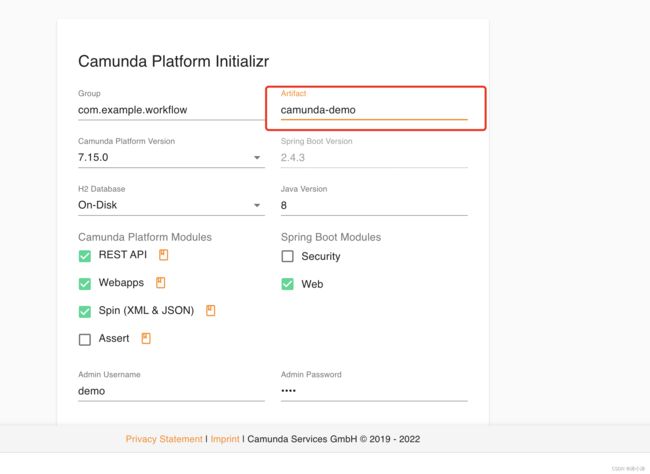
重新点击GENERATE PROJECT
3.将你的代码移动到你的位置,然后解压,使用Idea打开你的项目,这个就不用多说了。
4.打开项目后,项目结构如下图所示:
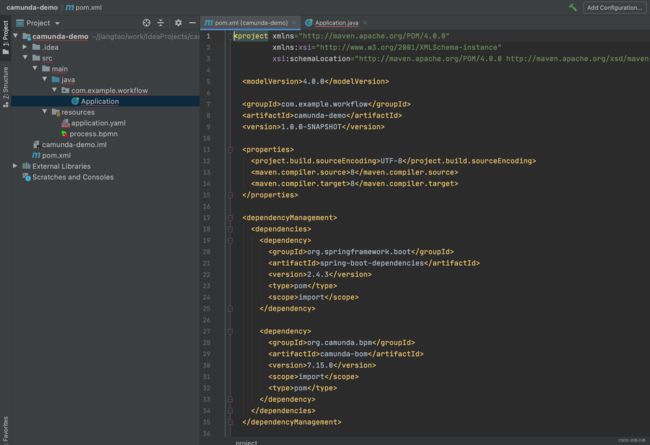
5.我们首先来看看 他的pom文件里都引入了啥:
<dependencyManagement>
    <dependencies>
      <dependency>
        <groupId>org.springframework.boot</groupId>
        <artifactId>spring-boot-dependencies</artifactId>
        <version>2.4.3</version>
        <type>pom</type>
        <scope>import</scope>
      </dependency>

      <dependency>
        <groupId>org.camunda.bpm</groupId>
        <artifactId>camunda-bom</artifactId>
        <version>7.15.0</version>
        <scope>import</scope>
        <type>pom</type>
      </dependency>
    </dependencies>
  </dependencyManagement>
dependencyManagement
首先这里先是定义了Spring-boot 和 camunda 的版本号,分别是 2.4.3 和 7.15.0 ,这样做的好处是:在dependencyManagement元素中声明所依赖的jar包的版本号等信息,那么所有子项目再次引入此依赖jar包时则无需显式的列出版本号。Maven会沿着父子层级向上寻找拥有dependencyManagement 元素的项目,然后使用它指定的版本号。
这里应该是Maven dependencyManagement 的知识。
5.1 这里有一个小插曲,我说一下,就是我搭建camunda 的demo 与公司项目的脚手架整合的时候遇到一个问题,就是camunda 与 spring boot 版本兼容的问题。
下面是出自:
https://blog.csdn.net/Demi_nini/article/details/109517381(Camunda与Spring Boot集成(1)–版本兼容性)
Camunda 与Spring Boot Starter的每个版本都绑定到特定版本的Camunda BPM和Spring Boot。 Camunda仅建议(并支持)这些默认组合。 其他组合必须在生产前进行深入测试。
注意:
从7.13.0版开始,Camunda BPM及其兼容的Spring Boot Starter始终共享同一版本。 另外,Spring Boot Starter中使用的Camunda BPM版本不再需要被覆盖。 只需选择与您要使用的Camunda BPM版本类似的Starter版
所以这里可以理解为,camunda 与 Spring boot 是有对应关系的,如果不按照他的对应关系,可能会出问题。
我们自己公司的脚手架,当时引得spring-boot 的版本是 2.1.0.RELEASE, 远远低于 camunda 7.15.0 对应spring boot 版本号(),所以当时就出了一个问题,我经过分析发现,在项目类中引入 RepositoryService 会用到
camunda 引入的 spring boot 版本中少一个类,报错信息如下:
No qualifying bean of type ‘org.springframework.transaction.PlatformTransactionManager’ available: expected at least 1 bean which qualifies as autowire candidate. Dependency annotations: {@org.springframework.beans.factory.annotation.Autowired(required=true)}
具体少哪个类 我忘了,但是我发现只要升级spring-boot 的版本号,就可以了,所以后来想办法升级了公司脚手架对应的版本号就解决了。好这个问题,暂时告一段落。
6.我们接着刚才的dependencyManagement 说。刚才看完了 dependencyManagement 现在我们来看一下:
<dependencies>
    <dependency>
      <groupId>org.camunda.bpm.springboot</groupId>
      <artifactId>camunda-bpm-spring-boot-starter-rest</artifactId>
    </dependency>

    <dependency>
      <groupId>org.camunda.bpm.springboot</groupId>
      <artifactId>camunda-bpm-spring-boot-starter-webapp</artifactId>
    </dependency>

    <dependency>
      <groupId>org.camunda.bpm</groupId>
      <artifactId>camunda-engine-plugin-spin</artifactId>
    </dependency>

    <dependency>
      <groupId>org.camunda.spin</groupId>
      <artifactId>camunda-spin-dataformat-all</artifactId>
    </dependency>

    <dependency>
      <groupId>org.springframework.boot</groupId>
      <artifactId>spring-boot-starter-web</artifactId>
    </dependency>

    <dependency>
      <groupId>com.h2database</groupId>
      <artifactId>h2</artifactId>
    </dependency>

    <dependency>
      <groupId>org.springframework.boot</groupId>
      <artifactId>spring-boot-starter-jdbc</artifactId>
    </dependency>

  </dependencies>
7.由此可见,引入了 camunda 与 spring boot 整合的一些starter
接下来。我们可以直接启动项目(直接启动 Application 启动类即可):
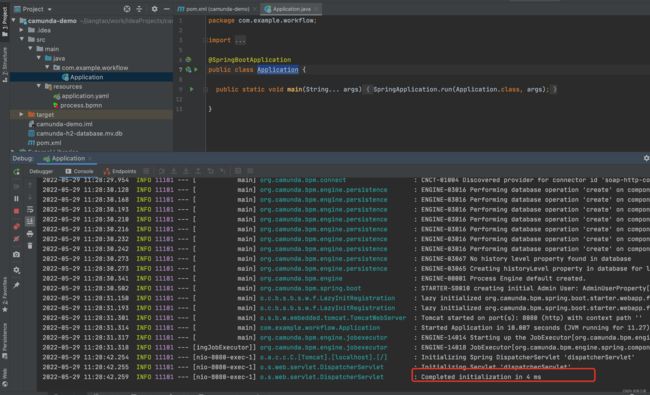
表示启动成功,启动成功之后其实就可以访问camunda 为我们提供的后台管理系统的页面,在浏览器输入:http://localhost:8080 ,然后就会跳到:
http://localhost:8080/camunda/app/welcome/default/#!/login
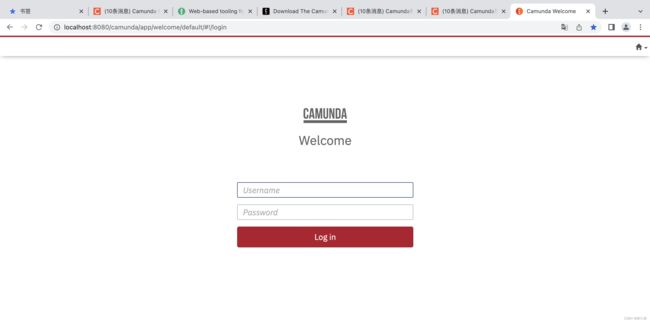
8.然后输入刚才创建的默认账号:demo/demo
之后就进入这个页面,这个页面的功能介绍可以看这两篇:
https://blog.csdn.net/liuying1802028915/article/details/124589053
https://blog.csdn.net/liuying1802028915/article/details/124590895
这里其实用的是H2数据库,那我们能不能换成是mysql,数据库呢,答案自然是肯定的。首先我们要在本地创建一个camunda 的数据库,我们知道 camunda 默认有49张数据库的表,为什么有这么多表,可以看一下camunda的发展史,camunda 其实也算是 Activiti 的分支,当前 几个比较好用的工作流引擎的关系,其实也可以另起一篇文章,这里不再多说,大家可以搜搜别人的文章,比如:
Camunda/Flowable/Activiti技术发展史:https://blog.csdn.net/qq_30739519/article/details/86583765
开源流程引擎哪个好,如何选型?:https://zhuanlan.zhihu.com/p/369761832
好了这里回归正题,当时我再学习Activiti的时候,其实可以用一个代码生成自带的数据库的,但是camunda 不行(我应该是没找到正确的方法),后来也是借鉴了前人的经验:
可以看这篇:
Camunda Platform社区版 - 如何配置和使用mysql数据库【转载】:https://blog.csdn.net/luo15242208310/article/details/122382564
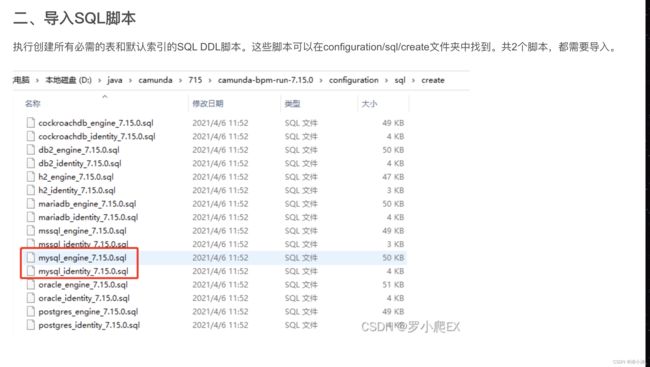
从这里可以看到,我们可以直接从camunda-bpm-run.7.15.0中找出对应的数据库的脚本.
camunda-bpm-run.7.15.0 怎么下载 大家可以去看我的这篇文章:
Camunda实战练习:Camunda 简单下载,安装,搭建(一):https://blog.csdn.net/liuying1802028915/article/details/124589053
9.我们找到了 这里的建表sql,因为我这里安装的是 camunda-bpm-run.7.17.0 的版本 7.15.0版本的方法,一样,所以这里拿出这两个sql文件直接运行:
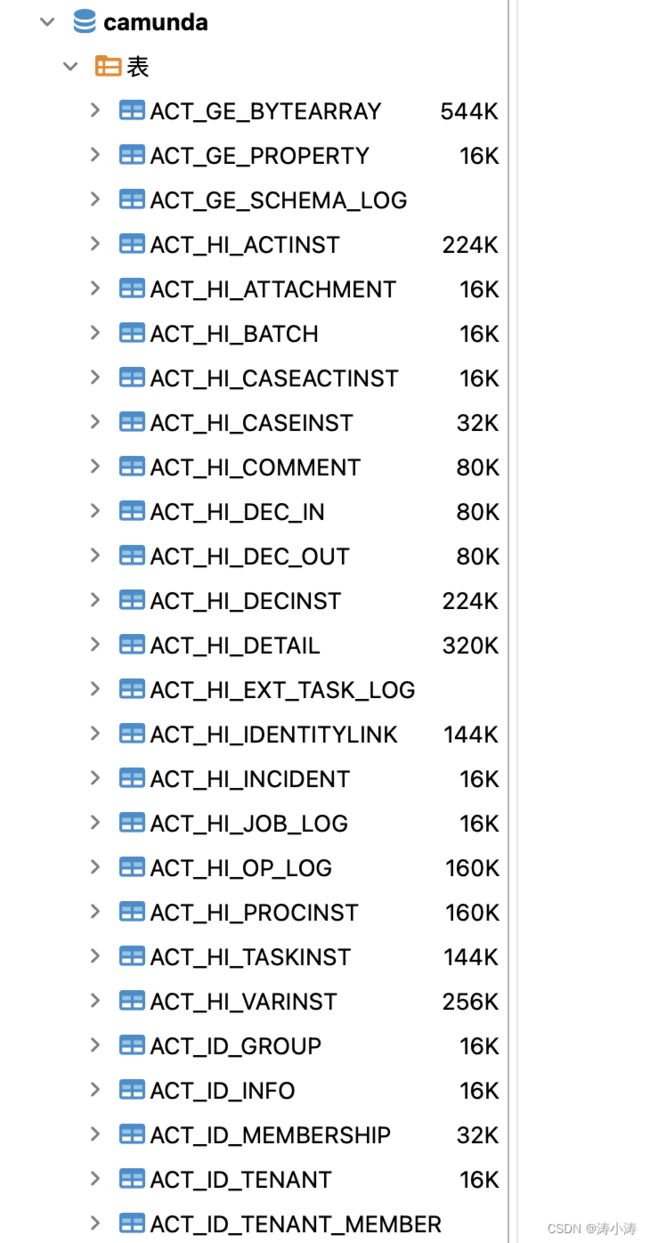
如图所示就会生成响应的49张表,至于这49张表的介绍,网上一大推,这里不再赘述。好了,现在camunda 的数据库已经建好,接下来,就是修改配置:
修改前:
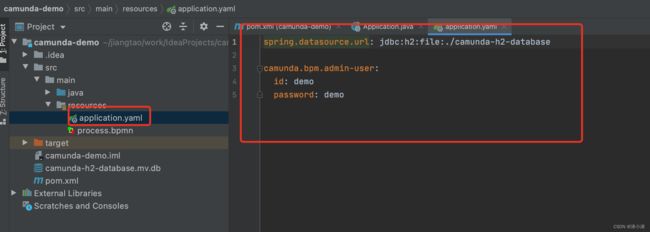
10 由此可见用的是H2的数据库,我们现在直接换成mysql的数据库:
spring:
  application:
    name: my-project
  jackson:
    #设置返回前端的参数为驼峰的转换形式
    property-naming-strategy: SNAKE_CASE
    #日期格式化
    date-format: yyyy-MM-dd HH:mm:ss
    time-zone: GMT+8
  #数据源配置
  datasource:
    url: jdbc:mysql://127.0.0.1:3306/camunda?serverTimezone=Asia/Shanghai
    driver-class-name: com.mysql.cj.jdbc.Driver
    username: root
    password: (这里是数据库的密码)

mybatis:
  configuration:
    map-underscore-to-camel-case: true
    log-impl: org.apache.ibatis.logging.stdout.StdOutImpl

camunda:
  bpm:
    #配置账户密码来访问Camunda自带的管理界面
    admin-user:
      id: admin
      password: 11111111
      first-name: admin
    filter:
      create: All tasks
    #指定数据库类型
    database:
      type: mysql
      schema-update: true
    #禁止自动部署resources下面的bpmn文件
    auto-deployment-enabled: true
    #禁止index跳转到Camunda自带的管理界面,默认true
#    webapp:
#      index-redirect-enabled: false
11 然后启动项目,这里我们用了一个 用户 admin/11111111
之后的情形就一样了,接下来就可以使用这个demo项目进行camunda的开发了。
