SpringBoot集成neo4j实战
文章目录
- 1.图数据库Neo4j介绍
-
- 1.1 什么是图数据库(graph database)
- 1.2 为什么需要图数据库
- 1.3 Neo4j特点和优势
-
- Neo4j的特点
- Neo4j的优点
- 1.4 Neo4j - 数据模型
- 2.安装Neo4j
- 3.Neo4j常用sql语句
- 4.SpringBoot集成neo4j
-
- 4.1 添加依赖
- 4.2 在application.properties中配置连接信息
- 5.实战
-
- 5.1 新增实体类
- 5.2 新建持久化类(PersonRepository)
- 5.3 测试
-
- 新增
- 删除
- 修改
- 查询
- 建立联系
1.图数据库Neo4j介绍
图形数据库也被称为图形数据库管理系统(GDBMS),现发展比较成熟的图数据库有Neo4j、OracleNoSQL、OrientDB、HypherGraphDB和GraphBase等。
1.1 什么是图数据库(graph database)
随着社交、电商、金融、零售、物联网等行业的快速发展。现实社会织起了了一张庞大而复杂的关系网,传统数据库很难处理关系运算。大数据行业需要处理的数据之间的关系随数据量呈几何级数增长,急需一种支持海量复杂数据关系运算的数据库,图数据库应运而生。
世界上很多著名的公司都在使用图数据库,比如:
- 社交额域:Facebook, Twitter,Linkedin用它来管理社交关系。实现好友推荐。
- 零售领域:eBay,沃尔玛使用它实现商品实时推荐。给买家更好的购物体验。全融领域:摩根大通。花旗和瑞银等银行在用图数据库做风控处理。
- 汽车制造领域:沃尔沃,戴姆勒和丰田等顶极汽车制造商依靠图数据库推动创新制造解决方案。
- 电信额域:Veriz2数据库来管理网络。控制访问井支持客户360。
- 酒店领域:万豪和雅高酒店等顶级酒店公司依使用图数据库来管理复杂且快速变化的库存图数据库并非指存储图片的数据库。而是以图数据结构存储和查询数据。
图数据库是基于图论实现的一种NoSQL数据库,其数据存储结构和数据查询方式都是以图论为基础的,图数据库主要用于存储更多的连接数据。
1.2 为什么需要图数据库
随着技术的发展,我们对数据的需求已经不再局限于对数据本身的获取了,我们还需要获取数据与数据间的关系(也就是连接数据)。
简单地说,我们可以说图数据库主要用于存储更多的连接数据(因为图结构相比其他数据结构而言,能保存更多的数据间的关系)。
如果我们使用 RDBMS 数据库来存储更多连接的数据,那么它们不能提供用于遍历大量数据的适当性能。 在这些情况下,Graph Database 提高了应用程序性能。
1.3 Neo4j特点和优势
Neo4j的特点
- SQL就像简单的查询语言Neo4j CQL
- 它遵循属性图数据模型
- 它通过使用Apache Lucence支持索引
- 它支持UNIQUE约束
- 它包含一个用于执行CQL命令的UI:Neo4j数据浏览器
- 它支持完整的ACID(原子性,一致性,隔离性和持久性)规则
- 它采用原生图形库与本地GPE(图形处理引擎)
- 它支持查询的数据导出到JSON和XLS格式
- 它提供了REST API,可以被任何编程语言(如Java,Spring,Scala等)访问
- 它提供了可以通过任何UI MVC框架(如Node JS)访问的Java脚本
- 它支持两种Java API:Cypher API和Native Java API来开发Java应用程序
Neo4j的优点
- 它很容易表示连接的数据
- 检索/遍历/导航更多的连接数据是非常容易和快速的
- 它非常容易地表示半结构化数据
- Neo4j CQL查询语言命令是人性化的可读格式,非常容易学习
- 使用简单而强大的数据模型
- 它不需要复杂的连接来检索连接的/相关的数据,因为它很容易检索它的相邻节点或关系细节没有连接或索引
1.4 Neo4j - 数据模型
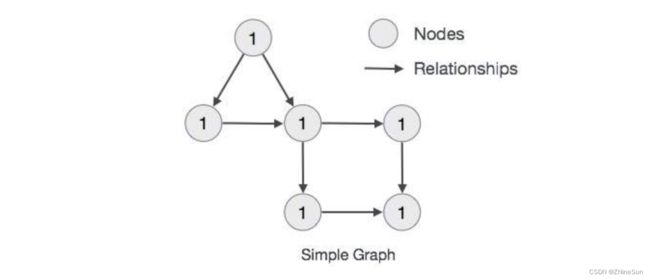
Neo4j图数据库遵循属性图模型来存储和管理其数据。
图形数据库数据模型的主要构建块是:
- 节点
- 关系
- 属性
2.安装Neo4j
- windows安装
- docker安装
3.Neo4j常用sql语句
我简单的罗列一下吧,更多操作,可以参考《Neo4j-w3School》
【增】
# 【增】创建一个标签为Person的节点,节点有一个name属性,属性值为'John'
CREATE (n:Person{name:'John'}) RETURN n
#【增】创建了LIKES关系类型,学生->老师,   新节点+新关系+无属性关系
# 如果已经存在LIKES该关系类型已经存在,不会产生新的关系,但是会新建两个空节点(学生节点和老师节点)
CREATE (n:Student)-[relationship:LIKES]->(m:Teacher)
RETURN LIKES
# 向现有结点添加关系
match (n:Student),(m:Teacher)
where n.name='王二' and m.name='张三' //增加限制,可不加
create (n)-[r:likes]->(m)
return n,r,m
其中关系类型为:likes
【删】
#【删】删除姓名为王二的结点
MATCH (n:Person{name:'王二'}) delete n;
# 如果n有关联结点,就无法删除,如果你非要删除,可以使用强制删除
MATCH (n:Person{name:'王二'}) detach  delete n;

#【删】删除所有王二节点的相关关系
MATCH (n:Person{name:'王二'})-[r]-()
DELETE r
#【删】删除节点的所有的向外关系
MATCH (n:Person{name:'王二'})-[r]->()
DELETE r
#【删】删除节点的所有向内关系
MATCH ()-[r]->(n:Person{name:'王二'})
DELETE r
#【删】删除王二节点的所有的LIKES类型的关系
MATCH (n:Person{name:'王二'})-[r:LIKES]-()
DELETE r
#【删】删除王二的地址字段
MATCH (n:Person{name:'王二'})
REMOVE n.address
#【删】删除所有节点和关系
MATCH (n)
OPTIONAL MATCH (n)-[r]-()
DELETE n,r
【改】
#修改节点属性
#【改】修改王二的名字
MATCH (n:Person{name:'王二'})
SET n.name='王八'
#修改节点的标签
#【改】修改王二的Person标签改为Animal
MATCH (n:Person{name:'王二'})
REMOVE n:Person
SET n:Animal
# 修改关系的类型
#【改】修改王二学生对张三老师的LIKES为HATES
MATCH (n:Person)-[r:LIKES]-(m:老师)
WHERE n.姓名='王二' and m.姓名='张三'
CREATE (n)-[r2:HATES]->(m)
DELETE r
【查】
# 查找节点及相关信息
# 查找姓名为王二的学生
match (n:Student) where n.姓名='王二' return n
#查询"王二"节点的所有标签
MATCH (a:Student) where a.姓名='王二' RETURN labels(a)
# 获取“王二”节点的所有属性值
MATCH (a:Student) where a.姓名='王二' RETURN properties(a)
# 获取“王二”节点的所有属性键
MATCH (a:Student) where a.姓名='王二' RETURN keys(a)
# 查找王二所有有关系的老师的姓名
MATCH (n:Student { 姓名 : '王二' })-->(m:老师)
RETURN m.姓名
# 查找王二所有喜欢的老师的姓名
MATCH (n:学生 { 姓名 : '张三' })-[r:LIKES]->(m:老师)
RETURN m.姓名
# 查询王二喜欢或不喜欢的老师的姓名
MATCH (n:学生 { 姓名 : '张三' })-[r:LIKES|DISLIKES]->(m:老师)
RETURN m.姓名
注意:?{}修饰和where子句修饰是一个意思,只是两种表示形式的问题
# 查找关系
#获取节点间关系
//查询王二和张三老师间的关系类型 (LIKES)
match(a) where a.姓名='张三' match(b) where b.姓名='王二' match p=(a)-[r]->(b) return type(r)
# 查找关系的所有属性值
//获取“王二”节点的所有属性值 (程度:非常喜欢)
match(a) where a.姓名='张三' match(b) where b.姓名='王二' match p=(a)-[r]->(b) return properties(r)
# 查找节点下的所有属性键
//获取“王二”节点的所有属性键 (程度)
match(a) where a.姓名='张三' match(b) where b.姓名='王二' match p=(a)-[r]->(b) return keys(r)
我上面简单的罗列了一些常用的增删改查操作,想要深入了解,建议自己先去学习一下。
4.SpringBoot集成neo4j
4.1 添加依赖
            org.springframework.boot
            spring-boot-starter-data-neo4j


            org.projectlombok
            lombok
4.2 在application.properties中配置连接信息
#集成neo4j
##配置地址
spring.data.neo4j.uri=bolt://192.168.1.2:7687
## 账号
spring.data.neo4j.username=neo4j
## 密码
spring.data.neo4j.password=123456
下面我们通过创建两个节点,建立节点之间的联系,然后修改节点的标签以及属性值,删除等操作来带大家看看我们的项目里是如何操作图数据库的。
5.实战
5.1 新增实体类
import lombok.Data;
import org.neo4j.ogm.annotation.GeneratedValue;
import org.neo4j.ogm.annotation.Id;
import org.neo4j.ogm.annotation.NodeEntity;
import org.neo4j.ogm.annotation.Property;

import java.io.Serializable;

@Data
@NodeEntity("Person")
public class Person implements Serializable {
    @Id
    @GeneratedValue //设置主键自增
    private Long id;
    @Property
    private String name;

    public Person(String name) {
        this.name = name;
    }
}
我来解释一下上面的注解:
- @Node表示会创建一个标签,标签名称为Person
5.2 新建持久化类(PersonRepository)
这个类就是我们的dao层,也就是我们和数据库交互的地方
import com.example.neo4j.po.Person;
import org.springframework.data.neo4j.annotation.Query;
import org.springframework.data.neo4j.repository.Neo4jRepository;
import org.springframework.stereotype.Repository;

@Repository
public interface PersonRepository extends Neo4jRepository {

}
5.3 测试
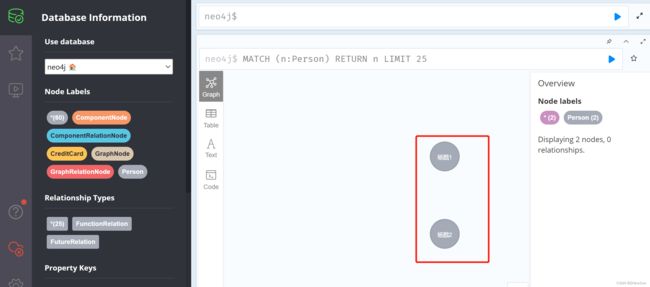
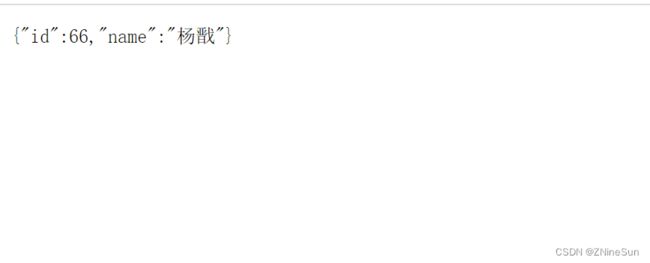
下面我们去实际新增一个结点试一下
新增
@RestController
@Slf4j
public class PersonController {
    @Autowired
    PersonRepository personRepository;

    @GetMapping("createNode")
    public Object createNode(@RequestParam(value = "nodeName") String nodeName) {
        Person person=new Person(nodeName);
        return personRepository.save(person);

    }
}
接下来试试删除
删除
   @GetMapping("deleteNodeById")
    public Object deleteNodeById(@RequestParam(value = "nodeId") Long nodeId) {
        personRepository.deleteById(nodeId);
        return "删除成功";
    }
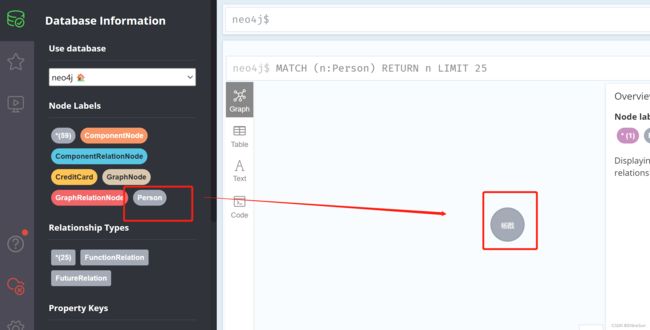
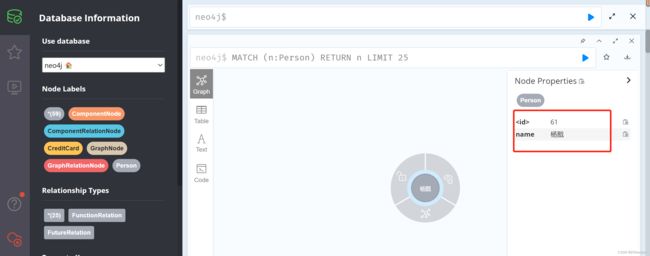
这是通过id删除,id来自于哪儿呢,我们在数据库里就可以看到
当然,我们也可以通过name去删除,不过呢需要我们自己去写sql
import com.example.neo4j.po.Person;
import org.springframework.data.neo4j.annotation.Query;
import org.springframework.data.neo4j.repository.Neo4jRepository;
import org.springframework.stereotype.Repository;

@Repository
public interface PersonRepository extends Neo4jRepository {
    @Query(value = "MATCH (n:Person {name:$name}) delete n")
    public void deleteByName(String name);

}


    @GetMapping("deleteNodeByName")
    public Object deleteNodeByName(@RequestParam(value = "name") String name) {
        personRepository.deleteByName(name);
        return "删除成功";
    }
自己可以新增几个结点然后测试一下,我就不再截图演示了。
修改
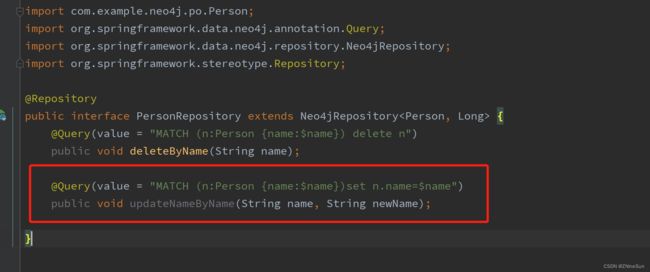
在PersonRepository新增方法:
@Query(value = "MATCH (n:Person {name:$name})set n.name=$newName")
    public void updateNameByName(String name, String newName);
    @GetMapping("updateNodeByName")
    public Object updateNode(@RequestParam(value = "newName") String newName,
                             @RequestParam(value = "name") String name) {
        personRepository.updateNameByName(name, newName);
        return "编辑成功";
    }
我们接下来就是需要将杨戬1改为杨戬
测试地址:http://localhost:8080/updateNodeByNamenewName=杨戬1&name=杨戬
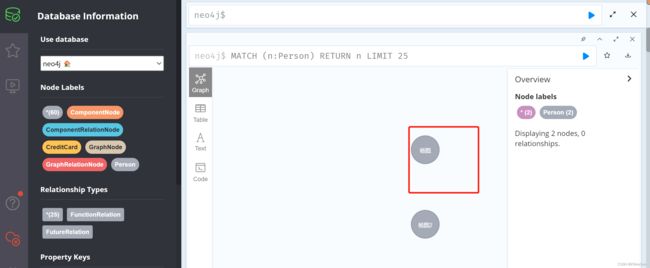
可以看到杨戬1已经改成杨戬了
查询
    @GetMapping("getById")
    public Object getById(@RequestParam(value = "id") Long id) {
        Optional person = personRepository.findById(id);
        Person person1=person.orElse(null);

        return person1;
    }
当然还有更复杂的查询操作,我们可以通过CQL进行编写,本文只是入门带大家简单了解一下,所以就不在深入去写
我们目前在数据库里看到的是孤零零的点,我们接下来就需要给这些点之间创建联系。
建立联系
我们还是以杨戬为例,我们在创建一个结点:玉鼎真人,同时和杨戬建立师徒关系
1.创建关系结点(PersonRelationShip)
import lombok.Data;
import org.neo4j.ogm.annotation.*;
import java.io.Serializable;

@Data
@RelationshipEntity(type = "PersonRelationShip")
public class PersonRelationShip implements Serializable {
    @Id
    @GeneratedValue //设置主键自增
    private Long id;
    @StartNode
    private Person parent;
    @EndNode
    private Person child;
    @Property
    private String relation;

    public PersonRelationShip(String name) {
        this.name = name;
    }
}
由parent->child
2.创建关系类型(PersonRelationShipRepository)
import com.example.neo4j.po.PersonRelationShip;
import org.springframework.data.neo4j.repository.Neo4jRepository;
import org.springframework.stereotype.Repository;

@Repository
public interface PersonRelationShipRepository extends Neo4jRepository {

}
3.测试
package com.example.neo4j.controller;

import com.example.neo4j.po.Person;
import com.example.neo4j.po.PersonRelationShip;
import com.example.neo4j.repository.PersonRelationShipRepository;
import com.example.neo4j.repository.PersonRepository;
import lombok.extern.slf4j.Slf4j;
import org.springframework.beans.factory.annotation.Autowired;
import org.springframework.web.bind.annotation.GetMapping;
import org.springframework.web.bind.annotation.RequestParam;
import org.springframework.web.bind.annotation.RestController;

import java.util.Optional;

@RestController
@Slf4j
public class PersonController {
    @Autowired
    PersonRepository personRepository;
    @Autowired
    PersonRelationShipRepository personRelationShipRepository;
    @GetMapping("createRalation")
    public Object createRalation() {
        Person person1 = new Person("杨戬");
        Person person2 = new Person("玉鼎真人");
        personRepository.save(person1);
        personRepository.save(person2);
        PersonRelationShip personRelationShip = new PersonRelationShip(person1, person2, "师徒");
        return personRelationShipRepository.save(personRelationShip);
    }
}
这种方式只能在创建新节点的时候才能建立联系,接下来我们通过sql来对已有的结点创建联系
我们在创建一个结点:玉皇大帝,然后和杨戬建立舅舅关系
我们在PersonRepository中新增一个方法
import com.example.neo4j.po.PersonRelationShip;
import org.springframework.data.neo4j.annotation.Query;
import org.springframework.data.neo4j.repository.Neo4jRepository;
import org.springframework.stereotype.Repository;

@Repository
public interface PersonRepository extends Neo4jRepository {
@Query("MATCH (a:Person{name:$from})" +
            "MATCH (b:Person{name:$to}) " +
            "CREATE (a) - [r:西游人物关系{relation:$relation}] -> (b)")
    void relevance(String from, String relation, String to);

}


    @GetMapping("createRalationExit")
    public Object createRalationExit(@RequestParam(value = "from") String from,
                                     @RequestParam(value = "relation") String relation,
                                     @RequestParam(value = "to") String to) {
        personRepository.relevance(from, relation, to);
        return "关系建立成功";
    }
访问:http://localhost:8080/createRalationExitfrom=杨戬&to=玉皇大帝&relation=舅舅
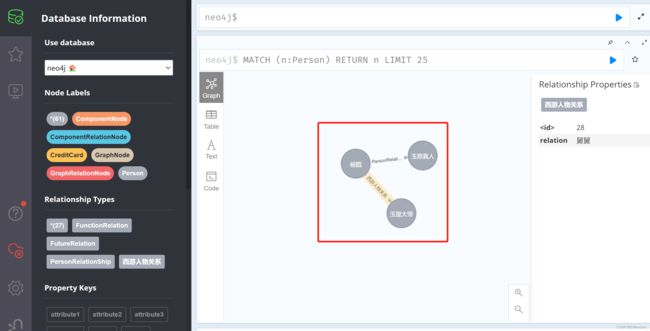
可以看到关系已经建立成功
相信你读到此处已经有所收获,欢迎在下方评论区讨论。
先自我介绍一下,小编13年上师交大毕业,曾经在小公司待过,去过华为OPPO等大厂,18年进入阿里,直到现在。深知大多数初中级java工程师,想要升技能,往往是需要自己摸索成长或是报班学习,但对于培训机构动则近万元的学费,着实压力不小。自己不成体系的自学效率很低又漫长,而且容易碰到天花板技术停止不前。因此我收集了一份《java开发全套学习资料》送给大家,初衷也很简单,就是希望帮助到想自学又不知道该从何学起的朋友,同时减轻大家的负担。添加下方名片,即可获取全套学习资料哦
