微信小程序插件开发
小程序插件
插件是对一组 js 接口、自定义组件 或页面的封装,用于嵌入到小程序中使用。插件不能独立运行,必须嵌入在其他小程序中才能被用户使用;而第三方小程序在使用插件时,也无法看到插件的代码。因此,插件适合用来封装自己的功能或服务,提供给第三方小程序进行展示和使用。
本文以支付插件为例,教你从0开发一个属于自己的插件。
开发前准备
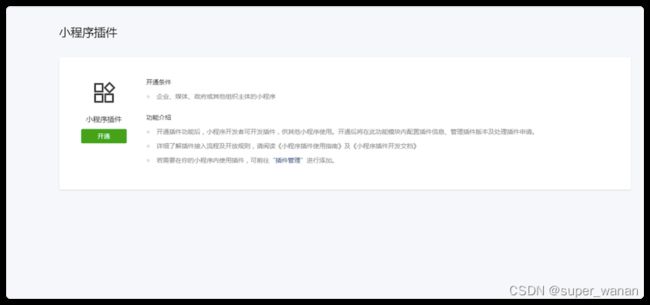
1. 申请开通插件功能
开通入口: 小程序管理后台 -> 功能 -> 小程序插件
填写插件基本信息
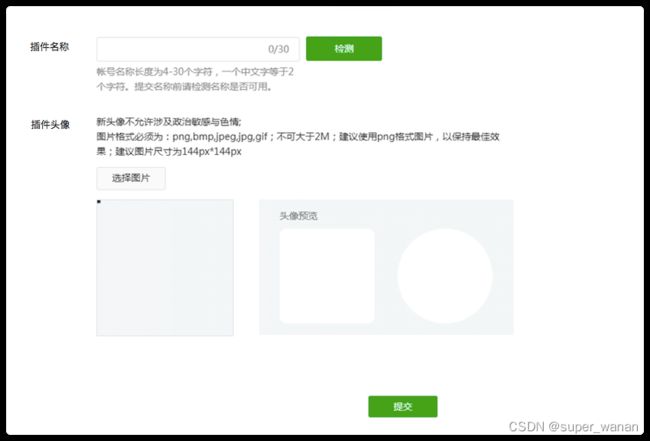
2. 设置插件基本信息
基本设置页面
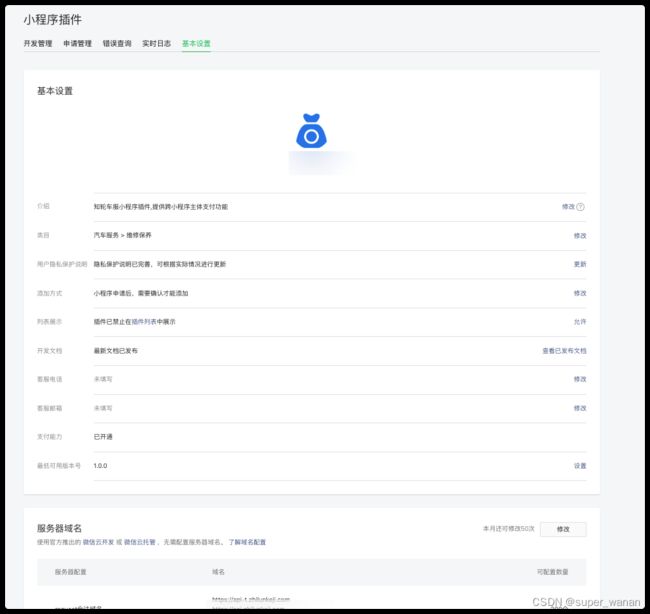
另外需要注意,我们开发的是支付插件,所以在基本设置的地方,我们要申请开通支付能力。
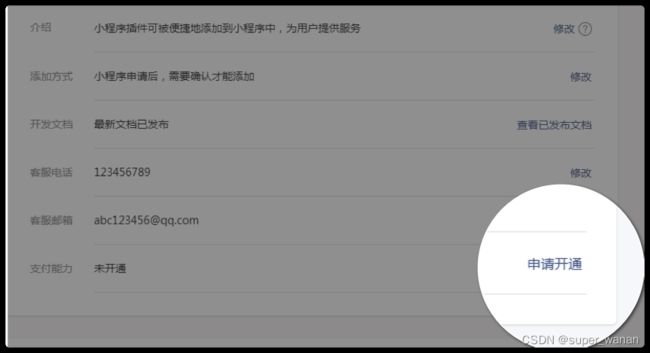
申请开通支付能力审核略严格,做好被拒的准备,修改措辞继续申请,总会过的。
开发插件
1. 创建插件项目
用维信开发者工具创建一个新项目,开发模式选择插件。宿主AppId就是你的小程序的AppID,可在小程序管理后台 -> 设置 -> 基本设置 -> 账号信息中查看,也可以在你的小程序项目中的project.config.json中查看。插件AppId与宿主AppId一致(这里官方文档写的很迷惑,其实填一样的就行)
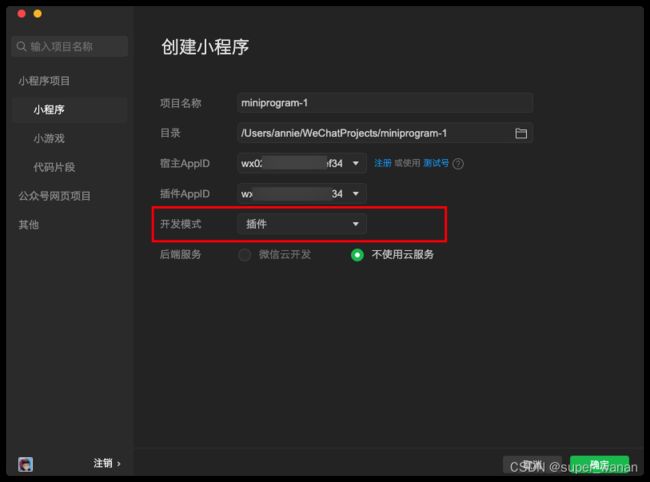
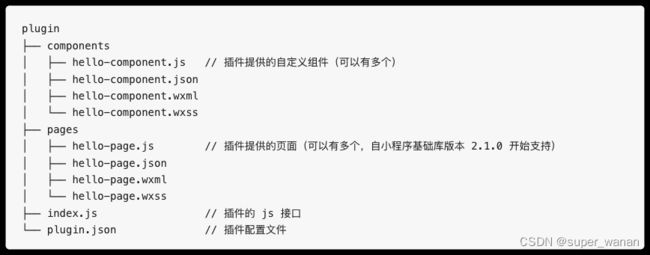
插件项目创建好后,项目中包含三个目录:
- plugin 目录:插件代码目录。
- miniprogram 目录:放置一个小程序,用于调试插件。(仅可用于调试)
- doc 目录:用于放置插件开发文档。
2. 配置插件配置文件
向使用者小程序开放的所有自定义组件、页面和 js 接口都必须在插件配置文件 plugin.json 列出,格式如下:
{
  "publicComponents": {
    "hello-component": "components/hello-component"
  },
  "pages": {
    "hello-page": "pages/hello-page"
  },
  "main": "index.js"
}
这个配置文件将向使用者小程序开放一个自定义组件 hello-component,一个页面 hello-page 和 index.js 下导出的所有 js 接口。
3. 插件开发
在插件开发中,只有 部分接口 可以直接调用;另外还有部分能力(如 获取用户信息 和 发起支付 等)可以通过 插件功能页 的方式使用。我们的支付功能就要配合插件功能页。
3.1 插件项目代码
- 在plugin目录下,修改plugin.json中声明:
{
    "publicComponents": {
        "zl-pay": "components/pay/index"
    },
    "main": "index.js"
}
- components文件夹下新增pay文件夹,在该文件夹下创建index.js, index.json, index.wxml, index.wxss四个文件。
// index.wxml
<view class="g-box">
  <view class="g-header">
      <view class="g-payable">
        <text class="g-paySign">¥text>{{intPart}}<text class="g-small-span">.{{dotPart}}text>
        <view class="ordersn">订单商品: XXXXview>
        <view class="ordersn">订单编号: {{orderSn}}view>
      view>
  view>
  <view class="g-confirm" bindtap='handlePay'>确认支付view>
view>
// plugin/components/pay/index.js
Component({
  /**
   * 组件的属性列表
   */
  properties: {
    payAmount: {
      type: Number,
      value: 0,
      observer(newVal) {
        const intPart = +newVal.toFixed(2).toString().split(".")[0]
        const dotPart = +newVal.toFixed(2).toString().split(".")[1]
        this.setData({intPart, dotPart})
      }
    },
    orderId: {
      type: Number,
      value: null
    },
    orderSn: {
      type: String,
      value: ''
    },
    tokenType: {
      type: String,
      value: null
    },
    accessToken: {
      type: String,
      value: null
    }
  },

  /**
   * 组件的初始数据
   */
  data: {
    fee: 0,             // 支付金额,单位为分
    currencyType: 'CNY', // 货币符号,页面显示货币简写 ¥
    version: 'develop', // 测试环境'develop' 上线时,version 应改为 "release",并确保插件所有者小程序已经发布
  },

  /**
   * 组件的方法列表
   */
  methods: {
    handlePay() {
    // 这里是调支付需要的参数,可通过插件调用者传进来。视自身情况而写
      const { payAmount, currencyType, version, orderId, orderSn, tokenType, accessToken, orderType } = this.data
      wx.requestPluginPayment({
          fee: payAmount * 100,  // *100是以为fee的单位是分
          paymentArgs: {payAmount, orderId, orderSn, tokenType, accessToken, orderType},
          currencyType,
          version,
          success: (r) => {
              this.triggerEvent('success', r)
          },
          fail: (e) => {
              this.triggerEvent('error', e)
          }
      })
    }
  }
})
剩下两个是样式文件和插件配置文件,就不写出了。
另外需要注意如果你有用到一些图片等静态资源,需要将该部分放到plugin目录下,而不是根目录下。
3.2 宿主项目代码
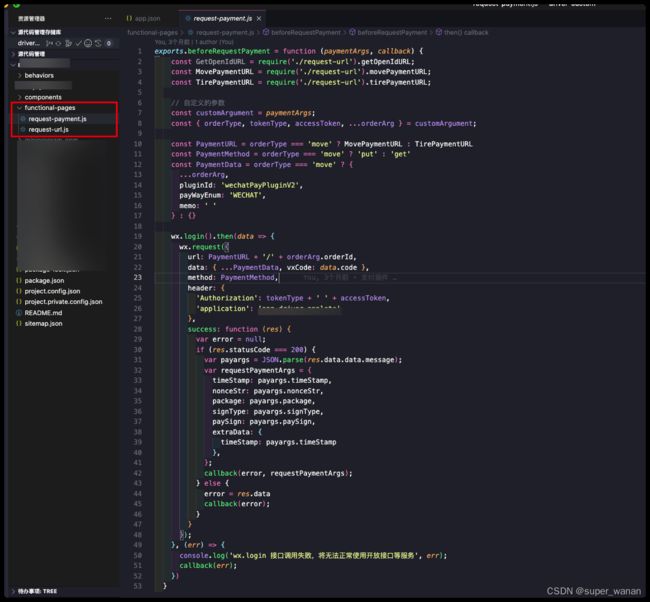
支付插件需要配置功能页函数,这部分是在宿主小程序中完成的:
注意:功能页函数不应 require 其他非 functional-pages 目录中的文件,其他非 functional-pages 目录中的文件也不应 require 这个目录中的文件。这样的 require 调用在未来将不被支持。
 "functionalPages": {
     "independent": true
 },
这样我们就完成了插件的开发工作
4. 插件调试
本地调试可以在插件小程序的miniprogram引用插件(使用者使用也是同样的步骤),并测试:
- 要在 app.json 中声明需要使用的插件
{
  "pages": [
    "pages/index/index"
  ],
  "plugins": {
    "hello-plugin": {
      "version": "dev",
      "provider": "wx*********34"
    }
  },
  "sitemapLocation": "sitemap.json"
}
plugins 定义段中可以包含多个插件声明,每个插件声明以一个使用者自定义的插件引用名作为标识,并指明插件的 appid 和需要使用的版本号。
- 在使用插件的页面的json文件中引入插件。这里是//miniprogram/pages/index.json
// miniprogram/pages/index/index.json
{
    "usingComponents": {
        "zl-pay": "plugin://hello-plugin/zl-pay"
    }
}
- 在页面中使用插件
<zl-pay
	bindsuccess="onSuccess"
	binderror="onError"
	payAmount="{{payAmount}}"
	orderId='{{orderId}}'
	orderSn='{{orderSn}}'
	tokenType='{{tokenType}}'
	accessToken='{{accessToken}}'
	orderType='move'
/>
- 在开发者工具的插件项目中上传插件,此时,在上传成功的通知信息中将包含这次上传获得的插件开发版 ID (一个英文、数字组成的随机字符串);
- 点击开发者工具右下角的通知按钮,可以打开通知栏,看到新生成的 ID ;
- 在需要使用开发版本插件的小程序项目中,将插件 version 设置为 “version”: “dev-[开发版 ID]” 的形式,如 “version”: “dev-abcdef0123456789abcdef0123456789” 即可。
5. 预览、上传和发布
插件可以预览和上传,但插件没有体验版。
插件会同时有多个线上版本,由使用插件的小程序决定具体使用的版本号。
手机预览和提审插件时,会使用一个特殊的小程序来套用项目中 miniprogram 文件夹下的小程序,从而预览插件。
