Ubuntu20下 vscode配置OpenCV 4.5.5
一 安装依赖
sudo apt install -y g++
sudo apt install -y cmake
sudo apt install -y make
二、安装opencv依赖的库
sudo apt-get install build-essential libgtk2.0-dev libgtk-3-dev libavcodec-dev libavformat-dev libjpeg-dev libswscale-dev libtiff5-dev参考下以下opencv依赖库
sudo apt-get install build-essential
sudo apt-get install cmake git libgtk2.0-dev pkg-config libavcodec-dev libavformat-dev libswscale-dev
sudo apt-get install python-dev python-numpy libtbb2 libtbb-dev libjpeg-dev libpng-dev libtiff-dev libjasper-dev libdc1394-22-dev
安装opencv依赖的时候,有可能会出现sbin/ldconfig.real:/usr/local/cuda-11.1/targets/x86_64-linux/lib/libcudnn_ops_infer.so.8 is not a symbolic link 这个问题,请参考Ubuntu20.04中配置opencv依赖时/usr/local/cuda-11.1/targets/x86_64-linux/lib/libcudnn_ops_infer.so.8 is not
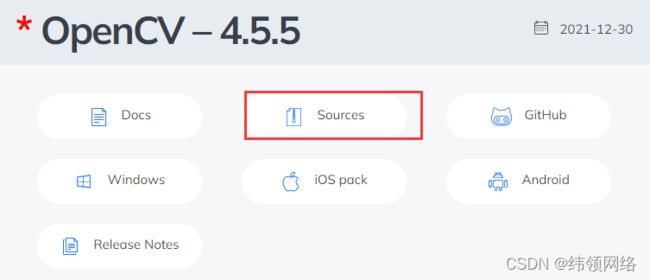
三、下载OpenCV 4.5.5和对应版本的opencv-contrib源文件 ,打开opencv官网 opencv.org
解压放到家目录,进入opencv4.5.5目录里,右击鼠标打开终端 创建目录build ,再执行 cd build
mkdir build
cd build
四、cd build目录,开始编译opencv
(1)不添加扩展库
sudo cmake -D CMAKE_BUILD_TYPE=Release -D OPENCV_GENERATE_PKGCONFIG=YES -D WITH_FFMPEG=ON ..(2)编译添加扩展库
sudo cmake -D CMAKE_INSTALL_PREFIX=/usr/local -D CMAKE_BUILD_TYPE=Release -D OPENCV_EXTRA_MODULES_PATH=../opencv_contrib/modules ..(3)若装过anaconda,可能存在一些 冲突,如果使用上面这条命令出现: recipe for target 'all' failed的报错。只需要改成
sudo cmake -D CMAKE_BUILD_TYPE=RELEASE -D CMAKE_INSTALL_PREFIX=/usr/local -D WITH_TBB=ON -D BUILD_SHARED_LIBS=OFF -D WITH_OPENMP=ON -D ENABLE_PRECOMPILED_HEADERS=OFF ..
-D OPENCV_GENERATE_PKGCONFIG=YES
OpenCV4以上默认不使用pkg-config,该编译选项开启生成opencv4.pc文件,支持pkg-config功能
opencv_contrib全部的版本下载地址:https://github.com/opencv/opencv_contrib/tags
五、编译
sudo make -j8-j8 8指同时使用8个进程,速度快,你也可以根据自己的电脑情况,用-j2 或者-j16
六、安装
sudo make install七、配置pkg-config环境
opencv4.pc文件的默认路径:/usr/local/lib/pkgconfig/opencv4.pc若此目录下没有,可以使用以下命令搜索 sudo find / -iname opencv4.pc
sudo gedit /etc/profile.d/pkgconfig.sh把路径加入到PKG_CONFIG_PATH,在文件中加入下面一行代码
export PKG_CONFIG_PATH=/usr/local/lib/pkgconfig:$PKG_CONFIG_PATH保存并退出,然后source,使生效
source /etc/profile八、验证是否成功
pkg-config --libs opencv4类似以上信息,即表示成功
九、配置动态库环境
sudo vim /etc/ld.so.conf.d/opencv4.conf文件末尾加上OpenCV的lib路径
/usr/local/lib配置生效
sudo ldconfig十、 测试
cd 到/opencv/samples/cpp/example_cmake目录下,执行如下命令
cmake .
make
./opencv_example
十一、vscode里配置
1、安装c/c++扩展, 点击文件,新建一个文件夹,打开文件夹,,新建test.cpp文件,找张图片,写入下列代码
#include

using namespace std;
using namespace cv;

int main(int argc, char* argv[]) {
    const char* imagename = "test.jpg";//此处为你自己的图片路径

    //从文件中读入图像
    Mat img = imread(imagename, 1);

    //如果读入图像失败
    if (img.empty()) {
        fprintf(stderr, "Can not load image %s\n", imagename);
        return -1;
    }
    //显示图像
    imshow("image", img);

    //此函数等待按键,按键盘任意键就返回
    waitKey();
    return 0;
}
2、vscode调试主要就是改那三个json文件,opencv4和以前版本的文件夹不一样,这里给出我适用的三个json文件
tasks.json
{
    "tasks": [
        {
            "type": "cppbuild",
            "label": "C/C++: g++ build active file",  /* 与launch.json文件里的preLaunchTask的内容保持一致 */
            "command": "/usr/bin/g++",
            "args": [
                "-std=c++11",
                "-g",
                //"${file}",   /* 编译单个文件 */
                "${fileDirname}/*.cpp",  /* 编译多个文件 */
                "-o",
                "${fileDirname}/${fileBasenameNoExtension}",  /* 输出文件路径 */

                /* 项目所需的头文件路径 */
                "-I","${workspaceFolder}/",
                "-I","/usr/local/include/",
                "-I","/usr/local/include/opencv4/",
                "-I","/usr/local/include/opencv4/opencv2",

                /* 项目所需的库文件路径 */
                "-L", "/usr/local/lib",

                /* OpenCV的lib库 */
                "/usr/local/lib/libopencv_*",

            ],
            "options": {
                "cwd": "${fileDirname}"
            },
            "problemMatcher": [
                "$gcc"
            ],
            "group": {
                "kind": "build",
                "isDefault": true
            },
            "detail": "Task generated by Debugger."
        }
    ],
    "version": "2.0.0"
}
launch.json
{
    // Use IntelliSense to learn about possible attributes.
    // Hover to view descriptions of existing attributes.
    // For more information, visit: https://go.microsoft.com/fwlink/?linkid=830387
    "version": "0.2.0",
    "configurations": [
        {
            "name": "g++ - Build and debug active file",
            "type": "cppdbg",
            "request": "launch",
            "program": "${fileDirname}/${fileBasenameNoExtension}",  //程序文件路径
            "args": [],  //程序运行需传入的参数
            "stopAtEntry": false,
            "cwd": "${fileDirname}",
            "environment": [],
            "externalConsole": true,   //运行时是否显示控制台窗口
            "MIMode": "gdb",
            "setupCommands": [
                {
                    "description": "Enable pretty-printing for gdb",
                    "text": "-enable-pretty-printing",
                    "ignoreFailures": true
                }
            ],
            "preLaunchTask": "C/C++: g++ build active file",
            "miDebuggerPath": "/usr/bin/gdb"
        }
    ]
}
c_cpp_properties.json
{
    "configurations": [
        {
            "name": "Linux",
            "includePath": [
                "${workspaceFolder}/**",

                "/usr/local/include/opencv4"
            ],
            "defines": [],
            "compilerPath": "/usr/bin/gcc",
            "cStandard": "gnu11",
            "cppStandard": "gnu++14",
            "intelliSenseMode": "linux-gcc-x64"
        }
    ],
    "version": 4
}
然后运行图片出来就OK了,完毕
opencv 4.5编译遇到的问题
1.boostdesc_bgm.i,vgg_generated_48.i等文件的缺失
链接: https://pan.baidu.com/s/13n1G8xcLoR8LEt8yetH9_A 提取码: cv8w
下载后解压了,将文件夹内的文件放入opencv_contrib/modules/xfeatures2d/src/ 路径下即可
2.fatal error: features2d/test/test_detectors_regression.impl.hpp: 没有那个文件或目录
将以下文件(文件不是在opencv\modules\features2d\test\ 里,就是在opencv_contrib-4.5.0\modules\xfeatures2d\test\ 中)放入opencv_contrib-4.5.0\modules\xfeatures2d\test\ 里(在你编译生成的文件夹中的\modules\features2d\中也最好新建个test文件夹,将内容粘贴过去)
test_descriptors_invariance.impl.hpp
test_descriptors_regression.impl.hpp
test_detectors_invariance.impl.hpp
test_detectors_regression.impl.hpp
test_features2d.cpp
test_invariance_utils.hpp
test_rotation_and_scale_invariance.cpp
