opencv-python——基于标志物的道路逆透视变换
文章目录
-
- 实现效果
-
- 原图
- 逆透视转换图
- 标定+逆透视变换
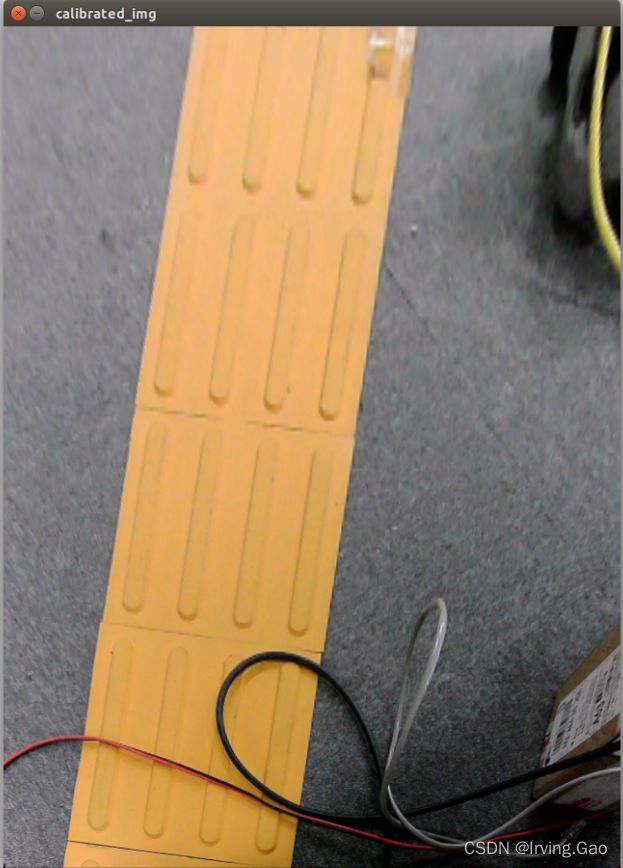
- 实时变换效果
因为在做导盲犬的项目,在做导航的过程中需要将雷达与视觉融合在一起,通过视觉得到目标点相对于自身的距离,所以使用逆透视变换就是最好的方案。
实现效果
先上图看效果:
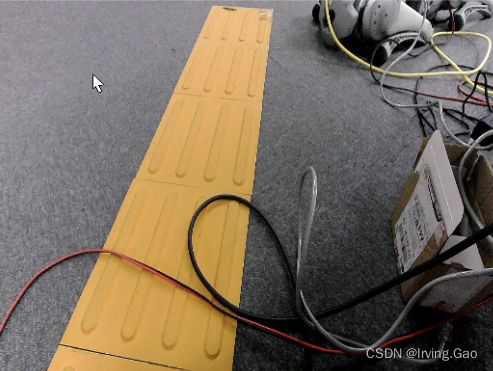
原图
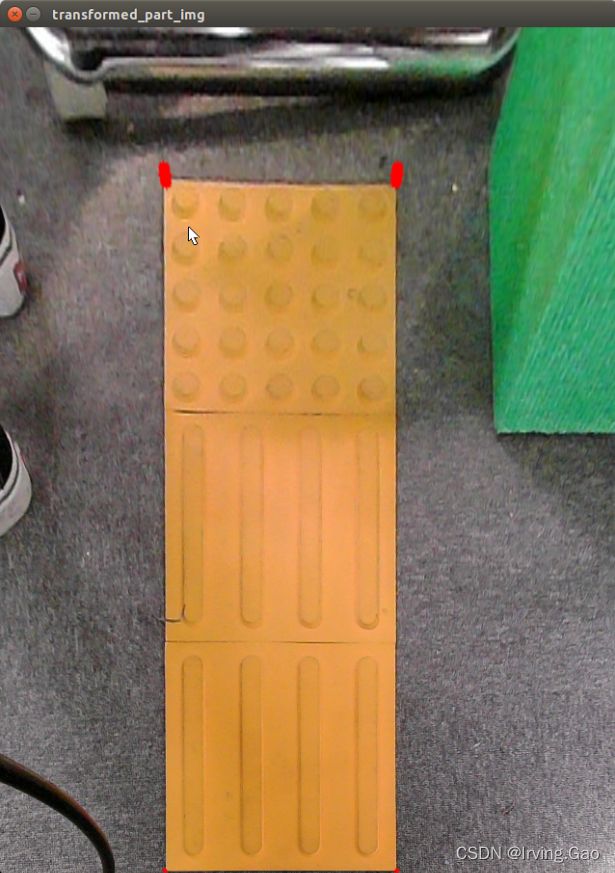
逆透视转换图
这里每个盲道块是25cm,有三个盲道块,经过逆透视变换后我就可以知道图上坐标与真实地面坐标的关系,从而给机器人发送对应的坐标位置,实现视觉的导航。
标定+逆透视变换
'''
Descripttion:
version:
Author: Irving.Gao
Date: 2022-01-11 19:37:42
LastEditors: Irving.Gao
LastEditTime: 2022-01-12 16:00:18
'''
import cv2
import numpy as np
import matplotlib.pyplot as plt

def get_location(img):
    '''
    function: 记录标定物体的坐标位置。get location of standard blind path block, the upper edge and lower edge must parallel to standard image.
    param {img}
    return {None}
    '''
    img[:, :, ::-1] # 是将BGR转化为RGB
    plt.plot()
    plt.imshow(img[:, :, ::-1])
    plt.title('img')
    plt.show()

def get_calibration_params(img, location_corners, block_num=1):
    '''
    function: 将记录的标定物体的坐标位置输入,进行逆透视变换。calibrate standard object and get transform matrix
    param {img, location_corners}
    return {img, transform_matrix}
    '''
    # 标定
    # jpg中正方形标定物的四个角点(左上、右上、左下、右下),与变换后矩阵位置
    standard_loc = np.float32(location_corners)
    for corner in standard_loc:
        cv2.circle(img, (int(corner[0]), int(corner[1])), 5, (0,0,255), -1) # 画出标定点坐标

    l_bot = standard_loc[0]
    r_bot = standard_loc[1]
    l_top = standard_loc[2]
    r_top = standard_loc[3]
    # 标定物最长边
    standard_edge = (r_top[0] - l_top[0])
    center_x = l_top[0] + (r_top[0] - l_top[0])/2
    center_y = l_top[1] + (r_top[1] - l_bot[1])/2

    left = center_x - standard_edge/2
    right = center_x + standard_edge/2
    bot = center_y - standard_edge*block_num/2
    top = center_y + standard_edge*block_num/2
    img_loc = np.float32([[left, bot],[right, bot],[left,top],[right,top]])

    # 生成透视变换矩阵
    transform_matrix = cv2.getPerspectiveTransform(standard_loc, img_loc)

    return img, transform_matrix

def calibration(img, location_corners, block_num=1):
    '''
    function: calibrate the img by transform matrix.
    param {img, location_corners, block_num}
    return {None}
    '''
    img, transform_matrix = get_calibration_params(img, location_corners, block_num)
    # 逆透视变换
    calibrated_img = cv2.warpPerspective(img, transform_matrix, (int(img.shape[1]),int(img.shape[0]*block_num)))
    # 裁剪图片到合适尺寸(该值需要自行根据自己的图像进行测试)
    # get_location(calibrated_img) # 获取尺寸
    calibrated_img = calibrated_img[:1750,:]
    print(calibrated_img.shape)
    print(transform_matrix)
    write_matrix(transform_matrix)
    img = cv2.resize(img, (int(img.shape[1]/2), int(img.shape[0]/2)))
    cv2.imshow("original_img",img)
    cv2.imshow("calibrated_img",cv2.resize(calibrated_img, (int(calibrated_img.shape[1]/4), int(calibrated_img.shape[0]/4))))
    cv2.waitKey(0)
    cv2.destroyAllWindows()

def write_matrix(matrix, save_dir="./"):
    import os
    np.save(os.path.join(save_dir,"transform_matrix.npy"), matrix)

if __name__ == '__main__':
    # 需要哪个注释掉另一个函数即可
    img = cv2.imread('standard.jpg')
    # get_location(img)    # 利用matplotlib记录标定物四点坐标
    calibration(img, location_corners=[[511, 71], [700, 71], [342, 709], [823, 709]], block_num=3)

    transform_matrix = np.load("transform_matrix.npy")
    print("transform_matrix:", transform_matrix)
实时变换效果
分享不易。觉得好就点个赞把~
参考文章:
- python opencv 前视图转化为鸟瞰图
- 利用逆透视变换获取车载图象的鸟瞰图
- 透视变换原理和变换矩阵的python实现


