微信小程序的一些基础入门
微信小程序的一些基础入门
前言
由于微信小程序有开放文档,且算文档里面写的算比较好的,我写这个文档的原因主要是前几天心血来潮想整一个微信小程序来做一个小东西,但是现在的CSDN复制粘贴太过于普遍,且质量十分低下,导致搜索十分浪费时间,十分恶心,所以干脆就自己写一篇文章吧
附参考文档 微信开放平台官方文档
文章目录
-
- 微信小程序的一些基础入门
-
-
- 前言
- app.json-全局配置
- sitemap.json-爬虫协议
-
- 允许爬虫爬取写法
- 不允许的写法
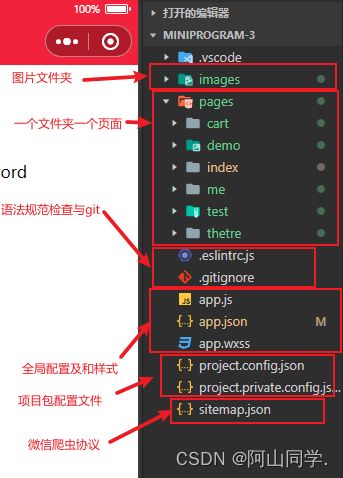
- 微信小程序中各个文件夹作用一览表
- 微信小程序的组件库
-
- 书写示意图
- view-盒子模型
- view样式类
-
-
- hover-class
- hover-start-time
- hover-stay-time
- hover-stop-propagation
- 为什么要写双花括号
-
- Image组件
-
- mode-裁剪属性
-
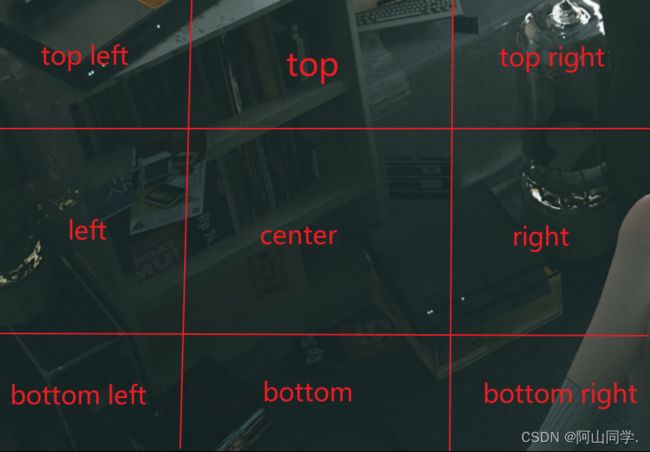
- mode参数对照表
- 使用方式如下
- show-menu-by-longpress-长按是否显示操作菜单
- text组件
-
- text组件使用
- 可控换行
- 奇怪的组件
- navigator -跳转
-
- 跳转的写法
- scroll-view组件
-
- 写法
- 分析
- 轮播图的滚动钩子函数
- input组件
-
- 基本写法
- 测试demo
-
- 显示效果
- input的双向数据绑定
-
- vue中的双向数据绑定
- 小程序的双向数据绑定-简易写法
- 小程序的双向数据绑定-官方推荐写法
- 江湖规矩上代码
- 小程序中的标准双向数据绑定的写法
- wxml中数据同台绑定的基本语法
-
app.json-全局配置
常见app.json里面的内容书写
{
	// 页面:一个文件夹代表一个页面
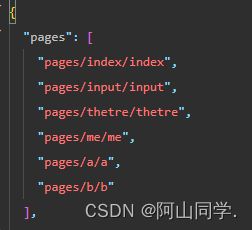
  "pages": [
    "pages/index/index",
    "pages/demo/demo",
    "pages/cart/carts",
    "pages/test/test",
    "pages/thetre/thetre",
    "pages/me/me"
  ],
  // 底部导航
  "tabBar": {
  // 配色
    "color": "#444",
    // 选中颜色
    "selectedColor": "#f03d37",
    // 导航按钮选项
    "list": [{
    // 名称
      "text": "首页",
      // 路径
      "pagePath": "pages/index/index",
      // 没有被激活图标路径
      "iconPath": "/images/index_disable.png",
      // 被激活图标路径
      "selectedIconPath": "/images/index_enable.png"
    }]
  },
    // 主页面的配置
  "window": {
  // 顶部模块的配色
    "backgroundTextStyle": "light",
    // 顶部模块配色
    "navigationBarBackgroundColor": "#f03d37",
    // 是否开启下拉刷新
    "enablePullDownRefresh": true,
    // 标题
    "navigationBarTitleText": "秋信",
    // 字体配色
    "navigationBarTextStyle": "white"
  },
	// 渲染版本
  "style": "v2",
  	// 指明爬虫
  "sitemapLocation": "sitemap.json"
}
sitemap.json-爬虫协议
允许爬虫爬取写法
{
    "desc": "关于本文件的更多信息,请参考文档 https://developers.weixin.qq.com/miniprogram/dev/framework/sitemap.html",
    "rules": [{
    //允许爬虫
    "action": "allow",
    // 位置
    "page": "*"
    }]
}
不允许的写法
{
    "desc": "关于本文件的更多信息,请参考文档 https://developers.weixin.qq.com/miniprogram/dev/framework/sitemap.html",
    "rules": [{
    //允许爬虫
    "action": "allow",
    // 位置
    "page": "*"
    },{
    // 不允许爬虫
    "action": "false",
    // 不允许的位置
    "page": "./xxxx/xxxx"
    }]
}
微信小程序中各个文件夹作用一览表
微信小程序的组件库
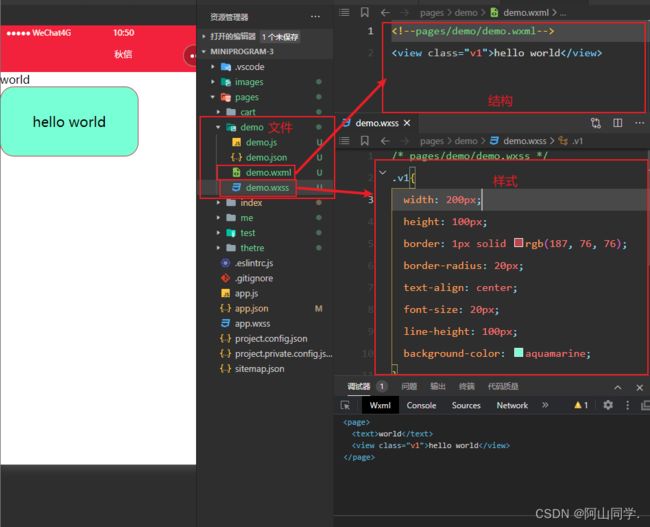
书写示意图
view-盒子模型
view组件用于表示视图容器
<view class="类名" hover-class="定义点击下状态的类名" >view>
其实这个标签相当于html里面的div标签
view样式类
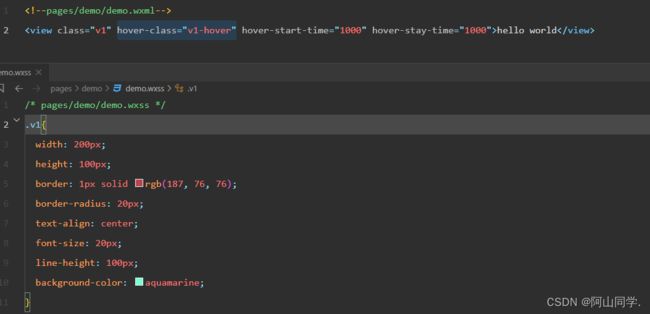
hover-class
点击之后的激活状态
hover-class="v1-hover"
hover-start-time
点击之后多少毫秒之后才有状态
hover-start-time="1000"
hover-stay-time
点击之后持续多久激活样式
hover-stay-time="1000"
hover-stop-propagation
子级点击之后不触发父级的点击态
// 空白代表默认为false
hover-stop-propagation=""
// 如果直接写true,会判定为字符串所以要加上双花括号
hover-stop-propagation="{{true}}"
// 为什么写双花括号后面说
为什么要写双花括号
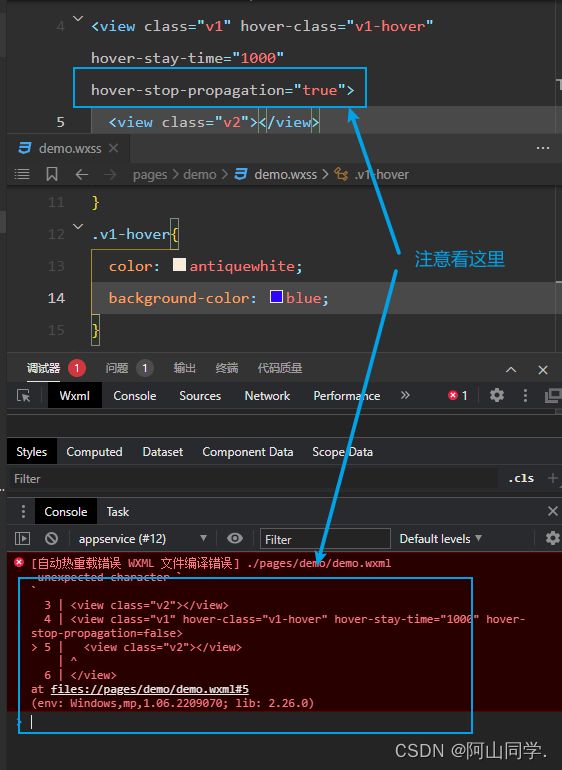
虽然不写双花括号页面上不会有问题,但是会报错,官方推荐写双花括号+属性,为什么写双花括号呢?,因为在框架解析里面写完代码之后框架会进行编译,这里的双花括号和vue框架一样,当这里写上双花括号之后,框架就会把它当作JavaScript代码来处理返回,即里面写上双花括号true即返回js代码里面true属性
Image组件
**其实就相当于html的img标签,只不过小程序的写法不支持但标签,需要闭合
**
<image src="图片路径">image>
其实大家会发现除了标签名不同之外其他的基本上和html差不多,我现在写博客用来制作代码块的语法其实就是用的html的代码块

我们给它加样式也是一样的

那这个东西和img那么像那是不是也像img标签那样支持文件那么广呢?
其实我们把鼠标放在标签上就会显示

mode-裁剪属性
<image src="图片路径" mode="裁剪属性">image>
mode参数对照表
使用方式如下
show-menu-by-longpress-长按是否显示操作菜单
如图所示
// 不写默认为false
show-menu-by-longpress="{{true}}"
text组件
text组件使用
<text>
 文本段落
text>
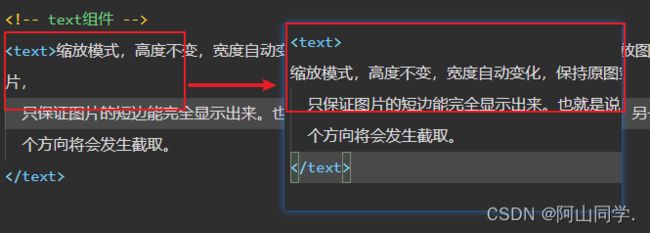
可控换行
<text>
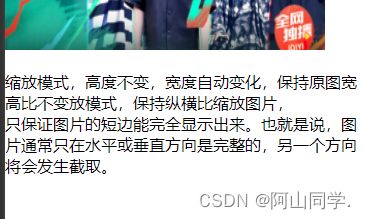
  缩放模式,高度不变,宽度自动变化,保持原图宽高比不变放模式,保持纵横比缩放图片,
  只保证图片的短边能完全显示出来。也就是说,图片通常只在水平或垂直方向是完整的,另一个方向将会发生截取。
text>
奇怪的组件
如下图

普通的基本上就是一大堆css样式了,但是小程序的话要实现的话方法就很离谱
navigator -跳转
跳转的写法
<navigator url="跳转路径" open-type="跳转方式">点我跳转navigator >
open-tape :打开页面的方式主要有以下五种
1.navigate 默认跳转方式:保留跳转。保留当前页,创建目标页,这种方式无法跳转到tabbar页面(在app.json中配置了底部选项卡的页面)。
2.navigateBack 这种方式可以销毁当前页并且返回到上一页,还可以借助于delta属性返回上n页
3.switchTab 这种方式可以跳转到tabbar页面,但是一旦使用这种方式进行跳转,将会销毁所有的非tabbar页面
4.redirect 这种跳转方式:销毁当前页,创建目标页。这种方式也不能跳转到tabbar页面,这种方式无法跳转到tabbar页面(在app.json中配置了底部选项卡的页面)。
5.reLaunch 这种方式代表重新启动小程序
6.exit 退出当前小程序
scroll-view组件
scroll-view 组件用于定义可滚动的视图容器
就相当于给了overflow scroll属性的div盒子
写法
<scroll-view scroll-x="{{true}}" scroll-y="{{true}}">
  ................
  ................
  ................
scroll-view>
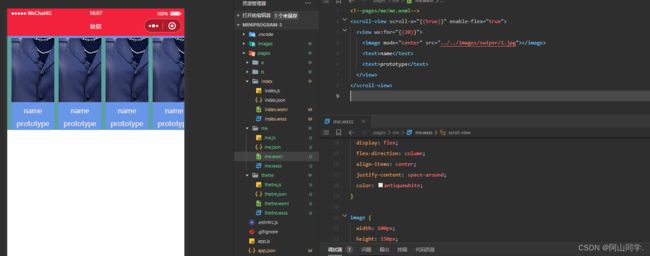
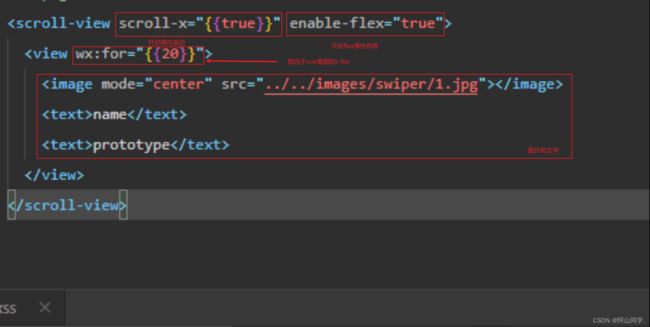
<scroll-view scroll-x="{{true}}" enable-flex="true">
  <view wx:for="{{20}}">
    <image mode="center" src="../../images/swiper/1.jpg">image>
    <text>nametext>
    <text>prototypetext>
  view>
scroll-view>
分析
轮播图的滚动钩子函数
如图所示
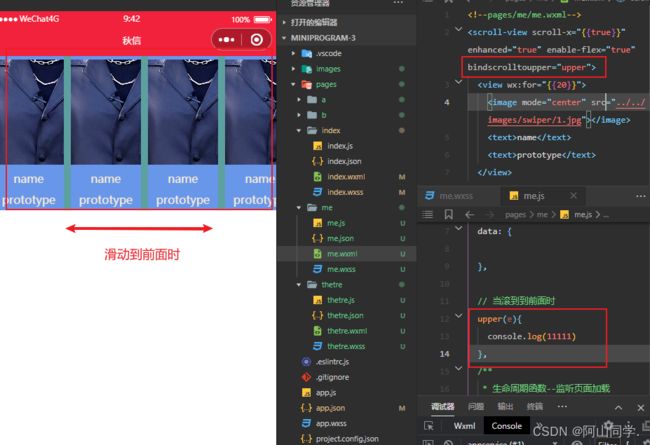
当滑动到前面时就会触发钩子函数
![]()
此外还有其他属性,和钩子函数
参考文档:微信开放平台:scroll-view组件
input组件
基本写法
<input type="text|number|digit|idcard" placeholder="占位文本" password="" 布尔类型是否为密码框 disabled="" 是否禁用 maxlength="" 最大长度 />
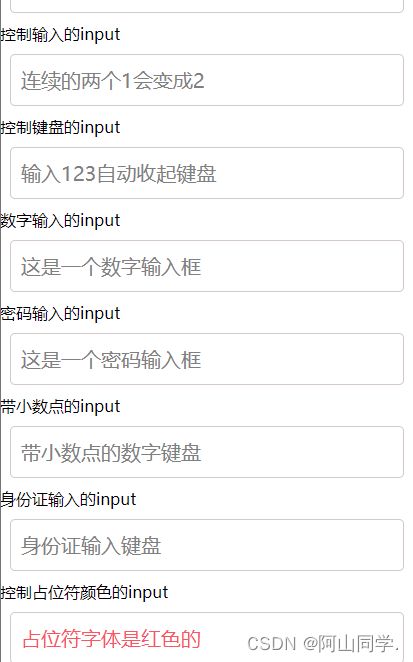
测试demo
创建一个input页面写入如下代码
input.wxml
<view class="page-body">
  <view class="page-section">
    <view class="weui-cells__title">可以自动聚焦的inputview>
    <view class="weui-cells weui-cells_after-title">
      <view class="weui-cell weui-cell_input">
        <input class="weui-input" auto-focus placeholder="将会获取焦点"/>
      view>
    view>
  view>
  <view class="page-section">
    <view class="weui-cells__title">控制最大输入长度的inputview>
    <view class="weui-cells weui-cells_after-title">
      <view class="weui-cell weui-cell_input">
        <input class="weui-input" maxlength="10" placeholder="最大输入长度为10" />
      view>
    view>
  view>
  <view class="page-section">
    <view class="weui-cells__title">实时获取输入值:{{inputValue}}view>
    <view class="weui-cells weui-cells_after-title">
      <view class="weui-cell weui-cell_input">
        <input class="weui-input"  maxlength="10" bindinput="bindKeyInput" placeholder="输入同步到view中"/>
      view>
    view>
  view>
  <view class="page-section">
    <view class="weui-cells__title">控制输入的inputview>
    <view class="weui-cells weui-cells_after-title">
      <view class="weui-cell weui-cell_input">
        <input class="weui-input"  bindinput="bindReplaceInput" placeholder="连续的两个1会变成2" />
      view>
    view>
  view>
  <view class="page-section">
    <view class="weui-cells__title">控制键盘的inputview>
    <view class="weui-cells weui-cells_after-title">
      <view class="weui-cell weui-cell_input">
        <input class="weui-input"  bindinput="bindHideKeyboard" placeholder="输入123自动收起键盘" />
      view>
    view>
  view>
  <view class="page-section">
    <view class="weui-cells__title">数字输入的inputview>
    <view class="weui-cells weui-cells_after-title">
      <view class="weui-cell weui-cell_input">
        <input class="weui-input" type="number" placeholder="这是一个数字输入框" />
      view>
    view>
  view>
  <view class="page-section">
    <view class="weui-cells__title">密码输入的inputview>
    <view class="weui-cells weui-cells_after-title">
      <view class="weui-cell weui-cell_input">
        <input class="weui-input" password type="text" placeholder="这是一个密码输入框" />
      view>
    view>
  view>
  <view class="page-section">
    <view class="weui-cells__title">带小数点的inputview>
    <view class="weui-cells weui-cells_after-title">
      <view class="weui-cell weui-cell_input">
        <input class="weui-input" type="digit" placeholder="带小数点的数字键盘"/>
      view>
    view>
  view>
  <view class="page-section">
    <view class="weui-cells__title">身份证输入的inputview>
    <view class="weui-cells weui-cells_after-title">
      <view class="weui-cell weui-cell_input">
        <input class="weui-input" type="idcard" placeholder="身份证输入键盘" />
      view>
    view>
  view>
  <view class="page-section">
    <view class="weui-cells__title">控制占位符颜色的inputview>
    <view class="weui-cells weui-cells_after-title">
      <view class="weui-cell weui-cell_input">
        <input class="weui-input" placeholder-style="color:#F76260" placeholder="占位符字体是红色的" />
      view>
    view>
  view>
view>
input.js
Page({
  data: {
    focus: false,
    inputValue: ''
  },
  bindKeyInput: function (e) {
    this.setData({
      inputValue: e.detail.value
    })
  },
  bindReplaceInput: function (e) {
    var value = e.detail.value
    var pos = e.detail.cursor
    var left
    if (pos !== -1) {
      // 光标在中间
      left = e.detail.value.slice(0, pos)
      // 计算光标的位置
      pos = left.replace(/11/g, '2').length
    }

    // 直接返回对象,可以对输入进行过滤处理,同时可以控制光标的位置
    return {
      value: value.replace(/11/g, '2'),
      cursor: pos
    }

    // 或者直接返回字符串,光标在最后边
    // return value.replace(/11/g,'2'),
  },
  bindHideKeyboard: function (e) {
    if (e.detail.value === '123') {
      // 收起键盘
      wx.hideKeyboard()
    }
  }
})
显示效果
input的双向数据绑定
vue中的双向数据绑定
当我修改data里面的数据页面上绑定data中name的值也会发生变化,当修改上面的输入框里面的值的时候data里面的数据也会发生变化
<template>
  <div>
    <<input type="text" v-model="name" placeholder="绑定">
  div>
template>

<script>
  export default {
    data() {
      return {
        name: ''
      }
    },
  }
script>

<style lang="scss" scoped>

style>
小程序的双向数据绑定-简易写法
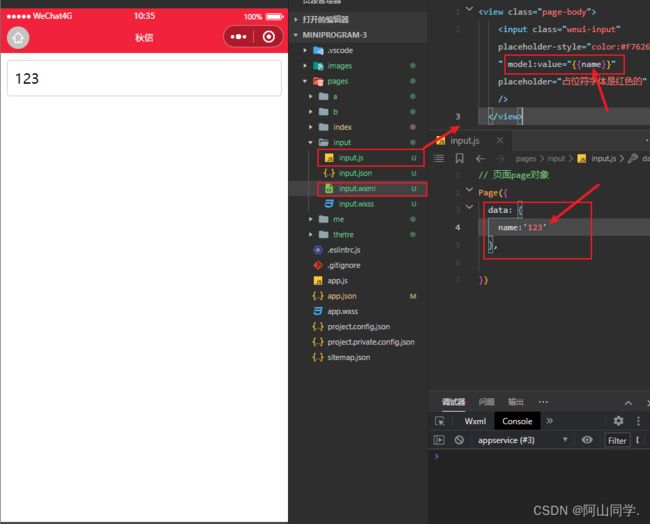
这样虽然完成了绑定,但是我们并看不到所以可以通过输出来看一下
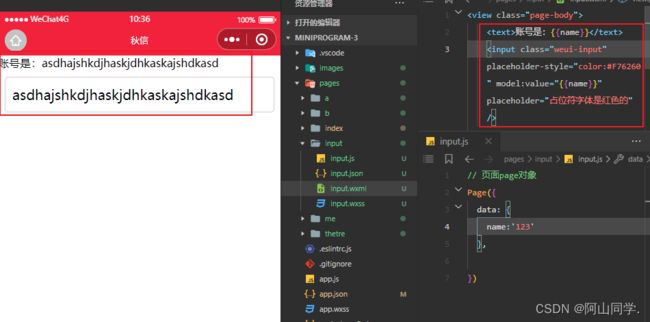
但是我们会发现为什么我输入内容之后会报错呢?
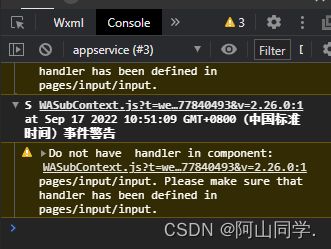
其实早期的小程序框架是没有双向数据绑定的,因为同为mvvm框架,vue的运行在主进程里面,而小程序主打的是性能这里涉及到一些其他的东西过于繁琐所以不细说了
那么小程序要怎么实现双向数据绑定呢?
小程序的双向数据绑定-官方推荐写法
江湖规矩上代码
wxml
<view class="page-body">
    <text>账号是:{{name}}text>
    <input class="weui-input" placeholder-style="color:#F76260" model:value="{{name}}" placeholder="占位符字体是红色的" />
    <text>手机号码是:{{phone}}text>
    <input type="text" bindinput="inputPhone"/>
    <text>身份证号为:{{cars}}text>
    <input type="idcard" model:value="{{cars}}"/>
    <text>password:{{pwd}}text>
    <input type="password" bindinput="inputPwd"/>
  view>
js
// 页面page对象
Page({
  data: {
    name:'123',
    phone:'',
    cars:'',
    pwd:''
  },
  // 当输入手机号码时就触发
  inputPhone(e){
    console.log(e.detail.value)
    // 为data修改的方式1,不能同步修改UI
    // this.data.phone=e.detail.value
    // 为data修改ui的第二种方式可以同步修改ui
    this.setData({
      phone:e.detail.value
    })
  },
  inputPwd(e){
    this.setData({
      pwd:e.detail.value
    })
  }
})
小程序中的标准双向数据绑定的写法
1,为input组件绑定input时间,一旦输入内容,就触发该事件
2,在事件处理函数中通过e.detail.value获取输入框的值,更新data中的变量
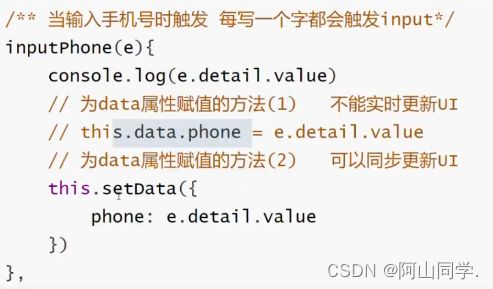
3,若页面中需要使用data中的变量,则通过{{}}即可输出该变量
<text>该手机号为:{{data}}text>
wxml中数据同台绑定的基本语法
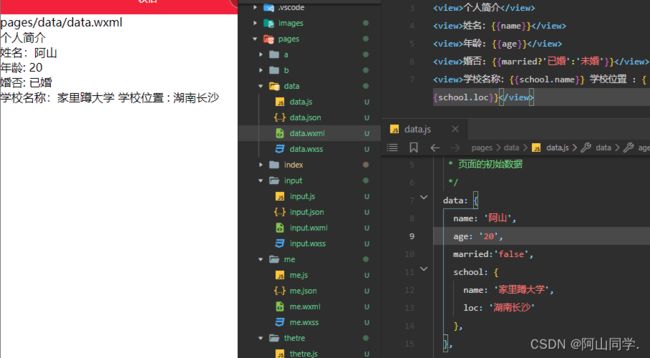
1,内容绑定
  data: {
    name: '阿山',
    age: '18',
    married:'false',
    school: {
      name: '家里蹲大学',
      loc: '湖南长沙'
    },
  }
我们该如何吧数据展示到前端去呢?其实和Vue的方式差不多
2,属性绑定
3,样式渲染
4,列表渲染
5,条件渲染
