【完整的WebGIS教程】2、第一个基于vue的webgis项目
1 利用vue-cli创建第一个vue项目
1 创建一个项目
a. 创建一个文件夹:命名为webgis
b. 在文件夹按Shitf+鼠标右键,打开PowerShell窗口,运行以下命令来创建一个新项目:
vue create hello-webgis
c. 选择vue的2版本,等待安装
d. 文件目录
hello-webgis  -------->项目名称
	.git      -------->git工具
	node_modules ----->用来管理项目中使用的依赖
	public    -------->项目中使用到的资源,图片等?
		- index.html-->项目主页
	src       -------->用来书写vue的源代码【重点】
		- assets ----->用来存放静态资源【重点】
		- components ->用来书写vue组件【重点】
		- App.vue ---->项目中的根组件【重点】
		- main.js ---->项目中的主入口【重点】
	.gitignore    ---->git版本控制忽略软件
	babel.config.js
	package.json  ---->依赖的名称和版本号
	package-lock.json->详细的依赖版本
	README.md     ---->项目说明文件
为规范代码,需要在根目录加入以下文件:这部分的教程CSDN有个大佬写了,链接.prettierrc代码格式化配置介绍_高素质车间工人的博客-CSDN博客_.prettierrc
.vscode    --------->文件夹
    settings.json -->文件
在settings.json文件写入以下代码,设置在代码保存后自动格式化,每按下ctrl+S是代码会根据你配置的prettierrc规则进行格式化
{
    "editor.formatOnSave": true
}
在根目录加入以下文件
.prettierrc.js是代码格式化的配置文件,代码的规范规则很多很繁琐,不可能每个都去手动修改,有时候一个页面能有上百个规范问题,那么这时候代码自动格式化就很有用了,最有名的就是prettierrc了。
.prettierrc.js -->文件,
在.prettierrc.js中写入以下代码:
module.exports = {
    semi: true, //句尾添加分号
    singleQuote: true, //使用单引号代替双引号
    trailingComma: 'all', //在对象或数组最后一个元素后面加逗号
    arrowParens: 'always', //箭头函数总是使用括号
    printWidth: 120, //超过最大值换行
    tabWidth: 2, //代码缩进
};
这样就在每次保存代码时自动将代码格式化了
2 运行vue-cli项目
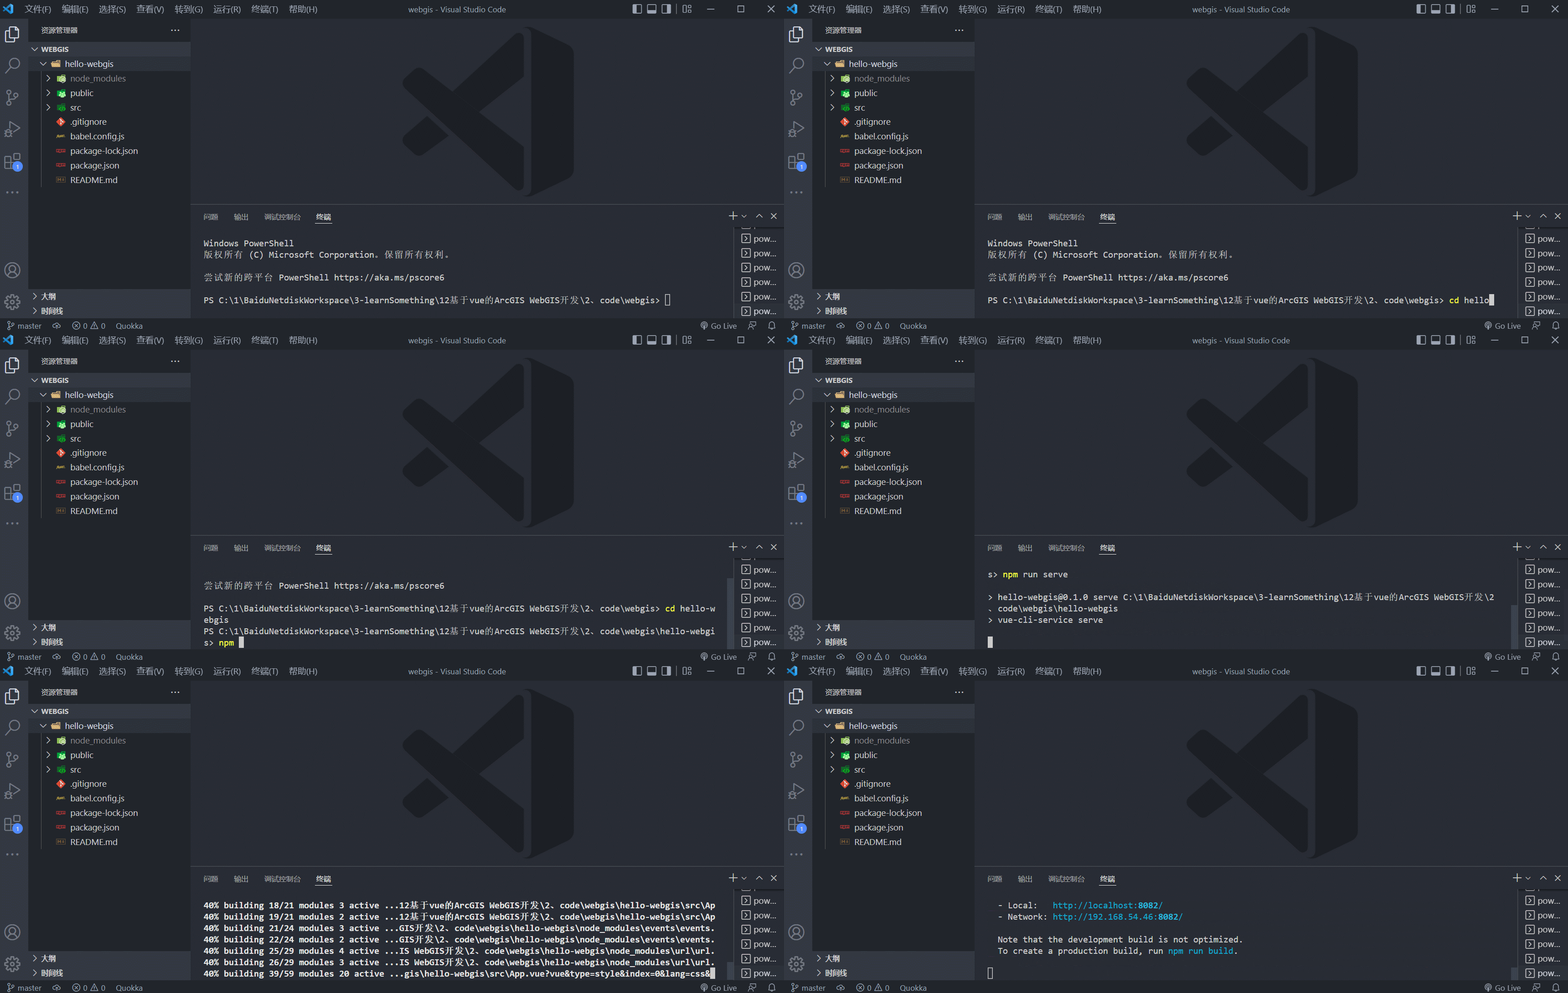
在项目的根目录的cmd或powelshell或者在vs code的终端里面运行命令
npm run serve
注意一定要在项目的根目录里面输入命令!!!要不然会出现上面的错误
如果不在根目录,要cd hello-webgis命令,进入根目录
在根目录运行
3 得到你的第一个vue页面
恭喜你,成功得到了第一个vue开发的程序!
2 使用Element UI给页面添加布局
1 安装Element UI库
在命令行或者终端输入
npm install element-ui --save-dev
安装成功,在package.json的devDependencies(开发环境)中看到element-ui已经被添加进去了

2 使用element ui
1 在main.js引入element ui
官网链接:组件 | Element
更改main.js
import Vue from 'vue'
import ElementUI from 'element-ui';
import 'element-ui/lib/theme-chalk/index.css';
import App from './App.vue'

Vue.config.productionTip = false
Vue.use(ElementUI);

new Vue({
  render: h => h(App),
}).$mount('#app')
2 引入element ui的布局
官网链接:组件 | Element
选择下图所示的容器布局,点击”显示代码“按钮,将代码复制到App.vue中。


更改App.vue
WebGIS一张图项目系统
左侧菜单栏
地图区域
运行 npm run serve,得到我们的WebGIS一张图系统的界面
3 引入GIS功能
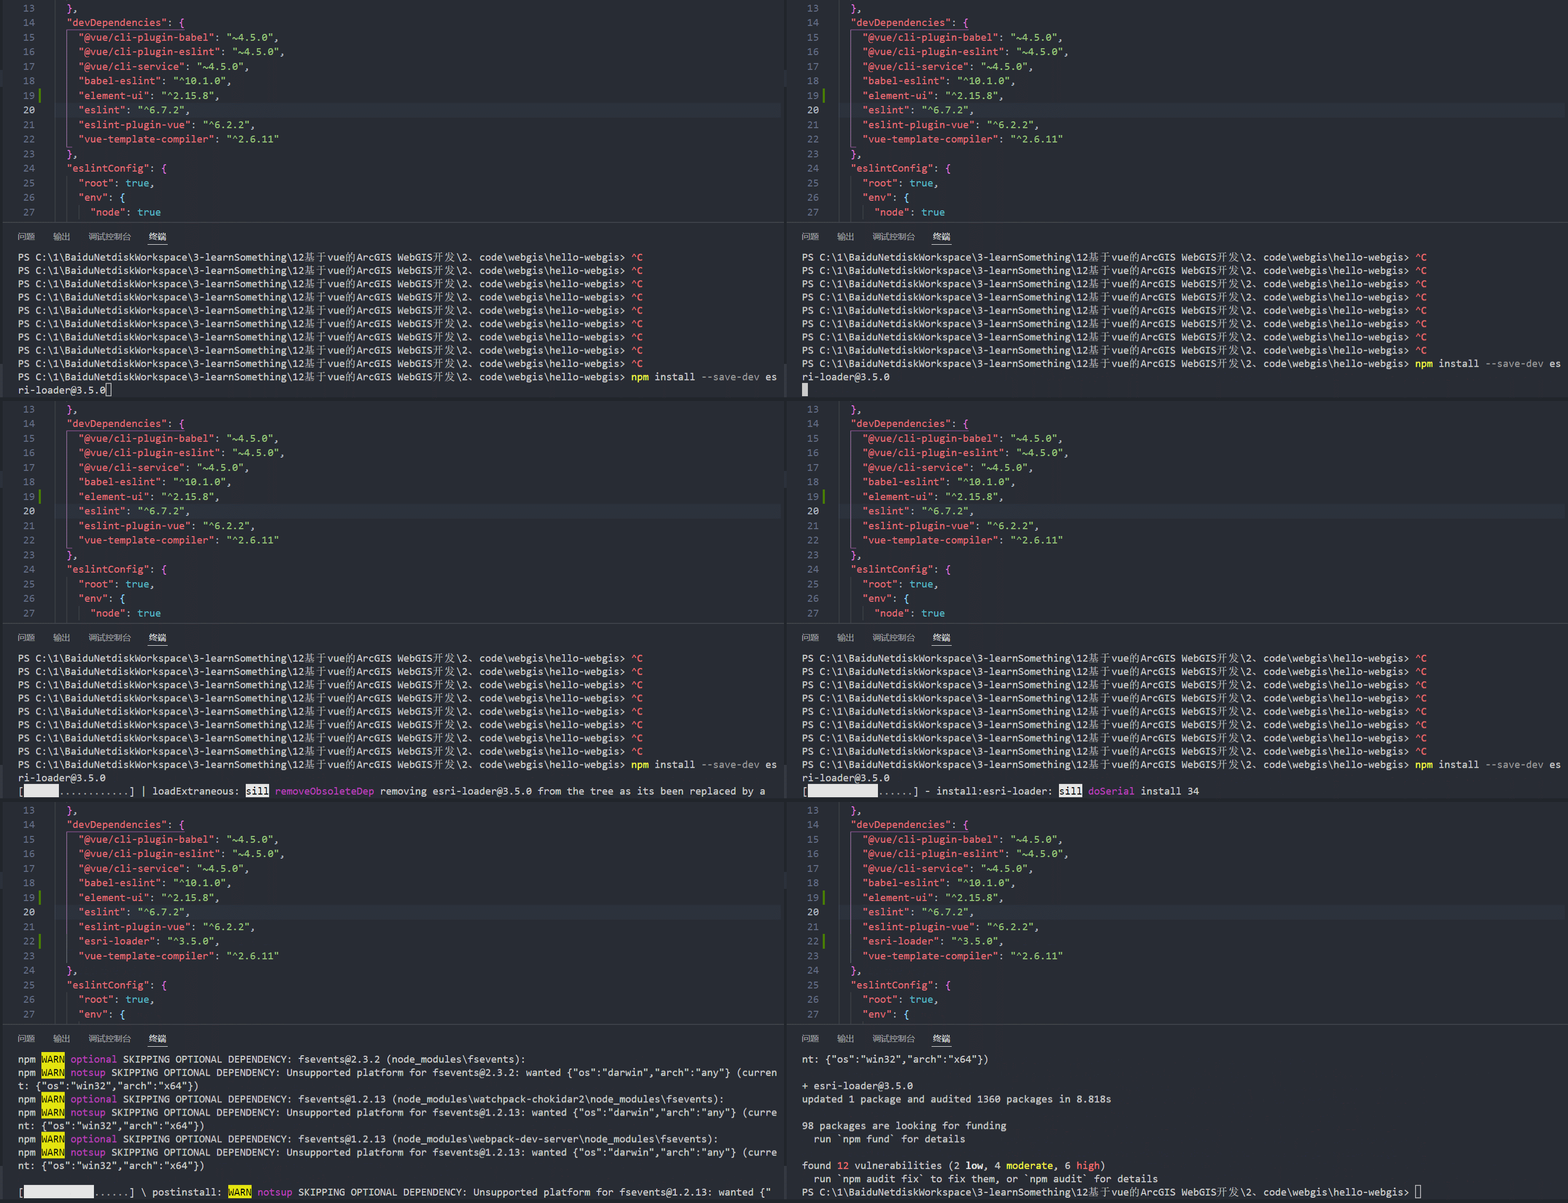
1 安装esri-loader
在命令行或终端输入:
npm install --save-dev esri-loader@3.5.0
注意,我是指定了版本安装的,大家也可以不指定版本
npm install --save-dev esri-loader
安装成功,可以看到devDependencies中多了一行
"esri-loader": "^3.5.0",
2 新建MapView.vue组件
在components下新建common文件夹,在文件夹内新建MapView.vue
注意命名要用驼峰命名,不能用mapView.vue或Mapview.vue
在MapView.vue中写入:
<template>
  <div id="mapview"></div>
</template>

<script>
export default {
  name: 'MapView',
  components: {},
};
</script>

<style>
#mapview {
  position: relative;
  width: 100%;
  height: 100%;
}
</style>
3 在App.vue中引入MapView.vue组件
在App.vue中写入:
<template>
  <div id="app">
    <el-container class="app-out-pannel">
      <el-header class="sys-header">WebGIS一张图项目系统</el-header>
      <el-container class="app-content-pannel">
        <el-aside class="sys-menu">左侧菜单栏</el-aside>
        <el-main class="sys-content">
          <MapView />
        </el-main>
      </el-container>
    </el-container>
  </div>
</template>

<script>
import MapView from './components/common/MapView.vue';
export default {
  name: 'App',
  components: {
    MapView,
  },
};
</script>

<style>
html,
body,
#app {
  position: relative;
  width: 100%;
  height: 100%;
  margin: 0;
}
.app-out-pannel,
.app-content-pannel {
  height: 100%;
}
.sys-header {
  background-color: #303133;
  line-height: 60px;
  height: 60px;
  color: #fff;
  font-size: 600;
}
.sys-menu {
  background-color: #c0c4cc;
}
.sys-content {
  padding: 5px;
}
</style>
4 在MapView.vue
在MapView.vue中写如下代码:
<template>
  <div id="mapview"></div>
</template>

<script>
//引入loadModules
import { loadModules } from 'esri-loader';
const options = {
  //引入ArcGIS API
  url: 'https://js.arcgis.com/4.18/init.js',
  css: 'https://js.arcgis.com/4.18/esri/themes/light/main.css',
};
export default {
  name: 'MapView',
  components: {},
  //mounted 生命周期函数,在MapView组件创建完成之后就会执行里面的函数
  mounted: function () {
    this._createMapView();
  },
  methods: {
    //   创建地图视图
    //async await是成对出现的,意思是把那些模块加载完成之后才可以执行后面的代码
    async _createMapView() {
      const [Map, MapView] = await loadModules(['esri/Map', 'esri/views/MapView'], options);
      const map = new Map({
        basemap: 'osm',
      });
      const view = new MapView({
        container: 'mapview',
        center: [108, 32],
        map: map,
        zoom: 5,
      });
      console.log(view);
    },
  },
};
</script>

<style>
#mapview {
  position: relative;
  width: 100%;
  height: 100%;
}
</style>
5 运行查看结果
后语
到这里就完成了一个基于vue的ArcGIS API for js 的webgis页面的开发。我的教程不收费,全部免费,如果觉得我讲的不错的话,就点个关注、收藏吧,这对我很重要!代码我会放在我的微信公众号上:“老靳的WebGIS”,请在微信公众号上给我发消息,得到代码哦!


