springboot+vue实现登录注册功能
相当于数据库的添加和查找操作
*Java使用JWT的小例子:使用HMAC256算法加密。
jwt里面事实上不算是加密,他的Header和Payload里面的内容是经过Base64转码的,这不算加密,最后一步使用HMAC256是给Header和Payload的Base64码做签名,目的是为了防止这部分内容被篡改,verify()是为了校验签名是否被篡改,所以jwt做token是,里面不要有敏感信息,或者对敏感信息单独加密,否则,会造成信息泄露
一、实现登录功能
1、后端获取token 保存登录状态
1.1 我们要使用JWT来生成token,因此我们需要引入JWT依赖。
在pom文件中加入依赖:
            com.auth0
            java-jwt
            3.8.3
1.2 在bean目录下创建util工具目录,创建TokenUtil类 里面有生成的方法和检测的方法。
package com.example.demo.bean.util;

import com.auth0.jwt.JWT;
import com.auth0.jwt.algorithms.Algorithm;
import com.auth0.jwt.interfaces.DecodedJWT;
import com.auth0.jwt.interfaces.JWTVerifier;

import java.util.Date;

public class TokenUtil {
    private static final long EXPIRE_TIME = 24*60*60*1000;  //有效时长
    private static final String TOKEN_SECRET = "ben";       // 秘钥

    /**
     * 签名 生成
     * @parm userName
     * */
    public static String sign(String userName){
        String token = null;
        try {
            Date expiresAt = new Date(System.currentTimeMillis()+EXPIRE_TIME);
            token = JWT.create()
                    .withIssuer("auth0")
                    .withClaim("userName",userName)
                    .withExpiresAt(expiresAt)
                    //使用HMAC256算法加密
                    .sign(Algorithm.HMAC256(TOKEN_SECRET));
        }catch (Exception e){
            e.printStackTrace();
        }
        return token;
    }

    /**
     * 签名验证
     * @param token
     * */
    public static boolean verify(String token){
        try {
            JWTVerifier verifier = JWT.require(Algorithm.HMAC256(TOKEN_SECRET))
                    .withIssuer("auth0").build();
            DecodedJWT jwt = verifier.verify(token);
            System.out.println("认证通过");
            System.out.println("userName"+jwt.getClaim("userName").asString());
            System.out.println("过期时间:"+jwt.getExpiresAt());
            return true;
        }catch (Exception e){
            return false;
        }
    }
}
1.3 controller层登录功能
    //    登录功能实现
    @RequestMapping(value = "/login", method = RequestMethod.POST)
    public JSONObject login(@RequestParam(value="userName",required=false) String userName, @RequestParam(value="password",required=false) String password){
        Consumer consumer = consumerService.loginService(userName, password);
        JSONObject result = new JSONObject();
        if(consumer == null){
            result.put("state",400);
        }else {
            String token = TokenUtil.sign("userName");
            System.out.println(token);
            result.put("state",200);
            result.put("token",token);
        }
        return result;
    }
1.4 mapper层
    //    登录(通过账号userName和密码password查找用户)
    Consumer findByUserNameAndPassword(String userName, String password);
1.5 service 接口层
    //    登录
    Consumer loginService(String userName,String password);
1.6 serviceImpl 层
    //登录
    @Override
    public Consumer loginService(String userName,String password) {
        // 如果账号密码都对则返回登录的用户对象,若有一个错误则返回null
        Consumer consumer = consumerMapper.findByUserNameAndPassword(userName,password);
        // 重要信息置空
        if(consumer != null){
            consumer.setPassword("");
        }
        return consumer;
    }
1.7 xml 层
2、前端实现登录功能
2.1 登录界面:
大学生论坛
登录
登录
注册
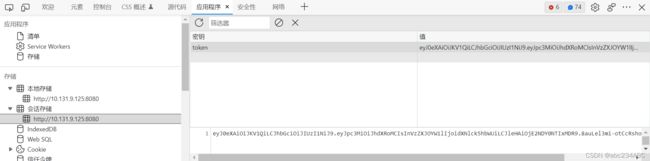
2.2 把token存储到了会话存储中
2.3 登录后 才可实现发帖功能(路由导航守卫beforeEach)
const router = new Router({
  routes: [
    { path: '/login', component: Login },
    { path: '/home', name: 'home', component: Home },
    { path: '/onlyRead', name: 'onlyRead', component: OnlyRead },
    { path: '/detail', name: 'detail', component: Detail }
  ]
})

// 挂载路由导航守卫
router.beforeEach((to, from, next) => {
  // to 将要访问的路径
  // from 代表从哪个路径跳转而来
  // next 是一个函数,表示放行
  // next() 放行 next('/login')强制跳转
2.4 退出功能
销毁本地的token
    handleCommand (command) {
      if (command === 'logout') {
        window.sessionStorage.clear()
        this.$router.push('/onlyRead')
      }
    },