MNIST数据集的图片读取显示,并保存图片(python代码)
MNIST的官网地址是 MNIST数据集下载
MNIST数据库由NIST的特殊数据库3和特殊数据库1构成,其中包含手写数字的二进制图像。
NIST最初指定SD-3为训练集,SD-1为测试集。然而,SD-3比SD-1更干净、更容易识别。究其原因,可以发现SD-3是在人口普查局员工中收集的,而SD-1是在高中生中收集的。从学习实验中得出合理的结论要求实验结果不依赖于训练集的选择和样本集的测试。因此,有必要通过混合NIST的数据集来建立一个新的数据库。
MNIST训练集由SD-3的30000个模式和SD-1的30000个模式组成。我们的测试集由来自SD-3的5000个模式和SD-1的5000个模式组成。60000个模式训练集包含了大约250个作家的例子。我们确保训练集和测试集的编写器集是不相交的。
SD-1包含了58527位数字图像,由500位不同的作家编写。与SD-3不同,SD-3中来自每个writer的数据块按顺序出现,SD-1中的数据被置乱。SD-1的Writer标识是可用的,我们使用这些信息来解读Writer。然后我们把SD-1分成两部分:第一批250名作家写的字符进入了我们的新训练集。剩下的250个作家被放在我们的测试集中。因此,我们有两组,每一组有近30000个例子。(SD1加起来总数是6000)
格式
文件中的所有整数都以多数非英特尔处理器使用的MSB first(高端)格式存储。英特尔处理器和其他低端计算机的用户必须翻转标头的字节。
有4个文件:
train-images-idx3-ubyte:训练集图像
train-labels-idx1-ubyte:训练集标签
t10k-images-idx3-ubyte:测试集图像
t10k-labels-idx1-ubyte:测试集标签
(1)训练集包含60000个示例。
(2)测试集包含10000个示例。测试集的前5000个示例取自原始的NIST训练集。最后5000个是从最初的NIST测试集中提取的。前5000个比后5000个更干净、更简单。
训练集是有60000个用例的,也就是说这个文件里面包含了60000个标签内容,每一个标签的值为0到9之间的一个数;
回到我们的训练标签集上,按上面说的,我们先解析每一个属性的含义:
offset代表了字节偏移量,也就是这个属性的二进制值的偏移是多少;
type代表了这个属性的值的类型;
value代表了这个属性的值是多少;
description是对这个的说明;所以呢,这里对下面的进行一下说明,它的说法是“从第0个字节开始有一个32位的整数,它的值是0x00000801,它是一个魔数magic number(补充说一下什么是魔数,其实它就是一个校验数,用来判断这个文件是不是MNIST里面的train-labels.idx1-ubyte文件);
从第4个字节开始有一个32位的整数(由type知道),它的值是60000(由value知道),它代表了数据集的数量;
从第8个字节开始有一个unsigned byte,它的值是??,是一个标签值….”
TRAINING SET LABEL FILE (train-labels-idx1-ubyte):
[offset] [type] [value] [description]
0000 32 bit integer 0x00000801(2049) magic number (MSB first)
0004 32 bit integer 60000 number of items
0008 unsigned byte ?? label
0009 unsigned byte ?? label
…
xxxx unsigned byte ?? label
The labels values are 0 to 9.
TRAINING SET IMAGE FILE (train-images-idx3-ubyte):
[offset] [type] [value] [description]
0000 32 bit integer 0x00000803(2051) magic number
0004 32 bit integer 60000 number of images
0008 32 bit integer 28 number of rows
0012 32 bit integer 28 number of columns
0016 unsigned byte ?? pixel
0017 unsigned byte ?? pixel
…
xxxx unsigned byte ?? pixel
Pixels are organized row-wise. Pixel values are 0 to 255. 0 means background (white), 255 means foreground (black).
TEST SET LABEL FILE (t10k-labels-idx1-ubyte):
[offset] [type] [value] [description]
0000 32 bit integer 0x00000801(2049) magic number (MSB first)
0004 32 bit integer 10000 number of items
0008 unsigned byte ?? label
0009 unsigned byte ?? label
…
xxxx unsigned byte ?? label
The labels values are 0 to 9.
TEST SET IMAGE FILE (t10k-images-idx3-ubyte):
[offset] [type] [value] [description]
0000 32 bit integer 0x00000803(2051) magic number
0004 32 bit integer 10000 number of images
0008 32 bit integer 28 number of rows
0012 32 bit integer 28 number of columns
0016 unsigned byte ?? pixel
0017 unsigned byte ?? pixel
…
xxxx unsigned byte ?? pixel
在MNIST图片集中,所有的图片都是28×28的,也就是每个图片都有28×28个像素;
我们的上述图片,train-images-idx3-ubyte文件中偏移量为0字节处有一个4字节的数为0000 0803表示魔数;接下来是value=60000代表容量;
接下来从第8个字节开始有一个4字节数,值为28,表示每个图片的行数;
从第12个字节开始有一个4字节数,值也为28,表示每个图片的列数;
从第16个字节开始才是我们的像素值,用图片说话
且每784个字节(784B,也就是28*28)代表一幅图片
python代码的预备查询知识:
(1)struct模块中最重要的三个函数是pack(), unpack(), calcsize()
| pack(fmt, v1, v2, …) | 按照给定的格式(fmt),把数据封装成字符串(实际上是类似于c结构体的字节流) |
|---|---|
| unpack(fmt, string) | 按照给定的格式(fmt)解析字节流string,返回解析出来的tuple |
| calcsize(fmt) | 计算给定的格式(fmt)占用多少字节的内存 |
(2)
MSB first,其全称是”Most Significant Bit first”,相对称的是一个LSB first,“Least Significant Bit”; MSB first是指最高有效位优先,也就是我们的大端存储,而LSB对应小端存储;关于大端,小端,可以参考
详解大端模式和小端模式
显示MNIST数据集里的图片:
注意:四个路径就对应MNIST数据集解压后的四个文件夹里面的那个形如train-labels.idx1-ubyte文件
import numpy as np
import struct
import matplotlib.pyplot as plt

# 训练集文件
train_images_idx3_ubyte_file = 'C:\\Users\\DELL\\mycode\\data\\MNIST\\train-images-idx3-ubyte\\train-images.idx3-ubyte'
# 训练集标签文件
train_labels_idx1_ubyte_file = 'C:\\Users\\DELL\\mycode\\data\\MNIST\\train-labels-idx1-ubyte\\train-labels.idx1-ubyte'

# 测试集文件
test_images_idx3_ubyte_file = 'C:\\Users\\DELL\\mycode\\data\\MNIST\\t10k-images-idx3-ubyte\\t10k-images.idx3-ubyte'
# 测试集标签文件
test_labels_idx1_ubyte_file = 'C:\\Users\\DELL\\mycode\\data\\MNIST\\t10k-labels-idx1-ubyte\\t10k-labels.idx1-ubyte'


def decode_idx3_ubyte(idx3_ubyte_file):
    """
    解析idx3文件的通用函数
    :param idx3_ubyte_file: idx3文件路径
    :return: 数据集
    """
    # 读取二进制数据
    bin_data = open(idx3_ubyte_file, 'rb').read()

    # 解析文件头信息,依次为魔数、图片数量、每张图片高、每张图片宽
    offset = 0
    fmt_header = '>iiii' #因为数据结构中前4行的数据类型都是32位整型,所以采用i格式,但我们需要读取前4行数据,所以需要4个i。我们后面会看到标签集中,只使用2个ii。
    magic_number, num_images, num_rows, num_cols = struct.unpack_from(fmt_header, bin_data, offset)
    print('魔数:%d, 图片数量: %d张, 图片大小: %d*%d' % (magic_number, num_images, num_rows, num_cols))

    # 解析数据集
    image_size = num_rows * num_cols
    offset += struct.calcsize(fmt_header)  #获得数据在缓存中的指针位置,从前面介绍的数据结构可以看出,读取了前4行之后,指针位置(即偏移位置offset)指向0016。
    print("offset:",offset)
    fmt_image = '>' + str(image_size) + 'B'  #图像数据像素值的类型为unsigned char型,对应的format格式为B。这里还有加上图像大小784,是为了读取784个B格式数据,如果没有则只会读取一个值(即一副图像中的一个像素值)
    print(fmt_image,offset,struct.calcsize(fmt_image))
    images = np.empty((num_images, num_rows, num_cols))
    #plt.figure()
    for i in range(num_images):
        if (i + 1) % 10000 == 0:
            print('已解析 %d' % (i + 1) + '张')
            print(offset)
        images[i] = np.array(struct.unpack_from(fmt_image, bin_data, offset)).reshape((num_rows, num_cols))####
        #print(images[i])
        offset += struct.calcsize(fmt_image)
#        plt.imshow(images[i],'gray')
#        plt.pause(0.00001)
#        plt.show()
    #plt.show()

    return images


def decode_idx1_ubyte(idx1_ubyte_file):
    """
    解析idx1文件的通用函数
    :param idx1_ubyte_file: idx1文件路径
    :return: 数据集
    """
    # 读取二进制数据
    bin_data = open(idx1_ubyte_file, 'rb').read()

    # 解析文件头信息,依次为魔数和标签数
    offset = 0
    fmt_header = '>ii'
    magic_number, num_images = struct.unpack_from(fmt_header, bin_data, offset)###
    print('魔数:%d, 图片数量: %d张' % (magic_number, num_images))

    # 解析数据集
    offset += struct.calcsize(fmt_header)
    fmt_image = '>B'
    labels = np.empty(num_images)
    for i in range(num_images):
        if (i + 1) % 10000 == 0:
            print ('已解析 %d' % (i + 1) + '张')
        ##labels[i] = np.array(struct.unpack_from(fmt_image, bin_data, offset)).reshape((1, 1))####等价于下面那一行
        labels[i] = struct.unpack_from(fmt_image, bin_data, offset)[0]
        offset += struct.calcsize(fmt_image)
    return labels


def load_train_images(idx_ubyte_file = train_images_idx3_ubyte_file):
    """
    TRAINING SET IMAGE FILE (train-images-idx3-ubyte):
    [offset] [type]          [value]          [description]
    0000     32 bit integer  0x00000803(2051) magic number
    0004     32 bit integer  60000            number of images
    0008     32 bit integer  28               number of rows
    0012     32 bit integer  28               number of columns
    0016     unsigned byte   ??               pixel
    0017     unsigned byte   ??               pixel
    ........
    xxxx     unsigned byte   ??               pixel
    Pixels are organized row-wise. Pixel values are 0 to 255. 0 means background (white), 255 means foreground (black).

    :param idx_ubyte_file: idx文件路径
    :return: n*row*col维np.array对象,n为图片数量
    """
    return decode_idx3_ubyte(idx_ubyte_file)


def load_train_labels(idx_ubyte_file = train_labels_idx1_ubyte_file):
    """
    TRAINING SET LABEL FILE (train-labels-idx1-ubyte):
    [offset] [type]          [value]          [description]
    0000     32 bit integer  0x00000801(2049) magic number (MSB first)
    0004     32 bit integer  60000            number of items
    0008     unsigned byte   ??               label
    0009     unsigned byte   ??               label
    ........
    xxxx     unsigned byte   ??               label
    The labels values are 0 to 9.

    :param idx_ubyte_file: idx文件路径
    :return: n*1维np.array对象,n为图片数量
    """
    return decode_idx1_ubyte(idx_ubyte_file)


def load_test_images(idx_ubyte_file=test_images_idx3_ubyte_file):
    """
    TEST SET IMAGE FILE (t10k-images-idx3-ubyte):
    [offset] [type]          [value]          [description]
    0000     32 bit integer  0x00000803(2051) magic number
    0004     32 bit integer  10000            number of images
    0008     32 bit integer  28               number of rows
    0012     32 bit integer  28               number of columns
    0016     unsigned byte   ??               pixel
    0017     unsigned byte   ??               pixel
    ........
    xxxx     unsigned byte   ??               pixel
    Pixels are organized row-wise. Pixel values are 0 to 255. 0 means background (white), 255 means foreground (black).

    :param idx_ubyte_file: idx文件路径
    :return: n*row*col维np.array对象,n为图片数量
    """
    return decode_idx3_ubyte(idx_ubyte_file)


def load_test_labels(idx_ubyte_file=test_labels_idx1_ubyte_file):
    """
    TEST SET LABEL FILE (t10k-labels-idx1-ubyte):
    [offset] [type]          [value]          [description]
    0000     32 bit integer  0x00000801(2049) magic number (MSB first)
    0004     32 bit integer  10000            number of items
    0008     unsigned byte   ??               label
    0009     unsigned byte   ??               label
    ........
    xxxx     unsigned byte   ??               label
    The labels values are 0 to 9.

    :param idx_ubyte_file: idx文件路径
    :return: n*1维np.array对象,n为图片数量
    """
    return decode_idx1_ubyte(idx_ubyte_file)


if __name__ == '__main__':                      ###
    #train_images = load_train_images()
    #train_labels = load_train_labels()
    test_images = load_test_images()
    test_labels = load_test_labels()

    # 查看前十个数据及其标签以读取是否正确
    for i in range(10):
        print(test_labels[i])#train_labels   test_labels
        plt.imshow(test_images[i], cmap='gray')#train_images  test_images
        plt.pause(0.000001)
        plt.show()
    print('done')
查看前十个数据及其标签以读取是否正确的时候,要么就用train_labels,train_images;要么就用test_labels,test_images来显示训练集或者测试集前多少张图片,张数的显示改动for i in range(10): 里的数字即可。
测试集前十张图片的label在anaconda显示结果如下图,程序在anaconda运行后,会弹出图片,关掉一幅,显示下一幅图片,直至前N张展示完毕。其image和label是对应的。如果还想查看训练集前N张图片(自己定义数目),见上一段话的叙述。

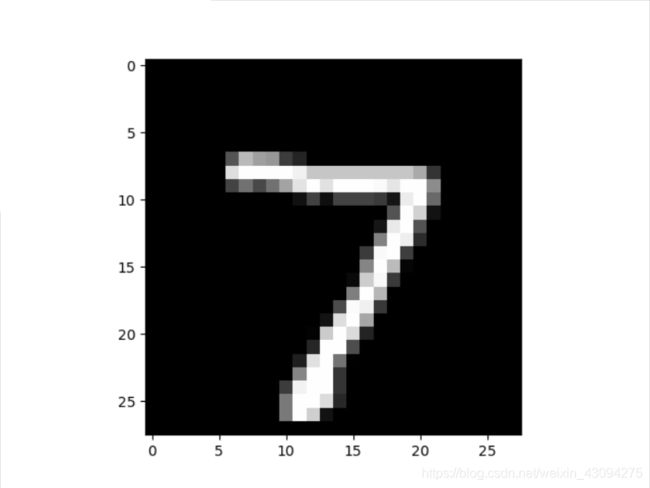
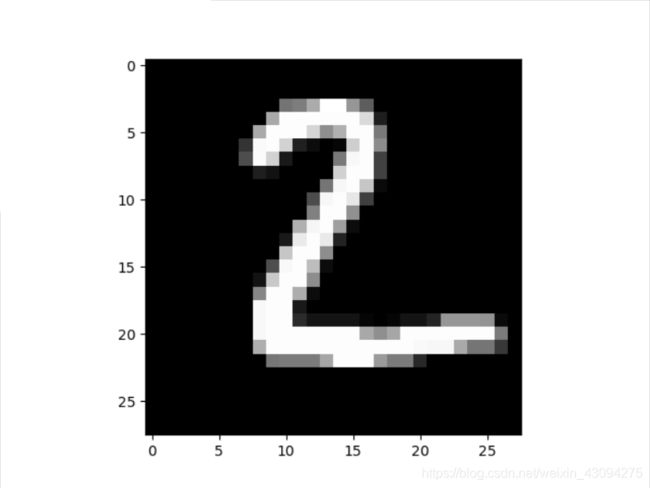
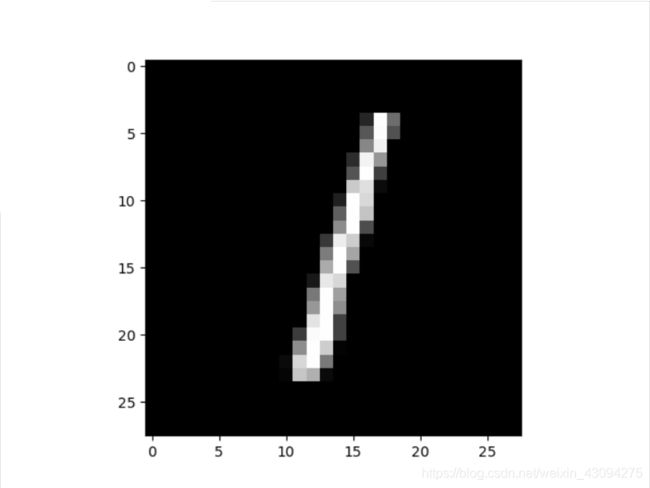
数字图片显示一共10次,分别对应label:7 2 1 0 4 1 4 9 5 9,上图中只展示了前三张
存储图片:
预备工作:若程序运行有:no module named cv2,需要pip install opencv-python安装模块。
代码如下:
import os
import cv2
import numpy as np

TRAIN_IMAGES_DIR = "train_images/"
TEST_IMAGES_DIR = "test_images/"

TRAIN_IMAGE_DATASET_PATH = "C:\\Users\\DELL\\mycode\\data\\MNIST\\train-images-idx3-ubyte\\train-images.idx3-ubyte"
TRAIN_LABEL_DATASET_PATH = "C:\\Users\\DELL\\mycode\\data\\MNIST\\train-labels-idx1-ubyte\\train-labels.idx1-ubyte"
TEST_IMAGE_DATASET_PATH = "C:\\Users\\DELL\\mycode\\data\\MNIST\\t10k-images-idx3-ubyte\\t10k-images.idx3-ubyte"
TEST_LABEL_DATASET_PATH = "C:\\Users\\DELL\\mycode\\data\\MNIST\\t10k-labels-idx1-ubyte\\t10k-labels.idx1-ubyte"


def convert_to_image(dataset_type):
    if dataset_type == "train":
        images_dir = TRAIN_IMAGES_DIR
        image_dataset = open(TRAIN_IMAGE_DATASET_PATH, "rb")
        label_dataset = open(TRAIN_LABEL_DATASET_PATH, "rb")
    elif dataset_type == "test":
        images_dir = TEST_IMAGES_DIR
        image_dataset = open(TEST_IMAGE_DATASET_PATH, "rb")
        label_dataset = open(TEST_LABEL_DATASET_PATH, "rb")
    else:
        print("Invalid type.")
        return

    counter = [0] * 10

    image_magic_number = int.from_bytes(image_dataset.read(4), byteorder='big', signed=False)
    image_num = int.from_bytes(image_dataset.read(4), byteorder='big', signed=False)
    image_row = int.from_bytes(image_dataset.read(4), byteorder='big', signed=False)
    image_col = int.from_bytes(image_dataset.read(4), byteorder='big', signed=False)

    label_magic_number = int.from_bytes(label_dataset.read(4), byteorder='big', signed=False)
    label_num = int.from_bytes(label_dataset.read(4), byteorder='big', signed=False)

    for i in range(10):
        if not os.path.exists(images_dir + str(i)):
            os.makedirs(images_dir + str(i))

    for i in range(image_num):
        image = []
        for j in range(image_row * image_col):
            image.append(int.from_bytes(image_dataset.read(1), byteorder='big', signed=False))

        image = np.array(image, dtype=np.uint8).reshape((image_row, image_col))

        label = int.from_bytes(label_dataset.read(1), byteorder='big', signed=False)

        counter[label] += 1

        image_path = images_dir + str(label) + "/" + str(label) + "." + str(counter[label]) + ".jpg"

        cv2.imwrite(image_path, image)

        if (i + 1) % 1000 == 0:
            print("Running, " + dataset_type + " images: " + str(i + 1) + "/" + str(image_num))

        # cv2.imshow('image', image)
        # cv2.waitKey(0)
        # cv2.destroyAllWindows()
    image_dataset.close()
    label_dataset.close()

    print(dataset_type + " dataset finished.")


if __name__ == "__main__":
    convert_to_image("train")
    convert_to_image("test")
    print("All finished.")
结果如下:
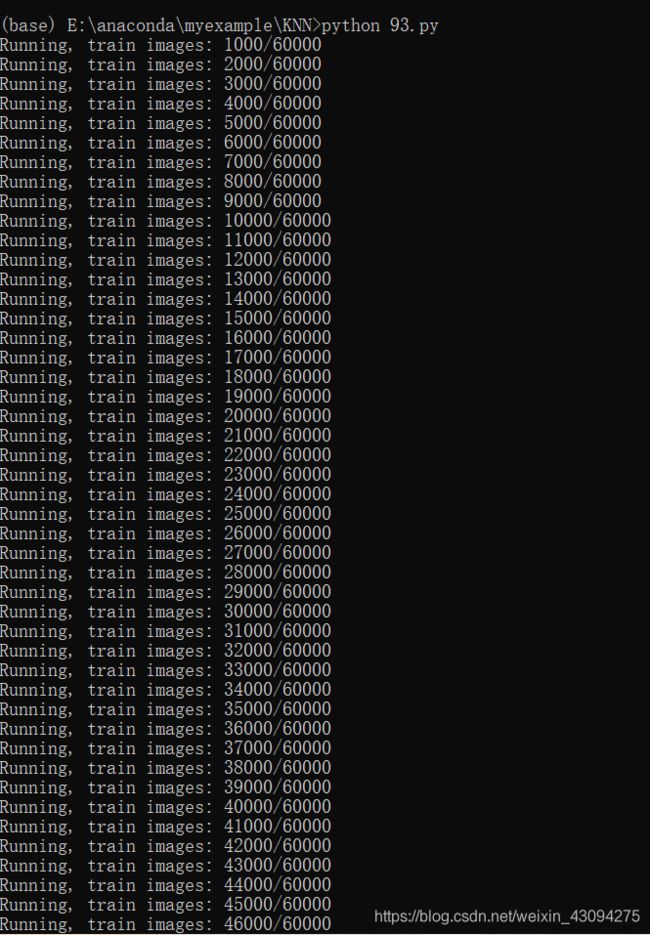


打开train_images:

End !
这里是引用:
MNIST数据集解析
MNIST数据集介绍
MNIST手写数字数据集读取方法