SVN集成LDAP认证
如何将
LDAP的认证,集成到SVN中。集成的办法,目前是有两种:一种是SVN直接通过SVN端口直接访问的,通过SASL实现LDAP的认证;另一种是SVN通过Apache进行HTTP访问的用户,通过配置Apache,在Apache上集成LDAP来实现SVN的LDAP认证集成。但是SASL方式只能是跟OpenLDAP在SVN同服务器上,使用远程的认证无效。
一、使用Sasl
SASL 全称 Simple Authentication and Security Layer,是一种用来扩充 C/S 模式验证能力的机制。
1、安装 SASL
# yum install -y *sasl*
2、配置文件修改
# vim /etc/sysconfig/saslauthd
......
MECH=ldap              # 只修改这一行
......
# vim /etc/saslauthd.conf  # 不存在则新建
servers: ldap://10.10.1.25
ldap_bind_dn: cn=admin,dc=qualitysphere,dc=github,dc=io
ldap_bind_pw: 123456
ldap_search_base: dc=qualitysphere,dc=github,dc=io
ldap_filter: uid=%U
ldap_password_attr: userPassword
# vim /etc/sasl2/svn.conf   # 没有就新建,内容如下
pwcheck_method: saslauthd
mech_list: PLAIN LOGIN
3、账号测试验证
# systemctl start saslauthd
# systemctl enable saslauthd
LDAP 账号测试验证
# testsaslauthd -ufeb -p123654
0: OK "Success."
4、SVN配置修改
- 修改
svn库配置
通过 svnadmin 创建的 svn 库,在 conf 下都会有一个配置文件 svnserver.conf,修改此配置文件,将use-sasl=true 打开即可
# cat /data/svnserver/test/conf/svnserve.conf
[general]
anon-access = none
auth-access = write
password-db = passwd
authz-db = authz
[sasl]
use-sasl = true    ## 添加这一行配置即可
启用 LDAP认证后,原本的用户密码配置文件 passwd的 就会失效,但是权限控制依然是在 authz 文件中进行配置。
- 重启
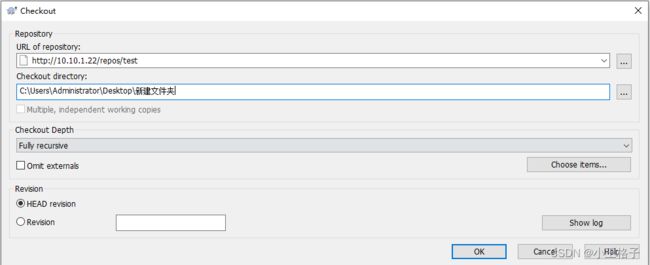
svn使用LDAP账号认证测试
二、使用Apache集成
SVN 通过 Apache 进行代理 HTTP 访问的场景。在这种场景下,SVN 的访问是通过 HTTP ,然后经过 Apache 来认证的,所以只需要在 Apache 上集成 LDAP 的认证即可实现 SVN 的 LDAP 认证。
1、安装 HTTP
# yum -y install httpd mod_dav_svn
2、配置文件修改
其中 /data/svnserver 为 svn 库文件根目录,在 /data/svnserver 下创建的 svn 库,即 svnserve -d -r /data/svnserver 为 svn 启动的命令。test 为 /data/svnserver 下的一个项目。
1. HTTP协议配置
使用 HTTP 协议访问,用的是 HTTP 账号密码访问,这个配置是没有与 LDAP 集成的。
- 创建
HTTP账号,后面登录SVN使用该账号认证登录:
# htpasswd -m /etc/svn/svnusers.conf feb
- HTTP 配置
cat /etc/httpd/conf.d/subversion.conf
LoadModule dav_svn_module modules/mod_dav_svn.so
LoadModule authz_svn_module modules/mod_authz_svn.so
<Location /repos>
DAV svn
SVNParentPath /data/svnserver
#2. LDAP集成配置
# vim /etc/httpd/conf.d/subversion.conf
LoadModule dav_svn_module modules/mod_dav_svn.so
LoadModule authz_svn_module modules/mod_authz_svn.so
<Location /repos>
DAV svn
SVNParentPath /data/svnserver
#上面的配置是我们把所有的项目都存放在统一的资源库目录,那么就可以使用 SVNParentPath 指令来指定存放所有项目的路径。
当然有可能我们并不希望某个项目提供这样一种访问方式,这时候我们就可以使用 SVNPath 为每个项目进行单独的设置。
<Location /test>
DAV svn
SVNPath /data/svnserver/test # 区别在这一行
#用了 Apache 做验证后,原先每个库中的 conf/passwd 文件就不生效了,而是使用指定的 AuthUserFile 来指定。而改为 LDAP 后,则由 LDAP 进行认证,但是授权文件则是由 AuthzSVNAccessFile 指定的授权文件来进行设置。这些在配置 Apache+SVN 时应该都已经设置过了。
3、测试验证
三 、总结
使用 SASL 来集成 LDAP 的方式在实际验证中需要保持跟 SVN 在同一台服务器,但在生产中基本是分服务器部署的。我们可以选用 Apache 来集成 LDAP 的方式进行 SVN 管理。另外这两种方式都不能使用 LDAP 中的群组功能,只能使用账号密码功能,权限用户组都需要在 SVN 中单独配置。
