yolov5 Grad-CAM可视化,以及对可视化过程的分析
目录
一、Grad CAM 可视化 实施与效果
1 、 配置和效果
2、 修改处
二、代码分析
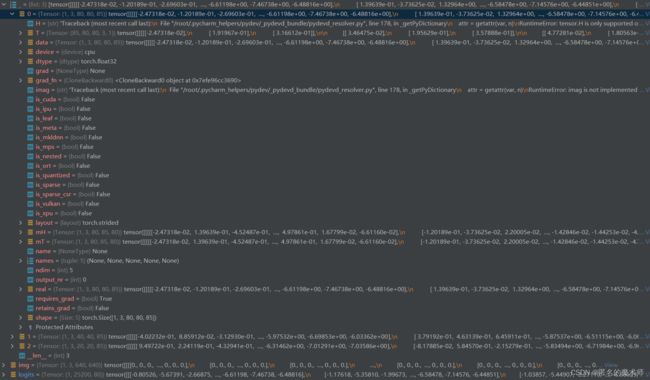
1、debug 参数记录
2、打印日志处
3、功能处接口
(1)实例化模型
(2) 对img 的处理
(3) YOLOV5 Grad-CAM
(4) 前向传播过程
(5)设置保存结果的路径
(6)热力图的实现
(7)画标签和矩形框
三、创建的文件和 构造的类都是干什么的,它们的作用都是什么
1、yolov5_object_detect.py
2、gradcam.py
3、main_gradcam.py
四、Grad CAM 实现的过程和代码
五、一些需要注意的地方
1、model的定义
2、得到的效果图片为什么那么多,并且有好有坏
Grad CAM 为 神经网络的一种可解释算法。
一、Grad CAM 可视化 实施与效果
直接运行 main_gradcam.py
或者终端运行
python main_gradcam.py --img-path 路径
1 、 配置和效果
yolov5 Grad-CAM可视化的修改可参考这两篇博客:YOLOv5结合GradCAM热力图可视化 和 【YOLOv5】结合GradCAM热力图可视化,我用的好像跟他不一样版本,不过问题不大,有几处需要改一下,见 2、修改处
实际效果如下所示
2、 修改处
yolov5_object_detector.py ---31
self.model = attempt_load(model_weight, device=device, inplace=False, fuse=False)注意 device 处修改了
main_gradcam.py --- 25
parser.add_argument('--model-path', type=str, default="yolov5s.pt", help='Path to the model')加载模型的路径改了。
二、代码分析
1、debug 参数记录
1) colors
2)
prediction
logits
__
2)x
2、打印日志处
(1) main_gradcam.py --- 82
Loading the model(2)gradcam.py --- 65
person, model-backward took: 90.6689 seconds(3)main_gradcam.py --- 104
Saving the final image at outputs/bus/gradcam(4)main_gradcam.py --- 120
17_0.jpg done!!(5)main_gradcam.py --- 121
print(f'Total time : {round(time.time() - tic, 4)} s')3、功能处接口
(1)实例化模型
man_gradcam.py --- 84
model = YOLOV5TorchObjectDetector(args.model_path, device, img_size=input_size, names=names)用的是创建的 CAM 代码 ,但进入这里面会发现,初始化时依然用的是attemp_load函数来加载模型,如下所示
self.model = attempt_load(model_weight, device=device, inplace=False, fuse=False)注意这其中的
self.model.requires_grad_(True)其为 nn.Model 模块中的方法。
(2) 对img 的处理
main_gradcam.py --- 87
torch_img = model.preprocessing(img[..., ::-1])原img ----> 增加1维 ----> letterbox ----> 调换维度----> to Tensor ----> /255 ----> input
(3) YOLOV5 Grad-CAM
main_gradcam.py --- 93
saliency_method = YOLOV5GradCAM(model=model, layer_name=target_layer, img_size=input_size)这个主要是挂hook,
(4) 前向传播过程
始 main_gradcam.py ---96
masks, logits, [boxes, _, class_names, conf] = saliency_method(torch_img)跳转到 gradcam.py ---55
preds, logits = self.model(input_img)接着跳转到 yolov5_object_detector.py --- 147
即YOLOV5TorchObjectDetector类中的 前向传播 函数中,
prediction, logits, _ = self.model(img, augment=False)接着跳转到 yolo.py --- 233
    def forward(self, x, augment=False, profile=False, visualize=False):
        if augment:
            return self._forward_augment(x)  # augmented inference, None
        return self._forward_once(x, profile, visualize)  # single-scale inference, train
接着跳转到 yolo.py --- 137
 def _forward_once(self, x, profile=False, visualize=False):
        y, dt = [], []  # outputs
        # print('================')
        for m in self.model:  # m 与 model
            # print('====================')
            # print("i is {}".format(m.i))
            # print('====================')
            if m.f != -1:  # if not from previous layer
                # print("when i is {},f is {}".format(m.i, m.f))
                x = y[m.f] if isinstance(m.f, int) else [x if j == -1 else y[j] for j in m.f]  # from earlier layers
            if profile:
                self._profile_one_layer(m, x, dt)
            x = m(x)  # run
            y.append(x if m.i in self.save else None)  # save output  这里注意 m.i 这个属性
            if visualize:
                feature_visualization(x, m.type, m.i, save_dir=visualize)
        return x
到这里与原来的 yolov5 推理过程接轨。这里注意,当 执行最后一个模块时,也就是当 m 的值为 Detect的时候,由于它是输出 head, 我们对它这里做了改变,所以 执行 Detect 的时候跟之前会有不同。
最终由于Detect函数种的改动
return x if self.training else (torch.cat(z, 1), torch.cat(logits_, 1), x)所以返回值有三个,第一个是原yolov5的输出,第二个是输入到Detect head检测头的输入的类别信息, 第三个是 输入到Detect head 的输入。其具体信息见 debug 参数中的 2)
接下来进行非极大值抑制,yolov5_object_detector.py --- 148
prediction, logits = self.non_max_suppression(prediction, logits, self.confidence, self.iou_thresh,
                                                      classes=None,
                                                      agnostic=self.agnostic)
(5)设置保存结果的路径
main_gradcam.py --- 101
save_path = f'{args.output_dir}{imgae_name[:-4]}/{args.method}'从这里可以看出主要由 args.output_dir 和 args.method 决定
(6)热力图的实现
main_gradcam.py --- 113
res_img, heat_map = get_res_img(bbox, mask, res_img)(7)画标签和矩形框
main_gradcam.py --- 114
res_img = plot_one_box(bbox, res_img, label=label, color=colors[int(names.index(cls_name))],
                                   line_thickness=3)
三、创建的文件和 构造的类都是干什么的,它们的作用都是什么
1、yolov5_object_detect.py
这个文件中 只 包含了一个类,即 YOLOV5TorchObjectDetector。
首先来看看它的初始化函数,最重要的地方是
self.model = attempt_load(model_weight, device=device, inplace=False, fuse=False)这里 利用原 yolov5 中的 attempt_load 函数 来加载model。再来看看其他函数,
def non_max_suppression # nms 函数
    def yolo_resize(img, new_shape=(640, 640), color=(114, 114, 114), auto=True, scaleFill=False, scaleup=True):  # 利用 letterbox函数 对图片进行处理

        return letterbox(img, new_shape=new_shape, color=color, auto=auto, scaleFill=scaleFill, scaleup=scaleup)
yolo_resize 函数 也是 调用了 原yolov5 中的 letterbox 函数来进行 img 的 resize 和 填充。
    def preprocessing(self, img):
        if len(img.shape) != 4:  # 增加一维
            img = np.expand_dims(img, axis=0)  # 举例 ndarray:(1,1080,810,3)
        im0 = img.astype(np.uint8)
        img = np.array([self.yolo_resize(im, new_shape=self.img_size)[0] for im in im0])  # 利用letterbox函数对img进行处理,举例 ndarray:(1,640,480,3)
        img = img.transpose((0, 3, 1, 2))  # 举例 ndarray:(1,3,640,480)
        img = np.ascontiguousarray(img)  # 举例 ndarray:(1,3,640,480) ascontiguousarray函数将一个内存不连续存储的数组转换为内存连续存储的数组,使得运行速度更快。
        img = torch.from_numpy(img).to(self.device)  # numpy to tensor
        img = img / 255.0
        return img
processing函数 是对原图片进行处理, 从而得到输入到 model 的图片。这里调用了它自己的方法 yolo_resize,而yolo_resize实际上就是 letterbox函数。哈哈。
最后是它的前向传播函数,首先执行的是原yolov5的前向传播过程,不过在Detect head 做了修改,返回值改变了。然后进行NMS,与原来不同的是这里的logits也同步处理。最后返回
return [self.boxes, self.classes, self.class_names, self.confidences], logits返回 [bbox信息,类别信息序号,类别的标签即名称,置信度分数] , logits 。
总的来说,这个文件中包含的 YOLOV5TorchObjectDetector 类实现的是一个接口,包括对原img的处理、yolov5的前向传播和NMS后处理。它联系原来的yolov5 对输入进行处理从而得到 Grad CAM 想要的输出。
2、gradcam.py
在这之前,首先需要了解两个关键的地方
一是 pytorch 的hook机制,二是 Grad CAM 论文中的原理。这两篇博客写的非常棒。
首先,看这个
def find_yolo_layer(model, layer_name):
函数,它的作用就是 得到需要的输出层的名字。 yolov5 中 Detect head 的输入有三个部分,分别来自 17,20,23,所以这里 它事先就设置好了这几个不同层,
target_layers = ['model_17_cv3_act', 'model_20_cv3_act', 'model_23_cv3_act']从这里就可以看出 它可视化的层是 Detect 层之前的卷积层,而且是三个层,根据结果也会看到不同的层 可视化 后的效果不一样,越是靠后的层 效果 越好。
接下来就是 class YOLOV5GradCAM: 这个类了。初始化函数中,实例化model,最重要的就是 挂hook 操作。
# 定义 钩子函数
        def backward_hook(module, grad_input, grad_output):
            self.gradients['value'] = grad_output[0]
            return None

        def forward_hook(module, input, output):
            self.activations['value'] = output
            return None

# 挂 hook
        target_layer.register_forward_hook(forward_hook)  # 挂hook
        target_layer.register_full_backward_hook(backward_hook)
这里 反向传播记录 梯度, 前向传播 记录的是 卷积层的输出,由于需要记录的输出的模块的最后一层 都是 SiLU 激活函数,所以命名为 self.activations。(详见yolov5前向传播过程)
前向传播 forward 函数中,此时的 self.model 是 YOLOV5TorchObjectDetector 类,所以返回的是
return [self.boxes, self.classes, self.class_names, self.confidences], logits这个 hook 是什么时候启动的呢?首先,当执行
preds, logits = self.model(input_img)时,启动model 的前向传播,在这个过程中 forward_hook 被启动,记录了相关卷积层的输出。当执行
score.backward(retain_graph=True)时,backward_hook被启动,记录反向传播时计算的梯度。至此, self.gradients 和 self.activations 记录了相关的数据。然后执行 Grad -CAM 算法,得到其 map ,然后进行线性插值和归一化,最后返回
return saliency_maps, logits, preds这只是一层的结果。注意在主文件中是分层进行的
for target_layer in target_layers:总的来说, 该文件中主要的就是 Gram CAM 算法的实现,其中还包括 挂 hook 的操作。
3、main_gradcam.py
实现整个流程,
def get_res_img # 为画热力图操作
def plot_one_box # 为画bbox 和 label
四、Grad CAM 实现的过程和代码
gradcam.py ---70
b, k, u, v = gradients.size()  # 举例 1, 128, 80, 60
alpha = gradients.view(b, k, -1).mean(2)  # 按通道求权重
实现的是
weights = alpha.view(b, k, 1, 1)
saliency_map = (weights * activations).sum(1, keepdim=True)
saliency_map = F.relu(saliency_map)
实现的是
然后进行双线性插值将尺寸扩大到原img尺寸,再进行归一化将数值 调整到 0 ~ 1 范围之间。
五、一些需要注意的地方
1、model的定义
saliency_method -----> YOLOV5GradCAM 对象
YOLOV5GradCAM 中的 model  -----> YOLOV5TorchObjectDetector 对象 YOLOV5TorchObjectDetector 中的model -----> 原yolov5 的 model
2、得到的效果图片为什么那么多,并且有好有坏
首先,它一共看了 三个 layer 的输出
target_layers = ['model_17_cv3_act', 'model_20_cv3_act', 'model_23_cv3_act']
其次,每个层的输出可能会又包含多个不同的目标,有几个矩形框它就分别绘制不同的效果。
所以,不同层的输出 得到的效果是不一样的, 实验证明越靠后的卷积层输出 得到的效果越明显。


