- 《Python 股票交易分析:开启智能投资新时代》(一)
2501_90693467
python开发语言fastapijavac#
一、Python在股票交易分析中的重要性Python以其强大的数据分析库和简洁的语法,成为股票交易分析的热门工具。它能够处理大量数据、进行复杂的计算和可视化,为投资者提供更准确的决策依据。股票分析是金融领域中至关重要的任务,而Python作为一种强大的编程语言,在股票分析中发挥着重要作用。首先,Python具有丰富的第三方库和工具,使得股票数据的获取和处理变得更加便捷。通过使用Python的pan
- 高效错误管理:Python 中 try、except、else 和 finally 的实用指南
刘同学Python学习日记
学习记录python开发语言excel
异常处理基本概念在编写程序时,总会有各种各样的错误发生,例如文件未找到、除以零、类型错误等。Python提供了一种机制,可以捕获这些错误并进行处理,而不是让程序崩溃。这种机制就是异常处理。try语句块的结构一个完整的try语句块可以包含以下部分:try块:包含可能引发异常的代码。except块:捕获并处理特定异常。else块:如果try块没有引发异常,则执行此块。finally块:无论是否引发异常
- Python一些异常的处理
qq_45923849
1024程序员节
list_data=[1,2,3]try:list_data[3]exceptIndexError:print("IndexError")tuple_data=(1,2,3)try:tuple_data[2]=10exceptTypeError:print("TypeError")dict_data={1:2,2:3}try:dict_data[3]exceptKeyError:print("Ke
- 【2025年春季】全国CTF夺旗赛-从零基础入门到竞赛,看这一篇就稳了!
白帽子凯哥
web安全网络安全pythonlinuxCTF夺旗赛
基于入门网络安全/黑客打造的:黑客&网络安全入门&进阶学习资源包目录一、CTF简介二、CTF竞赛模式三、CTF各大题型简介四、CTF学习路线4.1、初期1、html+css+js(2-3天)2、apache+php(4-5天)3、mysql(2-3天)4、python(2-3天)5、burpsuite(1-2天)4.2、中期1、SQL注入(7-8天)2、文件上传(7-8天)3、其他漏洞(14-15
- scratch闪亮登场 2024年9月scratch二级真题 中国电子学会 图形化编程 scratch二级真题和答案解析
小兔子编程
scratch案例scratch闪亮登场scratch二级真题scratch信息素养题目24年9月scratch二级题scratch考级二级真题scratch等级考试二级真题
目录scratch闪亮登场一、题目要求1、准备工作2、功能实现二、案例分析1、角色分析2、背景分析3、前期准备三、实现流程1、案例分析2、详细过程四、程序编写五、考点分析六、推荐资料1、入门基础2、蓝桥杯比赛3、考级资料4、视频课程5、python资料scratch闪亮登场2024年9月电子学会图形化编程Scratch等级考试二级真题一、题目要求1、准备工作1.保留默认小猫角色;2.添加背景Neo
- [原创](Modern C++)现代C++的关键性概念: 结构化绑定
我不是代码教父
#C/C++探究c++pairtuple
[作者]常用网名:猪头三出生日期:1981.XX.XX企鹅交流:643439947个人网站:80x86汇编小站编程生涯:2001年~至今[共24年]职业生涯:22年开发语言:C/C++、80x86ASM、PHP、Perl、Objective-C、ObjectPascal、C#、Python开发工具:VisualStudio、Delphi、XCode、Eclipse、C++Builder技能种类:逆
- 2025年全国CTF夺旗赛-从零基础入门到竞赛,看这一篇就稳了!
白帽安全-黑客4148
网络安全web安全linux密码学CTF
目录一、CTF简介二、CTF竞赛模式三、CTF各大题型简介四、CTF学习路线4.1、初期1、html+css+js(2-3天)2、apache+php(4-5天)3、mysql(2-3天)4、python(2-3天)5、burpsuite(1-2天)4.2、中期1、SQL注入(7-8天)2、文件上传(7-8天)3、其他漏洞(14-15天)4.3、后期五、CTF学习资源5.1、CTF赛题复现平台5.
- python 自动交易_Python自动化交易入门
weixin_39890431
python自动交易
自动交易是指通过计算机处理和执行的交易入口和出口。自动交易有一定的优势:最大限度地减少了人为干预:自动交易系统消除了交易过程中的情绪。交易者通常更容易通过控制情绪来坚持策略。”对历史数据的回溯测试:回自动交易是指通过计算机处理和执行的交易入口和出口。自动交易有一定的优势:最大限度地减少了人为干预:自动交易系统消除了交易过程中的情绪。交易者通常更容易通过控制情绪来坚持策略。”对历史数据的回溯测试:回
- python自动化交易_用Python寫自動交易程式的入門平台: Quantopian
weixin_39614657
python自动化交易
很多會寫程式的人開始踏入投資或金融市場後,都會有種想要寫程式來自動進行交易的衝動,但大多是不知道從何入門而不了了之。最近有個新平台Quantopian大大簡化了開發交易策略的難度。Quantopian提供了一個線上的Python程式碼編輯器,還有取得股票市場報價和模擬交易的API,讓人可以直接在線上編寫和測試自動交易的程式。此外,就像github一樣,上面有各式各樣的公開的交易策略,不但可以直接看
- 【Python爬虫(24)】Redis:Python爬虫的秘密武器
奔跑吧邓邓子
Python爬虫python爬虫redis开发语言缓存
【Python爬虫】专栏简介:本专栏是Python爬虫领域的集大成之作,共100章节。从Python基础语法、爬虫入门知识讲起,深入探讨反爬虫、多线程、分布式等进阶技术。以大量实例为支撑,覆盖网页、图片、音频等各类数据爬取,还涉及数据处理与分析。无论是新手小白还是进阶开发者,都能从中汲取知识,助力掌握爬虫核心技能,开拓技术视野。目录一、Redis数据结构大揭秘1.1字符串(String)1.2哈希
- 【Python爬虫(12)】正则表达式:Python爬虫的进阶利刃
奔跑吧邓邓子
Python爬虫python爬虫正则表达式进阶高级
【Python爬虫】专栏简介:本专栏是Python爬虫领域的集大成之作,共100章节。从Python基础语法、爬虫入门知识讲起,深入探讨反爬虫、多线程、分布式等进阶技术。以大量实例为支撑,覆盖网页、图片、音频等各类数据爬取,还涉及数据处理与分析。无论是新手小白还是进阶开发者,都能从中汲取知识,助力掌握爬虫核心技能,开拓技术视野。目录一、引言二、正则表达式高级语法详解2.1分组(Grouping)2
- Python 正则表达式全攻略:从入门到精通实战教程
tekin
PythonpythonPython正则表达式
正则表达式在文本处理领域占据着举足轻重的地位,它能够帮助开发者高效地进行复杂字符串的匹配、提取和替换操作。本教程聚焦于Python中的正则表达式,以re模块为核心,从基础概念到高级应用,全方位深入剖析其使用技巧。无论是编程新手还是经验丰富的开发者,都能通过丰富的示例代码、清晰的图文及表格对比,获取实用知识,大幅提升文本处理能力。正则表达式基础概念定义与用途:正则表达式是嵌入Python并通过re模
- Linux技术学习分享-Vim 编辑器与 Shell 命令脚本【1.5】
BinaryStarXin
Linux技术学习分享【1】linux学习运维安装配置VM虚拟机部署虚拟环境安装Linux系统Vim文本编辑器vim
3.3命令行的通配符大家可能都遇到过提笔忘字的尴尬,作为Linux运维人员,我们有时候也会遇到明明一个文件的名称就在嘴边但就是想不起来的情况。如果就记得一个文件的开头几个字母,想遍历查找出所有以这个关键词开头的文件,该怎么操作呢?又比如,假设想要批量查看所有硬盘文件的相关权限属性,一种方式是这样的:[root@linuxprobe~]#ls-l/dev/sdabrw-rw----.1rootdis
- 使用 Python 和 OpenCV 从一组图片生成 MP4 格式的视频
@Mr_LiuYang
写过的小程序pythonopencv音视频
概要在创建动画、制作幻灯片,从生成的图像数据中导出动态视频时,我们需要将一系列静态图片合成一个视频。安装依赖代码需要安装OpenCV库。可以通过命令行安装:pipinstallopencv-python完整代码图片尺寸不一时见后文调整视频尺寸importcv2importos#设置图像文件夹路径image_folder='person'#输出视频文件名output_video='person.mp
- Python 项目组织最佳实践:从脚本到大型项目的进化之路
python
在Python开发生涯中,相信很多人都是从写简单脚本开始的。随着项目规模扩大,我们会遇到各种项目组织的问题。今天,让我们从一个实际场景出发,看看如何一步步优化Python项目结构,实现从简单脚本到专业项目的进化。从一个数据处理需求说起假设我们需要处理一些日志文件,提取其中的错误信息并进行分析。最开始,很多人会这样写:#process_logs.pydefextract_errors(log_con
- w219网络海鲜市场系统的设计与实现
栗豆包
javaspringboot后端javaspringtomcat
作者简介:多年一线开发工作经验,原创团队,分享技术代码帮助学生学习,独立完成自己的网站项目。代码可以查看文章末尾⬇️联系方式获取,记得注明来意哦~赠送计算机毕业设计600个选题excel文件,帮助大学选题。赠送开题报告模板,帮助书写开题报告。作者完整代码目录供你选择:《Springboot网站项目》400套《ssm网站项目》800套《小程序项目》300套《App项目》500套《Python网站项目
- Markdown语法
SY.ZHOU
macos
这里写自定义目录标题欢迎使用Markdown编辑器新的改变功能快捷键合理的创建标题,有助于目录的生成如何改变文本的样式插入链接与图片如何插入一段漂亮的代码片生成一个适合你的列表创建一个表格设定内容居中、居左、居右SmartyPants创建一个自定义列表如何创建一个注脚注释也是必不可少的KaTeX数学公式新的甘特图功能,丰富你的文章UML图表FLowchart流程图导出与导入导出导入欢迎使用Mark
- python 基础知识
python
python基础知识说明:当前版本:3.7.0所有示例都是写在文件中.py参考教程:Python教程执行文件pythonindex.py所有的代码都在同一个文件index.py中,各部分引用变量一致。起步输出一个helloworld;print("helloworld")注意:在.py文件中代码是不能随意缩进的,不然执行报错用户输入;name=input("pleaseinputyourname\
- 用Python实现自动化交易:从趋势到收益
霸都小魔女
量化编程python自动化开发语言
在现代金融市场中,自动化交易已经成为越来越流行的一种方式。相比于传统的手工交易方式,自动化交易更加高效、精准、快速且免除了人为因素的影响。而Python作为一种高级编程语言,凭借其简单易学、灵活性强的优势逐渐成为自动化交易中最受欢迎的编程语言之一。本文将详细介绍如何运用Python实现自动化交易,从趋势分析到收益实现。一、技术分析技术分析是进行自动化交易的重要基础。它主要是通过历史价格走势数据来预
- 使用 Pandas 在 Python 中对移动平均线交叉进行回测
云梦量化
pandaspython开发语言均值算法信息可视化策略模式android
使用Pandas在Python中对移动平均线交叉进行回测移动平均线交叉策略移动平均线交叉技术是一种非常著名的简单动量策略。它通常被认为是量化交易的“HelloWorld”示例。此处概述的策略仅适用于多头。创建两个单独的简单移动平均线过滤器,具有特定时间序列的不同回溯期。当较短的回溯移动平均线超过较长的回溯移动平均线时,就会出现购买资产的信号。如果较长的平均值随后超过较短的平均值,则资产将被卖回。当
- 使用 pandas 研究 Python 中的回测环境
云梦量化
pandaspythonjava回归信息可视化算法均值算法
使用pandas研究Python中的回测环境回测是将交易策略理念应用于历史数据以确定过去表现的研究过程。具体而言,回测人员无法保证策略的未来表现。然而,它们是策略管道研究过程的重要组成部分,允许在将策略投入生产之前对其进行筛选。本文(以及后续文章)将概述一个用Python编写的基本面向对象回测系统。这个早期系统主要是一个“教学辅助工具”,用于演示回测系统的不同组件。随着我们阅读文章的深入,我们将添
- 量化交易的 Python 库从数据处理到实时交易系统开发
云梦量化
python开发语言流量运营信息可视化安全
量化交易的Python库从数据处理到实时交易系统开发对于任何想要涉足量化金融和系统交易领域的人来说,Python都是不可或缺的工具。作为许多量化开发人员的首选编程语言,Python提供了庞大的库生态系统,可简化从数据分析到策略执行的所有流程。无论您是刚起步还是想要提高技能,了解正确的Python库都是自信地构建和部署交易策略的关键。本指南向您介绍专业量化分析师和系统交易员使用的基本Python库。
- CentOS上远程连接SSH常用操作命令整理
luckyext
centossshlinux
1.SSH服务状态查询,查看SSH服务是否正在运行的命令sudosystemctlstatussshd2.SSH服务的启动及设置系统启动时自动运行命令sudosystemctlstartsshdsudosystemctlenablesshd3.SSH服务的重启命令sudosystemctlrestartsshd4.SSH的主要配置文件是/etc/ssh/sshd_config,可以用文本编辑器vi
- Python驱动的自动化交易-从数据获取到策略优化的全方位指南
egzosn
python自动化开发语言运维
随着科技的不断发展,自动化交易成为了投资者们追逐的一种高效、智能的投资方式。Python作为一种简洁、灵活且功能强大的编程语言,被广泛应用于自动化交易领域。本文将介绍如何使用Python进行自动化交易,并提供一些示例代码。1.获取市场数据在进行自动化交易之前,首先需要获取市场数据。Python中有许多第三方库可以用来获取各种金融市场的实时数据,比如pandas、numpy和yfinance等。下面
- edge-tts微软文本转语音库
caridle
edgepython
Edge-TTS是一个Python库,比较好用,直接pip安装。pipinstalledge-tts输入edge-tts,输出提示信息,安装完成。usage:edge-tts[-h][-tTEXT][-fFILE][-vVOICE][-l][--rateRATE][--volumeVOLUME][-OOVERLAPPING][--write-mediaWRITE_MEDIA][--write-su
- 使用Python爬取天气数据并解析!
Python_trys
python开发语言Python学习Python爬虫代码天气爬取计算机
包含编程籽料、学习路线图、爬虫代码、安装包等!【点击领取】在本文中,我们将使用Python编写一个简单的爬虫程序,从天气网站爬取天气数据,并解析出我们需要的信息。我们将以中国天气网(www.weather.com.cn)为例,爬取指定城市的天气数据。1.准备工作在开始之前,请确保你已经安装了以下Python库:requests:用于发送HTTP请求。BeautifulSoup:用于解析HTML文档
- 【CI/CD】持续集成及 Jenkins
Karoku066
ci/cdjenkins运维kubernetes容器云原生docker
文章目录传统与敏捷开发流程对比CI/CD持续集成(CI)持续交付/部署(CD)JenkinsPipeline语法实施CI/CD的典型流程常见问题与解决方案~传统与敏捷开发流程对比1.瀑布模型(WaterfallModel)核心特点:线性顺序开发,严格分阶段(需求→设计→开发→测试→部署),各阶段需完全完成后进入下一阶段。缺点:周期长(通常数月到数年),难以应对需求变更,测试滞后导致缺陷修复成本高。
- 【全栈】SprintBoot+vue3迷你商城(12)
杰九
springbootjavavue.js
【全栈】SprintBoot+vue3迷你商城(12)往期的文章都在这里啦,大家有兴趣可以看一下后端部分:【全栈】SprintBoot+vue3迷你商城(1)【全栈】SprintBoot+vue3迷你商城(2)【全栈】SprintBoot+vue3迷你商城-扩展:利用python爬虫爬取商品数据【全栈】SprintBoot+vue3迷你商城(3)【全栈】SprintBoot+vue3迷你商城(4)
- 基于非洲秃鹫算法优化的最大熵图像多阈值分割(python)
图像算法打怪
图像分割算法python开发语言
基于非洲秃鹫算法优化的最大熵图像多阈值分割(python)文章目录基于非洲秃鹫算法优化的最大熵图像多阈值分割(python)1.最大熵阈值分割原理2.基于非洲秃鹫算法优化的多阈值分割3.算法结果:4.参考文献:5.Python代码摘要:本文介绍基于最大熵的图像分割,并且应用非洲秃鹫算法进行阈值寻优。1.最大熵阈值分割原理Kapur等人于1985年提出的最大熵法是另一种广受关注的阈值选取方法,其是在
- 小红书架构演进与关键技术解析
ITPUB-微风
架构
小红书,作为一家领先的社交电商平台,一直致力于为用户提供优质的购物体验。随着业务的快速发展,小红书面临着前所未有的挑战,如系统的高可用性、高性能、可扩展性等。本文将深入探讨小红书终版的架构演进和关键技术,分享其实践经验,并展望未来发展方向。一、业务背景与挑战小红书的业务模式独特,结合了社交和电商的特点。随着用户量的不断增加,系统面临着高并发、大数据量等挑战。同时,小红书还需要支持快速的业务创新和迭
- 开发者关心的那些事
圣子足道
ios游戏编程apple支付
我要在app里添加IAP,必须要注册自己的产品标识符(product identifiers)。产品标识符是什么?
产品标识符(Product Identifiers)是一串字符串,它用来识别你在应用内贩卖的每件商品。App Store用产品标识符来检索产品信息,标识符只能包含大小写字母(A-Z)、数字(0-9)、下划线(-)、以及圆点(.)。你可以任意排列这些元素,但我们建议你创建标识符时使用
- 负载均衡器技术Nginx和F5的优缺点对比
bijian1013
nginxF5
对于数据流量过大的网络中,往往单一设备无法承担,需要多台设备进行数据分流,而负载均衡器就是用来将数据分流到多台设备的一个转发器。
目前有许多不同的负载均衡技术用以满足不同的应用需求,如软/硬件负载均衡、本地/全局负载均衡、更高
- LeetCode[Math] - #9 Palindrome Number
Cwind
javaAlgorithm题解LeetCodeMath
原题链接:#9 Palindrome Number
要求:
判断一个整数是否是回文数,不要使用额外的存储空间
难度:简单
分析:
题目限制不允许使用额外的存储空间应指不允许使用O(n)的内存空间,O(1)的内存用于存储中间结果是可以接受的。于是考虑将该整型数反转,然后与原数字进行比较。
注:没有看到有关负数是否可以是回文数的明确结论,例如
- 画图板的基本实现
15700786134
画图板
要实现画图板的基本功能,除了在qq登陆界面中用到的组件和方法外,还需要添加鼠标监听器,和接口实现。
首先,需要显示一个JFrame界面:
public class DrameFrame extends JFrame { //显示
- linux的ps命令
被触发
linux
Linux中的ps命令是Process Status的缩写。ps命令用来列出系统中当前运行的那些进程。ps命令列出的是当前那些进程的快照,就是执行ps命令的那个时刻的那些进程,如果想要动态的显示进程信息,就可以使用top命令。
要对进程进行监测和控制,首先必须要了解当前进程的情况,也就是需要查看当前进程,而 ps 命令就是最基本同时也是非常强大的进程查看命令。使用该命令可以确定有哪些进程正在运行
- Android 音乐播放器 下一曲 连续跳几首歌
肆无忌惮_
android
最近在写安卓音乐播放器的时候遇到个问题。在MediaPlayer播放结束时会回调
player.setOnCompletionListener(new OnCompletionListener() {
@Override
public void onCompletion(MediaPlayer mp) {
mp.reset();
Log.i("H
- java导出txt文件的例子
知了ing
javaservlet
代码很简单就一个servlet,如下:
package com.eastcom.servlet;
import java.io.BufferedOutputStream;
import java.io.IOException;
import java.net.URLEncoder;
import java.sql.Connection;
import java.sql.Resu
- Scala stack试玩, 提高第三方依赖下载速度
矮蛋蛋
scalasbt
原文地址:
http://segmentfault.com/a/1190000002894524
sbt下载速度实在是惨不忍睹, 需要做些配置优化
下载typesafe离线包, 保存为ivy本地库
wget http://downloads.typesafe.com/typesafe-activator/1.3.4/typesafe-activator-1.3.4.zip
解压r
- phantomjs安装(linux,附带环境变量设置) ,以及casperjs安装。
alleni123
linuxspider
1. 首先从官网
http://phantomjs.org/下载phantomjs压缩包,解压缩到/root/phantomjs文件夹。
2. 安装依赖
sudo yum install fontconfig freetype libfreetype.so.6 libfontconfig.so.1 libstdc++.so.6
3. 配置环境变量
vi /etc/profil
- JAVA IO FileInputStream和FileOutputStream,字节流的打包输出
百合不是茶
java核心思想JAVA IO操作字节流
在程序设计语言中,数据的保存是基本,如果某程序语言不能保存数据那么该语言是不可能存在的,JAVA是当今最流行的面向对象设计语言之一,在保存数据中也有自己独特的一面,字节流和字符流
1,字节流是由字节构成的,字符流是由字符构成的 字节流和字符流都是继承的InputStream和OutPutStream ,java中两种最基本的就是字节流和字符流
类 FileInputStream
- Spring基础实例(依赖注入和控制反转)
bijian1013
spring
前提条件:在http://www.springsource.org/download网站上下载Spring框架,并将spring.jar、log4j-1.2.15.jar、commons-logging.jar加载至工程1.武器接口
package com.bijian.spring.base3;
public interface Weapon {
void kil
- HR看重的十大技能
bijian1013
提升能力HR成长
一个人掌握何种技能取决于他的兴趣、能力和聪明程度,也取决于他所能支配的资源以及制定的事业目标,拥有过硬技能的人有更多的工作机会。但是,由于经济发展前景不确定,掌握对你的事业有所帮助的技能显得尤为重要。以下是最受雇主欢迎的十种技能。 一、解决问题的能力 每天,我们都要在生活和工作中解决一些综合性的问题。那些能够发现问题、解决问题并迅速作出有效决
- 【Thrift一】Thrift编译安装
bit1129
thrift
什么是Thrift
The Apache Thrift software framework, for scalable cross-language services development, combines a software stack with a code generation engine to build services that work efficiently and s
- 【Avro三】Hadoop MapReduce读写Avro文件
bit1129
mapreduce
Avro是Doug Cutting(此人绝对是神一般的存在)牵头开发的。 开发之初就是围绕着完善Hadoop生态系统的数据处理而开展的(使用Avro作为Hadoop MapReduce需要处理数据序列化和反序列化的场景),因此Hadoop MapReduce集成Avro也就是自然而然的事情。
这个例子是一个简单的Hadoop MapReduce读取Avro格式的源文件进行计数统计,然后将计算结果
- nginx定制500,502,503,504页面
ronin47
nginx 错误显示
server {
listen 80;
error_page 500/500.html;
error_page 502/502.html;
error_page 503/503.html;
error_page 504/504.html;
location /test {return502;}}
配置很简单,和配
- java-1.二叉查找树转为双向链表
bylijinnan
二叉查找树
import java.util.ArrayList;
import java.util.List;
public class BSTreeToLinkedList {
/*
把二元查找树转变成排序的双向链表
题目:
输入一棵二元查找树,将该二元查找树转换成一个排序的双向链表。
要求不能创建任何新的结点,只调整指针的指向。
10
/ \
6 14
/ \
- Netty源码学习-HTTP-tunnel
bylijinnan
javanetty
Netty关于HTTP tunnel的说明:
http://docs.jboss.org/netty/3.2/api/org/jboss/netty/channel/socket/http/package-summary.html#package_description
这个说明有点太简略了
一个完整的例子在这里:
https://github.com/bylijinnan
- JSONUtil.serialize(map)和JSON.toJSONString(map)的区别
coder_xpf
jqueryjsonmapval()
JSONUtil.serialize(map)和JSON.toJSONString(map)的区别
数据库查询出来的map有一个字段为空
通过System.out.println()输出 JSONUtil.serialize(map): {"one":"1","two":"nul
- Hibernate缓存总结
cuishikuan
开源sshjavawebhibernate缓存三大框架
一、为什么要用Hibernate缓存?
Hibernate是一个持久层框架,经常访问物理数据库。
为了降低应用程序对物理数据源访问的频次,从而提高应用程序的运行性能。
缓存内的数据是对物理数据源中的数据的复制,应用程序在运行时从缓存读写数据,在特定的时刻或事件会同步缓存和物理数据源的数据。
二、Hibernate缓存原理是怎样的?
Hibernate缓存包括两大类:Hib
- CentOs6
dalan_123
centos
首先su - 切换到root下面1、首先要先安装GCC GCC-C++ Openssl等以来模块:yum -y install make gcc gcc-c++ kernel-devel m4 ncurses-devel openssl-devel2、再安装ncurses模块yum -y install ncurses-develyum install ncurses-devel3、下载Erang
- 10款用 jquery 实现滚动条至页面底端自动加载数据效果
dcj3sjt126com
JavaScript
无限滚动自动翻页可以说是web2.0时代的一项堪称伟大的技术,它让我们在浏览页面的时候只需要把滚动条拉到网页底部就能自动显示下一页的结果,改变了一直以来只能通过点击下一页来翻页这种常规做法。
无限滚动自动翻页技术的鼻祖是微博的先驱:推特(twitter),后来必应图片搜索、谷歌图片搜索、google reader、箱包批发网等纷纷抄袭了这一项技术,于是靠滚动浏览器滚动条
- ImageButton去边框&Button或者ImageButton的背景透明
dcj3sjt126com
imagebutton
在ImageButton中载入图片后,很多人会觉得有图片周围的白边会影响到美观,其实解决这个问题有两种方法
一种方法是将ImageButton的背景改为所需要的图片。如:android:background="@drawable/XXX"
第二种方法就是将ImageButton背景改为透明,这个方法更常用
在XML里;
<ImageBut
- JSP之c:foreach
eksliang
jspforearch
原文出自:http://www.cnblogs.com/draem0507/archive/2012/09/24/2699745.html
<c:forEach>标签用于通用数据循环,它有以下属性 属 性 描 述 是否必须 缺省值 items 进行循环的项目 否 无 begin 开始条件 否 0 end 结束条件 否 集合中的最后一个项目 step 步长 否 1
- Android实现主动连接蓝牙耳机
gqdy365
android
在Android程序中可以实现自动扫描蓝牙、配对蓝牙、建立数据通道。蓝牙分不同类型,这篇文字只讨论如何与蓝牙耳机连接。
大致可以分三步:
一、扫描蓝牙设备:
1、注册并监听广播:
BluetoothAdapter.ACTION_DISCOVERY_STARTED
BluetoothDevice.ACTION_FOUND
BluetoothAdapter.ACTION_DIS
- android学习轨迹之四:org.json.JSONException: No value for
hyz301
json
org.json.JSONException: No value for items
在JSON解析中会遇到一种错误,很常见的错误
06-21 12:19:08.714 2098-2127/com.jikexueyuan.secret I/System.out﹕ Result:{"status":1,"page":1,&
- 干货分享:从零开始学编程 系列汇总
justjavac
编程
程序员总爱重新发明轮子,于是做了要给轮子汇总。
从零开始写个编译器吧系列 (知乎专栏)
从零开始写一个简单的操作系统 (伯乐在线)
从零开始写JavaScript框架 (图灵社区)
从零开始写jQuery框架 (蓝色理想 )
从零开始nodejs系列文章 (粉丝日志)
从零开始编写网络游戏
- jquery-autocomplete 使用手册
macroli
jqueryAjax脚本
jquery-autocomplete学习
一、用前必备
官方网站:http://bassistance.de/jquery-plugins/jquery-plugin-autocomplete/
当前版本:1.1
需要JQuery版本:1.2.6
二、使用
<script src="./jquery-1.3.2.js" type="text/ja
- PLSQL-Developer或者Navicat等工具连接远程oracle数据库的详细配置以及数据库编码的修改
超声波
oracleplsql
在服务器上将Oracle安装好之后接下来要做的就是通过本地机器来远程连接服务器端的oracle数据库,常用的客户端连接工具就是PLSQL-Developer或者Navicat这些工具了。刚开始也是各种报错,什么TNS:no listener;TNS:lost connection;TNS:target hosts...花了一天的时间终于让PLSQL-Developer和Navicat等这些客户
- 数据仓库数据模型之:极限存储--历史拉链表
superlxw1234
极限存储数据仓库数据模型拉链历史表
在数据仓库的数据模型设计过程中,经常会遇到这样的需求:
1. 数据量比较大; 2. 表中的部分字段会被update,如用户的地址,产品的描述信息,订单的状态等等; 3. 需要查看某一个时间点或者时间段的历史快照信息,比如,查看某一个订单在历史某一个时间点的状态, 比如,查看某一个用户在过去某一段时间内,更新过几次等等; 4. 变化的比例和频率不是很大,比如,总共有10
- 10点睛Spring MVC4.1-全局异常处理
wiselyman
spring mvc
10.1 全局异常处理
使用@ControllerAdvice注解来实现全局异常处理;
使用@ControllerAdvice的属性缩小处理范围
10.2 演示
演示控制器
package com.wisely.web;
import org.springframework.stereotype.Controller;
import org.spring

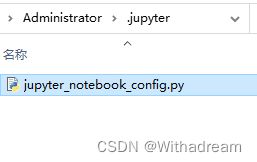
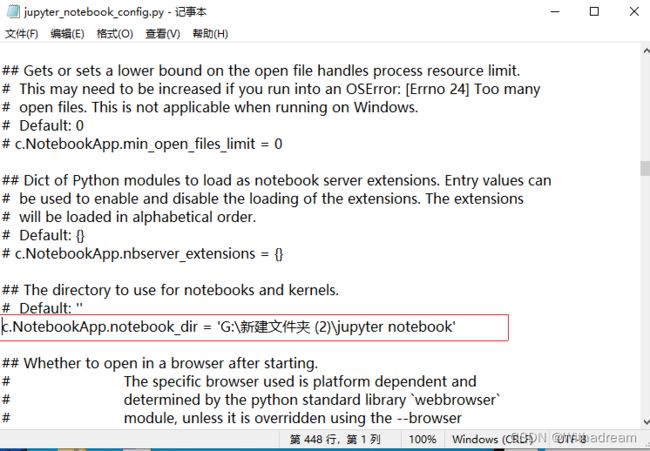
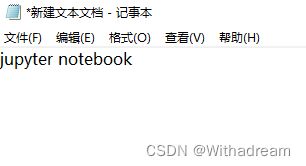
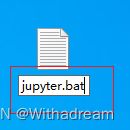
 二、更改打开文件位置和快捷启动方式