Pytorch 多层感知机
多层感知机
0. 环境介绍
环境使用 Kaggle 里免费建立的 Notebook
教程使用李沐老师的 动手学深度学习 网站和 视频讲解
小技巧:当遇到函数看不懂的时候可以按 Shift+Tab 查看函数详解。
1. 多层感知机概述
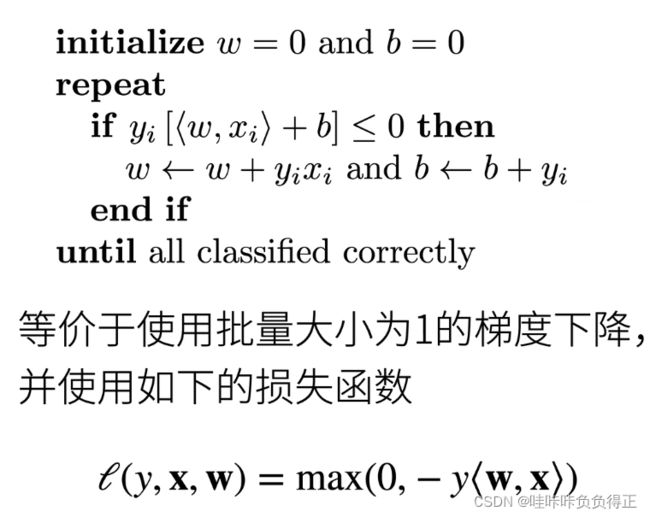
1.0 感知机
1.1 多层感知机
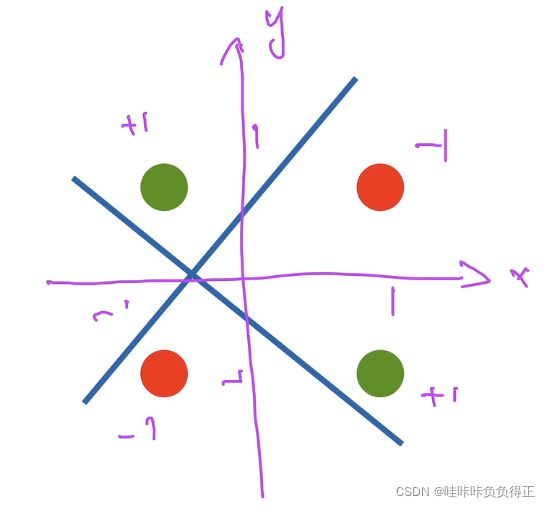
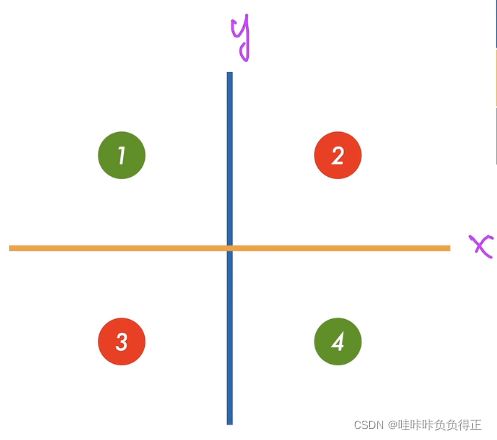
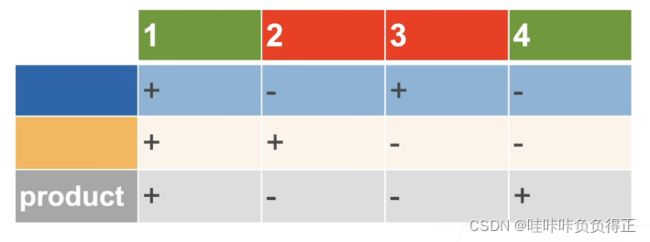
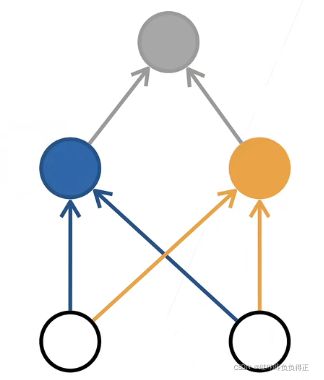
1.1.1 学习 XOR
1.1.2 隐藏层
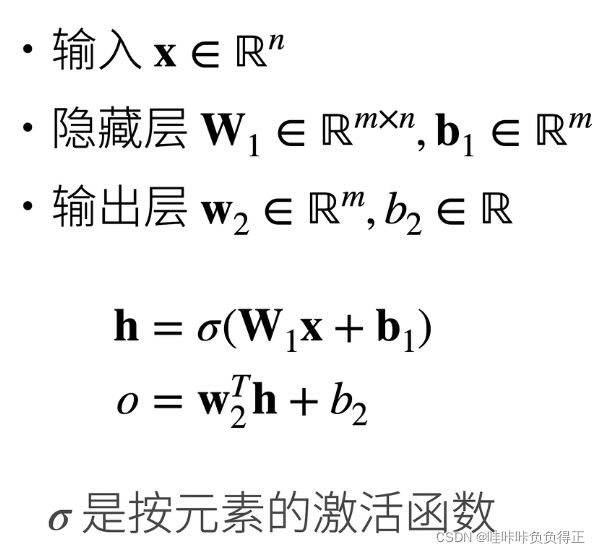
在网络中加入一个或多个隐藏层来克服线性模型的限制, 使其能处理更普遍的函数关系类型。 每一层都输出到上面的层,直到生成最后的输出。 我们可以把前 L − 1 L-1 L−1 层看作表示,把最后一层看作线性预测器。
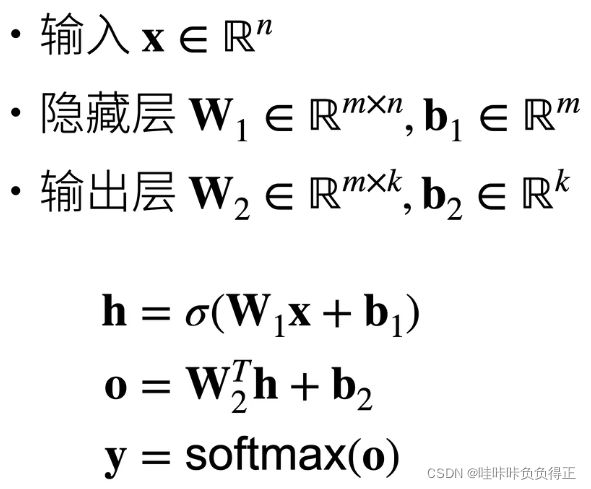
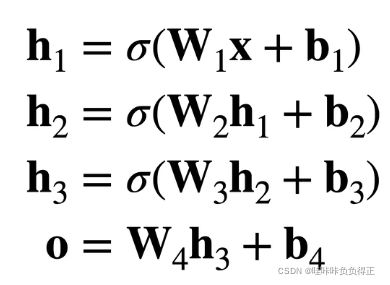
1.1.3 MLP 结构
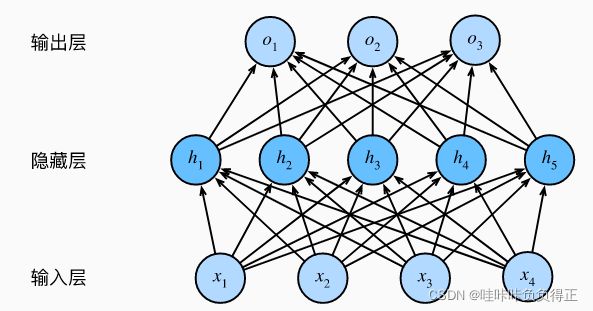
怎么设计网络比较好?
李沐老师说:更深且瘦的网络效果可能要比浅而胖的网络效果要好,浅而胖的网络容易过拟合。但是老师也说这个没有理论依据,但效果上确实要好。
1.1.4 激活函数
激活函数(activation function)通过计算加权和并加上偏置来确定神经元是否应该被激活, 它们将输入信号转换为输出的可微运算。
并且激活函数必须是非线性的。若激活函数是线性的话,即使经过多层感知机,运算结果还是 W i j W_{ij} Wij 的线性组合,即还是线性的,无法解决非线性问题。
为方便理解:
浙江大学 胡浩基老师的机器学习课程 6:50 左右有例子。
1.1.4.1 ReLU
最受欢迎的激活函数是修正线性单元(Rectified linear unit,ReLU), 因为它实现简单,同时在各种预测任务中表现良好。 ReLU 提供了一种非常简单的非线性变换。
ReLU 激活函数公式:
ReLU ( x ) = max ( x , 0 ) \operatorname{ReLU}(x) = \max(x, 0) ReLU(x)=max(x,0)
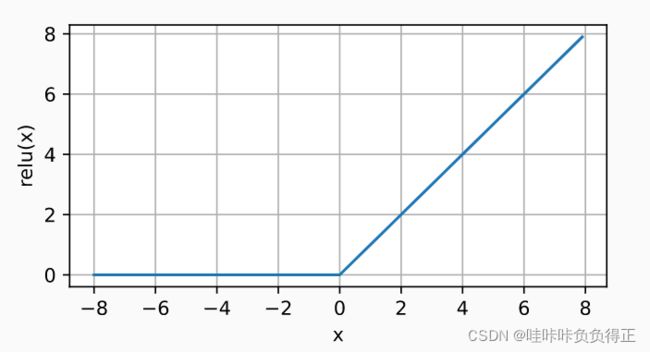
使用ReLU的原因是,它求导表现得特别好:要么让参数消失,要么让参数通过。 这使得优化表现得更好,并且ReLU减轻了困扰以往神经网络的梯度消失问题。
1.1.4.2 Sigmoid
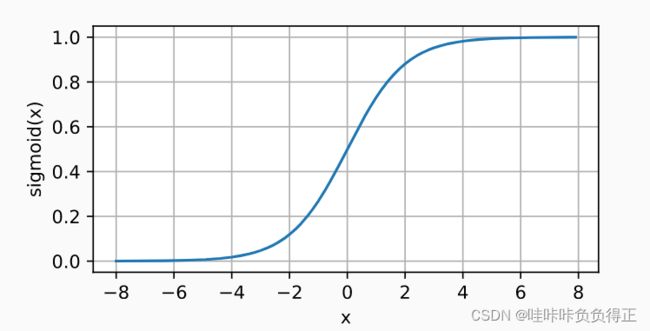
将输入投影到 ( 0 , 1 ) (0, 1) (0,1)。
Sigmoid激活函数的公式:
sigmoid ( x ) = 1 1 + exp ( − x ) . \operatorname{sigmoid}(x) = \frac{1}{1 + \exp(-x)}. sigmoid(x)=1+exp(−x)1.
1.1.4.3 tanh
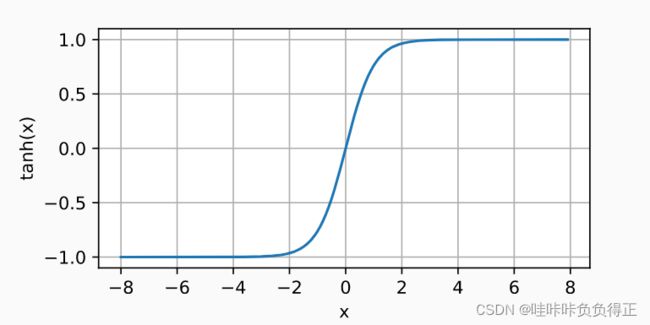
与 sigmoid 函数类似, tanh (双曲正切)函数能将其输入压缩转换到区间 ( − 1 , 1 ) (-1, 1) (−1,1) 上。
tanh 激活函数的公式:
tanh ( x ) = 1 − exp ( − 2 x ) 1 + exp ( − 2 x ) . \operatorname{tanh}(x) = \frac{1 - \exp(-2x)}{1 + \exp(-2x)}. tanh(x)=1+exp(−2x)1−exp(−2x).
1.1.5 超参数
- 隐藏层数
- 每层隐藏层的大小(神经元个数)
2. 从零实现
2.0 导入模块
!pip install -U d2l # install d2l 模块
import torch
from torch import nn
from d2l import torch as d2l

batch_size = 256
train_iter, test_iter = d2l.load_data_fashion_mnist(batch_size)
2.1 初始化模型参数
实现一个具有单隐藏层的多层感知机, 它包含 256 256 256 个隐藏单元。
通常,我们选择 2 2 2 的若干次幂作为层的宽度。 因为内存在硬件中的分配和寻址方式,这么做往往可以在计算上更高效。
num_inputs, num_outputs, num_hiddens = 784, 10, 256
# 第一层
W1 = nn.Parameter(torch.randn(
    num_inputs, num_hiddens, requires_grad=True) * 0.01)
b1 = nn.Parameter(torch.zeros(num_hiddens, requires_grad=True))
# 第二层
W2 = nn.Parameter(torch.randn(
    num_hiddens, num_outputs, requires_grad=True) * 0.01)
b2 = nn.Parameter(torch.zeros(num_outputs, requires_grad=True))

params = [W1, b1, W2, b2]
2.2 激活函数(ReLU)
def relu(X):
    a = torch.zeros_like(X)
    return torch.max(X, a)
2.3 模型
def net(X):
    X = X.reshape((-1, num_inputs))
    H = relu(X@W1 + b1)  # 这里“@”代表矩阵乘法
    return (H@W2 + b2)
2.4 损失函数
loss = nn.CrossEntropyLoss(reduction='none')
2.5 训练
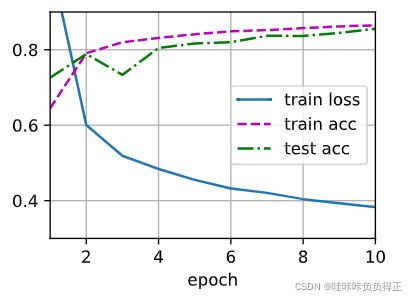
num_epochs, lr = 10, 0.1
updater = torch.optim.SGD(params, lr=lr)
d2l.train_ch3(net, train_iter, test_iter, loss, num_epochs, updater)
2.6 预测
d2l.predict_ch3(net, test_iter)
3. 简洁实现
3.0 导入模块
import torch
from torch import nn
from d2l import torch as d2l
3.1 模型
net = nn.Sequential(nn.Flatten(),
                    nn.Linear(784, 256),
                    nn.ReLU(),
                    nn.Linear(256, 10))

def init_weights(m):
    if type(m) == nn.Linear:
        nn.init.normal_(m.weight, std=0.01)

net.apply(init_weights);
3.2 损失函数,优化器
batch_size, lr, num_epochs = 256, 0.1, 10
loss = nn.CrossEntropyLoss(reduction='none')
trainer = torch.optim.SGD(net.parameters(), lr=lr)
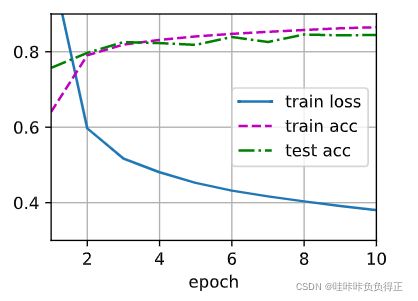
3.3 训练
train_iter, test_iter = d2l.load_data_fashion_mnist(batch_size)
d2l.train_ch3(net, train_iter, test_iter, loss, num_epochs, trainer)
