Win10系统搭建最新Anaconda(3)+python(3.8)+tensorflow-gpu(2.7)+CUDA(11.5)+cuDNN(8.1)环境的详细流程
一、Anaconda安装
1. 下载安装
下载地址:https://mirrors.tuna.tsinghua.edu.cn/anaconda/archive/
镜像使用帮助:https://mirror.tuna.tsinghua.edu.cn/help/anaconda/
参考教程(简书,很详细):https://www.jianshu.com/p/62f155eb6ac5
2. 验证安装成功
终端输入:
conda list
在终端中输入anaconda-navigator。如果Anaconda被成功安装,则Anaconda Navigator将会被启动。
3. 修改镜像
Windows 用户无法直接创建名为 .condarc 的文件,可先执行 conda config --set show_channel_urls yes 生成该文件之后再修改
生成文件路径在:C:\Users\UserName
channels:
  - defaults
show_channel_urls: true
default_channels:
  - https://mirrors.tuna.tsinghua.edu.cn/anaconda/pkgs/main
  - https://mirrors.tuna.tsinghua.edu.cn/anaconda/pkgs/r
  - https://mirrors.tuna.tsinghua.edu.cn/anaconda/pkgs/msys2
custom_channels:
  conda-forge: https://mirrors.tuna.tsinghua.edu.cn/anaconda/cloud
  msys2: https://mirrors.tuna.tsinghua.edu.cn/anaconda/cloud
  bioconda: https://mirrors.tuna.tsinghua.edu.cn/anaconda/cloud
  menpo: https://mirrors.tuna.tsinghua.edu.cn/anaconda/cloud
  pytorch: https://mirrors.tuna.tsinghua.edu.cn/anaconda/cloud
  simpleitk: https://mirrors.tuna.tsinghua.edu.cn/anaconda/cloud
二、Windows下安装CPU版本的tensorflow
终端是:Anaconda Prowershell Prompt
1. 搭建python环境
在Anaconda Prompt中,用Anaconda3创建一个python的环境,环境名称为tensorflow ,输入下面命令:
- 查看python版本

输入命令:conda create -n tensorflow python=3.8.8 - 查看环境
运行 开始—>Anaconda3—>Anaconda Navigator,点击左侧的Environments,可以看到tensorflow的环境已经创建好了。

- 打开与关闭tensorflow环境

2. 安装TensorFlow
CPU版本-命令是:pip install --ignore-installed --upgrade tensorflow

.whl下载地址
https://pypi.org/project/tensorflow/#files
使用镜像下载:pip install -i https://pypi.tuna.tsinghua.edu.cn/simple/ --upgrade --ignore-installed tensorflow
速度快的飞起~
3.测试代码
注意:这里安装的是TF2.0版本,因此使用TF1.x的版本测试代码会出现问题,可修改后使用(TF2.0中已经移除了session这一功能)
import tensorflow as tf
tf.compat.v1.disable_eager_execution() #保证sess.run()能够正常运行
hello = tf.constant('Hello, TensorFlow!')  #初始化一个TensorFlow的常量
#sess = tf.Session()  #启动一个会话 TensorFlow1.x版本
sess =  tf.compat.v1.Session()
print(sess.run(hello))

可能出现的问题:
输入import tensorflow as tf
提示No module named 'tensorflow'问题
输入conda list 查看
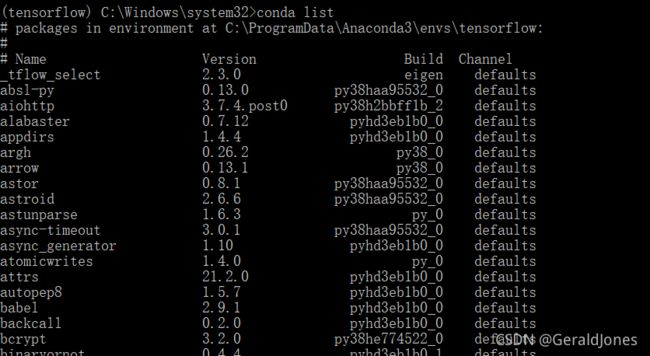
其中没有tensorflow 和 numpy包,需要安装
在tensorflow环境下conda install tensorflow
在查看conda list 已经存在tensorflow 和 numpy包
三、Windows下安装GPU版本的TensorFlow
参考TensorFlow官方文档:https://tensorflow.google.cn/install/source_windows
1. 安装CUDA
查看机器的显卡并检查显卡是否支持CUDA
官方的安装介绍文档:https://docs.nvidia.com/cuda/
Windows
Linux
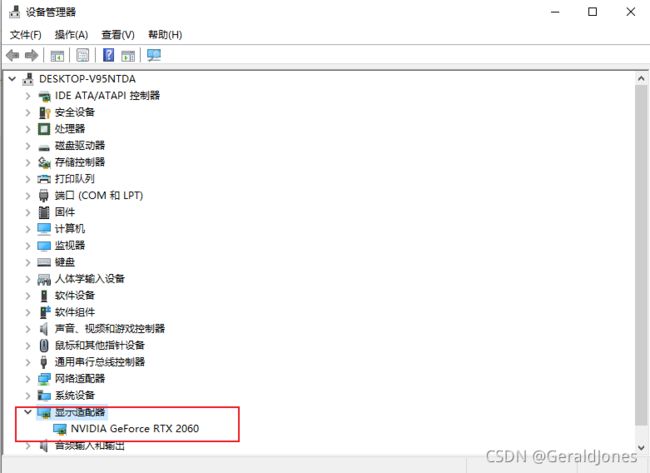
**IMP!!!先检查自己的CPU是否为安培架构,如果是安培架构(RTX30代)**可以选择CUDA11以上,如果是非安培架构推荐使用CUDA10.2,性能更优。此处自己初次安装,机器是RTX2060,非安培架构(图灵架构),但是安装了CUDA11.5(以下部分参考图示有些是V10.2,操作过程均相同)
(此处推荐一个很方便的截图工具Snipastehttps://zh.snipaste.com/)
windows winkey+x键调出此界面,打开设备管理器
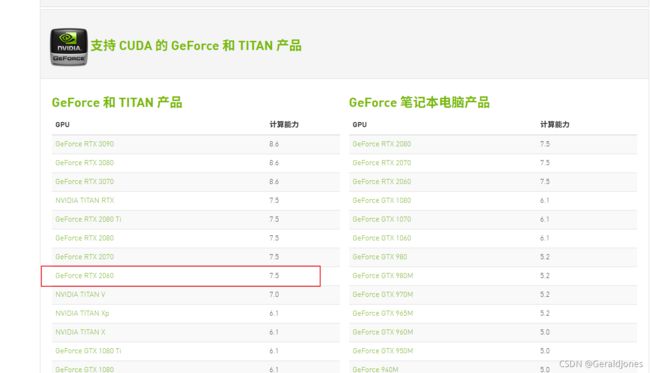
打开NVIDIA网址查看支持情况https://developer.nvidia.com/zh-cn/cuda-gpus
下载安装CUDA
最新版本(11.5.1)下载网址:https://developer.nvidia.com/cuda-downloads
以往的版本下载网址:https://developer.nvidia.com/cuda-toolkit-archive
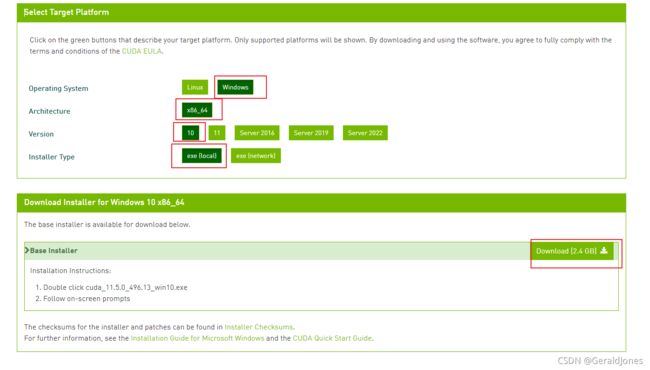
本地安装CUDA
双击exe->选择解压缩安装程序的暂存目录->安装(依此选择精简—>I understand…)
**注意:**安装期间请关闭杀毒软件

2. 配置cuDNN
官方安装介绍文档:https://docs.nvidia.com/deeplearning/cudnn/install-guide/
下载软件
最新版本网址:https://developer.nvidia.com/zh-cn/cudnn
cuDNN以往的版本:https://developer.nvidia.com/rdp/cudnn-archive
此网站需要注册会员(免费)进行下载,(网站响应较慢,耐心等待)
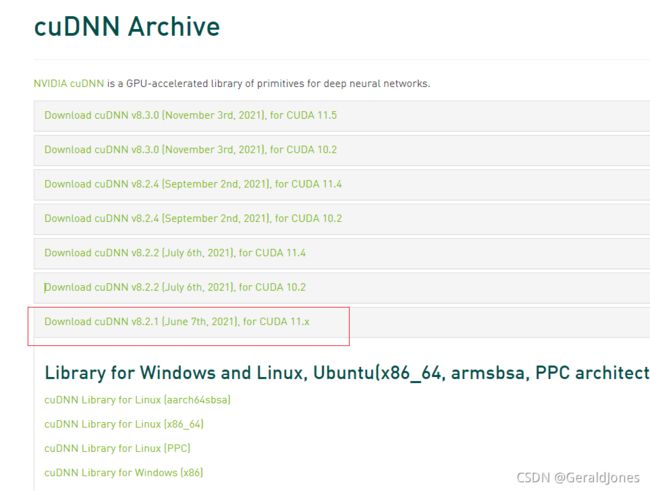
选择与CUDA相匹配的版本
cuDNN v8.3.0对应CUDA11.5

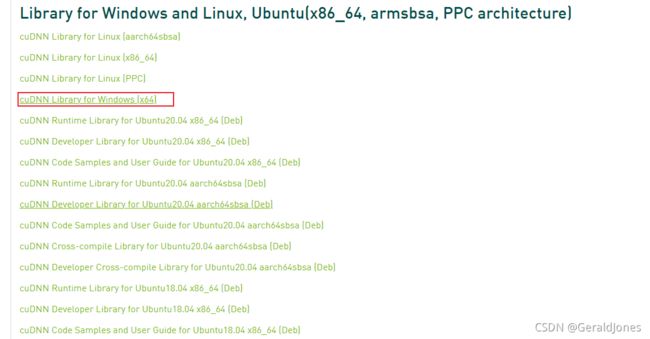
解压cuDNN,并将其文件拷贝到C:\Program Files\NVIDIA GPU Computing Toolkit\CUDA\v11.5下
如下图(此图是CUDA10.2版本,11.5版本相同):
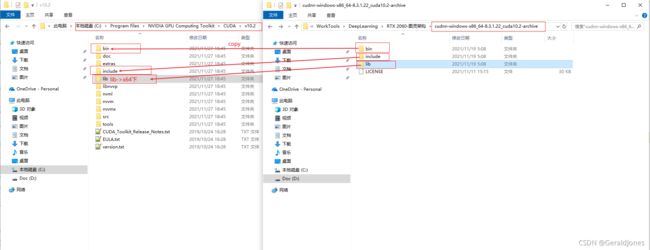
配置环境变量
安装好CUDA后,环境变量中已经有CUDA_PATH和CUDA_PATH_Vx.x,并且系统环境变量中也已经添加

此外还需要在path中添加以下环境变量:
C:\Program Files\NVIDIA GPU Computing Toolkit\CUDA\v11.5\include
C:\Program Files\NVIDIA GPU Computing Toolkit\CUDA\v11.5\lib\x64
C:\Program Files\NVIDIA GPU Computing Toolkit\CUDA\v11.5\extras\CUPTI\lib64
安装完成后看一下显卡信息
进入到对应的目录下运行.\deviceQuery.exe

3.搭建TensorFlow的GPU虚拟环境
安装python
conda create --name tensorflow-gpu python=3.8.8 anaconda


启动与关闭TensorFlow-gpu虚拟环境

安装TensorFlow
在TensorFlow-gpu虚拟环境下安装TensorFlow-gpu版本
命令:pip install tensorflow-gpu

速度太慢了,4个小时受不了
使用下面的命令:pip install -i https://pypi.tuna.tsinghua.edu.cn/simple/ tensorflow-gpu
安装指定版本的tensorflow-gpu命令:pip install -i https://pypi.tuna.tsinghua.edu.cn/simple tensorflow-gpu==2.3.0

不到一分钟解决!!!

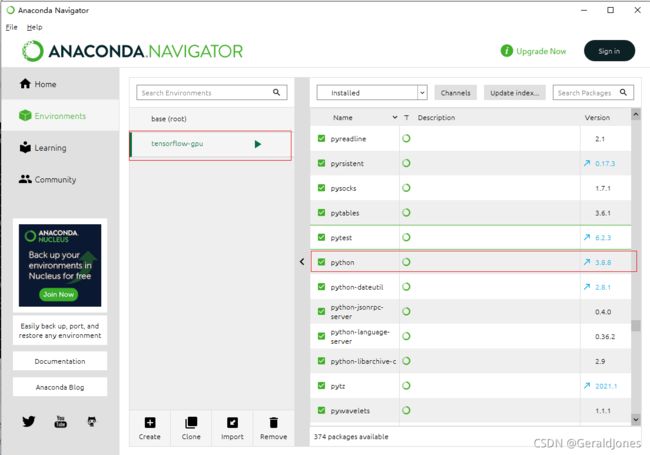
此时查看一下Anaconda Navigator中也已经安装完毕!!!
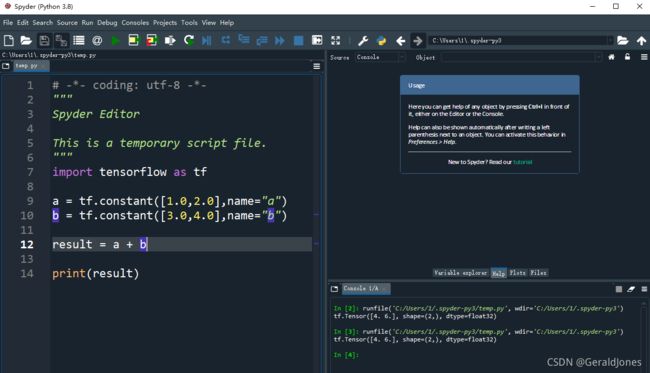
3. 安装结束进行测试验证
简单验证一下
TensorFlow-gpu虚拟环境下唤醒spyder

# -*- coding: utf-8 -*-
"""
Spyder Editor

This is a temporary script file.
"""
import tensorflow as tf

a = tf.constant([1.0,2.0],name="a")
b = tf.constant([3.0,4.0],name="b")

result = a + b

print(result)
遇到问题
CUDA11.5版本 cuDNN8.3.1官方给出的对应版本,测试起来不匹配
可以看一下:
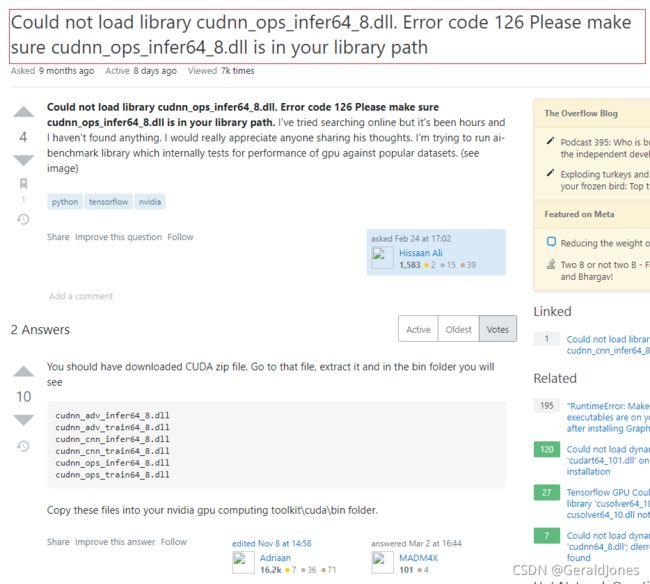
2021-11-27 22:38:54.686294: I tensorflow/stream_executor/cuda/cuda_dnn.cc:366] Loaded cuDNN version 8301
Could not load library cudnn_cnn_infer64_8.dll. Error code 126
Please make sure cudnn_cnn_infer64_8.dll is in your library path!
网上的类似的问题:https://stackoverflow.com/questions/66355477/could-not-load-library-cudnn-ops-infer64-8-dll-error-code-126-please-make-sure

可以参考官方TensorFlow已测试搭建版本

怎么解决呢?
stackoverflow网址
- 路径的问题,前面路径都已经配置,此问题这种方法不适用
- 官方给出的版本不一致,目前官方给出的cuDNN v8.3其实和CUDA v11.5不匹配,网友的做法是选择非当前对应版本,比当前版本靠前一些的版本(太坑了,遇到此问题后,我原以为是路径的问题,期间重新安装了CUDA10.2 以及对应的cuDNN版本,添加了对应的变量路径,后没有出现此问题,但遇到tensorflow版本不一致的问题,掉头发……,决定重新安装11.5版本,还是遇到此问题)建议根据TensorFlow官方已测试CUDA和cuDNN对应版本安装,避免踩大坑
博主根据第二点进行安装的CUDA是v11.5版本,选cuDNN是v8.2.1
4. 安装paddlepaddle-gpu
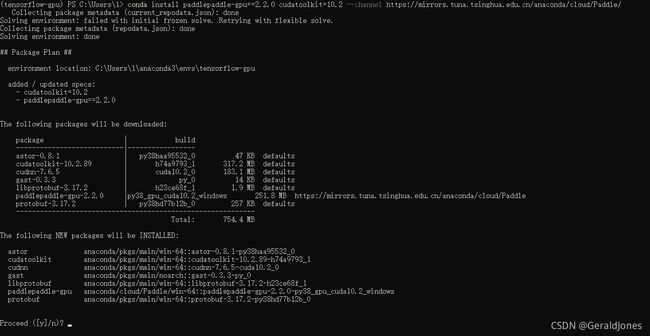
conda命令下安装:conda install paddlepaddle-gpu==2.2.0 cudatoolkit=10.2 --channel https://mirrors.tuna.tsinghua.edu.cn/anaconda/cloud/Paddle/

验证安装是否成功
python环境下输入一下命令:
import paddle
paddle.utils.run_check()
结束语
博客的目的一是为了后续自己的学习做一个记录,另一是把自己的操作流程分享出来,方便其他同学们参考,同时自己也参考了多个优秀博主的教程,也算是一个回馈!


