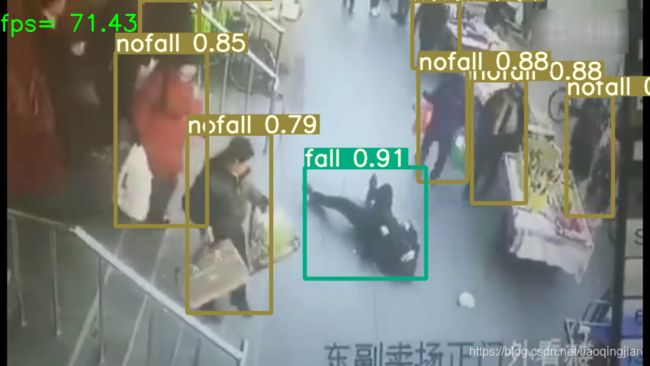
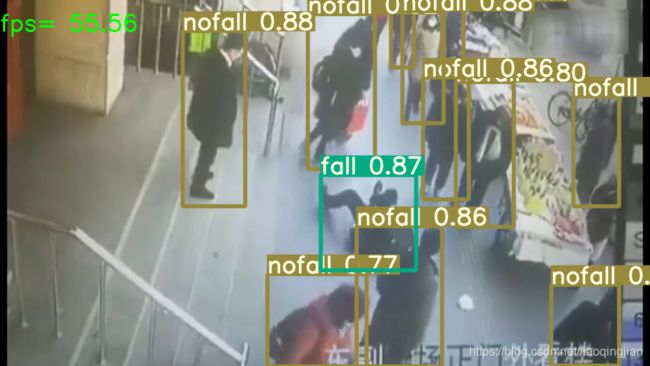
2021年7月20日,使用yolov5训练摔倒检测模型,效果超乎你想象!!!
1.准备阶段,配置好自己的cuda 10.0环境,这里我就不多说了,网上教程太多了。在cmd中输入nvcc -V,最终结果显示下图即确定你的cuda 10.0环境安装成功。
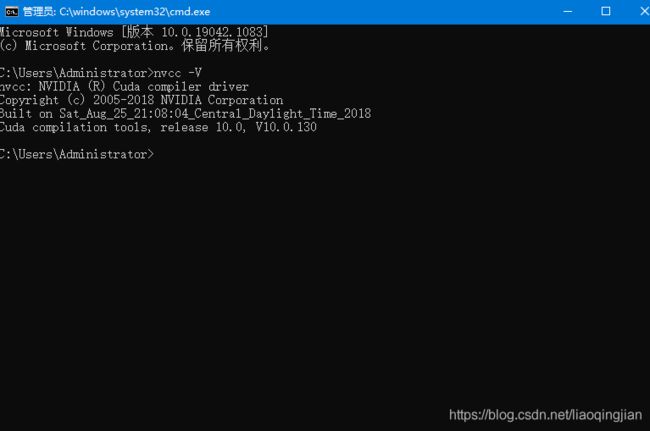
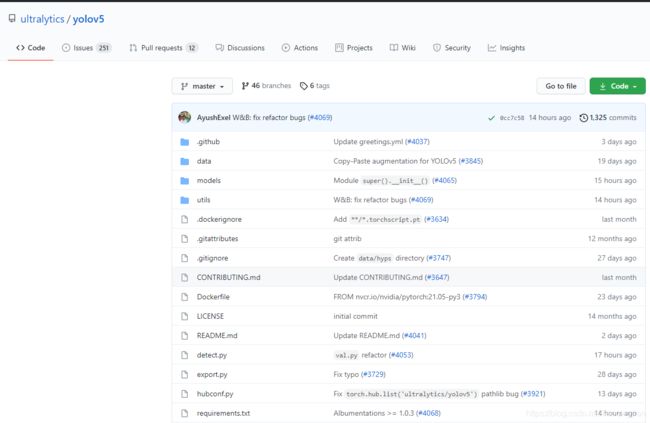
2.去github里面下载原作者的yolo5代码,地址:https://github.com/ultralytics/yolov5,原作者空间如下,如果github下不了自行去gitee官网去下,兄弟们懂得都懂。
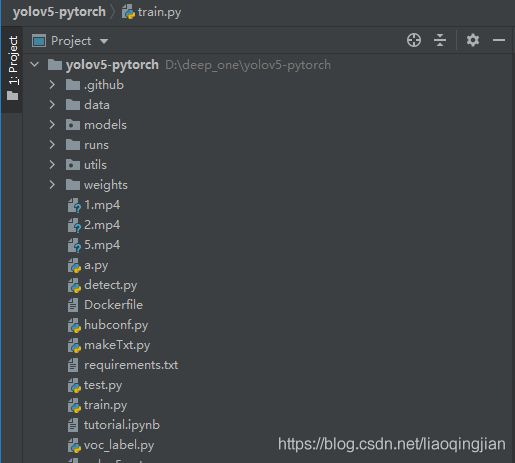
3.下载好后使用Pycharm软件打开
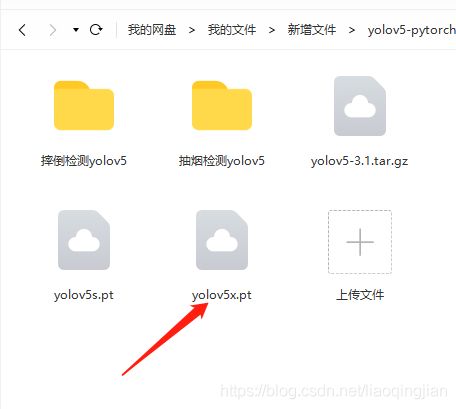
4.这一步需要下载模型了,大家没用过的可能不知道,我使用四个模型发现yolov5x.pt模型训练出来的效果是最好最准确的,我也不多废话,这四个模型网上都有,需要其他的模型自行去找就行,我就只给你们yolov5x.pt模型网盘内容了,如下
链接:https://pan.baidu.com/s/1KynYtWOLn0h2l78mtc_hhQ
提取码:ukr5
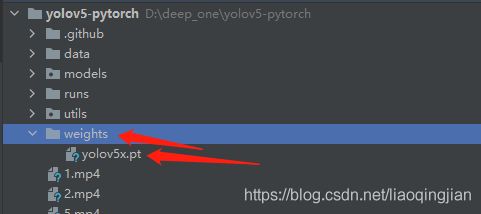
5.将下载好的yolov5x.pt模型放在weights文件夹中
6.接下来安装python库和环境,首先创建一个python 3.7的虚拟环境,然后安装pytorch 1.7.1版本的
使用以下命令安装python库
pip install torch==1.7.1 torchvision==0.8.2 -f https://download.pytorch.org/whl/torch_stable.html -i  https://pypi.tuna.tsinghua.edu.cn/simple/
pip install numpy
pip install matplotlib
pip install pandas
pip install scipy
pip install seaborn
pip install opencv-python
pip install tqdm
pip install pillow
pip install tensorboard -i https://pypi.tuna.tsinghua.edu.cn/simple
pip install pyyaml  -i https://pypi.tuna.tsinghua.edu.cn/simple
pip install pandas
pip install scikit-image -i https://pypi.tuna.tsinghua.edu.cn/simple
pip install Cython
pip install thop -i https://pypi.tuna.tsinghua.edu.cn/simple
pip install pycocotools
7.python环境安装完成后,在data文件夹下面创建下面四个文件夹:Annotations、images、ImageSets、labels
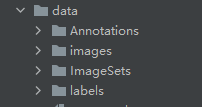
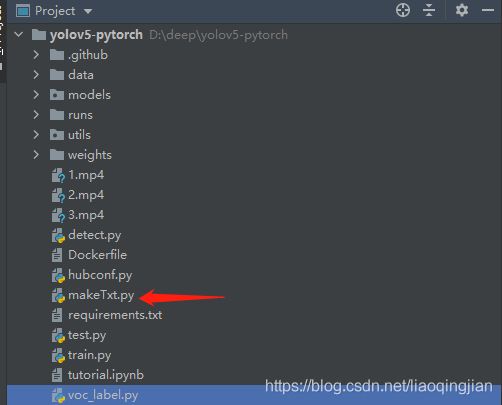
8.在主目录创建一个文件:makeTex.py,将下面内容复制进去
import os
import random


trainval_percent = 0.9
train_percent = 0.9
xmlfilepath = 'data/Annotations'
txtsavepath = 'data/ImageSets'
total_xml = os.listdir(xmlfilepath)

num = len(total_xml)
list = range(num)
tv = int(num * trainval_percent)
tr = int(tv * train_percent)
trainval = random.sample(list, tv)
train = random.sample(trainval, tr)

ftrainval = open('data/ImageSets/trainval.txt', 'w')
ftest = open('data/ImageSets/test.txt', 'w')
ftrain = open('data/ImageSets/train.txt', 'w')
fval = open('data/ImageSets/val.txt', 'w')

for i in list:
    name = total_xml[i][:-4] + '\n'
    if i in trainval:
        ftrainval.write(name)
        if i in train:
            ftrain.write(name)
        else:
            fval.write(name)
    else:
        ftest.write(name)

ftrainval.close()
ftrain.close()
fval.close()
ftest.close()
9.在主目录创建一个文件:voc_label.py,将下面内容复制进去
# xml解析包
import xml.etree.ElementTree as ET
import pickle
import os
# os.listdir() 方法用于返回指定的文件夹包含的文件或文件夹的名字的列表
from os import listdir, getcwd
from os.path import join


sets = ['train', 'test', 'val']
classes=["fall","nofall"]


# 进行归一化操作
def convert(size, box): # size:(原图w,原图h) , box:(xmin,xmax,ymin,ymax)
    dw = 1./size[0]     # 1/w
    dh = 1./size[1]     # 1/h
    x = (box[0] + box[1])/2.0   # 物体在图中的中心点x坐标
    y = (box[2] + box[3])/2.0   # 物体在图中的中心点y坐标
    w = box[1] - box[0]         # 物体实际像素宽度
    h = box[3] - box[2]         # 物体实际像素高度
    x = x*dw    # 物体中心点x的坐标比(相当于 x/原图w)
    w = w*dw    # 物体宽度的宽度比(相当于 w/原图w)
    y = y*dh    # 物体中心点y的坐标比(相当于 y/原图h)
    h = h*dh    # 物体宽度的宽度比(相当于 h/原图h)
    return (x, y, w, h)    # 返回 相对于原图的物体中心点的x坐标比,y坐标比,宽度比,高度比,取值范围[0-1]


# year ='2012', 对应图片的id(文件名)
def convert_annotation(image_id):
    '''
    将对应文件名的xml文件转化为label文件,xml文件包含了对应的bunding框以及图片长款大小等信息,
    通过对其解析,然后进行归一化最终读到label文件中去,也就是说
    一张图片文件对应一个xml文件,然后通过解析和归一化,能够将对应的信息保存到唯一一个label文件中去
    labal文件中的格式:calss x y w h  同时,一张图片对应的类别有多个,所以对应的bunding的信息也有多个
    '''
    # 对应的通过year 找到相应的文件夹,并且打开相应image_id的xml文件,其对应bund文件
    in_file = open('data/Annotations/%s.xml' % (image_id), encoding='utf-8')
    # 准备在对应的image_id 中写入对应的label,分别为
    #
    out_file = open('data/labels/%s.txt' % (image_id), 'w', encoding='utf-8')
    # 解析xml文件
    tree = ET.parse(in_file)
    # 获得对应的键值对
    root = tree.getroot()
    # 获得图片的尺寸大小
    size = root.find('size')
    # 如果xml内的标记为空,增加判断条件
    if size != None:
        # 获得宽
        w = int(size.find('width').text)
        # 获得高
        h = int(size.find('height').text)
        # 遍历目标obj
        for obj in root.iter('object'):
            # 获得difficult ??
            difficult = obj.find('difficult').text
            # 获得类别 =string 类型
            cls = obj.find('name').text
            # 如果类别不是对应在我们预定好的class文件中,或difficult==1则跳过
            if cls not in classes or int(difficult) == 1:
                continue
            # 通过类别名称找到id
            cls_id = classes.index(cls)
            # 找到bndbox 对象
            xmlbox = obj.find('bndbox')
            # 获取对应的bndbox的数组 = ['xmin','xmax','ymin','ymax']
            b = (float(xmlbox.find('xmin').text), float(xmlbox.find('xmax').text), float(xmlbox.find('ymin').text),
                 float(xmlbox.find('ymax').text))
            print(image_id, cls, b)
            # 带入进行归一化操作
            # w = 宽, h = 高, b= bndbox的数组 = ['xmin','xmax','ymin','ymax']
            bb = convert((w, h), b)
            # bb 对应的是归一化后的(x,y,w,h)
            # 生成 calss x y w h 在label文件中
            out_file.write(str(cls_id) + " " + " ".join([str(a) for a in bb]) + '\n')


# 返回当前工作目录
wd = getcwd()
print(wd)


for image_set in sets:
    '''
    对所有的文件数据集进行遍历
    做了两个工作:
    1.将所有图片文件都遍历一遍,并且将其所有的全路径都写在对应的txt文件中去,方便定位
    2.同时对所有的图片文件进行解析和转化,将其对应的bundingbox 以及类别的信息全部解析写到label 文件中去
         最后再通过直接读取文件,就能找到对应的label 信息
    '''
    # 先找labels文件夹如果不存在则创建
    if not os.path.exists('data/labels/'):
        os.makedirs('data/labels/')
    # 读取在ImageSets/Main 中的train、test..等文件的内容
    # 包含对应的文件名称
    image_ids = open('data/ImageSets/%s.txt' % (image_set)).read().strip().split()
    # 打开对应的2012_train.txt 文件对其进行写入准备
    list_file = open('data/%s.txt' % (image_set), 'w')
    # 将对应的文件_id以及全路径写进去并换行
    for image_id in image_ids:
        list_file.write('data/images/%s.jpg\n' % (image_id))
        # 调用  year = 年份  image_id = 对应的文件名_id
        try:
            convert_annotation(image_id)
        except:
            continue
    # 关闭文件
    list_file.close()
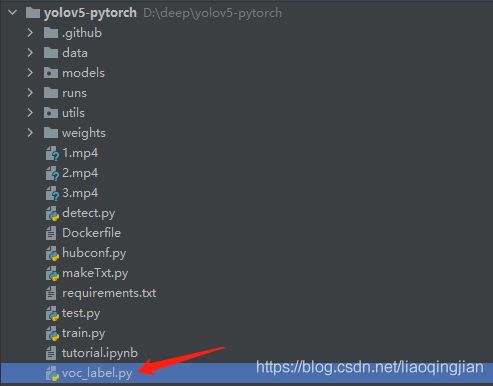
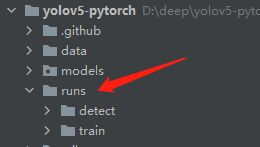
10.在主目录下创建文件夹runs,在runs文件夹下面创建文件夹detect、train
11.所有前期准备已经完成,现在获取摔倒数据集准备训练,获取摔倒数据集地址:https://download.csdn.net/download/liaoqingjian/20371164?spm=1001.2014.3001.5501
该数据集需要9.9元,标注不易,希望理解。
12.将下载好的摔倒数据集分别放入Annotations、images文件夹
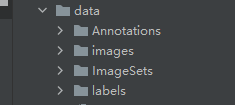
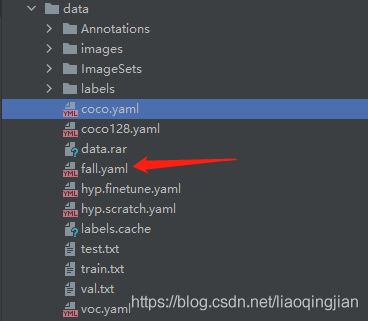
13.在data文件夹中找到coco.yaml,复制coco.yaml文件在同目录下黏贴换一个名为fall.yaml文件,如下图
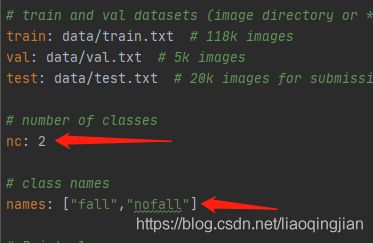
14.修改fall.yaml文件内容,包括类别数和类别名,如下
15.找到models文件夹下的yolov5x.yaml文件,修改yolov5x.yaml中的类别数,如下图

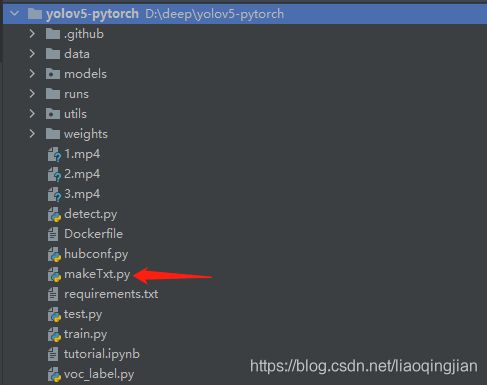
16.运行makeTxt.py文件
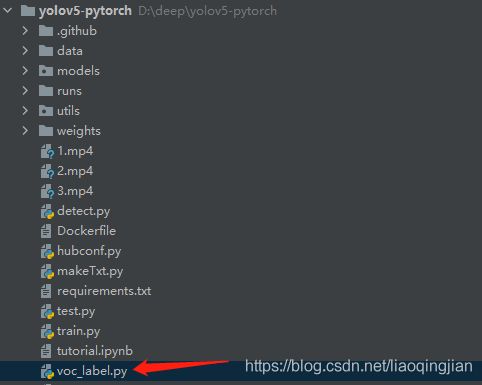
17.运行voc_label.py文件
18.找到train.py文件,在train.py文件中按照下图的修改前三个路径

19.运行train.py文件

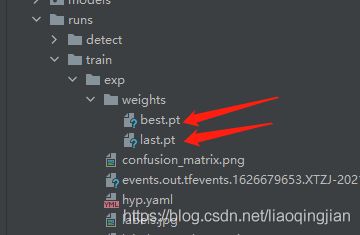
20.训练的模型存在的位置
21.找到detect.py文件,修改detect.py文件的模型路径和运行的视频素材路径,如下图。
![]()
22.运行的时候没有展示,会直接生成视频保存在runs下的detect文件夹下,如想直接展示,修改detect.py文件的部分代码,部分代码如下
            if save_img:
                fps = 0.0
                if dataset.mode == 'image':
                    cv2.imwrite(save_path, im0)
                    cv2.imshow("11",im0)
                    cv2.waitKey(1)
                else:  # 'video'
                    if vid_path != save_path:  # new video
                        vid_path = save_path
                        if isinstance(vid_writer, cv2.VideoWriter):
                            vid_writer.release()  # release previous video writer

                        fourcc = 'mp4v'  # output video codec
                        fps = vid_cap.get(cv2.CAP_PROP_FPS)
                        w = int(vid_cap.get(cv2.CAP_PROP_FRAME_WIDTH))
                        h = int(vid_cap.get(cv2.CAP_PROP_FRAME_HEIGHT))
                        vid_writer = cv2.VideoWriter(save_path, cv2.VideoWriter_fourcc(*fourcc), fps, (w, h))
                    vid_writer.write(im0)
                    fps = (fps + (1. / (time.time() - t2))) / 2
                    print("fps= %.2f" % (fps))
                    im0 = cv2.putText(im0, "fps= %.2f" % (fps), (0, 40), cv2.FONT_HERSHEY_SIMPLEX, 1, (0, 255, 0),2)
                    cv2.imshow("11", im0)
                    cv2.waitKey(1)
23.送上视频素材
链接:https://pan.baidu.com/s/1U5esHlzrNIjAXyB_me7D8A
提取码:8ymo
运行成功的兄弟们给个一键三连!!!
如有运行问题或出现报错又或有bug请在下方留言,我会及时回复!!!
