照猫画虎——OpenCV绘图函数
照猫画虎——OpenCv入门之绘图函数
-
- OpenCV 中的绘图函数
-
- 【绘图函数】
- 【参数】
- 画线
- 画矩形
- 写文字
- 画圆
- 画椭圆
- 画多边形
- 综合练习
OpenCV 中的绘图函数
【绘图函数】
cv2.line(),cv2.circle(),cv2.rectangle(), cv2.ellipse(),cv2.polylines(),cv2.putText() 等。
【参数】
- img:你想要绘制图形的那幅图像。
- color:形状的颜色。以RGB为例,需要传入一个元组,例如:(255, 0, 0) 代表蓝色;对于灰度图只需要传入灰度值。
- thickness:线条的粗细。如果给一个闭合图形设置为 -1,那么这个图形就会被填充,默认值是 1。
- linetype:线条的类型, 8连接,抗锯齿等;默认情况是8连接;cv2.LINE_AA 为抗锯齿,这样看起来会非常平滑。
- shift:坐标的小数点位数。
- cv2.waitKey():顾名思义等待键盘输入,单位为毫秒,即等待指定的毫秒数看是否有键盘输入,若在等待时间内按下任意键,则返回按键的ASCII码,程序继续运行;若没有按下任何键,超时后返回-1;参数为0表示无限等待;不调用waitKey的话,窗口会一闪而逝,看不到显示的图片。
画线
返回顶部
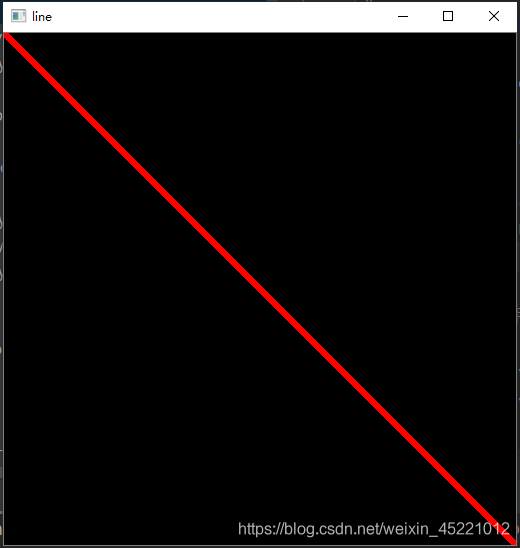
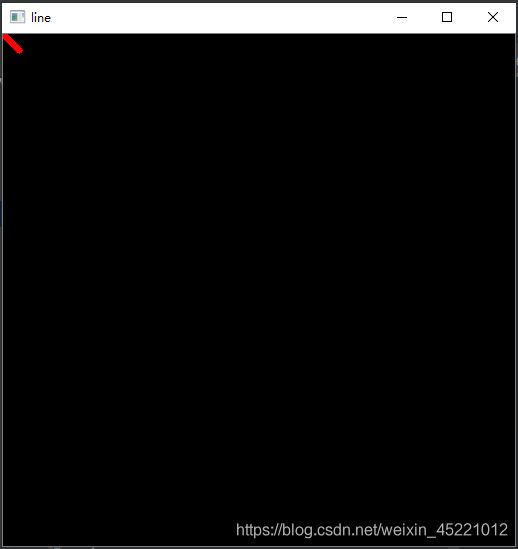
要画一条线,你只需要告诉函数这条线的起点和终点。
我们下面会画一条【从左上方到右下角的红色线段】。
line(img, pt1, pt2, color, thickness=None, lineType=None, shift=None)
import numpy as np
import cv2


# 画布
canvas = np.zeros((512, 512, 3), np.uint8)
# 画直线
line = cv2.line(canvas, (0, 0), (511, 511), (0, 0, 255), 5, shift=0)
cv2.imshow("line", line)
cv2.waitKey(0)
画矩形
返回顶部
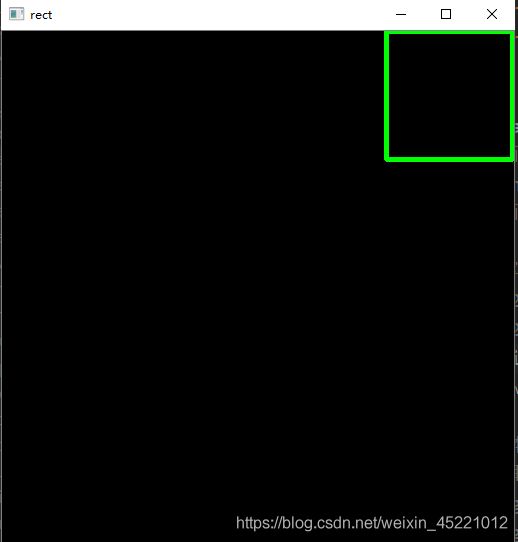
要画一个矩形,你需要告诉函数的左上角顶点和右下角顶点的坐标。
这次,我们会在图像的右上角画一个绿色的矩形。
rectangle(img, pt1, pt2, color, thickness=None, lineType=None, shift=None)
import numpy as np
import cv2


canvas = np.zeros((512, 512, 3), np.uint8)
# 画矩形
rect = cv2.rectangle(canvas, (384, 0), (510, 128), (0, 255, 0), 3)
cv2.imshow("rect", rect)
cv2.waitKey(0)
写文字
返回顶部
putText(img, text, org, fontFace, fontScale, color, thickness=None, lineType=None, bottomLeftOrigin=None)
- 要绘制的文字
- 要绘制的位置
- 字体类型【通过查看 cv2.putText() 的文档找到支持的字体】
- 字体的大小
- 文字的一般属性如颜色,粗细,线条的类型等【为了更好看一点推荐使用 linetype=cv2.LINE_AA】
import numpy as np
import cv2


canvas = np.zeros((512, 512, 3), np.uint8)
rect = cv2.rectangle(canvas, (384, 0), (510, 128), (0, 255, 0), 3)
# 写文字
cv2.putText(canvas, "Lucy", (10, 10), cv2.FONT_HERSHEY_SIMPLEX, 0.55, (0, 255, 0), 1)
cv2.imshow("rect", rect)
cv2.waitKey(0)
画圆
返回顶部
要画圆的话,只需要指定圆形的中心点坐标和半径大小。
我们在上面的矩形中画一个圆。
circle(img, center, radius, color, thickness=None, lineType=None, shift=None)
import numpy as np
import cv2


canvas = np.zeros((512, 512, 3), np.uint8)
rect = cv2.rectangle(canvas, (384, 0), (510, 128), (0, 255, 0), 3)
cv2.putText(canvas, "Lucy", (10, 10), cv2.FONT_HERSHEY_SIMPLEX, 0.55, (0, 255, 0), 1)
# 画圆
cv2.circle(canvas, (447, 63), 63, (0, 0, 255), -1)
cv2.imshow("rect", rect)
cv2.waitKey(0)
画椭圆
返回顶部
画椭圆比较复杂,我们要多输入几个参数:
- 一个参数是中心点的位置坐标;
- 下一个参数是长轴和短轴的长度;
- 椭圆轴沿顺时针方向旋转的角度。
椭圆弧沿顺时针方向起始的角度和结束角度,如果是 0 和 360,就是整个椭圆。
下面的例子是在图片的中心绘制半个椭圆。
ellipse(img, center, axes, angle, startAngle, endAngle, color, thickness=None, lineType=None, shift=None)
import numpy as np
import cv2


canvas = np.zeros((512, 512, 3), np.uint8)
# 画椭圆
ellipse = cv2.ellipse(canvas, (256, 256), (100, 50), 45, 0, 180, 255, -1)
cv2.imshow("ellipse", ellipse)
cv2.waitKey(0)
画多边形
返回顶部
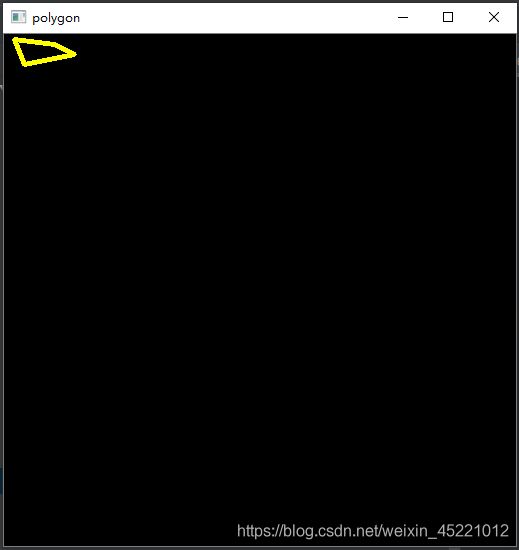
画多边形,需要指点每个顶点的坐标。
用这些点的坐标构建一个大小等于行数的 [ x 1 , x 2 ] [x_1, x_2] [x1,x2]数组,行数就是点的数目,这个数组的数据类型必须为 int32。
这里画一个黄色的具有四个顶点的多边形。
polylines(img, pts, isClosed, color, thickness=None, lineType=None, shift=None)
- 如果第三个参数是 False,我们得到的多边形是不闭合的(首尾不相连)。
import numpy as np
import cv2


# 多边形
pts = np.array([[10, 5], [20, 30], [70, 20], [50, 10]], np.int32)
pts = pts.reshape((-1, 1, 4, 2))  # 这里 reshape 的第一个参数为 -1,表明这一维的长度是根据后面的维度的计算出来的。
polygon = cv2.polylines(canvas, pts, True, (0, 255, 255), 4)
cv2.imshow("polygon", polygon)
cv2.waitKey(0)
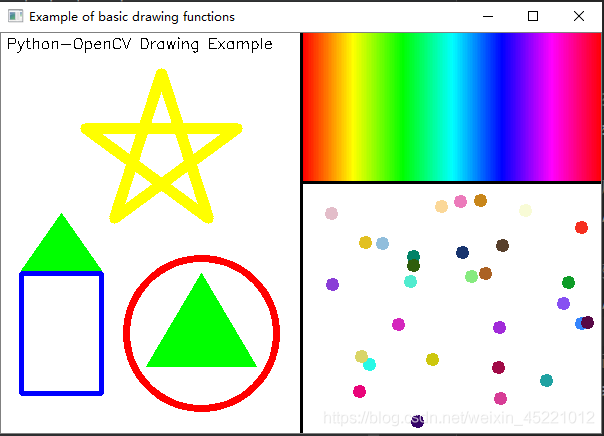
综合练习
import numpy as np
import cv2

# 定义一块宽600,高400的画布,初始化为白色
canvas = np.zeros((400, 600, 3), dtype=np.uint8) + 255

# 画一条纵向的正中央的黑色分界线
cv2.line(canvas, (300, 0), (300, 399), (0, 0, 0), 2)

# 画一条右半部份画面以150为界的横向分界线
cv2.line(canvas, (300, 149), (599, 149), (0, 0, 0), 2)

# 左半部分的右下角画个红色的圆
cv2.circle(canvas, (200, 300), 75, (0, 0, 255), 5)

# 左半部分的左下角画个蓝色的矩形
cv2.rectangle(canvas, (20, 240), (100, 360), (255, 0, 0), 3)

# 定义两个三角形,并执行内部绿色填充
triangles = np.array([
    [(200, 240), (145, 333), (255, 333)],
    [(60, 180), (20, 237), (100, 237)]])
cv2.fillPoly(canvas, triangles, (0, 255, 0))

# 画一个黄色五角星
# 第一步通过旋转角度的办法求出五个顶点
phi = 4 * np.pi / 5
rotations = [[[np.cos(i * phi), -np.sin(i * phi)], [i * np.sin(phi), np.cos(i * phi)]] for i in range(1, 5)]
pentagram = np.array([[[[0, -1]] + [np.dot(m, (0, -1)) for m in rotations]]], dtype=np.float)

# 定义缩放倍数和平移向量把五角星画在左半部分画面的上方
pentagram = np.round(pentagram * 80 + np.array([160, 120])).astype(np.int)

# 将5个顶点作为多边形顶点连线,得到五角星
cv2.polylines(canvas, pentagram, True, (0, 255, 255), 9)

# 按像素为间隔从左至右在画面右半部份的上方画出HSV空间的色调连续变化
for x in range(302, 600):
    color_pixel = np.array([[[round(180 * float(x - 302) / 298), 255, 255]]], dtype=np.uint8)
    line_color = [int(c) for c in cv2.cvtColor(color_pixel, cv2.COLOR_HSV2BGR)[0][0]]
    cv2.line(canvas, (x, 0), (x, 147), line_color)

# 如果定义圆的线宽大于半径,则等效于画圆点,随机在画面右下角的框内生成坐标
np.random.seed(42)
n_pts = 30
pts_x = np.random.randint(310, 590, n_pts)
pts_y = np.random.randint(160, 390, n_pts)
pts = zip(pts_x, pts_y)

# 画出每个点,颜色随机
for pt in pts:
    pt_color = [int(c) for c in np.random.randint(0, 255, 3)]
    cv2.circle(canvas, pt, 3, pt_color, 5)

# 在左半部分最上方打印文字
cv2.putText(canvas,
            'Python-OpenCV Drawing Example',
            (5, 15),
            cv2.FONT_HERSHEY_SIMPLEX,
            0.5,
            (0, 0, 0), # 黑色
            1)

cv2.imshow('Example of basic drawing functions', canvas)
cv2.waitKey()
OpenCV系列不断追加更新中。
欢迎关注,敬请点赞!
返回顶部
