Ubuntu下C++ opencv详细教程,句句注释
Python opencv学习:https://blog.csdn.net/qq_34717531/article/details/107402545
一、读图并显示
首先建立一个工程项目C++,其中有read.cpp ,CMakeLists.txt ,和一张美照。
其中,read.cpp
//该头文件中已经包含了OpenCV中各个模块的头文件
#include

//cv 命名空间,如果希望不要每次都输入 cv:: ,则可使用下面语句:using namespace cv;
using namespace cv;

/*
int main(int argc, char **argv) 用于运行时,把命令行参数传入主程序。
argc -- 命令行参数总个数,包括可执行程序名。
argv[i] -- 第 i 个参数。
argv[0] -- 可执行程序名。
例如运行: abc.exe
argc 等于 1, argv[0] 是 "abc.exe"
例如运行:rec.exe 4 5.2
argc 等于 3, argv[0] 是 "rec.exe", argv[1] 是 "4", argv[2] 是 "5.2".
*/
int main(int argc,char **argv)
{
    //Mat是c++中类的概念,不再需要手动分配其内存大小,当不需要使用它的时候也不再需要手动释放它
    Mat img=imread("1.jpg");
    //和Python opencv的写法相同,展示图像
    imshow("meinv",img);
    //waitKey()是OpenCV中的内置函数,语句waitKey(0);表示“暂停程序,等待一个按键输入”!也就是说,当程序执行到waitKey(0);时,程序被暂停运行,只有当你输入一个按键时,它才会继续运行。
    waitKey(0);
}
其中CMakeLists.txt 可以在 opencv-3.4.5 / samples / cpp / example_cmake /中找到,
修改工程名 test 和 cpp 文件名 read.cpp 即可使用。
# cmake needs this line
cmake_minimum_required(VERSION 2.8)

# Define project name
project(test)

# Find OpenCV, you may need to set OpenCV_DIR variable
# to the absolute path to the directory containing OpenCVConfig.cmake file
# via the command line or GUI
find_package(OpenCV REQUIRED)

# If the package has been found, several variables will
# be set, you can find the full list with descriptions
# in the OpenCVConfig.cmake file.
# Print some message showing some of them
message(STATUS "OpenCV library status:")
message(STATUS "    version: ${OpenCV_VERSION}")
message(STATUS "    libraries: ${OpenCV_LIBS}")
message(STATUS "    include path: ${OpenCV_INCLUDE_DIRS}")

if(CMAKE_VERSION VERSION_LESS "2.8.11")
  # Add OpenCV headers location to your include paths
  include_directories(${OpenCV_INCLUDE_DIRS})
endif()

# Declare the executable target built from your sources
add_executable(test read.cpp)

# Link your application with OpenCV libraries
target_link_libraries(test ${OpenCV_LIBS})
编译,运行。
cmake .
make
./test
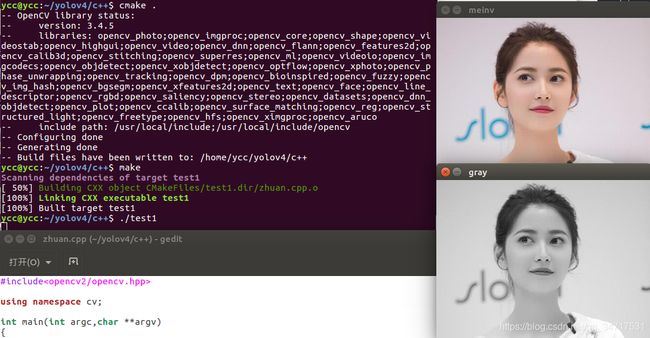
二、读图转灰度图并保存
为节约篇幅,之前注释过的不再注释。
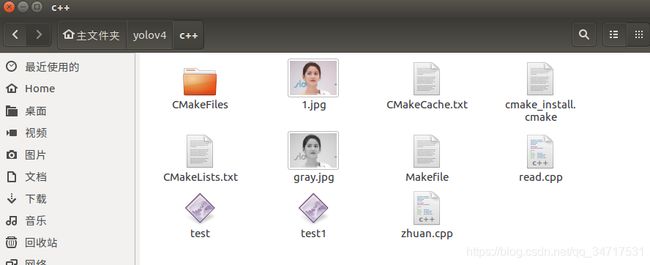
新建 zhuan.cpp ,修改CMakeLists.txt 的对应名字即可。
#include

using namespace cv;

int main(int argc,char **argv)
{
    Mat img=imread("1.jpg");
    imshow("meinv",img);
    //转灰度cvtColor():第一个img转化为第二个img,由rgb转为gray
    cvtColor(img,img,CV_BGR2GRAY);
    imshow("gray",img);
    //和Python opencv一样,保存图像
    imwrite("gray.jpg",img);
    waitKey(0);
}
报错,将CV_BGR2GRAY改为了COLOR_BGR2GRAY即可.
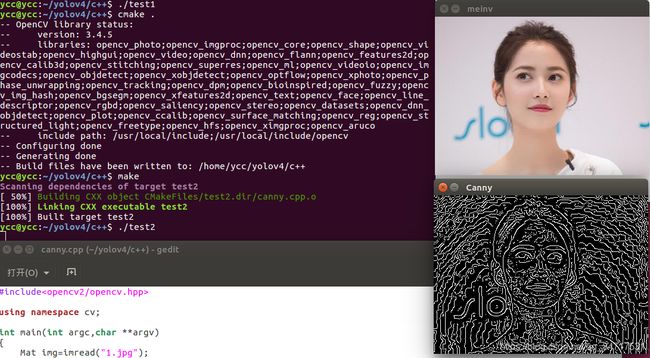
三、Canny边缘检测并保存
新建canny.cpp
#include

using namespace cv;

int main(int argc,char **argv)
{
    Mat img=imread("1.jpg");
    imshow("meinv",img);
    cvtColor(img,img,CV_BGR2GRAY);
    //图像模糊
    blur(img,img,Size(4,4));
    //canny运算
    Canny(img,img,3,3,3);
    imshow("Canny",img);
    imwrite("canny.jpg",img);
    waitKey(0);
}
CMakeLists.txt 同理修改。
四、读取视频做Canny边缘检测
新建shi.cpp
#include

using namespace cv;

int main(int argc,char **argv)
{
    //读取视频
    VideoCapture capture("1.mp4");

    //执行循环,到视频结束为止
    while(1){
        //定义frame
        Mat frame;
        //读取每一帧
        capture>>frame;
        imshow("meinv",frame);
        cvtColor(frame,frame,CV_BGR2GRAY);
        blur(frame,frame,Size(4,4));
        Canny(frame,frame,3,60,3);
        imshow("Canny",frame);
        waitKey(10);
    }
    return 0;
}
五、读取视频并画矩形框
#include
using namespace cv;
int main(int argc,char **argv)
{
    VideoCapture capture("chou2.mp4");
    while(1){
        Mat frame;
        capture>>frame;
        cv::Rect area(50, 50, 200, 100);
        cv::rectangle(frame, area, cv::Scalar(0, 0, 255), 3, 8);
        imshow("c",frame);
        waitKey(10);
    }
} 


