视觉培训6 yolov7的卸载、重装、测试、训练
目录
卸载并重装yolov7 + pytorch(GPU
判断pytorch的版本
删除anaconda环境
yolov7的安装测试与训练
创建yolov7环境
安装pytorch
安装yolov7
测试yolov7
数据集标注
训练yolov7
卸载并重装yolov7 + pytorch(GPU
由于战队接下来要使用yolov7了,我的pytorch是cpu版本的,但是需要gpu版本的,所以删了重新下一遍
判断pytorch的版本
打开anaconda,点CMD.exe.Prompt
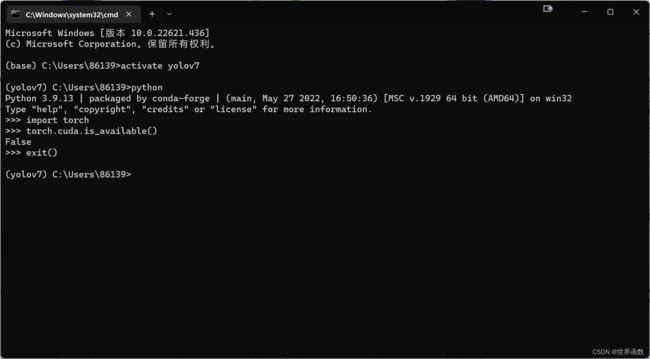
进入yolov7的环境
activate yolov7进入python
python判断pytorch是否为gpu版本
import torch
torch.cuda.is_available()
如果输出为True则为gpu版本,是False的话那就是cpu版本了,很不幸我之前是cpu版本
注:我发现一旦你使用conda update --all来更新所有包,这时候一般会把你的pytorch更新成cpu版本的,所有建议不要使用这种一下子全部更新的方法,我就是这样把我的pytorch更新成了gpu版本
我怕删包删不干净,加上其他队员可能还不会装,所以我就删了重新安装一次
删除anaconda环境
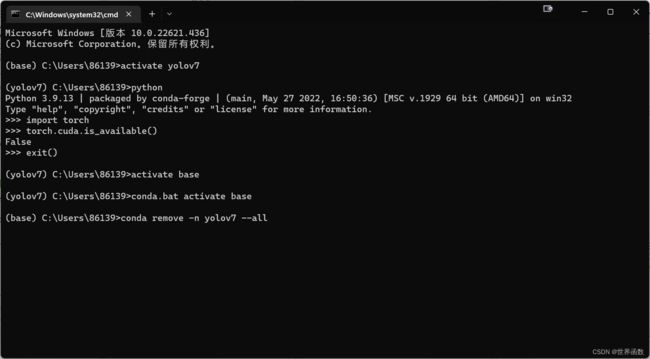
退出python
exit()回到原环境(不能在yolov7中把自己删掉
activate base然后过河拆桥把yolov7删了
conda remove -n yolov7 --all回车
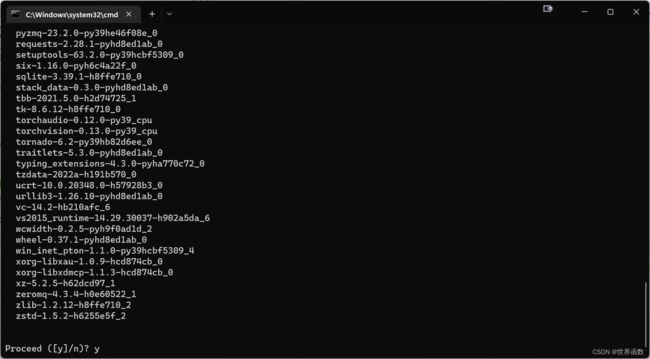
输入y,回车等待~~
看看我们的yolov7是不是真的删掉了咧
conda env list啊确实没了,那接下来就是重新装一下yolov7了
yolov7的安装测试与训练
创建yolov7环境
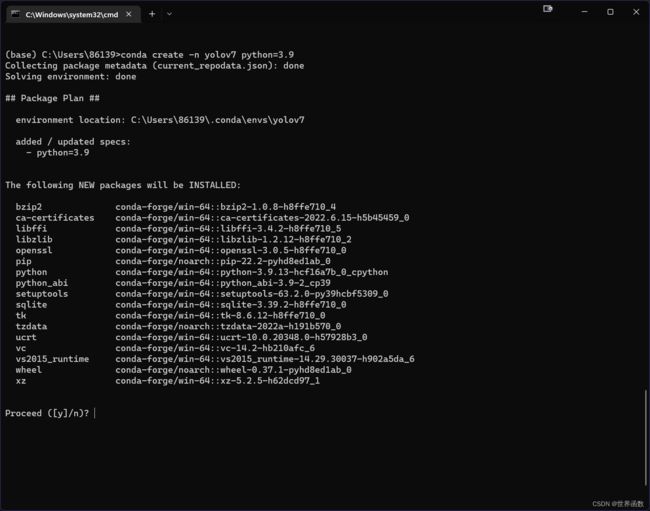
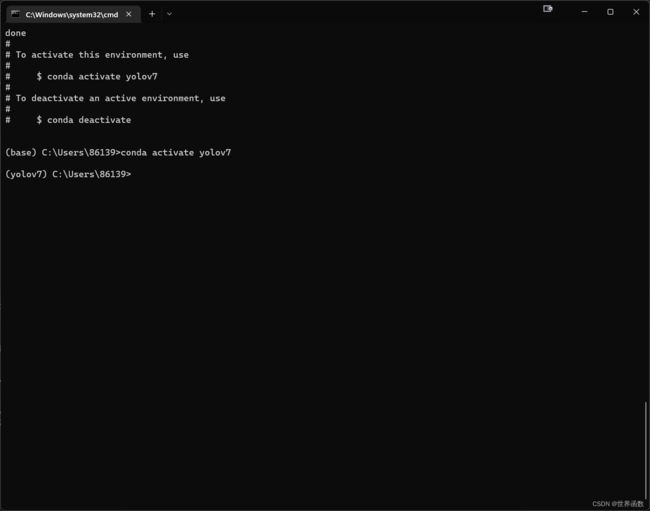
conda create -n yolov7 python=3.9因为pytorch最新版好像只兼容python3.9,所以下3.9的
输入y,等待~
进入yolov7
conda activate yolov7安装pytorch
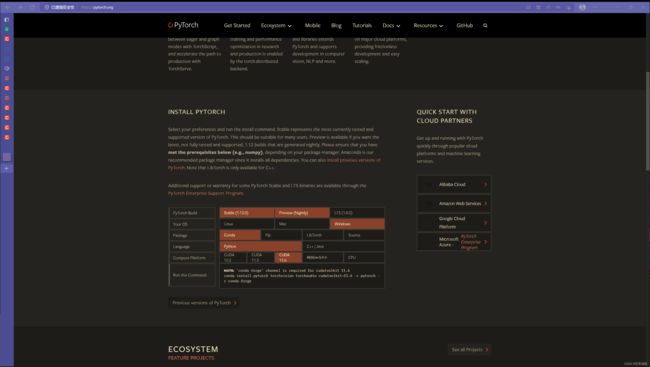
官网链接
直接复制上面下最新版的
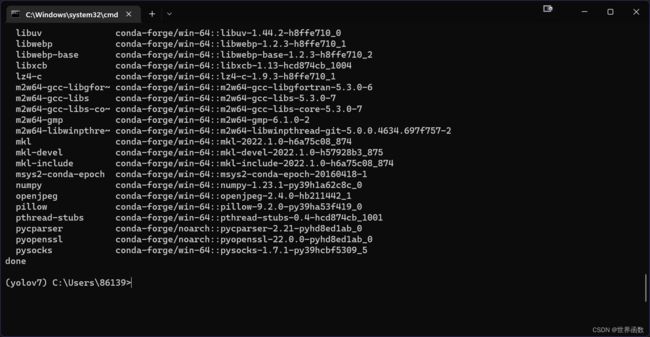
conda install pytorch torchvision torchaudio cudatoolkit=11.6 -c pytorch -c conda-forge输入y,等待~
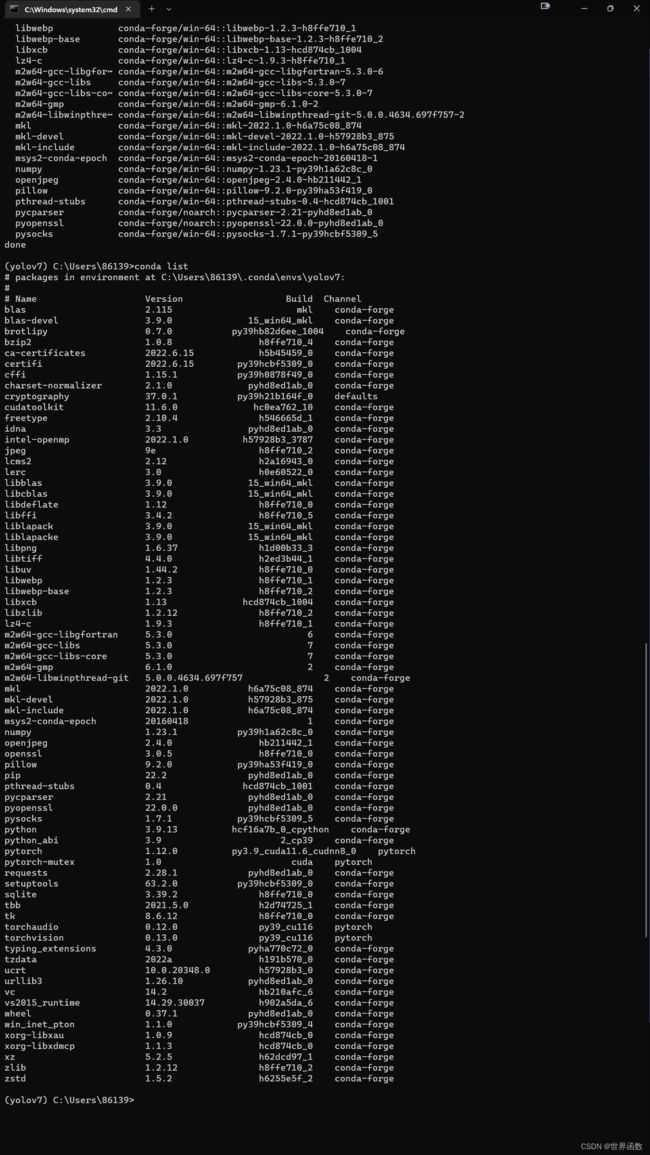
查看我们都下了啥玩意
conda list发现还没有cudnn,所以再下一个cudnn
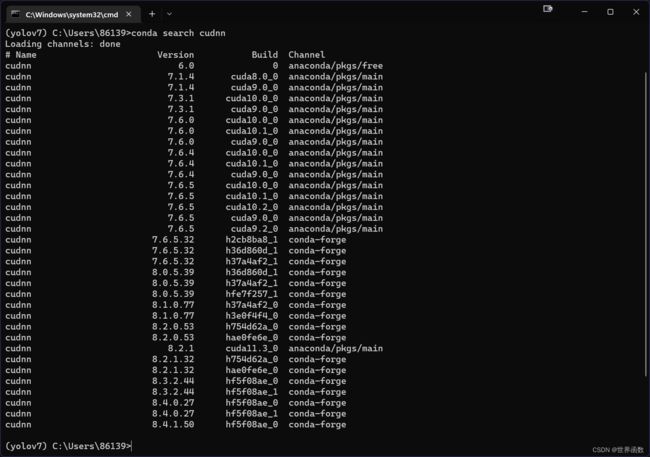
下载链接,先看看conda库里面有哪些cudnn
conda search cudnn那当然是下最新版啦
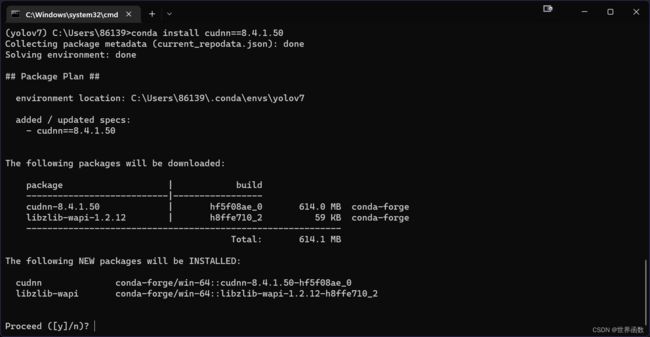
conda install cudnn==8.4.1.50输入y,等待~
安装yolov7
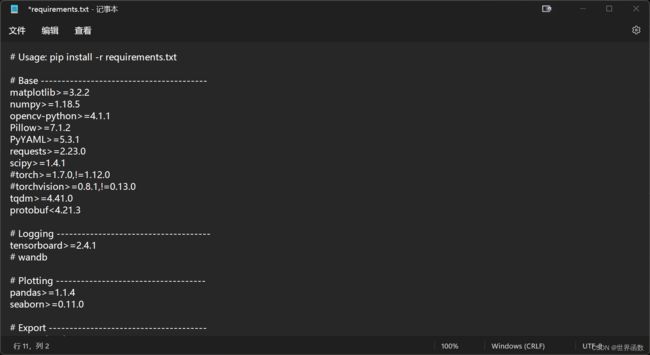
因为我们已经下过pytorch了所以可以直接把我们yolov7\requirements.txt里面的torch和torchvision给注释掉
用cd到达我们requirements.txt的目录
安装yolov7
pip install -r requirements.txt我这里不知道为什么不能下ipykernel,重新用conda下一下就好了,反正就是缺啥下啥就好了
既然下好了,那就测试一下吧
测试yolov7
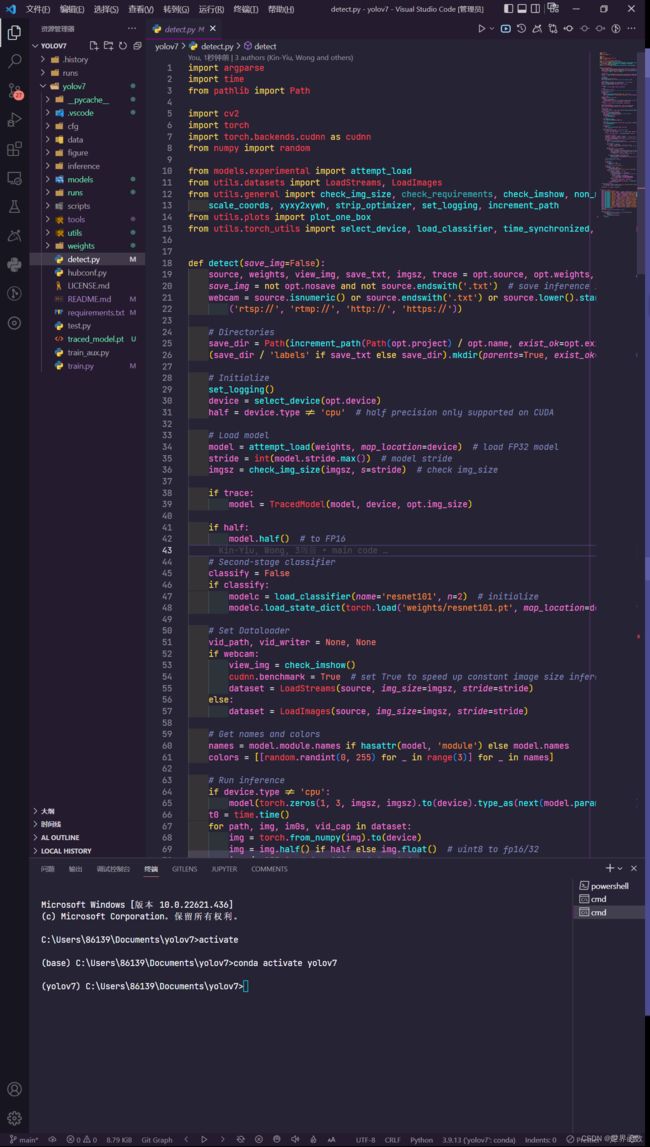
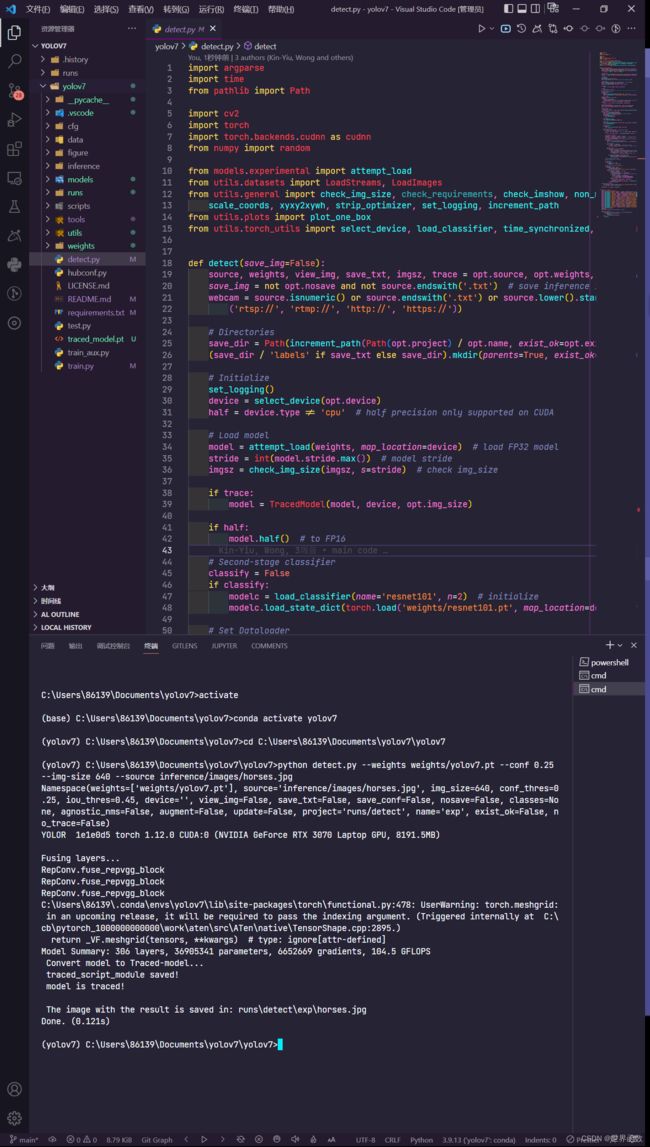
用vscode打开yolov7,打开终端,我们要运行的就是这个detect.py文件
用cd到达yolov7文件,运行detect.py
python detect.py --weights weights/yolov7.pt --conf 0.25 --img-size 640 --source inference/images/horses.jpg生成的图片在runs的exp里面
接下来就是训练自己的数据集啦
数据集标注
先爬取数据集,我这里爬取狗的照片做例子,用python爬取一下图片
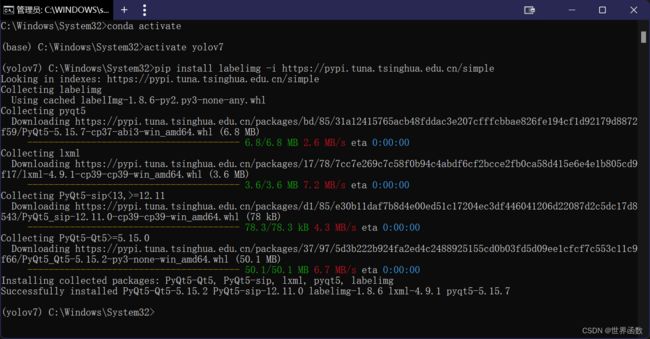
安装labelimg
进入环境输入
pip install labelimg -i https://pypi.tuna.tsinghua.edu.cn/simple在yolov7的目录下新建一个xml2txt.py,代码如下
import xml.etree.ElementTree as ET
import pickle
import os
from os import listdir, getcwd
from os.path import join
import random
from shutil import copyfile

classes = ["dog"]

TRAIN_RATIO = 20


def clear_hidden_files(path):
    dir_list = os.listdir(path)
    for i in dir_list:
        abspath = os.path.join(os.path.abspath(path), i)
        if os.path.isfile(abspath):
            if i.startswith("._"):
                os.remove(abspath)
        else:
            clear_hidden_files(abspath)


def convert(size, box):
    dw = 1. / size[0]
    dh = 1. / size[1]
    x = (box[0] + box[1]) / 2.0
    y = (box[2] + box[3]) / 2.0
    w = box[1] - box[0]
    h = box[3] - box[2]
    x = x * dw
    w = w * dw
    y = y * dh
    h = h * dh
    return (x, y, w, h)


def convert_annotation(image_id):
    in_file = open('VOCdevkit/VOC2007/Annotations/%s.xml' % image_id)
    out_file = open('VOCdevkit/VOC2007/YOLOLabels/%s.txt' % image_id, 'w')
    tree = ET.parse(in_file)
    root = tree.getroot()
    size = root.find('size')
    w = int(size.find('width').text)
    h = int(size.find('height').text)

    for obj in root.iter('object'):
        # difficult = obj.find('difficult').text
        cls = obj.find('name').text
        if cls not in classes:
            continue
        cls_id = classes.index(cls)
        xmlbox = obj.find('bndbox')
        b = (float(xmlbox.find('xmin').text), float(xmlbox.find('xmax').text), float(xmlbox.find('ymin').text),
             float(xmlbox.find('ymax').text))
        bb = convert((w, h), b)
        out_file.write(str(cls_id) + " " + " ".join([str(a) for a in bb]) + '\n')
    in_file.close()
    out_file.close()


wd = os.getcwd()
wd = os.getcwd()
data_base_dir = os.path.join(wd, "VOCdevkit/")
if not os.path.isdir(data_base_dir):
    os.mkdir(data_base_dir)
work_sapce_dir = os.path.join(data_base_dir, "VOC2007/")
if not os.path.isdir(work_sapce_dir):
    os.mkdir(work_sapce_dir)
annotation_dir = os.path.join(work_sapce_dir, "Annotations/")
if not os.path.isdir(annotation_dir):
    os.mkdir(annotation_dir)
clear_hidden_files(annotation_dir)
image_dir = os.path.join(work_sapce_dir, "JPEGImages/")
if not os.path.isdir(image_dir):
    os.mkdir(image_dir)
clear_hidden_files(image_dir)
yolo_labels_dir = os.path.join(work_sapce_dir, "YOLOLabels/")
if not os.path.isdir(yolo_labels_dir):
    os.mkdir(yolo_labels_dir)
clear_hidden_files(yolo_labels_dir)
yolov5_images_dir = os.path.join(data_base_dir, "images/")
if not os.path.isdir(yolov5_images_dir):
    os.mkdir(yolov5_images_dir)
clear_hidden_files(yolov5_images_dir)
yolov5_labels_dir = os.path.join(data_base_dir, "labels/")
if not os.path.isdir(yolov5_labels_dir):
    os.mkdir(yolov5_labels_dir)
clear_hidden_files(yolov5_labels_dir)
yolov5_images_train_dir = os.path.join(yolov5_images_dir, "train/")
if not os.path.isdir(yolov5_images_train_dir):
    os.mkdir(yolov5_images_train_dir)
clear_hidden_files(yolov5_images_train_dir)
yolov5_images_test_dir = os.path.join(yolov5_images_dir, "val/")
if not os.path.isdir(yolov5_images_test_dir):
    os.mkdir(yolov5_images_test_dir)
clear_hidden_files(yolov5_images_test_dir)
yolov5_labels_train_dir = os.path.join(yolov5_labels_dir, "train/")
if not os.path.isdir(yolov5_labels_train_dir):
    os.mkdir(yolov5_labels_train_dir)
clear_hidden_files(yolov5_labels_train_dir)
yolov5_labels_test_dir = os.path.join(yolov5_labels_dir, "val/")
if not os.path.isdir(yolov5_labels_test_dir):
    os.mkdir(yolov5_labels_test_dir)
clear_hidden_files(yolov5_labels_test_dir)

train_file = open(os.path.join(wd, "yolov7_train.txt"), 'w')
test_file = open(os.path.join(wd, "yolov7_val.txt"), 'w')
train_file.close()
test_file.close()
train_file = open(os.path.join(wd, "yolov7_train.txt"), 'a')
test_file = open(os.path.join(wd, "yolov7_val.txt"), 'a')
list_imgs = os.listdir(image_dir)  # list image files
prob = random.randint(1, 100)
print("Probability: %d" % prob)
for i in range(0, len(list_imgs)):
    path = os.path.join(image_dir, list_imgs[i])
    if os.path.isfile(path):
        image_path = image_dir + list_imgs[i]
        voc_path = list_imgs[i]
        (nameWithoutExtention, extention) = os.path.splitext(os.path.basename(image_path))
        (voc_nameWithoutExtention, voc_extention) = os.path.splitext(os.path.basename(voc_path))
        annotation_name = nameWithoutExtention + '.xml'
        annotation_path = os.path.join(annotation_dir, annotation_name)
        label_name = nameWithoutExtention + '.txt'
        label_path = os.path.join(yolo_labels_dir, label_name)
    prob = random.randint(1, 100)
    print("Probability: %d" % prob)
    if (prob < TRAIN_RATIO):  # train dataset
        if os.path.exists(annotation_path):
            train_file.write(image_path + '\n')
            convert_annotation(nameWithoutExtention)  # convert label
            copyfile(image_path, yolov5_images_train_dir + voc_path)
            copyfile(label_path, yolov5_labels_train_dir + label_name)
    else:  # test dataset
        if os.path.exists(annotation_path):
            test_file.write(image_path + '\n')
            convert_annotation(nameWithoutExtention)  # convert label
            copyfile(image_path, yolov5_images_test_dir + voc_path)
            copyfile(label_path, yolov5_labels_test_dir + label_name)
train_file.close()
test_file.close()
如果懒的话可以直接进入yolov7目录运行这个xml2txt.py,他会帮你建好数据集的文件夹
在VOC2007中
JPEGImages 存放需要打标签的图片文件
Annotations 存放标注的标签文件
predefined_classes.txt 定义自己要标注的所有类别
把刚刚下的狗狗照片放进JPEGImages里面
在predefined_classes.txt文件里面添加你要识别的类,我这里只有狗狗类所以直接打个dog
打开终端进入到你的VOC2007的目录下输入
labelimg JPEGImages predefined_classes.txt将会打开labelimg
然后标注数据集(自己查一下labelimg用法
得到xml和源图片,接下来把这些数据存放在date中建立如下树状结构
把刚才标注过的xml文件放在Annotations中,原图放JPEGImages中,到达yolov7位置再次运行xml2txt.py,会帮你在
VOCdevkit\images\train 中生成训练集的图片
VOCdevkit\images\val 中生成验证集的图片
VOCdevkit\labels\train 中生成训练集的txt格式标注
VOCdevkit\labels\val 中生成验证集的txt格式标注
训练yolov7
train: C:/Users/86139/Documents/yolo/yolov7/VOCdevkit/images/train
val: C:/Users/86139/Documents/yolo/yolov7/VOCdevkit/images/val

# Classes
nc: 1
names: ['dog']
train中写你训练集的位置
val中写你验证集的位置
nc为你所定义的类的个数
names为你类的名字
接下来修改cfg\training\yolov7.yaml文件,将nc值改为你类的个数
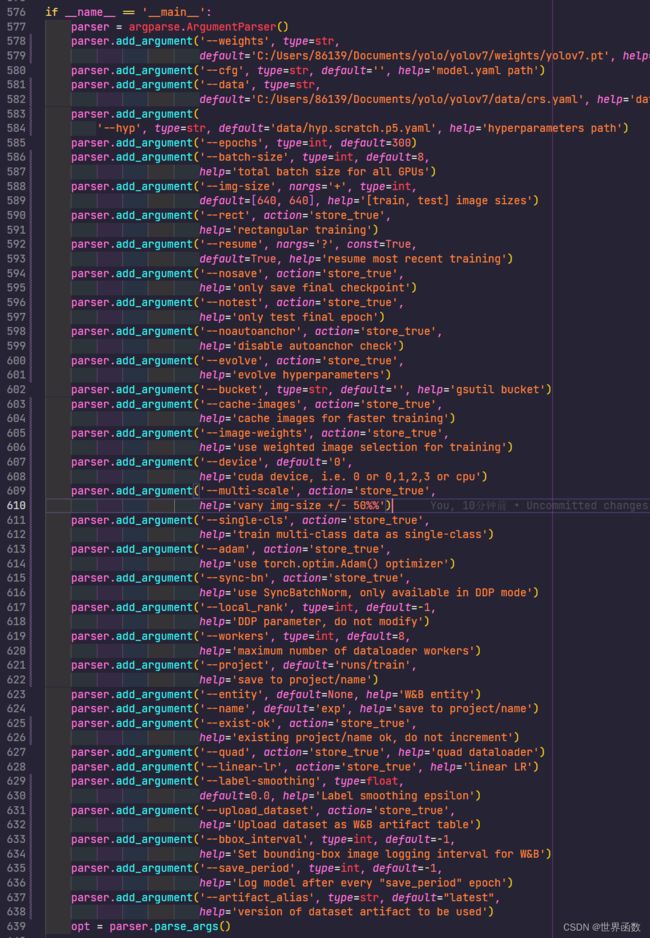
接下来修改train.py文件
weights改为你所下的后缀为.pt的文件
data改为刚才再data文件夹里你自己命名的后缀为.ymal的文件
batch-size按你电脑配置改,32需要200gb显存,16需要20gb显存(不得不说真的离谱
resume是个神奇的玩意,改为True后你可以接着上一次没有训练完的数据继续训练
device如果是独显就改为0
接下来就可以训练,运行train.py
中间可能会出现各种各样的报错,我自己也折腾了好久,现在应该是因为显存不够,pytorch疯狂报错
反正我认为大部分的问题都来自于显存不够,可以降低batch-size和在train.py中添加断点来释放显存
如果你电脑足够好(酸了,成功训练完了,你训练的数据将会存在runs\train\exp中
runs\train\exp\weights\best.pt 是训练过程最好的那次的权重
runs\train\exp\weights\last.pt 是训练最后一次的权重
runs\train\exp\results.txt 是记录了你训练过程的参数
那么就到此为止吧,再写就不礼貌了,还是很谢谢你yolov7让我浪费两整天


