ROS2 基于humble版本机器人仿真教程
ros2与turtlebot3仿真教程-安装ros2
说明:
- 介绍如何安装ros2 humble版本
步骤:
-
简单步骤:
-
安装
sudo apt install ros-humble-ros-desktop
- 安装colcon
$ sudo apt install python3-colcon-common-extensions
- 安装humble
$ sudo apt install ros-humble-cartographer
- 安装cartographer建图
$ sudo apt install ros-humble-cartographer
$ sudo apt install ros-humble-cartographer-ros
- 安装导航包
$ sudo apt install ros-humble-navigation2
$ sudo apt install ros-humble-nav2-bringup
- 安装vcstool工具
-
$ sudo apt install python3-vcstool - gazebo ROS相关包安装
sudo apt install ros-humble-gazebo-ros*ros2与turtlebot3仿真教程-安装turtlebot3
说明:
- 介绍如何在ros2安装turtlebot3
步骤:
- 下载编译
$ mkdir -p ~/tb3_ws/src
$ cd ~/tb3_ws
#humble版本
$wget https://raw.githubusercontent.com/ROBOTIS-GIT/turtlebot3/humble-devel/turtlebot3.repos


$ vcs import src < turtlebot3.repos
$ colcon build --symlink-install
- 编译问题
- 删掉出错不影响使用然后编译就通过了
- 添加环境变量
$ echo 'source ~/tb3_ws/install/setup.bash' >> ~/.bashrc
$ echo 'export ROS_DOMAIN_ID=30 #TURTLEBOT3' >> ~/.bashrc
$ source ~/.bashrc
ros2与turtlebot3仿真教程-启动gazebo不同环境
说明:
- 介绍如何在ros2下使用gazebo
- 默认安装humble已经安装了gezebo11.0
步骤:
- 下载gazebo的模型,加速运行gazebo
cd ~/.gazebo/
git clone https://github.com/osrf/gazebo_models models
- 需要删除.git目录,要不运行会出错
rm -rf models/.git
- 设置GAZEBO_MODEL_PATH变量, 指定机器人类型为burger
$ echo 'export GAZEBO_MODEL_PATH=$GAZEBO_MODEL_PATH:~/tb3_ws/src/turtlebot3/turtlebot3_simulations/turtlebot3_gazebo/models' >> ~/.bashrc
$ echo 'export TURTLEBOT3_MODEL=burger' >> ~/.bashrc
$ source ~/.bashrc
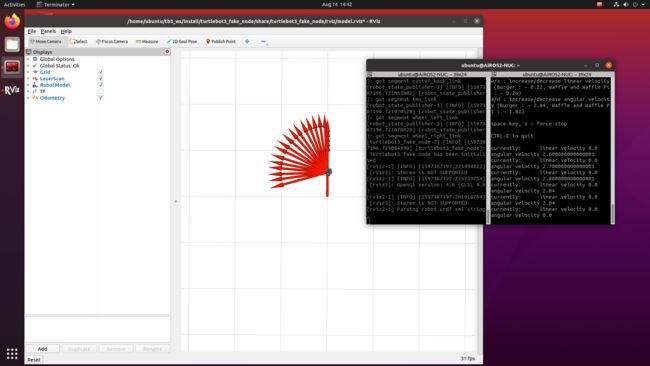
启动Fake Node
- 启动Fake Node
$ ros2 launch turtlebot3_fake_node turtlebot3_fake_node.launch.py
- 启动后弹出rviz,并显示小车模型
- 启动键盘控制
$ ros2 run turtlebot3_teleop teleop_keyboard
- 效果图如下:
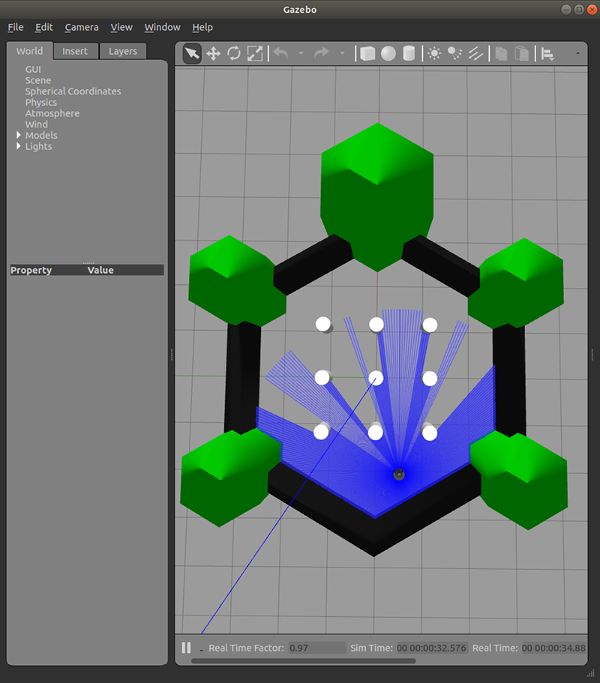
启动empty地图
- 新开终端,启动gezebo,并带有empty地图
$ ros2 launch turtlebot3_gazebo empty_world.launch.py
- 效果如下:

启动world地图
- 新开终端,启动gezebo,并带有world地图
$ ros2 launch turtlebot3_gazebo turtlebot3_world.launch.py
- 效果如下:
启动house地图
- 新开终端,启动gezebo,并带有house地图
$ ros2 launch turtlebot3_gazebo turtlebot3_house.launch.py
ros2与turtlebot3仿真教程-turtlebot3遥控
说明:
- 介绍如何控制小车移动
步骤:
- 新开终端,启动gezebo
$ ros2 launch turtlebot3_gazebo turtlebot3_world.launch.py
- 启动键盘控制
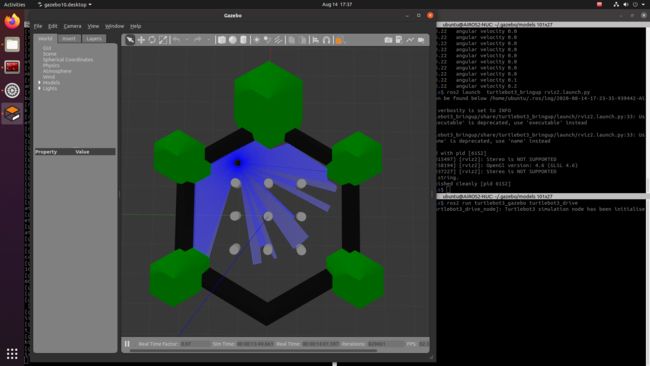
$ ros2 run turtlebot3_teleop teleop_keyboardros2与turtlebot3仿真教程-turtlebot3自走避障
说明:
- 介绍如何在ros2下实现随机行走并避障
步骤:
- 新开终端,启动gazebo
$ ros2 launch turtlebot3_gazebo turtlebot3_world.launch.py
- 新开终端,执行自走避障程序
$ ros2 run turtlebot3_gazebo turtlebot3_drive
- 效果如下:
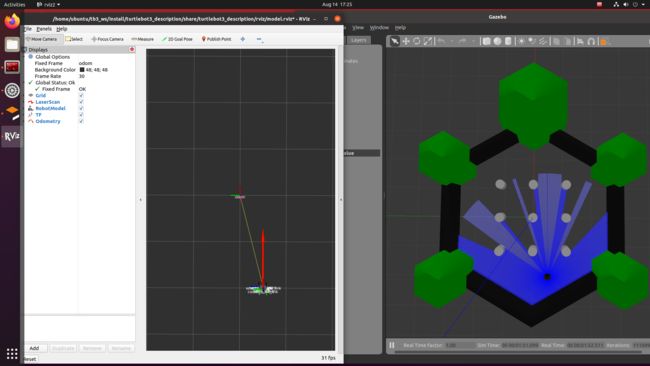
ros2与turtlebot3仿真教程-rviz2模型显示
说明:
- 介绍如何利用rviz2来显示小车模型
步骤:
- 启动gazebo
$ ros2 launch turtlebot3_gazebo turtlebot3_house.launch.py
- 启动rviz2
$ ros2 launch turtlebot3_bringup rviz2.launch.py
- 效果如下:
ros2与turtlebot3仿真教程-turtlebot3建图
说明:
- 介绍如何ros2下实现turtlebot3建图
步骤:
- 新开终端,运行gazebo
$ ros2 launch turtlebot3_gazebo turtlebot3_world.launch.py
- 新开终端,运行建图
$ ros2 launch turtlebot3_cartographer cartographer.launch.py use_sim_time:=True
- 新开终端,启动键盘
$ ros2 run turtlebot3_teleop teleop_keyboard
-
控制小车随机移动,并进行建图,并查看建立的地图,差不多后,保存地图。
-
效果如下:

- 新开终端,保存地图
$ ros2 run nav2_map_server map_saver_cli -f ~/map
- 地图保存在目录下
ros2与turtlebot3仿真教程-turtlebot3导航
说明:
- 介绍如何ros2下进行导航
步骤:
- 新开终端,运行gazebo
$ ros2 launch turtlebot3_gazebo turtlebot3_world.launch.py
- 新开终端,导航
$ ros2 launch turtlebot3_navigation2 navigation2.launch.py use_sim_time:=True map:=/home/ubuntu/map.yaml
- 需要指定地图的绝对路径,要不地图不能正常加载
- 修改burger.yaml配置文件内容"robot_model_type: "differential" 变为robot_model_type: "nav2_amcl::DifferentialMotionModel" 地图就可正常显示
- 点击2D Pose Estimate初始化位姿,点击Navigation2 Goal选择目标点进行导航
- 效果如下:
