部署U-net过程中遇到的问题
U-net部署中的问题
- 一、问题1:AttributeError: module 'wandb' has no attribute 'init'
- 二、问题2: requests.exceptions.ProxyError: HTTPSConnectionPool(host='api.wandb.ai', port=443): Max retries exceeded with url: /graphql (Caused by ProxyError('Cannot connect to proxy.', OSError(0, 'Error')))
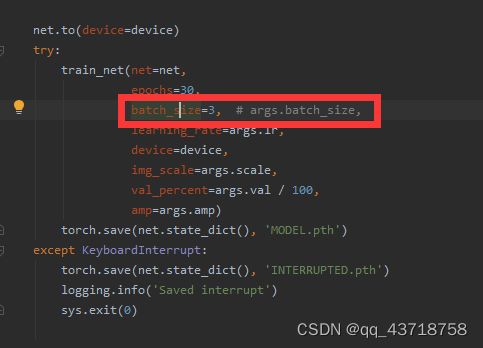
- 三、问题3: torch.cuda.OutOfMemoryError: CUDA out of memory. Tried to allocate 80.00 MiB
- **至此,U-net成功运行。接下来是利用训练的模型进行测试**
- 四、问题4: No module named 'matplotlib'
-
- 解决1:输入:pip install matplotlib(没有成功)
- 解决2:输入 pip install matplotlib -i http://pypi.douban.com/simple --trusted-host pypi.douban.com
- 五、问题5:No such file or directory: 'checkpoints/checkpoint_epoch40.pth'
-
- 解决办法1:
- 解决方法2: epochs是训练轮数的意思,在train.py代码里,原来的轮数为30,所以只会生成30个文件,所以找不到No such file or directory: 'checkpoints/checkpoint_epoch40.pth'
一、问题1:AttributeError: module ‘wandb’ has no attribute ‘init’
在pycharm中打开U-net的代码包,运行报错:AttributeError: module ‘wandb’ has no attribute ‘init’
解决办法:因为运行环境是conda pycharm01
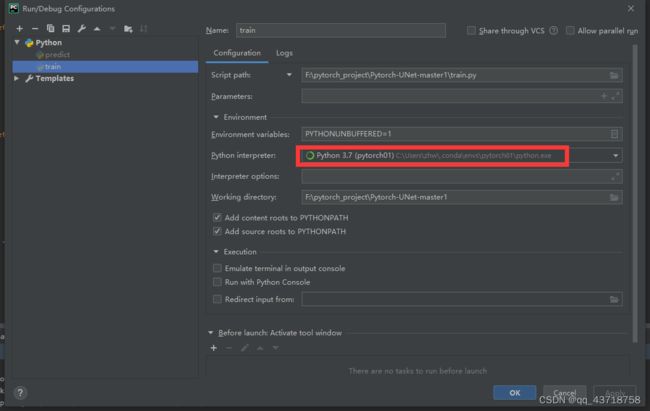
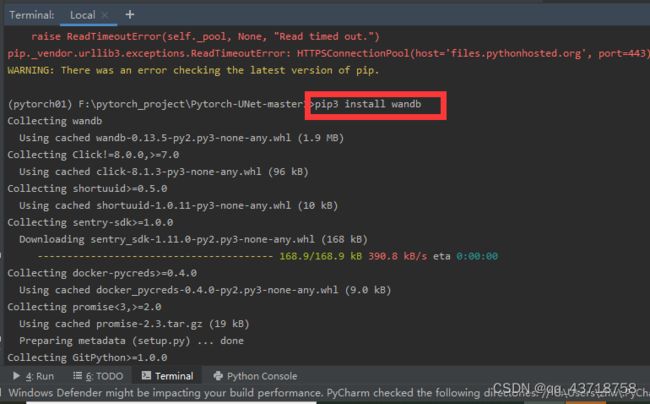
首先激活环境,然后安装wandb
pip3 install wandb
二、问题2: requests.exceptions.ProxyError: HTTPSConnectionPool(host=‘api.wandb.ai’, port=443): Max retries exceeded with url: /graphql (Caused by ProxyError(‘Cannot connect to proxy.’, OSError(0, ‘Error’)))
然后遇到第二个问题:
之前查错挂了梯子,然后我把梯子退出,问题解决。
三、问题3: torch.cuda.OutOfMemoryError: CUDA out of memory. Tried to allocate 80.00 MiB
问题3:
input, weight, bias, running_mean, running_var, training, momentum, eps, torch.backends.cudnn.enabled
torch.cuda.OutOfMemoryError: CUDA out of memory. Tried to allocate 80.00 MiB (GPU 0; 2.00 GiB total capacity; 1.59 GiB already allocated; 0 bytes free; 1.68 GiB reserved in total by PyTorch) If reserved memory is >> allocated memory try setting max_split_size_mb to avoid fragmentation.  See documentation for Memory Management and PYTORCH_CUDA_ALLOC_CONF
wandb: Waiting for W&B process to finish... (failed 1). Press Ctrl-C to abort syncing.
wandb: ERROR Failed to serialize metric: division by zero
wandb: Synced curious-puddle-1: https://wandb.ai/anony-moose-445420/U-Net/runs/2o8l71a4?apiKey=269d1610694140326baeb759b57d6483f8c2db9d
wandb: Synced 5 W&B file(s), 0 media file(s), 0 artifact file(s) and 0 other file(s)
wandb: Find logs at: .\wandb\run-20221120_180900-2o8l71a4\logs
参考博客:https://blog.csdn.net/m0_64531459/article/details/127487627
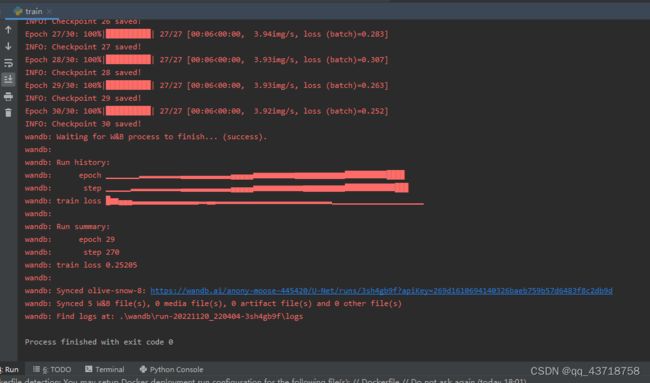
至此,U-net成功运行。接下来是利用训练的模型进行测试
四、问题4: No module named ‘matplotlib’
在训练完成后,要测试一下训练结果
在README中看到

于是在命令行中输入,报错:No module named ‘matplotlib’
Traceback (most recent call last):
  File "predict.py", line 13, in <module>
    from utils.utils import plot_img_and_mask
  File "F:\pytorch_project\Pytorch-UNet-master1\utils\utils.py", line 1, in <module>
    import matplotlib.pyplot as plt
ModuleNotFoundError: No module named 'matplotlib'
解决1:输入:pip install matplotlib(没有成功)
报错:
(pytorch01) F:\pytorch_project\Pytorch-UNet-master1>pip install matplotlib
WARNING: Retrying (Retry(total=4, connect=None, read=None, redirect=None, status=None)) after connection broken by 'ProxyError('Cannot connect to proxy.', OSError(0, 'Error'))': /simple/matplotlib/
WARNING: Retrying (Retry(total=3, connect=None, read=None, redirect=None, status=None)) after connection broken by 'ProxyError('Cannot connect to proxy.', OSError(0, 'Error'))': /simple/matplotlib/
WARNING: Retrying (Retry(total=2, connect=None, read=None, redirect=None, status=None)) after connection broken by 'ProxyError('Cannot connect to proxy.', OSError(0, 'Error'))': /simple/matplotlib/
WARNING: Retrying (Retry(total=1, connect=None, read=None, redirect=None, status=None)) after connection broken by 'ProxyError('Cannot connect to proxy.', OSError(0, 'Error'))': /simple/matplotlib/
WARNING: Retrying (Retry(total=0, connect=None, read=None, redirect=None, status=None)) after connection broken by 'ProxyError('Cannot connect to proxy.', OSError(0, 'Error'))': /simple/matplotlib/
ERROR: Could not find a version that satisfies the requirement matplotlib (from versions: none)
ERROR: No matching distribution found for matplotlib
解决2:输入 pip install matplotlib -i http://pypi.douban.com/simple --trusted-host pypi.douban.com
结果:

参考:https://blog.csdn.net/qq_32651245/article/details/126166568
五、问题5:No such file or directory: ‘checkpoints/checkpoint_epoch40.pth’
解决问题4后,再次运行命令行命令:报错
(pytorch01) F:\pytorch_project\Pytorch-UNet-master1>python predict.py -i image.tif -o output.jpg
Traceback (most recent call last):
  File "predict.py", line 92, in <module>
    net.load_state_dict(torch.load(args.model, map_location=device))
  File "C:\Users\zhw\.conda\envs\pytorch01\lib\site-packages\torch\serialization.py", line 771, in load
    with _open_file_like(f, 'rb') as opened_file:
  File "C:\Users\zhw\.conda\envs\pytorch01\lib\site-packages\torch\serialization.py", line 270, in _open_file_like
    return _open_file(name_or_buffer, mode)
  File "C:\Users\zhw\.conda\envs\pytorch01\lib\site-packages\torch\serialization.py", line 251, in __init__
    super(_open_file, self).__init__(open(name, mode))
FileNotFoundError: [Errno 2] No such file or directory: 'checkpoints/checkpoint_epoch40.pth'
解决办法1:

将40改为30
一共只有30个照片,这里不太清楚,明天问一下同学。
解决方法2: epochs是训练轮数的意思,在train.py代码里,原来的轮数为30,所以只会生成30个文件,所以找不到No such file or directory: ‘checkpoints/checkpoint_epoch40.pth’
所以可以修改代码train.py代码epochs=40 (原来的值为30)
 try:
        train_net(net=net,
                  epochs=40,
                  batch_size=3,  # args.batch_size,e
                  learning_rate=args.lr,
                  device=device,
                  img_scale=args.scale,
                  val_percent=args.val / 100,
                  amp=args.amp)
        torch.save(net.state_dict(), 'MODEL.pth')
再次训练模型:可以发现这次文件夹checkpoints中出现了checkpoint_epoch40.pth,
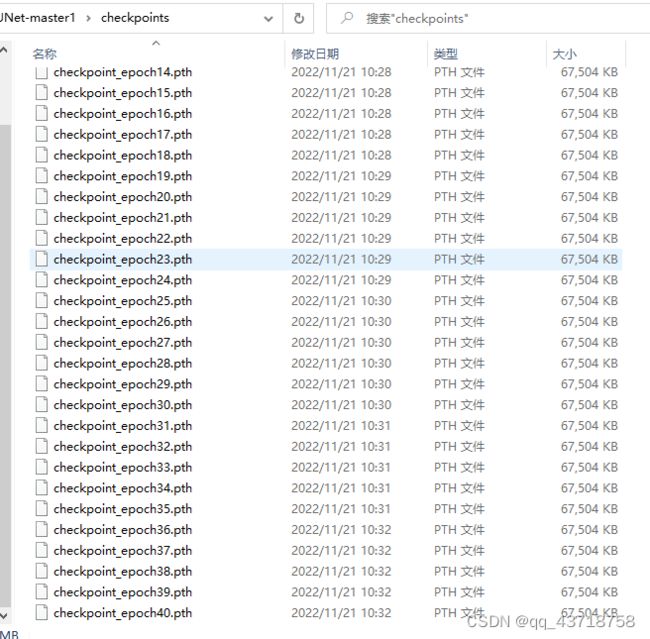
保持predict.py中的代码不变,把第50行的代码改回去即:
parser.add_argument('--model', '-m', default='checkpoints/checkpoint_epoch40.pth', metavar='FILE', #***shuchudijilun
运行:python predict.py -i test02.tif -o test02_out.jpg
得到结果:

至此,U-net网络部署完成!
