Nanodet训练自己的轻量级目标检测模型实践
官方地址:https://github.com/RangiLyu/nanodet
一、 准备训练的数据:
数据文件目录为如下,分别存放训练集和验证集的图片和xml文件(注意图片和标签一一对应)
二、建立自己yaml文件
在config文件夹下建立自己的yaml文件,VOC格式标签参照官方的
https://github.com/RangiLyu/nanodet/blob/main/config/nanodet_custom_xml_dataset.yml
文件进行修改:
注意修改的地方有以下几点:
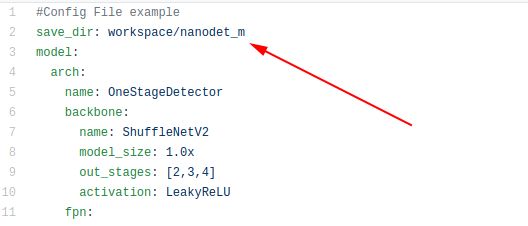
1.修改训练结果的保存路径
2.修改自己的训练集中的目标类别数量
3.修改类别标签
4.修改训练集和验证集的文件夹路径
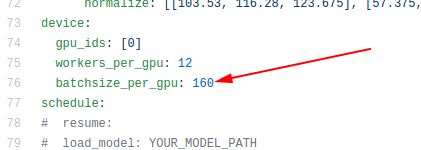
5.修改训练的批次
三、训练
切换项目的主目录下执行
python train.py nanodet-m.yaml(注意次此处输入的是train.py路径和自己的yaml文件路径)显示的训练过程:
注:可以使用tensorboard查看训练过程
四、测试训练结果
训练的结果保存在workspace文件夹下(如果使用官方的保存路径的话)
参考:https://github.com/RangiLyu/nanodet/blob/main/demo/demo-inference-with-pytorch.ipynb
import os
import cv2
import torch
from demo.demo import Predictor
from nanodet.util import cfg, load_config, Logger
from nanodet.util import overlay_bbox_cv
import numpy as np
from PIL import Image
os.environ["CUDA_DEVICE_ORDER"]="PCI_BUS_ID"
os.environ["CUDA_VISIBLE_DEVICES"]="0"
device = torch.device('cuda')
torch.backends.cudnn.enabled = True
torch.backends.cudnn.benchmark = True

def cv2_imshow(a, convert_bgr_to_rgb=True):
    """A replacement for cv2.imshow() for use in Jupyter notebooks.
    Args:
        a: np.ndarray. shape (N, M) or (N, M, 1) is an NxM grayscale image. shape
            (N, M, 3) is an NxM BGR color image. shape (N, M, 4) is an NxM BGRA color
            image.
        convert_bgr_to_rgb: switch to convert BGR to RGB channel.
    """
    a = a.clip(0, 255).astype('uint8')
    # cv2 stores colors as BGR; convert to RGB
    if convert_bgr_to_rgb and a.ndim == 3:
        if a.shape[2] == 4:
            a = cv2.cvtColor(a, cv2.COLOR_BGRA2RGBA)
        else:
            a = cv2.cvtColor(a, cv2.COLOR_BGR2RGB)
    # display(Image.fromarray(a))
    # cv2.imshow("", np.uint8(Image.fromarray(a)))
    # cv2.waitKey(0)
    return np.uint8(Image.fromarray(a))


if __name__ == '__main__':
    config_path = 'config/My_nanodet-m.yml'                     #更改为自己的yml文件路径
    model_path = 'workspace/data/model_last.pth'                #更改文自己的权重路径
    image_path = 'nanodet/imgs/1.jpg'         #更改为预测图的路径
    load_config(cfg, config_path)
    logger = Logger(-1, use_tensorboard=False)

    predictor = Predictor(cfg, model_path, logger, device=device)
    meta, res = predictor.inference(image_path)
    # print(res)
    result = overlay_bbox_cv(meta['raw_img'], res, cfg.class_names, score_thresh=0.35)
    imshow_scale = 1.0
    img = cv2_imshow(cv2.resize(result, None, fx=imshow_scale, fy=imshow_scale),False)
    cv2.imshow("", img)
    cv2.waitKey(0)
    cv2.destroyAllWindows()
五、导出为onnx模型
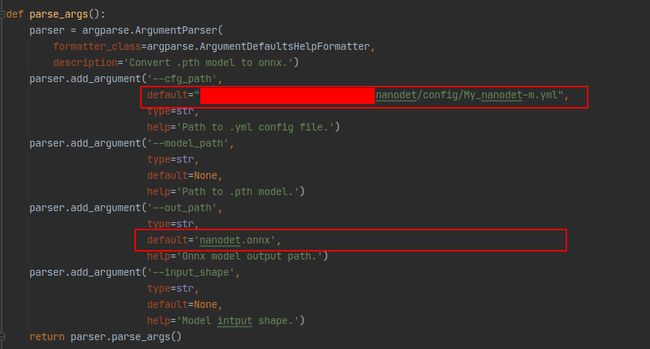
进入到tools/export.py
修改为自己的yml文件路径和自己的输出的onnx文件路径
直接运行就可以了
默认生成的onnx文件在export.py同级目录下
六、onnx转NCNN
先使用onnx-simplifier工具将onnx文件简化,没有安装的需要提前安装(此处不介绍了)
简化模型,命令行输入
python -m onnxsim nanodet.onnx nanodet_sim.onnx
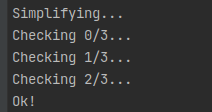
模型简化成功。
使用NCNN工具对转化或者使用一键转换模型https://convertmodel.com/将简化后的模型转为NCNN模型即可。


