OPENCV运动追踪研究和PYTHON及JAVA实现
opencv运动追踪可以用来捕捉到运行物体或者活物,在被动摄像头上应用,可以在运行时录相,节省宝贵的存储空间。
一个外国老哥借助树霉派的摄像头使用PYTHON做一个简单的运行捕捉摄像头,用于捕捉工作时间偷喝他冰箱里啤酒的同事。代码有一些转义字符的乱码,使用3.0API后有些问题,由于findContours不同版本返回值不同,我小修改了一下,可以完美运行于PC机带的摄像头,由于没有红外和辅助设备测距,所以需要离摄像头一段距离才能完美展示和处理。
运行检测的核心算法有很多,有些复杂,有些简单,有些准确,有些粗糙。同时也一行业和机器学习,机器视觉结合后,每一天都在发生新变化,不停的有牛B的数学家,物理学家,程序员加入。这个算法的核心是,更详细的算法可以去参考http://python.jobbole.com/81593/,他们禁止转载,原理如下:
我们视频流中的背景在连续的视频帧内,多数时候应该是静止不变的,因此如果我们可以建立背景模型,我们的就可以监视到显著的变化。如果发生了显著的变化,我们就可以检测到它——通常这些变化和我们视频中的运动有关。
上修改后的PYTHON代码,如果2.0的API,需要修改这一行代码,2.0返回两个值,把前面的下划线和逗号去掉,3.0不需要修改
(_, cnts, _) = cv2.findContours(thresh.copy(), cv2.RETR_EXTERNAL,
                             cv2.CHAIN_APPROX_SIMPLE)
:
# 导入必要的软件包
import argparse
import datetime
import imutils
import time
import cv2

# 创建参数解析器并解析参数
ap = argparse.ArgumentParser()
ap.add_argument("-v", "--video", help="path to the video file")
ap.add_argument("-a", "--min-area", type=int, default=500, help="minimum area size")
args = vars(ap.parse_args())

# 如果video参数为None,那么我们从摄像头读取数据
if args.get("video", None) is None:
    camera = cv2.VideoCapture(0)
    time.sleep(0.25)

# 否则我们读取一个视频文件
else:
    camera = cv2.VideoCapture(args["video"])

# 初始化视频流的第一帧
firstFrame = None
# 遍历视频的每一帧
while True:
    # 获取当前帧并初始化occupied/unoccupied文本
    (grabbed, frame) = camera.read()
    text = "Unoccupied"

    # 如果不能抓取到一帧,说明我们到了视频的结尾
    if not grabbed:
        break

    # 调整该帧的大小,转换为灰阶图像并且对其进行高斯模糊
    frame = imutils.resize(frame, width=500)
    gray = cv2.cvtColor(frame, cv2.COLOR_BGR2GRAY)
    gray = cv2.GaussianBlur(gray, (21, 21), 0)

    # 如果第一帧是None,对其进行初始化
    if firstFrame is None:
        firstFrame = gray
        continue
    # 计算当前帧和第一帧的不同
    frameDelta = cv2.absdiff(firstFrame, gray)
    thresh = cv2.threshold(frameDelta, 25, 255, cv2.THRESH_BINARY)[1]

    # 扩展阀值图像填充孔洞,然后找到阀值图像上的轮廓
    thresh = cv2.dilate(thresh, None, iterations=2)
    (_, cnts, _) = cv2.findContours(thresh.copy(), cv2.RETR_EXTERNAL,
                                 cv2.CHAIN_APPROX_SIMPLE)

    # 遍历轮廓
    for c in cnts:
        # if the contour is too small, ignore it
        if cv2.contourArea(c) < args["min_area"]:
            continue

        # compute the bounding box for the contour, draw it on the frame,
        # and update the text
        # 计算轮廓的边界框,在当前帧中画出该框
        (x, y, w, h) = cv2.boundingRect(c)
        cv2.rectangle(frame, (x, y), (x + w, y + h), (0, 255, 0), 2)
        text = "Occupied"
    # draw the text and timestamp on the frame
    # 在当前帧上写文字以及时间戳
    cv2.putText(frame, "Room Status: {}".format(text), (10, 20),
                cv2.FONT_HERSHEY_SIMPLEX, 0.5, (0, 0, 255), 2)
    cv2.putText(frame, datetime.datetime.now().strftime("%A %d %B %Y %I:%M:%S%p"),
                (10, frame.shape[0] - 10), cv2.FONT_HERSHEY_SIMPLEX, 0.35, (0, 0, 255), 1)

    # 显示当前帧并记录用户是否按下按键
    cv2.imshow("Security Feed", frame)
    cv2.imshow("Thresh", thresh)
    cv2.imshow("Frame Delta", frameDelta)
    key = cv2.waitKey(1) & 0xFF

    # 如果q键被按下,跳出循环
    if key == ord("q"):
        break
# 清理摄像机资源并关闭打开的窗口
camera.release()
cv2.destroyAllWindows()其实在OPENCV里有很多运行追踪的算法,使用起来更准确,也更简单,下面是一个使用JAVA写的调用BackgroundSubtractorMOG2运行追踪算法实现,十分简单,把加一个特效,给捕捉到人染色。import java.awt.EventQueue; import java.awt.event.MouseAdapter; import java.awt.event.MouseEvent; import java.awt.image.BufferedImage; import java.awt.image.DataBufferByte; import java.awt.image.WritableRaster; import java.util.ArrayList; import java.util.List; import javax.swing.ImageIcon; import javax.swing.JButton; import javax.swing.JFrame; import javax.swing.JLabel; import org.opencv.core.Core; import org.opencv.core.Mat; import org.opencv.core.MatOfPoint; import org.opencv.core.Point; import org.opencv.core.Rect; import org.opencv.core.Scalar; import org.opencv.core.Size; import org.opencv.imgproc.Imgproc; import org.opencv.videoio.VideoCapture; public class CameraBasic { static { System.loadLibrary(Core.NATIVE_LIBRARY_NAME); } private JFrame frame; static JLabel label; static int flag = 0; /** * Launch the application. */ public static void main(String[] args) { EventQueue.invokeLater(new Runnable() { public void run() { try { CameraBasic window = new CameraBasic(); window.frame.setVisible(true); } catch (Exception e) { e.printStackTrace(); } } }); VideoCapture camera = new VideoCapture(); camera.open(0); if (!camera.isOpened()) { System.out.println("Camera Error"); } else { Mat frame = new Mat(); Mat firstFrame = null; while (flag == 0) { camera.read(frame); // 捕捉动态 Imgproc.resize(frame, frame, new Size(500, 500)); Mat gray = new Mat(); Imgproc.cvtColor(frame, gray, Imgproc.COLOR_BGR2GRAY); Imgproc.GaussianBlur(gray, gray, new Size(21, 21), 0); if (firstFrame == null) { firstFrame = gray; continue; } Mat frameDelta = new Mat(); Core.absdiff(firstFrame, gray, frameDelta); Mat thresh = new Mat(); Imgproc.threshold(frameDelta, thresh, 25, 255, Imgproc.THRESH_BINARY); Listcontours = new ArrayList<>(); Mat hierarchy = new Mat(); Imgproc.findContours(thresh, contours, hierarchy, Imgproc.RETR_EXTERNAL, Imgproc.CHAIN_APPROX_SIMPLE); Imgproc.dilate(thresh, thresh, new Mat(), new Point(-1, -1), 2); for (MatOfPoint mf : contours) { if (Imgproc.contourArea(mf) < 2000) { continue; } Imgproc.drawContours(frame, contours, contours.indexOf(mf), new Scalar(0, 255, 255)); Imgproc.fillConvexPoly(frame, mf, new Scalar(0, 255, 255)); Rect r = Imgproc.boundingRect(mf); Imgproc.rectangle(frame, r.tl(), r.br(), new Scalar(0, 255, 0), 2); } firstFrame = gray; label.setIcon(new ImageIcon(matToBufferedImage(frame))); try { Thread.sleep(40); } catch (InterruptedException e) { // TODO Auto-generated catch block e.printStackTrace(); } } } } /** * Create the application. */ public CameraBasic() { initialize(); } /** * Initialize the contents of the frame. */ private void initialize() { frame = new JFrame(); frame.setBounds(100, 100, 800, 450); frame.setDefaultCloseOperation(JFrame.EXIT_ON_CLOSE); frame.getContentPane().setLayout(null); JButton btnNewButton = new JButton("\u62CD\u7167"); btnNewButton.addMouseListener(new MouseAdapter() { @Override public void mouseClicked(MouseEvent arg0) { flag = 1; } }); btnNewButton.setBounds(33, 13, 113, 27); frame.getContentPane().add(btnNewButton); label = new JLabel(""); label.setBounds(0, 0, 800, 450); frame.getContentPane().add(label); } public static BufferedImage matToBufferedImage(Mat mat) { if (mat.height() > 0 && mat.width() > 0) { BufferedImage image = new BufferedImage(mat.width(), mat.height(), BufferedImage.TYPE_3BYTE_BGR); WritableRaster raster = image.getRaster(); DataBufferByte dataBuffer = (DataBufferByte) raster.getDataBuffer(); byte[] data = dataBuffer.getData(); mat.get(0, 0, data); return image; } return null; } }
package javaCv;

import java.awt.EventQueue;
import java.awt.event.MouseAdapter;
import java.awt.event.MouseEvent;
import java.awt.image.BufferedImage;
import java.awt.image.DataBufferByte;
import java.awt.image.WritableRaster;
import java.util.ArrayList;
import java.util.List;

import javax.swing.ImageIcon;
import javax.swing.JButton;
import javax.swing.JFrame;
import javax.swing.JLabel;

import org.opencv.core.Core;
import org.opencv.core.Mat;
import org.opencv.core.MatOfPoint;
import org.opencv.core.Point;
import org.opencv.core.Rect;
import org.opencv.core.Scalar;
import org.opencv.imgcodecs.Imgcodecs;
import org.opencv.imgproc.Imgproc;
import org.opencv.video.BackgroundSubtractorMOG2;
import org.opencv.video.Video;
import org.opencv.videoio.VideoCapture;

public class CameraBasic2 {

	static {
		System.loadLibrary(Core.NATIVE_LIBRARY_NAME);
	}

	private JFrame frame;
	static JLabel label;
	static int flag = 0;

	/**
	 * Launch the application.
	 */
	public static void main(String[] args) {
		EventQueue.invokeLater(new Runnable() {
			public void run() {
				try {
					CameraBasic2 window = new CameraBasic2();
					window.frame.setVisible(true);

				} catch (Exception e) {
					e.printStackTrace();
				}
			}
		});

		VideoCapture camera = new VideoCapture();
		camera.open(0);
		if (!camera.isOpened()) {
			System.out.println("Camera Error");
		} else {
			Mat frame = new Mat();
			BackgroundSubtractorMOG2 bs = Video.createBackgroundSubtractorMOG2();
			bs.setHistory(100);
			Mat tmp = new Mat();

			while (flag == 0) {
				camera.read(frame);
				// 捕捉
				bs.apply(frame, tmp, 0.1f);

				List contours = new ArrayList<>();
				Mat hierarchy = new Mat();
				Imgproc.findContours(tmp, contours, hierarchy, Imgproc.RETR_EXTERNAL, Imgproc.CHAIN_APPROX_SIMPLE);
				Imgproc.dilate(tmp, tmp, new Mat(), new Point(-1, -1), 2);

				for (MatOfPoint mf : contours) {
					if (Imgproc.contourArea(mf) < 1000) {
						continue;
					}
					// Imgproc.drawContours(frame, contours,
					// contours.indexOf(mf), new Scalar(0, 255, 255));
					Imgproc.fillConvexPoly(frame, mf, new Scalar(0, 255, 255));
					Rect r = Imgproc.boundingRect(mf);
					Imgproc.rectangle(frame, r.tl(), r.br(), new Scalar(0, 255, 0), 2);
					//Imgcodecs.imwrite("E:\\work\\qqq\\camera2\\" + "img" + System.currentTimeMillis() + ".jpg", frame);
				}

				label.setIcon(new ImageIcon(matToBufferedImage(frame)));
				try {
					Thread.sleep(40);
				} catch (InterruptedException e) {
					// TODO Auto-generated catch block
					e.printStackTrace();
				}
			}
		}
	}

	/**
	 * Create the application.
	 */
	public CameraBasic2() {
		initialize();
	}

	/**
	 * Initialize the contents of the frame.
	 */
	private void initialize() {
		frame = new JFrame();
		frame.setBounds(100, 100, 800, 450);
		frame.setDefaultCloseOperation(JFrame.EXIT_ON_CLOSE);
		frame.getContentPane().setLayout(null);

		JButton btnNewButton = new JButton("\u62CD\u7167");
		btnNewButton.addMouseListener(new MouseAdapter() {
			@Override
			public void mouseClicked(MouseEvent arg0) {
				flag = 1;
			}
		});
		btnNewButton.setBounds(33, 13, 113, 27);
		frame.getContentPane().add(btnNewButton);

		label = new JLabel("");
		label.setBounds(0, 0, 800, 450);
		frame.getContentPane().add(label);
	}

	public static BufferedImage matToBufferedImage(Mat mat) {
		if (mat.height() > 0 && mat.width() > 0) {
			BufferedImage image = new BufferedImage(mat.width(), mat.height(), BufferedImage.TYPE_3BYTE_BGR);
			WritableRaster raster = image.getRaster();
			DataBufferByte dataBuffer = (DataBufferByte) raster.getDataBuffer();
			byte[] data = dataBuffer.getData();
			mat.get(0, 0, data);
			return image;
		}

		return null;
	}
}
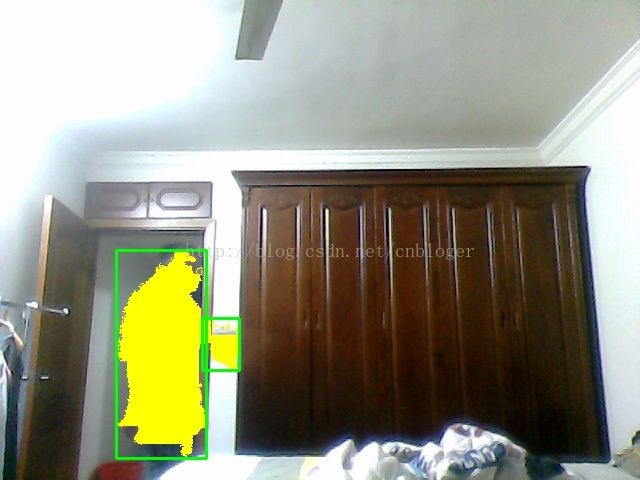
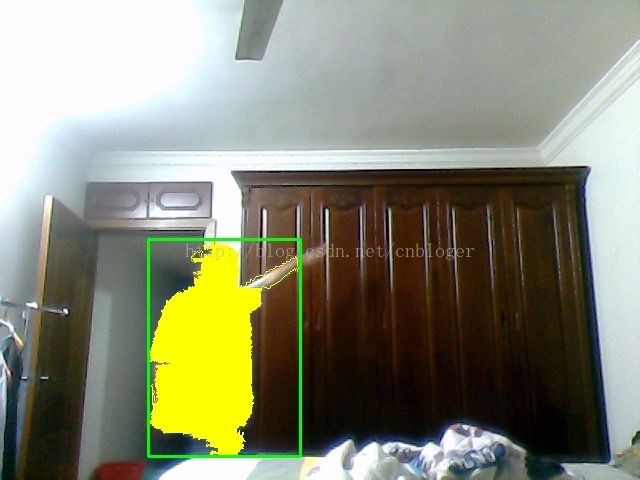
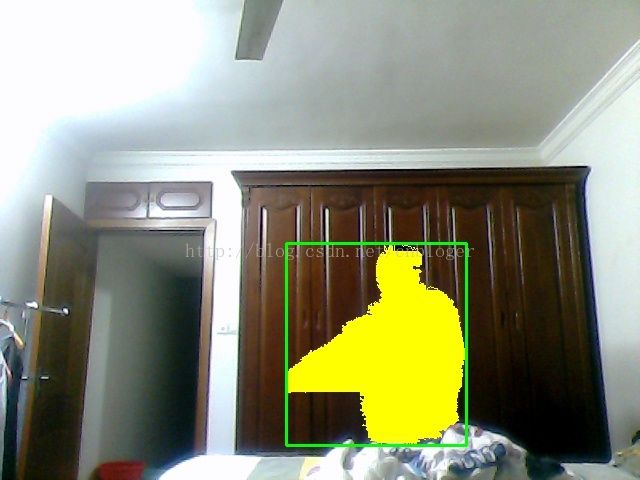
运行追踪十分有用,可以用在家里的摄像头上,既节省空间,也节省观看的时间,其实这个开发是比较有意思的,在捕捉动态对象的前提下,可以主动报警,有人入侵,也可以加入人脸识别,把好哥们都加进去,这样如果不在家时,谁到了家里都能知道,遇到不喜欢的人可以选择性避开,遇到想见的人可以去见。也可以在摄像头里加入动作识别,来开启空调电视之类,从而实现摄像头的充分利用。
效果图如下,我对人添加了染色效果:

参考:
http://python.jobbole.com/81593/
http://blog.csdn.net/jjddss/article/details/72674704