基于C++的ITK图像分割与配准学习笔记3(图像分割)
ITK学习参考资料整理汇总(包含 ItkSoftwareGuide.PDF英文版、ItkSoftwareGuide-2.4.0-中文版、医学图像分割与配准(1ITK初步分册) (1)PDF、 医学图像分割与配准(ITK实现分册2)PDF、ITK介绍与开发 WORD中文版)
本文章全部源码和用到的素材整理汇总
ITK系列目录:
1 ITK图像数据表达之图像
2 ITK图像处理之图像滤波
3 ITK图像处理之图像分割
目录:
1 区域生长
1.1 连接门限
实例1 连接门限对脑部切片PNG图像进行二维分割
实例2 连接门限对脑部MHA文件进行三维分割
1.2 OTSU 分割(最大类间方差阈值分割)
实例3 OTSU算法对PNG图像进行单阈值二维分割
实例4 OTSU算法对PNG图像进行多阈值二维分割
1.3 邻域连接
实例5 领域连接算法对脑部PNG图像进行二维分割
1.4 置信连接
实例6 置信连接算法对脑部PNG图像进行二维分割
实例7 置信连接算法对脑部MHA文件进行三维分割
1.5 孤立连接分割
实例8 孤立连接算法对脑部PNG图像进行二维分割
实例9 孤立连接算法对脑部MHA文件进行三维分割
实例10 边缘保留平滑滤波对PNG图像进行二维滤波
实例11 边缘保留平滑滤波对MHA文件进行三维滤波
1.6 向量图像中的置信连接
实例12 置信连接对PNG向量图像进行二维分割
2 分水岭算法的分割
实例13 ITK分水岭算法对PNG图像进行二维分割
3 水平集分割
3.1 快速步进分割
实例14 快速步进算法对脑部PNG图像进行二维分割
3.2 测量主动轮廓分割
实例15 测量主动轮廓算法对脑部PNG图像进行二维分割
3.3 阈值水平集分割
实例16 阈值水平集算法对脑部PNG图像进行二维分割
实例17 阈值水平集算法对脑部MHA文件进行三维分割
3.4 Canny 边缘水平集分割
1 区域生长
区域生长算法被证实是一个有效的图像分割方法。区域生长的基本方法是从被分割对象里作为种子区域 ( 通常是一个或多个像素 ) 的一个区域开始,在种子区域的相邻像素寻找与种子像素有相同或相似性质的像素,并将这些像素合并到种子像素所在的区域中。将这些新像素当作新的种子区域继续进行上述过程。区域生长算法主要取决于用来选择确定为种子区域像素的标准、用来确定相邻像素的连通性类型和用来访问相邻像素的策略。
1.1 连接门限
在生长区域中包含像素的一个简单标准是以一个特殊的间距来计算亮度值。
接下来的例子阐述了 itk:: ConnectedThresholdImageFilter 的用法。这个滤波器使用注水迭代器。区域生长方法最主要的算法复杂性是访问相邻像素。注水迭代器承担起这个责任并大大简化了区域生长算法的执行。剩下的算法就是确定一个是否应该将一个特殊的像素包含到当前区域中的标准。ConnectedThresholdImageFilter 使用的标准是基于用户提供的一个亮度值间距,需要提供上下限的值。区域生长算法将包括那些亮度在亮度值间距标准中的像素。
I(X) ∈ [lower,upper]
实例1 连接门限对脑部切片PNG图像进行二维分割
#include "itkConnectedThresholdImageFilter.h"//连接门限头文件
#include "itkImage.h"
#include "itkCastImageFilter.h"
#include "itkCurvatureFlowImageFilter.h"
#include "itkImageFileReader.h"
#include "itkImageFileWriter.h"
//图像中存在的噪声将大大降低滤波器生长大面积区域的能力。当面对噪声图像时,通常
//是使用一个边缘保留平滑滤波器。
int main( int argc, char *argv[])
{
  /*if( argc < 7 )
    {
    std::cerr << "Missing Parameters " << std::endl;
    std::cerr << "Usage: " << argv[0];
    std::cerr << " inputImage  outputImage seedX seedY lowerThreshold upperThreshold" << std::endl;
    return EXIT_FAILURE;
    }*/
  /*我们基于一个特殊的像素类型和维来定义图像类型。由于平滑滤波器的需要,在这里我
  们使用浮点型数据定义像素*/
  typedef   float           InternalPixelType;
  const     unsigned int    Dimension = 2;
  typedef itk::Image< InternalPixelType, Dimension >  InternalImageType;

  typedef unsigned char                            OutputPixelType;
  typedef itk::Image< OutputPixelType, Dimension > OutputImageType;
  typedef itk::CastImageFilter< InternalImageType, OutputImageType >
                                                   CastingFilterType;
  CastingFilterType::Pointer caster = CastingFilterType::New();

  //图像读取与图像写类型定义
  typedef  itk::ImageFileReader< InternalImageType > ReaderType;
  typedef  itk::ImageFileWriter<  OutputImageType  > WriterType;
  //图像读取与图像写对象实例化
  ReaderType::Pointer reader = ReaderType::New();
  WriterType::Pointer writer = WriterType::New();

  reader->SetFileName( "BrainProtonDensitySlice.png" );
  writer->SetFileName( "BrainProtonDensitySlice_huizhi.png" );

  //使用图像类型作为模板参数来对平滑滤波器进行实例化
  typedef itk::CurvatureFlowImageFilter< InternalImageType, InternalImageType >
  CurvatureFlowImageFilterType;
  //调用 New() 方式来创建滤波器并将接指向 itk::SmartPointer
  //平滑滤波器实例化对象smoothing
  CurvatureFlowImageFilterType::Pointer smoothing =
                         CurvatureFlowImageFilterType::New();
  //声明区域生长滤波器的类型,本例中使用 ConnectedThresholdImageFilter
  typedef itk::ConnectedThresholdImageFilter< InternalImageType,
                                    InternalImageType > ConnectedFilterType;
  //使用 New( ) 方式构造这种类的一个滤波器
  //连接门限滤波器实例化对象connectedThreshold
  ConnectedFilterType::Pointer connectedThreshold = ConnectedFilterType::New();
  //读取图像进行平滑滤波
  smoothing->SetInput( reader->GetOutput() );
  //滤波后进行连接门限
  connectedThreshold->SetInput( smoothing->GetOutput() );
  /*由于只有一小部分图像文件格式支持浮点型数据类型,所以使
  用 cast filter 将浮点型数据类型转换成整型*/
  caster->SetInput( connectedThreshold->GetOutput() );
  //处理后输出数据到writer
  writer->SetInput( caster->GetOutput() );
  /*CurvatureFlowImageFilter(平滑滤波器)需要定义两个参数。下面是一个二维图像的常见值。
  当然它们也需要根据输入图像存在的噪声的数量进行适当的调整*/
  smoothing->SetNumberOfIterations( 5 );
  smoothing->SetTimeStep( 0.125 );
  /*ConnectedThresholdImageFilter(连通门限图像滤波)有两个主要的
  参数(lowerThreshold和upperThreshold)需要定义,
  它们分别是为了确定是否包含在区域中的亮度值而制定的标准的上门限和下门限。
  这两个值设定得太接近势必会降低区域生长的机动性,而设定得太远必将整个图像都卷入区域中*/
  const InternalPixelType lowerThreshold = atof( "180" );
  const InternalPixelType upperThreshold = atof( "210" );

  connectedThreshold->SetLower(  lowerThreshold  );
  connectedThreshold->SetUpper(  upperThreshold  );
  /*这个滤波器的输出是一个二值图像,这个二值图像除了分割出的区域外到处都是零值像
  素。区域中的亮度值是由 SetReplaceValue() 方式来选择的*/
  connectedThreshold->SetReplaceValue( 255 );

  InternalImageType::IndexType  index;

  /*这个算法的实例化需要用户提供一个种子点index。将这个点选在被分割的解剖学结构的典型
 区域是很便捷的。种子是以一种 itk::Index 的形式传递给 SetSeed() 方式的*/
  index[0] = atoi( "107" );
  index[1] = atoi( "69" );
  connectedThreshold->SetSeed( index );
  /*writer 上的 Updata() 方法引发了管道的运行。通常在出现错误和抛出异议时, 从一个
  try / catch 模块调用 updata :*/
  try
    {
    writer->Update();
    }
  catch( itk::ExceptionObject & excep )
    {
    std::cerr << "Exception caught !" << std::endl;
    std::cerr << excep << std::endl;
    }
    return EXIT_SUCCESS;
}
脑部组织结构图像进行分割时可参考的参数:
![]()
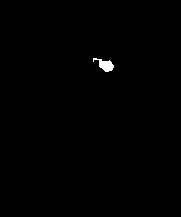
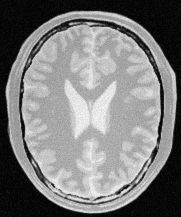
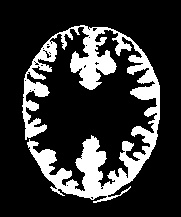
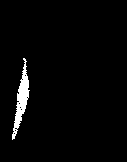
输入图像 分割出的白质组织 分割出的脑室组织 分割出的灰质组织
注意:灰质部分并没有被完全分割,这就是区域生长方法在对被分割的解剖学结构在图像空间上没有相似的统计分布时进行分割的弱点。你可以通过使用不同的上下限值进行分割,以达到扩展可接受区域的目的。
区域分割的另外一个选择是利用由 ConnectedThresholdImageFilter 在处理多种子时提供的优点。使用 AddSeed( ) 方式可以将一个接一个的传递给滤波器。你可以想象一个用户界面,在这个界面中被分割对象的多个点是都有一个操作键并且没个选择点作为一个种子传递给这个滤波器。
实例2 连接门限对脑部MHA文件进行三维分割
#include "itkConnectedThresholdImageFilter.h"//连接门限头文件
#include "itkImage.h"
#include "itkCastImageFilter.h"
#include "itkCurvatureFlowImageFilter.h"
#include "itkImageFileReader.h"
#include "itkImageFileWriter.h"
//图像中存在的噪声将大大降低滤波器生长大面积区域的能力。当面对噪声图像时,通常
//是使用一个边缘保留平滑滤波器。
int main( int argc, char *argv[])
{
  /*if( argc < 7 )
    {
    std::cerr << "Missing Parameters " << std::endl;
    std::cerr << "Usage: " << argv[0];
    std::cerr << " inputImage  outputImage seedX seedY lowerThreshold upperThreshold" << std::endl;
    return EXIT_FAILURE;
    }*/
  /*我们基于一个特殊的像素类型和维来定义图像类型。由于平滑滤波器的需要,在这里我
  们使用浮点型数据定义像素*/
  typedef   float           InternalPixelType;
  const     unsigned int    Dimension = 3;
  typedef itk::Image< InternalPixelType, Dimension >  InternalImageType;

  typedef unsigned char                            OutputPixelType;
  typedef itk::Image< OutputPixelType, Dimension > OutputImageType;
  typedef itk::CastImageFilter< InternalImageType, OutputImageType >
                                                   CastingFilterType;
  CastingFilterType::Pointer caster = CastingFilterType::New();

  //图像读取与图像写类型定义
  typedef  itk::ImageFileReader< InternalImageType > ReaderType;
  typedef  itk::ImageFileWriter<  OutputImageType  > WriterType;
  //图像读取与图像写对象实例化
  ReaderType::Pointer reader = ReaderType::New();
  WriterType::Pointer writer = WriterType::New();

  //reader->SetFileName( "BrainProtonDensitySlice.png" );
  reader->SetFileName("BrainProtonDensity3Slices.mha");
  writer->SetFileName( "ConnectedThreshold_baizhi.mha" );

  //使用图像类型作为模板参数来对平滑滤波器进行实例化
  typedef itk::CurvatureFlowImageFilter< InternalImageType, InternalImageType >
  CurvatureFlowImageFilterType;
  //调用 New() 方式来创建滤波器并将接指向 itk::SmartPointer
  //平滑滤波器实例化对象smoothing
  CurvatureFlowImageFilterType::Pointer smoothing =
                         CurvatureFlowImageFilterType::New();
  //声明区域生长滤波器的类型,本例中使用 ConnectedThresholdImageFilter
  typedef itk::ConnectedThresholdImageFilter< InternalImageType,
                                    InternalImageType > ConnectedFilterType;
  //使用 New( ) 方式构造这种类的一个滤波器
  //连接门限滤波器实例化对象connectedThreshold
  ConnectedFilterType::Pointer connectedThreshold = ConnectedFilterType::New();
  //读取图像进行平滑滤波
  smoothing->SetInput( reader->GetOutput() );
  //滤波后进行连接门限
  connectedThreshold->SetInput( smoothing->GetOutput() );
  /*由于只有一小部分图像文件格式支持浮点型数据类型,所以使
  用 cast filter 将浮点型数据类型转换成整型*/
  caster->SetInput( connectedThreshold->GetOutput() );
  //处理后输出数据到writer
  writer->SetInput( caster->GetOutput() );
  /*CurvatureFlowImageFilter(平滑滤波器)需要定义两个参数。下面是一个二维图像的常见值。
  当然它们也需要根据输入图像存在的噪声的数量进行适当的调整*/
  smoothing->SetNumberOfIterations( 5 );//越大滤波效果越好
  smoothing->SetTimeStep( 0.125 );
  /*ConnectedThresholdImageFilter(连通门限图像滤波)有两个主要的
  参数(lowerThreshold和upperThreshold)需要定义,
  它们分别是为了确定是否包含在区域中的亮度值而制定的标准的上门限和下门限。
  这两个值设定得太接近势必会降低区域生长的机动性,而设定得太远必将整个图像都卷入区域中*/
  const InternalPixelType lowerThreshold = atof( "150" );
  const InternalPixelType upperThreshold = atof( "180" );

  connectedThreshold->SetLower(  lowerThreshold  );
  connectedThreshold->SetUpper(  upperThreshold  );
  /*这个滤波器的输出是一个二值图像,这个二值图像除了分割出的区域外到处都是零值像
  素。区域中的亮度值是由 SetReplaceValue() 方式来选择的*/
  connectedThreshold->SetReplaceValue( 255 );

  InternalImageType::IndexType  index;

  /*这个算法的实例化需要用户提供一个种子点index。将这个点选在被分割的解剖学结构的典型
 区域是很便捷的。种子是以一种 itk::Index 的形式传递给 SetSeed() 方式的*/
  //白质种子点
  index[0] = atoi( "60" );
  index[1] = atoi( "116" );
  index[2] = atoi("2");
  connectedThreshold->SetSeed( index );
  /*writer 上的 Updata() 方法引发了管道的运行。通常在出现错误和抛出异议时, 从一个
  try / catch 模块调用 updata :*/
  try
    {
    writer->Update();
    }
  catch( itk::ExceptionObject & excep )
    {
    std::cerr << "Exception caught !" << std::endl;
    std::cerr << excep << std::endl;
    }
    return EXIT_SUCCESS;
}
输入三维图像(BrainProtonDensity3Slices.mha):
![]()
![]()
![]()
切片1 切片2 切片3
输出白质三维图像(ConnectedThreshold_baizhi.mha):
切片1 切片2 切片3
输出灰质三维图像(ConnectedThreshold_huizhi.mha):
切片1 切片2 切片3
输出脑室三维图像(ConnectedThreshold_naoshi.mha):
切片1 切片2 切片3
1.2 OTSU 分割(最大类间方差阈值分割)
实例3 OTSU算法对PNG图像进行单阈值二维分割
#include "itkOtsuThresholdImageFilter.h"//Otsu分割头文件
#include "itkImage.h"
#include "itkImageFileReader.h"
#include "itkImageFileWriter.h"

int main( int argc, char * argv[] )
{
  /*if( argc < 5 )
    {
    std::cerr << "Usage: " << argv[0];
    std::cerr << " inputImageFile outputImageFile ";
    std::cerr << " insideValue    outsideValue   "  << std::endl;
    return EXIT_FAILURE;
    }*/

  //确定作为输入和输出图像的像素类型
  typedef  unsigned char  InputPixelType;
  typedef  unsigned char  OutputPixelType;
  const unsigned int      Dimension = 2;
 //使用输入输出图像的像素类型和维来定义它们的图像类型
  typedef itk::Image< InputPixelType,  Dimension >   InputImageType;
  typedef itk::Image< OutputPixelType, Dimension >   OutputImageType;
  //使用上面定义的输入输出图像的类型对滤波器类型进行实例化
  typedef itk::OtsuThresholdImageFilter  FilterType;
  //对一个 itk::ImageFileReader 类也进行实例化以便从文件中读取图像数据
  typedef itk::ImageFileReader< InputImageType >  ReaderType;

  typedef itk::ImageFileWriter< OutputImageType >  WriterType;
  //调用 New( ) 方式创建滤波器和 reader 并将结果指向 itk::Smartpointers
  ReaderType::Pointer reader = ReaderType::New();
  FilterType::Pointer filter = FilterType::New();
  WriterType::Pointer writer = WriterType::New();

  //由 reader 得到的图像作为输入传递给 OtsuThresholdImageFilter
  reader->SetFileName("BrainProtonDensitySlice.png");
  filter->SetInput(reader->GetOutput());
  writer->SetInput( filter->GetOutput() );

  //outsideValue:给定阈值的上下限范围之外的像素的亮度值
  //insideValue:给定阈值的上下限范围之内的像素的亮度值
  const OutputPixelType outsideValue = atoi( "0" );//范围之外设置为纯黑
  const OutputPixelType insideValue  = atoi( "255" );//范围之内设置为纯白

  /*用 SetOutsideValue() 方式定义指向那些亮度值在给定阈值的上下限范围之外的像素的
  亮度值,用 SetInsideValue() 方式定义指向那些亮度值在给定阈值的上下限范围之内的像素的
  亮度值*/
  filter->SetOutsideValue( outsideValue );
  filter->SetInsideValue(  insideValue  );

  try
    {
    filter->Update();
    }
  catch( itk::ExceptionObject & excp )
    {
    std::cerr << "Exception thrown " << excp << std::endl;
    }

  //由滤波器内部计算得到的阈值。为了做到这些我们调用 GetThreshold 方式
  int threshold = filter->GetThreshold();
  std::cout << "Threshold = " << threshold << std::endl;

  writer->SetFileName( "BrainProtonDensitySlice_OTSU2.png" );
  try
    {
    writer->Update();
    }
  catch( itk::ExceptionObject & excp )
    {
    std::cerr << "Exception thrown " << excp << std::endl;
    }

  return EXIT_SUCCESS;
}
实例4 OTSU算法对PNG图像进行多阈值二维分割
#include "itkOtsuMultipleThresholdsCalculator.h"//包含头文件

#include "itkImage.h"
#include "itkImageFileReader.h"
#include "itkImageFileWriter.h"
#include "itkScalarImageToHistogramGenerator.h"
#include "itkBinaryThresholdImageFilter.h"
#include "itkNumericTraits.h"

#include
#include
//这个例子阐述了如何使用 itk::OtsuMultipleThresholdsCalculator
int main( int argc, char * argv[] )
{
  /*if( argc < 5 )
    {
    std::cerr << "Usage: " << argv[0];
    std::cerr << " inputImageFile outputImageFileBase ";
    std::cerr << "  outputImageFileExtension numberOfThresholdsToCalculate "  << std::endl;
    return EXIT_FAILURE;
    }*/

  //Convenience typedefs
  typedef  unsigned short  InputPixelType;
  typedef  unsigned char   OutputPixelType;

  typedef itk::Image< InputPixelType,  2 >   InputImageType;
  typedef itk::Image< OutputPixelType, 2 >   OutputImageType;

  /*OtsuMultipleThresholdsCalculator 以最大化类之间的变异的原则来计算一个给定的直方
  图的门限。我们使用 ScalarImageToHistogramGenerator 来得到直方图*/
  typedef itk::Statistics::ScalarImageToHistogramGenerator<
   InputImageType > ScalarImageToHistogramGeneratorType;

  typedef ScalarImageToHistogramGeneratorType::HistogramType HistogramType;

  typedef itk::OtsuMultipleThresholdsCalculator< HistogramType > CalculatorType;

  typedef itk::ImageFileReader< InputImageType >  ReaderType;
  typedef itk::ImageFileWriter< OutputImageType > WriterType;
  //一旦计算得到门限值,我们将使用 BinaryThresholdImageFilter 来对图像进行分割
   typedef itk::BinaryThresholdImageFilter<
  InputImageType, OutputImageType >  FilterType;

  ScalarImageToHistogramGeneratorType::Pointer scalarImageToHistogramGenerator
    = ScalarImageToHistogramGeneratorType::New();

  CalculatorType::Pointer calculator = CalculatorType::New();
  FilterType::Pointer filter = FilterType::New();

  ReaderType::Pointer reader = ReaderType::New();
  WriterType::Pointer writer = WriterType::New();

  scalarImageToHistogramGenerator->SetNumberOfBins( 128 );
  //设置Otsu分割阈值数目
  calculator->SetNumberOfThresholds( atoi("3") );

  const OutputPixelType outsideValue = 0;
  const OutputPixelType insideValue = 255;

  filter->SetOutsideValue( outsideValue );
  filter->SetInsideValue(  insideValue  );

  //Connect Pipeline
  reader->SetFileName( "BrainProtonDensitySlice.png" );

  //管道如下所示
  scalarImageToHistogramGenerator->SetInput( reader->GetOutput() );
  calculator->SetInputHistogram(scalarImageToHistogramGenerator->GetOutput() );
  filter->SetInput( reader->GetOutput() );
  writer->SetInput( filter->GetOutput() );
  //读取报错异常
  try
    {
    reader->Update();
    }
  catch( itk::ExceptionObject & excp )
    {
    std::cerr << "Exception thrown while reading image" << excp << std::endl;
    }
  scalarImageToHistogramGenerator->Compute();
  //calculator报错异常
  try
    {
    calculator->Compute();
    }
  catch( itk::ExceptionObject & excp )
    {
    std::cerr << "Exception thrown " << excp << std::endl;
    }

  //使用 GetOutput 方式可以得到门限值
  const CalculatorType::OutputType &thresholdVector = calculator->GetOutput();

  std::string outputFileBase = "BrainProtonDensitySlice_OtsuMu";

  InputPixelType lowerThreshold = itk::NumericTraits::min();
  InputPixelType upperThreshold;

  typedef CalculatorType::OutputType::const_iterator ThresholdItType;

  for( ThresholdItType itNum = thresholdVector.begin();
       itNum != thresholdVector.end();
       ++itNum )
    {
    std::cout << "OtsuThreshold["
              << (int)(itNum - thresholdVector.begin())
              << "] = "
              << static_cast::PrintType>(*itNum)
              << std::endl;

    upperThreshold = static_cast(*itNum);

    filter->SetLowerThreshold( lowerThreshold );
    filter->SetUpperThreshold( upperThreshold );

    lowerThreshold = upperThreshold;

    std::ostringstream outputFilename;
    outputFilename << outputFileBase
                   << std::setfill('0') << std::setw(3) << (itNum - thresholdVector.begin())
                   << "."
                   << "png";
    writer->SetFileName( outputFilename.str() );

    try
      {
      writer->Update();
      }
    catch( itk::ExceptionObject & excp )
      {
      std::cerr << "Exception thrown " << excp << std::endl;
      }
    }

  upperThreshold = itk::NumericTraits::max();
  filter->SetLowerThreshold( lowerThreshold );
  filter->SetUpperThreshold( upperThreshold );

  std::ostringstream outputFilename2;
  outputFilename2 << outputFileBase
                  << std::setfill('0') << std::setw(3) << thresholdVector.size()
                  << "."
                  << "jpg";
  writer->SetFileName( outputFilename2.str() );

  try
    {
    writer->Update();
    }
  catch( itk::ExceptionObject & excp )
    {
    std::cerr << "Exception thrown " << excp << std::endl;
    }

  return EXIT_SUCCESS;
}
当OTSU分割阈值数目设置为1时,得到的分割阈值为:
输入图像 OTSU分割图1(.png) OTSU分割图2(.jpg)
注:分割图2为分割图1的取反,图1的分割为输入图像对应阈值97的分割
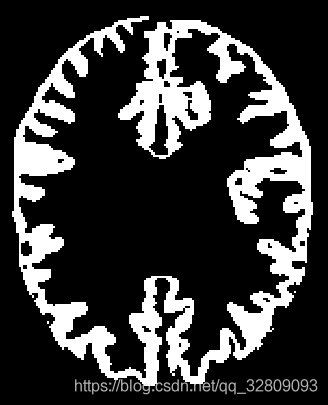
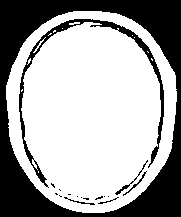
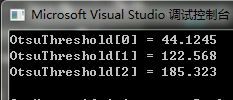
当OTSU分割阈值数目设置为3时,得到的分割阈值分别为:
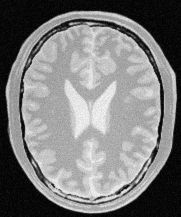
输入图像 OTSU分割图1(.png) OTSU分割图2(.png) OTSU分割图3(.png) OTSU分割图4(.jpg)
注:分割图4为分割图3的取反,图1-3的分割分别对应阈值44、122、185
1.3 邻域连接
接下来的例子阐述了 itk::NeighborhoodConnectedImageFilter 的用法。这个滤波器是itk::ConnectedThresholdImageFilter 的一个相关变量。一方面,如果一个像素的亮度在用户提供的两个门限值之间,那么 ConnectedThresholdImageFilter 就接受这个像素作为区域内的一个像素。另一方面, NeighborhoodConnectedImageFilter 仅仅接受那些所有相邻像素的亮度都在范围内的像素。每个像素的邻域大小是由用户提供的整数范围来定义的。邻域的亮度仅仅替换当前像素的亮度的原因是区域中几乎不接受小的结构。这个滤波器的操作等同于伴随数学形态学的腐蚀运算应用 ConnectedThresholdImageFilter ,腐蚀使用和邻域提供NeighborhoodConnectedImageFilter 的形状相同的结构成员。
实例5 领域连接算法对脑部PNG图像进行二维分割
#include "itkNeighborhoodConnectedImageFilter.h"
#include "itkImage.h"
#include "itkCastImageFilter.h"
//使用 itk::CurvatureFlowImageFilter 在保护边缘时平滑图像
#include "itkCurvatureFlowImageFilter.h"
#include "itkImageFileReader.h"
#include "itkImageFileWriter.h"

int main( int argc, char *argv[] )
{

  /*if( argc < 7 )
    {
    std::cerr << "Missing Parameters." << std::endl;
    std::cerr << "Usage: " << argv[0]
              << " inputImage outputImage"
              << " seedX seedY"
              << " lowerThreshold upperThreshold" << std::endl;
    return EXIT_FAILURE;
    }*/

  /*现在我们使用一个特殊的像素类型和图像维来定义图像的类型。由于平滑滤波器的需
  要,这种情况下对像素使用浮点型数据类型*/
  typedef   float           InternalPixelType;
  const     unsigned int    Dimension = 2;
  typedef itk::Image< InternalPixelType, Dimension >  InternalImageType;
  //使用图像类型作为一个模板参数来对平滑滤波器类型进行实例化
  typedef unsigned char                            OutputPixelType;
  typedef itk::Image< OutputPixelType, Dimension > OutputImageType;

  typedef itk::CastImageFilter< InternalImageType, OutputImageType >
    CastingFilterType;
  CastingFilterType::Pointer caster = CastingFilterType::New();

  typedef  itk::ImageFileReader< InternalImageType > ReaderType;
  typedef  itk::ImageFileWriter<  OutputImageType  > WriterType;

  ReaderType::Pointer reader = ReaderType::New();
  WriterType::Pointer writer = WriterType::New();

  reader->SetFileName( "BrainProtonDensitySlice.png" );
  writer->SetFileName( "Neighborhood_huizhi2.png");

  typedef itk::CurvatureFlowImageFilter
    CurvatureFlowImageFilterType;
  //调用 New( ) 方式来定义滤波器并将结果指向一个 itk::SmartPointer
  CurvatureFlowImageFilterType::Pointer smoothing =
                         CurvatureFlowImageFilterType::New();
  //现在我们声明区域生长滤波器的类型。这种情况下是 NeighborhoodConnectedImageFilter
  typedef itk::NeighborhoodConnectedImageFilter ConnectedFilterType;
  //使用 New( ) 方式对这个类的一个文件进行结构化
  ConnectedFilterType::Pointer neighborhoodConnected
                                                 = ConnectedFilterType::New();
  /*现在到了连接一个简单的线性管道的时候。在管道的开头添加一个 reader 文件并在末尾
  添加一个 cast filter 和 writer 。由于只有仅仅一小部分图像文件格式支持浮点型数据类型,
  所以使用 cast filter 将浮点型数据类型转换成整型*/
  smoothing->SetInput( reader->GetOutput() );
  neighborhoodConnected->SetInput( smoothing->GetOutput() );
  caster->SetInput( neighborhoodConnected->GetOutput() );
  writer->SetInput( caster->GetOutput() );
  //滤波
  /*CurvatureFlowImageFilter 需要定义两个参数。下面是一个二维图像的常见值。当然它们
  也需要根据输入图像存在的噪声的数量进行适当的调整*/
  smoothing->SetNumberOfIterations( 5 );
  smoothing->SetTimeStep( 0.125 );

  const InternalPixelType lowerThreshold = atof( "180" );
  const InternalPixelType upperThreshold = atof( "210" );
  /*NeighborhoodConnectedImageFilter 有两个主要的参数需要设定,它们分别是为了确定是
  否包含在区域中的亮度值而制定的标准的上门限和下门限。这两个值设定得太接近势必会降
  低区域生长的机动性,而设定得太远必将整个图像都卷入区域中*/
  neighborhoodConnected->SetLower( lowerThreshold );
  neighborhoodConnected->SetUpper( upperThreshold );
  /*这里我们增加定义邻域大小的一个至关重要的参数,用来决定一个像素是否在这个区域
  中。邻域越大,这个滤波器在输入图像中滤掉噪声的稳定性就越强,但是计算需要的时间也
  将更长。这里我们选择每个维上两个长度r(2r+1)的一个滤波器,这将产生一个 5×5 像素的邻域*/
  InternalImageType::SizeType radius;

  radius[0] = 2;   // two pixels along X
  radius[1] = 2;   // two pixels along Y

  neighborhoodConnected->SetRadius( radius );
  /*由于在 ConnectedThresholdImageFilter 中,现在我们就必须提供在区域中能被输出像素所
  接受的亮度值而且至少是一个种子点来定义最初的区域*/
  InternalImageType::IndexType index;

  index[0] = atoi( "107" );
  index[1] = atoi( "69");

  neighborhoodConnected->SetSeed( index );
  neighborhoodConnected->SetReplaceValue( 255 );
  /*Writer 上的 Updata() 方法引发了管道的运行。通常在出现错误和抛出异议时, 从一个
  try / catch 模块调用 updata*/
  try
    {
    writer->Update();
    }
  catch( itk::ExceptionObject & excep )
    {
    std::cerr << "Exception caught !" << std::endl;
    std::cerr << excep << std::endl;
    }
  return EXIT_SUCCESS;
}
输入图像 分割出的白质组织 分割出的脑室组织 分割出的灰质组织
由于结合 ConnectedThresholdImageFilter ,使用 AddSeed( ) 方式就可以提供一些种子给滤波器。对比下图所示的输出和由 ConnectedThresholdImageFilter 生成的结果,你可能想得到邻域范围的值和查看它是如何影响分割对象边界的平滑度、分割区域的大小和计算所需要的时间。
1.4 置信连接
接下来的例子阐述了 itk::ConfidenceConnectedImageFilter 的用法。 ConfidenceConnected Image Filter 使用的标准是基于当前区域的简单统计上的。首先,算法计算包含在区域中的所有像素亮度的平均值和标准差。用户提供一个因子用来乘以标准差并定义一个平均值的范围。相邻像素中亮度值在这个范围内的将包含到这个区域中。当没有更多的像素符合这个标准时,算法将结束它的第一次迭代。使用包含在区域内的所有像素再次计算亮度值的平均值和标准差。这个平均值和标准差定义一个新的亮度范围,用来查看当前区域的邻域并评价它们的亮度是否落在这个范围内。重复这个迭代过程直到没有新的像素再加进来或者已经达到了迭代器的最大数目。下面的式子阐述了这个滤波器的使用范围:
I(X) ∈ [m− f σ , m+ f σ]
其中 m 和 σ 分别是区域亮度的平均值和标准差, f 是用户提供的一个因子, I( ) 是图像,X 是区域中特殊相邻像素的位置。
实例6 置信连接算法对脑部PNG图像进行二维分割
#include "itkConfidenceConnectedImageFilter.h"//包含置信连接类
//图像中存在的噪声会降低这个滤波器生长大面积区域的能力。当面对噪声图像时,通常
//是使用一个边缘保留平滑滤波器
#include "itkCastImageFilter.h"//滤波器
#include "itkCurvatureFlowImageFilter.h"//边缘保留平滑滤波器
#include "itkImageFileReader.h"
#include "itkImageFileWriter.h"

//ConfidenceConnected Image Filter 使用的标准是基于当前区域的简单统计上的。首先,算法计算包含在区域中的所
//有像素亮度的平均值和标准差。用户提供一个因子用来乘以标准差并定义一个平均值的范
//围。相邻像素中亮度值在这个范围内的将包含到这个区域中。当没有更多的像素符合这个标
//准时,算法将结束它的第一次迭代。使用包含在区域内的所有像素再次计算亮度值的平均值
//和标准差。这个平均值和标准差定义一个新的亮度范围,用来查看当前区域的邻域并评价它
//们的亮度是否落在这个范围内。重复这个迭代过程直到没有新的像素再加进来或者已经达到
//了迭代器的最大数目。下面的式子阐述了这个滤波器的使用范围:
//I(X) ∈[m− fσ, m + fσ]
//其中 m 和 σ 分别是区域亮度的平均值和标准差, f 是用户提供的一个因子, I() 是图像,
//X 是区域中特殊相邻像素的位置

int main( int argc, char *argv[] )
{
  //if( argc < 5 )
  //  {
  //  std::cerr << "Missing Parameters " << std::endl;
  //  std::cerr << "Usage: " << argv[0];
  //  std::cerr << " inputImage  outputImage seedX seedY " << std::endl;
  //  return EXIT_FAILURE;
  //  }
  /*现在我们使用一个像素类型和一个特殊的维来定义图像类型。由于需要使用平滑滤波
  器,所以这种情况下对像素使用浮点型数据类型*/
  typedef   float           InternalPixelType;
  const     unsigned int    Dimension = 2;
  typedef itk::Image< InternalPixelType, Dimension > InternalImageType;

  typedef unsigned char                            OutputPixelType;
  typedef itk::Image< OutputPixelType, Dimension > OutputImageType;

  typedef itk::CastImageFilter< InternalImageType, OutputImageType >
    CastingFilterType;
  CastingFilterType::Pointer caster = CastingFilterType::New();

  typedef itk::ImageFileReader< InternalImageType > ReaderType;
  typedef itk::ImageFileWriter< OutputImageType >   WriterType;

  ReaderType::Pointer reader = ReaderType::New();
  WriterType::Pointer writer = WriterType::New();

  reader->SetFileName( "BrainProtonDensitySlice.png" );
  writer->SetFileName( "BrainProtonDensitySlice_connect2.png" );

  //使用图像类型作为模板参数来对平滑滤波器进行实例化
  typedef itk::CurvatureFlowImageFilter< InternalImageType, InternalImageType >
    CurvatureFlowImageFilterType;
  //调用 New( ) 方式来创建滤波器并将接指向 itk::SmartPointer
  CurvatureFlowImageFilterType::Pointer smoothing =
                         CurvatureFlowImageFilterType::New();

  /*现在我们声明区域生长滤波器的类型,本例中使用 ConnectedThresholdImageFilter*/
  typedef itk::ConfidenceConnectedImageFilter<
            InternalImageType, InternalImageType> ConnectedFilterType;
  //然后我们使用 New( ) 方式构造这种类的一个滤波器
  ConnectedFilterType::Pointer confidenceConnected = ConnectedFilterType::New();
  /*现在到了创建一个简单的线性管道的时候。在管道的开头添加一个 reader 件头并在末尾
  添加一个 cast filter 和 writer 。由于只有仅仅一小部分图像文件格式支持浮点型数据类型,
  所以使用 cast filter 将浮点型数据类型转换成整型*/
  smoothing->SetInput( reader->GetOutput() );//滤波
  confidenceConnected->SetInput( smoothing->GetOutput() );//区域增长置信连接
  caster->SetInput( confidenceConnected->GetOutput() );//类型转换,浮点型数据类型转换成整型
  writer->SetInput( caster->GetOutput() );

  //滤波
  /*CurvatureFlowImageFilter 需要定义两个参数。下面是一个二维图像的常见值。当然它们
  也需要根据输入图像存在的噪声的数量进行适当的调整*/
  smoothing->SetNumberOfIterations( 5 );
  smoothing->SetTimeStep( 0.125 );


  //区域增长-置信连接
  /*ConfidenceConnectedImageFilter 需要定义两个参数。第一个,定义亮度范围大小的因子
  f 。乘法因子太小将限制当前区域中很多有相似亮度的像素;乘法因子太大将放松接受条件
  并导致区域过度生长。值太大就会使得这些区域生长到邻近区域,而这些邻近区域实际上可
  能属于独立的解剖结构*/
  confidenceConnected->SetMultiplier( 2.5 );//定义亮度范围大小的因子f
  /*迭代器的数目是基于被分割的解剖学结构亮度的均匀性之上指定的。均匀性高的区域仅
  需要一对迭代器。带有 ramp 效果的区域,如带有不同一领域的 MRI 图像,就需要更多的迭代
  器。实际上,精心选择乘法因子似乎比迭代器的数目更加重要。然而,务必紧记这个算法毫
  无疑问需要集中于一个稳定的区域。在这个算法上使用过多的迭代器将很有可能使这个区域
  吞没整个图像*/
  confidenceConnected->SetNumberOfIterations( 5 );//迭代器数目(迭代次数)
  /*这个滤波器的输出是一个二值图像,这个二值图像除了分割出的区域外到处都是零值像
  素。区域中的亮度值是由 SetReplaceValue() 方式来选择的*/
  confidenceConnected->SetReplaceValue( 255 );

  /*这个算法的实例化需要用户提供一个种子点。将这个点选在被分割的解剖学结构的典型
  区域是很便捷的。种子区域周围的一个小的邻域将用来计算包含在标准里的最初的平均值和
  标准差。种子是以一种 itk::Index 的形式传递给 SetSeed() 方式的*/
  InternalImageType::IndexType  index;
  //设置种子点坐标位置
  index[0] = atoi( "107" );
  index[1] = atoi( "69" );
  confidenceConnected->SetSeed( index );
  /*种子区域周围邻域最初的大小是使用 SetInitialNeighborhoodRadius() 方式来定义的。这
  个邻域将定义成一个拥有 2r + 1 个像素的 N(二维图像为2,三维为3) 维矩形区域,其中 r 是作为最初邻域范围的传递值*/
  confidenceConnected->SetInitialNeighborhoodRadius( 2 );//设置最初邻域范围的传递值r  即5像素矩阵
  /*writer 上的 Updata() 方法引发了管道的运行。通常在出现错误和抛出异议时, 从一个
  try / catch 模块调用 updata*/
  try
    {
    writer->Update();
    }
  catch( itk::ExceptionObject & excep )
    {
    std::cerr << "Exception caught !" << std::endl;
    std::cerr << excep << std::endl;
    }

  return EXIT_SUCCESS;
}
输入图像 分割出的白质组织 分割出的脑室组织 分割出的灰质组织
注意:灰质部分并未被完全分割,这就是区域生长方法在对被分割的解剖学结构在图像空间上没有相似的统计分布时进行分割的弱点。你可以通过使用不同的迭代次数进行分割,以达到扩展可接受区域的目的。
实例7 置信连接算法对脑部MHA文件进行三维分割
在这个例子中使用前面例子中的代码,并设置图像的维数为 3 。应用梯度各向异性扩散来平滑图像。这个滤波器使用两个迭代器、一个值为 0.05 的 time step 和一个值为 3 的conductance 值,然后使用置信连接方式对平滑后的图像进行分割。使用的五个种子点的坐标分别为( 118 , 85 , 92 )、( 63 , 87 , 94 )、( 63 , 157 , 90 )、( 111 , 188 , 90 )、( 111 , 50 , 88 )。置信连接滤波器使用的参数:邻域范围是 2 ; 迭代器数目为5;和 f 值 为2.5( 跟前面的例子中一样 ) 。然后使VolView 来显示结果。
#include "itkConfidenceConnectedImageFilter.h"
#include "itkCastImageFilter.h"
#include "itkCurvatureFlowImageFilter.h"
#include "itkImageFileReader.h"
#include "itkImageFileWriter.h"

int main( int argc, char *argv[] )
{
  //if( argc < 3 )
  //  {
  //  std::cerr << "Missing Parameters " << std::endl;
  //  std::cerr << "Usage: " << argv[0];
  //  std::cerr << " inputImage  outputImage " << std::endl;
  //  return EXIT_FAILURE;
  //  }


  typedef   float           InternalPixelType;
  const     unsigned int    Dimension = 3;
  typedef itk::Image< InternalPixelType, Dimension >  InternalImageType;

  typedef unsigned char                            OutputPixelType;
  typedef itk::Image< OutputPixelType, Dimension > OutputImageType;

  typedef itk::CastImageFilter< InternalImageType, OutputImageType >
    CastingFilterType;
  CastingFilterType::Pointer caster = CastingFilterType::New();


  typedef  itk::ImageFileReader< InternalImageType > ReaderType;
  typedef  itk::ImageFileWriter<  OutputImageType  > WriterType;

  ReaderType::Pointer reader = ReaderType::New();
  WriterType::Pointer writer = WriterType::New();

  reader->SetFileName( "BrainProtonDensity3Slices.mha" );
  writer->SetFileName( "BrainProtonDensity3Slices_3.mha" );

  typedef itk::CurvatureFlowImageFilter< InternalImageType, InternalImageType >
    CurvatureFlowImageFilterType;
  CurvatureFlowImageFilterType::Pointer smoothing =
                         CurvatureFlowImageFilterType::New();

  typedef itk::ConfidenceConnectedImageFilter
    ConnectedFilterType;
  ConnectedFilterType::Pointer confidenceConnected = ConnectedFilterType::New();

  smoothing->SetInput( reader->GetOutput() );
  confidenceConnected->SetInput( smoothing->GetOutput() );
  caster->SetInput( confidenceConnected->GetOutput() );
  writer->SetInput( caster->GetOutput() );

  smoothing->SetNumberOfIterations( 2 );//
  smoothing->SetTimeStep(0.05);//每步迭代时间

  confidenceConnected->SetMultiplier( 2.5 );//;设置乘法因子f 2.5  可调
  confidenceConnected->SetNumberOfIterations( 5 );//设置迭代次数为5(迭代器数目)
  confidenceConnected->SetInitialNeighborhoodRadius( 2 );//设置领域范围为2
  confidenceConnected->SetReplaceValue( 255 );

  //设置种子点1
  InternalImageType::IndexType index1;
  index1[0] = 63;//X 轴
  index1[1] = 67;//Y 轴
  index1[2] = 1;//Z 轴 (第几个切片)
  confidenceConnected->AddSeed(index1);

 /* InternalImageType::IndexType index1;
  index1[0] = 118;
  index1[1] = 133;
  index1[2] = 92;
  confidenceConnected->AddSeed( index1 );*/

  try
    {
    writer->Update();
    }
  catch( itk::ExceptionObject & excep )
    {
    std::cerr << "Exception caught !" << std::endl;
    std::cerr << excep << std::endl;
    return EXIT_FAILURE;
    }


  return EXIT_SUCCESS;
}
当选取一个种子点(63,67,1),f=2.5时,三维图像中包含的三张二维图像的白质分割效果如下:
![]()
![]()
![]()
![]()
![]()
![]()
当选取一个种子点(120,146,1),f=2.3时,三维图像中包含的三张二维图像的白质分割效果如下:
![]()
![]()
![]()
当选取两个种子点(63,67,1)、(120,146,1),f=2.2时,三维图像中包含的三张二维图像的白质分割效果:
![]()
![]()
![]()
注:index1[2] = 0;//表示Z 轴 (第几个切片)从0开始计算(0表示第一个切片)
1.5 孤立连接
接 下 来 的 例 子 阐 述 了 itk::IsolatedConnectedImageFilter 的 用 法 。 这 个 滤 波 器 是itk::ConnectedThresholdImageFilter 的一个相关变量。在这个滤波器中用户提供两个种子和一个最小门限值。这个滤波器将在一个与第一个种子相连而与第二个种子不相连的区域中生长。为了做到这一点,这个滤波器找到了一个能用来作为第一个种子的上门限值的亮度值。使用一个二进位的搜索方法来找到分开两个种子的值。
我们可以通过选取两个适当的位置作为种子对和设定门限的下限来很便捷地对主要的解剖学结构进行分割。很重要的一点是务必紧记在这个和以前的例子中都是对进行平滑过后的图像来进行分割的。由于平滑过后的图像的亮度分布和输入图像的亮度分布会有一定的差别,所以选择的门限值应该在平滑过后的图像中执行。如图所示中从左到右是输入图像和使CurvatureFlowImageFilter 平滑的结果,在它后面是分割的结果。这个滤波器可以在对邻近解剖学结构很难被分开的情况下进行使用。在一个结构中选择
一个种子并在邻近结构中选择另一个种子创建合适的设置用来计算将两个结构分开的门限。
下表所示列出了得到下图所示的图像所使用的参数(区分下图所示的白质和灰质的参数):
实例8 孤立连接算法对脑部PNG图像进行二维分割
#include "itkIsolatedConnectedImageFilter.h"
#include "itkImage.h"
#include "itkCastImageFilter.h"
#include "itkCurvatureFlowImageFilter.h"
#include "itkImageFileReader.h"
#include "itkImageFileWriter.h"

int main( int argc, char *argv[] )
{
  /*if( argc < 7 )
    {
    std::cerr << "Missing Parameters " << std::endl;
    std::cerr << "Usage: " << argv[0];
    std::cerr << " inputImage  outputImage seedX1 seedY1";
    std::cerr << " lowerThreshold seedX2 seedY2" << std::endl;
    return EXIT_FAILURE;
    }*/
  //我们使用一个像素类型和一个特殊维来定义图像的类型:
  typedef   float           InternalPixelType;
  const     unsigned int    Dimension = 2;
  typedef itk::Image< InternalPixelType, Dimension >  InternalImageType;

  //下面几行是对 IsolatedConnectedImageFilter 进行实例化的代码
  typedef unsigned char                            OutputPixelType;
  typedef itk::Image< OutputPixelType, Dimension > OutputImageType;
  typedef itk::CastImageFilter< InternalImageType, OutputImageType >
                                                   CastingFilterType;
  CastingFilterType::Pointer caster = CastingFilterType::New();

  typedef  itk::ImageFileReader< InternalImageType > ReaderType;
  typedef  itk::ImageFileWriter<  OutputImageType  > WriterType;

  ReaderType::Pointer reader = ReaderType::New();
  WriterType::Pointer writer = WriterType::New();

  reader->SetFileName( "BrainProtonDensitySlice.png" );
  writer->SetFileName( " Isolated_baizhi.png" );


  typedef itk::CurvatureFlowImageFilter< InternalImageType, InternalImageType >
    CurvatureFlowImageFilterType;
  CurvatureFlowImageFilterType::Pointer smoothing =
                         CurvatureFlowImageFilterType::New();

  typedef itk::IsolatedConnectedImageFilter ConnectedFilterType;
  //使用 New( ) 方式对这个类的一个文件进行结构化
  ConnectedFilterType::Pointer isolatedConnected = ConnectedFilterType::New();
  //现在连接管道
  smoothing->SetInput( reader->GetOutput() );
  isolatedConnected->SetInput( smoothing->GetOutput() );
  caster->SetInput( isolatedConnected->GetOutput() );
  writer->SetInput( caster->GetOutput() );
  /*IsolatedConnectedImageFilter 期望用户指定一个门限和两个种子。在这个例子中,我们
  从命令行得到它们*/
  smoothing->SetNumberOfIterations( 5 );
  smoothing->SetTimeStep( 0.125 );

  InternalImageType::IndexType  indexSeed1;
  //白质种子点
  indexSeed1[0] = atoi( "61" );
  indexSeed1[1] = atoi( "140" );
  //下门限值(要分割的白质的下门限值)
  const InternalPixelType lowerThreshold = atof( "150" );

  InternalImageType::IndexType  indexSeed2;
  //灰质种子点
  indexSeed2[0] = atoi( "63" );
  indexSeed2[1] = atoi( "43" );
  /*由于在 ConnectedThresholdImageFilter 中,现在我们就必须指定在区域中能被输出像素所
  接受的亮度值以及至少一个种子点来定义最初的区域*/
  isolatedConnected->SetLower(  lowerThreshold  );
  isolatedConnected->AddSeed1( indexSeed1 );
  isolatedConnected->AddSeed2( indexSeed2 );

  isolatedConnected->SetReplaceValue( 255 );
  /*writer 上的 Updata() 方法触发管道的运行。通常在出现错误和抛出异议时, 从一个 try / catch
  模块调用 updata*/
  try
    {
    writer->Update();
    }
  catch( itk::ExceptionObject & excep )
    {
    std::cerr << "Exception caught !" << std::endl;
    std::cerr << excep << std::endl;
    }
  /*这个亮度值允许我们对两个区域进行分割,使用 GetIsolatedValue() 方式可以对区域进行恢复*/
  std::cout << "Isolated Value Found = ";
  std::cout << isolatedConnected->GetIsolatedValue()  << std::endl;
  return EXIT_SUCCESS;
}
输入图像 CurvatureFlowImageFilter 平滑 孤立连接分割白质
孤立连接分割灰质 孤立连接分割脑室
实例9 孤立连接算法对脑部MHA文件进行三维分割
#include "itkIsolatedConnectedImageFilter.h"
#include "itkImage.h"
#include "itkCastImageFilter.h"
#include "itkCurvatureFlowImageFilter.h"
#include "itkImageFileReader.h"
#include "itkImageFileWriter.h"

int main( int argc, char *argv[] )
{
  /*if( argc < 7 )
    {
    std::cerr << "Missing Parameters " << std::endl;
    std::cerr << "Usage: " << argv[0];
    std::cerr << " inputImage  outputImage seedX1 seedY1";
    std::cerr << " lowerThreshold seedX2 seedY2" << std::endl;
    return EXIT_FAILURE;
    }*/
  //我们使用一个像素类型和一个特殊维来定义图像的类型:
  typedef   float           InternalPixelType;
  const     unsigned int    Dimension = 3;
  typedef itk::Image< InternalPixelType, Dimension >  InternalImageType;

  //下面几行是对 IsolatedConnectedImageFilter 进行实例化的代码
  typedef unsigned char                            OutputPixelType;
  typedef itk::Image< OutputPixelType, Dimension > OutputImageType;
  typedef itk::CastImageFilter< InternalImageType, OutputImageType >
                                                   CastingFilterType;
  CastingFilterType::Pointer caster = CastingFilterType::New();

  typedef  itk::ImageFileReader< InternalImageType > ReaderType;
  typedef  itk::ImageFileWriter<  OutputImageType  > WriterType;

  ReaderType::Pointer reader = ReaderType::New();
  WriterType::Pointer writer = WriterType::New();

  reader->SetFileName( "BrainProtonDensity3Slices.mha" );
  writer->SetFileName( "Isolated_baizhi.mha" );


  typedef itk::CurvatureFlowImageFilter< InternalImageType, InternalImageType >
    CurvatureFlowImageFilterType;
  CurvatureFlowImageFilterType::Pointer smoothing =
                         CurvatureFlowImageFilterType::New();

  typedef itk::IsolatedConnectedImageFilter ConnectedFilterType;
  //使用 New( ) 方式对这个类的一个文件进行结构化
  ConnectedFilterType::Pointer isolatedConnected = ConnectedFilterType::New();
  //现在连接管道
  smoothing->SetInput( reader->GetOutput() );
  isolatedConnected->SetInput( smoothing->GetOutput() );
  caster->SetInput( isolatedConnected->GetOutput() );
  writer->SetInput( caster->GetOutput() );
  /*IsolatedConnectedImageFilter 期望用户指定一个门限和两个种子。在这个例子中,我们
  从命令行得到它们*/
  smoothing->SetNumberOfIterations(4);
  smoothing->SetTimeStep( 0.125 );

  InternalImageType::IndexType  indexSeed1;
  //白质种子点
  indexSeed1[0] = atoi( "61" );
  indexSeed1[1] = atoi( "140" );
  indexSeed1[2] = atoi("2");
  //下门限值(要分割的白质的下门限值)
  const InternalPixelType lowerThreshold = atof( "150" );

  InternalImageType::IndexType  indexSeed2;
  //灰质种子点
  indexSeed2[0] = atoi( "63" );
  indexSeed2[1] = atoi( "43" );
  indexSeed2[2] = atoi("2");
  /*由于在 ConnectedThresholdImageFilter 中,现在我们就必须指定在区域中能被输出像素所
  接受的亮度值以及至少一个种子点来定义最初的区域*/
  isolatedConnected->SetLower(  lowerThreshold  );
  isolatedConnected->AddSeed1( indexSeed1 );
  isolatedConnected->AddSeed2( indexSeed2 );

  isolatedConnected->SetReplaceValue( 255 );
  /*writer 上的 Updata() 方法触发管道的运行。通常在出现错误和抛出异议时, 从一个 try / catch
  模块调用 updata*/
  try
    {
    writer->Update();
    }
  catch( itk::ExceptionObject & excep )
    {
    std::cerr << "Exception caught !" << std::endl;
    std::cerr << excep << std::endl;
    }
  /*这个亮度值允许我们对两个区域进行分割,使用 GetIsolatedValue() 方式可以对区域进行恢复*/
  std::cout << "Isolated Value Found = ";
  std::cout << isolatedConnected->GetIsolatedValue()  << std::endl;
  return EXIT_SUCCESS;
}
输入三维图像(BrainProtonDensity3Slices.mha):
![]()
![]()
![]()
切片1 切片2 切片3
输出三维白质图像(Isolated_baizhi.mha):
切片1 切片2 切片3
输出三维脑室图像(Isolated_naoshi.mha):
切片1 切片2 切片3
输出三维灰质图像(Isolated_naoshi.mha):
切片1 切片2 切片3
实例10 边缘保留平滑滤波对PNG图像进行二维滤波
#include "itkImage.h"
#include "itkCastImageFilter.h"
#include "itkCurvatureFlowImageFilter.h"
#include "itkImageFileReader.h"
#include "itkImageFileWriter.h"

int main(int argc, char* argv[])
{
    //定义浮点像素类型 InternalPixelType
    typedef   float           InternalPixelType;
    const     unsigned int    Dimension = 2;
    //定义浮点、维数2的图像类型 InternalImageType
    typedef itk::Image< InternalPixelType, Dimension >  InternalImageType;
    //定义无符号字符 输出像素类型 OutputPixelType
    typedef unsigned char                            OutputPixelType;
    //定义无符号字符、维数2 输出图像类型 OutputImageType
    typedef itk::Image< OutputPixelType, Dimension > OutputImageType;
    //定义滤波输入图像类型InternalImageType   滤波输出图像类型OutputImageType
    typedef itk::CastImageFilter< InternalImageType, OutputImageType >
        CastingFilterType;
    //实例化滤波器对象caster
    CastingFilterType::Pointer caster = CastingFilterType::New();
    //定义图像读取类型ReaderType
    typedef  itk::ImageFileReader< InternalImageType > ReaderType;
    //定义图像写类型WriterType
    typedef  itk::ImageFileWriter<  OutputImageType  > WriterType;

    ReaderType::Pointer reader = ReaderType::New();
    WriterType::Pointer writer = WriterType::New();

    reader->SetFileName("BrainProtonDensitySlice.png");
    writer->SetFileName(" lvbo_CastingFilter.png");

    //实例化滤波对象smoothing
    typedef itk::CurvatureFlowImageFilter< InternalImageType, InternalImageType >
        CurvatureFlowImageFilterType;
    CurvatureFlowImageFilterType::Pointer smoothing =
        CurvatureFlowImageFilterType::New();

    现在连接管道
    smoothing->SetInput(reader->GetOutput());
    //输出滤波后的效果图
    caster->SetInput(smoothing->GetOutput());
    writer->SetInput(caster->GetOutput());

    /*IsolatedConnectedImageFilter 期望用户指定一个门限和两个种子。在这个例子中,我们
    从命令行得到它们*/
    smoothing->SetNumberOfIterations(10);
    smoothing->SetTimeStep(0.125);

    try
    {
        writer->Update();
    }
    catch (itk::ExceptionObject & excep)
    {
        std::cerr << "Exception caught !" << std::endl;
        std::cerr << excep << std::endl;
    }

    return EXIT_SUCCESS;
}
输入图像 CurvatureFlowImageFilter 平滑
实例11 边缘保留平滑滤波对脑部MHA文件进行三维滤波
#include "itkImage.h"
#include "itkCastImageFilter.h"
#include "itkCurvatureFlowImageFilter.h"
#include "itkImageFileReader.h"
#include "itkImageFileWriter.h"

int main(int argc, char* argv[])
{
    //定义浮点像素类型 InternalPixelType
    typedef   float           InternalPixelType;
    const     unsigned int    Dimension = 3;
    //定义浮点、维数2的图像类型 InternalImageType
    typedef itk::Image< InternalPixelType, Dimension >  InternalImageType;
    //定义无符号字符 输出像素类型 OutputPixelType
    typedef unsigned char                            OutputPixelType;
    //定义无符号字符、维数2 输出图像类型 OutputImageType
    typedef itk::Image< OutputPixelType, Dimension > OutputImageType;
    //定义滤波输入图像类型InternalImageType   滤波输出图像类型OutputImageType
    typedef itk::CastImageFilter< InternalImageType, OutputImageType >
        CastingFilterType;
    //实例化滤波器对象caster
    CastingFilterType::Pointer caster = CastingFilterType::New();
    //定义图像读取类型ReaderType
    typedef  itk::ImageFileReader< InternalImageType > ReaderType;
    //定义图像写类型WriterType
    typedef  itk::ImageFileWriter<  OutputImageType  > WriterType;

    ReaderType::Pointer reader = ReaderType::New();
    WriterType::Pointer writer = WriterType::New();

    reader->SetFileName("BrainProtonDensity3Slices.mha");
    writer->SetFileName("lvbo_CastingFilter.mha");

    //实例化滤波对象smoothing
    typedef itk::CurvatureFlowImageFilter< InternalImageType, InternalImageType >
        CurvatureFlowImageFilterType;
    CurvatureFlowImageFilterType::Pointer smoothing =
        CurvatureFlowImageFilterType::New();

    现在连接管道
    smoothing->SetInput(reader->GetOutput());
    //输出滤波后的效果图
    caster->SetInput(smoothing->GetOutput());
    writer->SetInput(caster->GetOutput());

    /*IsolatedConnectedImageFilter 期望用户指定一个门限和两个种子。在这个例子中,我们
    从命令行得到它们*/
    smoothing->SetNumberOfIterations(12);
    smoothing->SetTimeStep(0.125);

    try
    {
        writer->Update();
    }
    catch (itk::ExceptionObject & excep)
    {
        std::cerr << "Exception caught !" << std::endl;
        std::cerr << excep << std::endl;
    }

    return EXIT_SUCCESS;
}
输入三维图像(BrainProtonDensity3Slices.mha):
切片1 切片2 切片3
输出三维滤波图像(lvbo_CastingFilter.mha):
切片1 切片2 切片3
1.6 向量图像中的置信连接
这个例子阐述了应用在含有向量像素类型的图像中的置信连接的用法。对向量图像执行的置信连接在类itk::VectorConfidenceConnected 中。标量版本和向量版本之间的基本区别是向量版本使用向量矩阵来代替变量,而一个向量值代替一个标量值。区域中一个向量像素值的成员关系是使用作为类 itk::Statistics::MahalanobisDistanceThresholdImageFunction 马氏距离(mahalanobis distance) 来衡量的。
实例12 置信连接对PNG向量图像进行二维分割
#include "itkVectorConfidenceConnectedImageFilter.h"
#include "itkImage.h"
#include "itkImageFileReader.h"
#include "itkImageFileWriter.h"
#include "itkRGBPixel.h"

int main( int argc, char *argv[] )
{
  /*if( argc < 7 )
    {
    std::cerr << "Missing Parameters " << std::endl;
    std::cerr << "Usage: " << argv[0]
              << " inputImage  outputImage"
              << " seedX seedY"
              << " multiplier iterations" << std::endl;
    return EXIT_FAILURE;
    }*/
  /*现在我们使用一个像素类型和一个特殊的维来定义图像类型。由于需要使用平滑滤波
  器,所以这种情况下对像素使用浮点型数据类型*/
  const unsigned int Dimension = 2;
  typedef unsigned char                           PixelComponentType;
  typedef itk::RGBPixel< PixelComponentType >     InputPixelType;
  typedef itk::Image< InputPixelType, Dimension > InputImageType;

  typedef unsigned char                            OutputPixelType;
  typedef itk::Image< OutputPixelType, Dimension > OutputImageType;

  typedef itk::ImageFileReader< InputImageType >  ReaderType;
  typedef itk::ImageFileWriter< OutputImageType > WriterType;

  ReaderType::Pointer reader = ReaderType::New();
  WriterType::Pointer writer = WriterType::New();

  reader->SetFileName( "VisibleWomanEyeSlice.png" );
  writer->SetFileName( "VisibleWomanEyeSlice_Vitreo.png" );
  /*声明区域生长滤波器的类型,本例中使用 itk::VectorConfidenceConnectedImageFilter*/
  typedef itk::VectorConfidenceConnectedImageFilter< InputImageType,
                                   OutputImageType > ConnectedFilterType;
  /*然后我们使用 New() 方式对一个滤波器对象结构化*/
  ConnectedFilterType::Pointer confidenceConnected
                                                 = ConnectedFilterType::New();
  //然后我们创建一个简单的线性处理管
  confidenceConnected->SetInput( reader->GetOutput() );
  writer->SetInput( confidenceConnected->GetOutput() );
  //乘法因数f
  const double multiplier = atof("3");
  //VectorConfidenceConnectedImageFilter 需要定义两个参数。第一个,定义亮度范围大小
  //的因子 f 。乘法因子太小将限制当前区域中很多有相似亮度的像素;乘法因子太大将放松接
  //受条件并将导致区域过度生长。值太大就会使得这些区域生长到邻近区域,而这些邻近区域
  //实际上可能属于独立的解剖结构。
  confidenceConnected->SetMultiplier( multiplier );
  /*迭代器的数目是基于被分割的解剖学结构亮度的均匀性之上指定的。均匀性高的区域仅
  需要一对迭代器。带有 ramp 效果的区域,如带有不同一领域的 MRI 图像,就需要更多的迭代
  器。实际上,精心选择乘法因子似乎比迭代器的数目更加重要。然而,务必记住这个算法需
  要集中于一个稳定的区域。在这个算法上使用过多的迭代器将很有可能是这个区域吞没整个
  图像*/
  //迭代器数目
  const unsigned int iterations = atoi("1");

  confidenceConnected->SetNumberOfIterations( iterations );
  /*这个滤波器的输出是一个二值图像,这个二值图像除了分割出的区域外到处都是零值像
  素。区域中的亮度值是由 SetReplaceValue() 方式来选择的*/
  confidenceConnected->SetReplaceValue( 255 );

  InputImageType::IndexType  index;
  /*这个算法的实例化需要用户提供一个种子点。将这个点选在被分割的解剖学结构的典型
  区域是很便捷的。种子区域周围的一个小的邻域将用来计算包含在标准里的最初的平均值和
  标准差。种子以一种 itk::Index 的形式传递给 SetSeed() 方式*/
  //种子位置
  index[0] = atoi("66");
  index[1] = atoi("66");
  confidenceConnected->SetSeed( index );
  /*种子区域周围邻域最初的大小是使用 SetInitialNeighborhoodRadius() 方式来定义的。这
  个邻域将定义成一个拥有 2r + 1 个像素的 N 维矩形区域,其中 r 是作为最初邻域范围的传递值*/
  confidenceConnected->SetInitialNeighborhoodRadius( 3 );
  /*writer 上的 Updata() 方法引发了管道的运行。通常在出现错误和抛出异议时, 从一个
  try / catch 模块调用 updata*/
  try
    {
    writer->Update();
    }
  catch( itk::ExceptionObject & excep )
    {
    std::cerr << "Exception caught !" << std::endl;
    std::cerr << excep << std::endl;
    }
  /*使用 GetMean() 方式和 GetCoaraiance() 方式可以查看最后一个迭代器最终的均值向量和
  协方差矩阵的值*/
  typedef ConnectedFilterType::MeanVectorType       MeanVectorType;
  typedef ConnectedFilterType::CovarianceMatrixType CovarianceMatrixType;

  const MeanVectorType & mean = confidenceConnected->GetMean();
  const CovarianceMatrixType & covariance
                                       = confidenceConnected->GetCovariance();

  std::cout << "Mean vector = "       << mean       << std::endl;
  std::cout << "Covariance matrix = " << covariance << std::endl;

  return EXIT_SUCCESS;
}
以上选择三个种子点对应的组织结构得到的最后一个迭代器最终的均值向量和协方差矩阵的值及最后效果图分别为:
输入原图 分割出的直肌Rectum_1 分割出的直肌Rectum_2 玻璃体Vitreo
肌肉组织的色现象使得它们很容易从周围的解剖结构中被识别出来。另一端的眼膜的色现象在眼球中非常均匀,并不能仅基于颜色来产生一个完全的分割。
2 基于分水岭算法的分割
分水岭分割对图像特征使用梯度下降法和沿区域边界分析弱点 (weak points) 来将像素分类为区域。想像在一个有水流动的拓扑地形结构中,水在重力的引导下聚集到一个地势较低的盆地。随着水量的增加,水将流满整个盆地直到水流溢出到另一个盆地,这样就会将一些小盆地吞没形成大的盆地。使用局部的几何结构来形成区域 ( 集水的盆地 ) ,在图像领域中正如使用一些诸如曲率或梯度强度等特征中的局部极值来将像素连接成区域。这种技术不像其他区域分割,它几乎不需要用户定义门限,尤其适合对以不同的特征类型从不同的数据集融合而来的图像进行分割。分水岭技术在那些不仅仅产生单一图像分割的应用中也更加灵活,但是使用一个门限,或者交互式地在一个用户绘图界面的帮助下,从一个可以提取一个单一区域或区域集的 a-priori 中的一个分割层级更合适。
用来实现分水岭方法的两个常见的不同算法:顶部下降和底部上升。顶部下降,梯度下降策略是 ITK 选择的算法,因为我们想考虑这个多元微分操作的输出和问题中的 f 将会有浮动点值。底部上升策略以图像中的局部最小值处的种子开始并在离散的亮度水平上向外向上生长(等同于一个形态学操作上的次序,有时也称为形态学分水岭)。这将通过加强图像上的一系列离散灰度值限制精确度。
接下来的例子阐述了如何使用 itk::WatershedImageFilter 对图像进行预处理和分割。注意:预处理的数据将大大影响到结果的质量。典型地,通过使用边缘保护扩散滤波器对原始图像进行预处理可以得到最好的结果,比如各向异性扩散滤波器或双边图像滤波器。如 9.2.1 小节中介绍的那样,用来作为输入的高度函数,必须通过同对象边缘相关的正的更高的值来创建。对许多应用都合适的一个高度函数是使用被分割图像的梯度大小。使用 itk::VectorGradientMagnitudeAnisotropicDiffusionImageFilter 类来平滑图像并使用itk::VectorGradientMagnitudeImageFilter 类来创建高度函数。我们以包含所有预处理滤波器的头文件和分水岭滤波器的头文件开始。我们使用这些滤波器的向量形式,因为输入数据是一个彩色图像。
把这些滤波器参数转换用来做任何特殊的应用是一个实验和误差的过程。门限参数可以用来控制图像的过分割,提高门限通常将减少计算时间和产生更少更大的区域。转换参数的诀窍是考虑你将要分割的图像中的对象的范围级别。
实例13 ITK分水岭算法对PNG图像进行二维分割
#include
#include "itkVectorGradientAnisotropicDiffusionImageFilter.h"
#include "itkVectorGradientMagnitudeImageFilter.h"
#include "itkWatershedImageFilter.h"

#include "itkImageFileReader.h"
#include "itkImageFileWriter.h"
#include "itkVectorCastImageFilter.h"
#include "itkScalarToRGBPixelFunctor.h"

int main( int argc, char *argv[] )
{
  /*if (argc < 8 )
    {
    std::cerr << "Missing Parameters " << std::endl;
    std::cerr << "Usage: " << argv[0];
    std::cerr << " inputImage outputImage conductanceTerm diffusionIterations lowerThreshold outputScaleLevel gradientMode " << std::endl;
    return EXIT_FAILURE;
    }*/
  /*现在我们声明图像和像素类型用来势力化滤波器。所有的滤波器都需要实数类型的像素
  类型来正常工作。预处理阶段直接使用向量类型的数据而分割时使用浮点型标量数据。使用
  itk::VectorCastImageFilter 来将图像从 RGB 像素类型转换为数字向量类型*/
  typedef itk::RGBPixel< unsigned char >       RGBPixelType;
  typedef itk::Image< RGBPixelType, 2 >        RGBImageType;
  typedef itk::Vector< float, 3 >              VectorPixelType;
  typedef itk::Image< VectorPixelType, 2 >     VectorImageType;
  typedef itk::Image< itk::IdentifierType, 2 > LabeledImageType;
  typedef itk::Image< float, 2 >               ScalarImageType;
  //使用上面创建的类型来声明各种图像域处理滤波器,并最终将它们用在处理过程中
  typedef itk::ImageFileReader< RGBImageType >   FileReaderType;
  typedef itk::VectorCastImageFilter< RGBImageType, VectorImageType >
                                                 CastFilterType;
  typedef itk::VectorGradientAnisotropicDiffusionImageFilter<
                        VectorImageType, VectorImageType >
                                                 DiffusionFilterType;
  typedef itk::VectorGradientMagnitudeImageFilter< VectorImageType >
                                                 GradientMagnitudeFilterType;
  typedef itk::WatershedImageFilter< ScalarImageType >
                                                 WatershedFilterType;

  typedef itk::ImageFileWriter FileWriterType;

  FileReaderType::Pointer reader = FileReaderType::New();
  reader->SetFileName("VisibleWomanEyeSlice.png");

  CastFilterType::Pointer caster = CastFilterType::New();
  /*接下来我们实例化这些滤波器并设置它们的参数。第一步在图像预处理管道中使用一个
  各向异性扩散滤波器来扩散输入彩色图像。对于这种滤波器类, CFL 条件要求对二维图像的
  time step 不能超过 0.25 ,对三维不能超过 0.125 。迭代器的数量和 conductance term 将从命令行
  得到。参见 6.7.3 小节将得到更多关于 ITK 各向异性扩散滤波器的信息*/
  DiffusionFilterType::Pointer diffusion = DiffusionFilterType::New();
  //设置迭代次数
  diffusion->SetNumberOfIterations( atoi("10") );
  //设置参数 conductance
  diffusion->SetConductanceParameter( atof("2.0") );
  diffusion->SetTimeStep(0.125);
  //对向量类型图像 ITK 梯度大小滤波器可以随意地选择几个参数,这里我们仅允许那些主
  //要成分分析的可用和不可用
  GradientMagnitudeFilterType::Pointer
    gradient = GradientMagnitudeFilterType::New();
  //设置主要组成部分
  gradient->SetUsePrincipleComponents(atoi("on"));
  /*最后我们设置分水岭滤波器。它有两个参数。水平 Level 控制分水岭深度,而门限
  Threshold 控制输入的最低门限值。这两个参数都作为输入图像中最大深度的一个百分比
  (0.0 - 1.0) 来设置的*/
  WatershedFilterType::Pointer watershed = WatershedFilterType::New();
  //设置level
  watershed->SetLevel( atof("0.2") );
  /*分水岭滤波器的输出是一个无符号长整型 lable 图像,其中 lable 表示在一个特殊分割区域
  中一个像素的成员关系。这种形式对视觉是不现实的,所以为了这个例子的目的,我们将把
  它转换为 RGB 像素。 RGB 图像具有可以被保存为 png 文件和使用标准视图软件观看的优点。
  itk::Functor::ScalarToRGBPixelFunctor 类是可以将一个标量值转换成一个 itk::RGBPixel 的一
  个特殊功能对象。将这个算符写进 itk::UnaryFunctorImageFilter 来创建一个图像滤波器,用来
  把标量图像转换成 RGB 图像*/
  //设置阈值
  watershed->SetThreshold( atof("0.01") );

  typedef itk::Functor::ScalarToRGBPixelFunctor
    ColorMapFunctorType;
  typedef itk::UnaryFunctorImageFilter ColorMapFilterType;
  ColorMapFilterType::Pointer colormapper = ColorMapFilterType::New();

  FileWriterType::Pointer writer = FileWriterType::New();
  //保存的文件名
  writer->SetFileName("VisibleWomanEyeSlice_FSL1.png");
  //这种滤波器连接到一个单一的管道,在每个结尾都有 readers 和 writers
  caster->SetInput(reader->GetOutput());
  diffusion->SetInput(caster->GetOutput());
  gradient->SetInput(diffusion->GetOutput());
  watershed->SetInput(gradient->GetOutput());
  colormapper->SetInput(watershed->GetOutput());
  writer->SetInput(colormapper->GetOutput());

  try
    {
    writer->Update();
    }
  catch (itk::ExceptionObject &e)
    {
    std::cerr << e << std::endl;
    return EXIT_FAILURE;
    }

  return EXIT_SUCCESS;
}
中图是以参数 conductance=2.0、迭代=10、阈值=0.001、level=0.15、主要组成部分=off 生成的。生成右图使用的参数为 conductance=2.0、迭代=10、阈值=0.01、level=0.2、主要组成部分=off生成:
初始图像 分割图1 分割图2
分水岭算法计算复杂性的一个问题是授权许可问题。 ITK 实现的大部分复杂性是在产生层级,这一阶段的处理时间和最初分割中的集水盆地的数目是非线性关系,这就意味着一个图像中包含的信息数量远比图像中的像素数目重要。对一个很大但比较均匀的输入图像进行分割可能比对一个很小但细节很突出的输入图像进行分割所需要的时间更短。
3 水平集分割
水平集是跟踪轮廓和表面运动的一种数字化方法。不直接对轮廓进行操作,而是将轮廓设置成一个高维函数的零水平集,这个高维函数叫做水平集函数: Ψ(X,t) 。然后水平集函数运动成为一个微分方程。在任何时候,通过从输出中提取零水平集![]() 来得到运动的轮廓。使用水平集的主要优点是可以对任何复杂的结构进行模式化和拓扑变换,比如暗中操作融合和分离。通过使用基于图像的诸如亮度均值、梯度和边缘之类的特征的微分方程的解答,水平集就可以用来对图像进行分割。在一个典型的方法中,用户对一个轮廓进行初始化并运动这个轮廓直到它符合图像中的一个解剖结构。在这个文献中,发表了许多这些基本概念的执行和变量。赛思 Sethian 已经对这一领域做了一个综述。
来得到运动的轮廓。使用水平集的主要优点是可以对任何复杂的结构进行模式化和拓扑变换,比如暗中操作融合和分离。通过使用基于图像的诸如亮度均值、梯度和边缘之类的特征的微分方程的解答,水平集就可以用来对图像进行分割。在一个典型的方法中,用户对一个轮廓进行初始化并运动这个轮廓直到它符合图像中的一个解剖结构。在这个文献中,发表了许多这些基本概念的执行和变量。赛思 Sethian 已经对这一领域做了一个综述。
3.1 快速步进分割
当微分方程控制水平集运动时有一个非常简单的形式,可以使用一个快速运动算法叫做快速步进。接下来的例子阐述了 itk::FastMarchingImageFilter 的用法。这个滤波器对一个简单水平集运动问题执行一个快速行进方法。在这个例子中,微分方程中使用的速率系数是通过用户以一种图像的形式来提供的。通常作为一个梯度值的函数来计算这个图像。在文献中有几个映射是很常见的,比如负指数 exp( − x) 和倒数 1/(1+x) 。在当前的例子中我们决定使用一种 S 函数Sigmoid 函数,因为它可以提供一个控制参数的好方法,这个参数可以定制成一个很好的速率图像形状。这个映射按以下方式进行:当图像梯度很高时前面的传播速率很慢而在梯度很低的区域传播速率很快。这种方式将导致轮廓不断传播直到它到达图像中的解剖结构边缘并在那些边
缘前将速率降低下来。 FastMarchingImageFilter 的输出是一个时间交叉图,对每一个像素,它还表达了到达这个像素位置之前所花费的时间。然后在输出图像中一个门限的应用等同于在轮廓运动过程中的一个特殊时间上对轮廓取一个快照。轮廓横渡到一个特殊解剖结构边缘被认为将花费更长的时间。这将导致在接近结构边缘的时间交叉像素值发生很大的变化。通过调用一个时间范围用这个滤波器来执行分割,在这个时间范围内图像空间中一个区域将在一段长时间内包含轮廓。如图 9-15 所示显示了包含在一个分割任务中的 FastMarchingImageFilter 的应用的主要成员。它包括一个使用 itk::CurvatureAnisotropicDiffusionImageFilter 进行平滑的最初阶段。平滑后的图像作为输入传递给 itk::GradientMagnitudeRecursiveGaussianImageFilter ,然后再给
itk::SigmoidImageFilter 。 最 后 , 将 FastMarchingImageFilter 的 输 出 传 递 给 itk::BinaryThresholdImageFilter 以便产生一个 binary mask 来表达分割对象。
接下来例子中的代码阐述了一个用来执行快速步进分割的管道的典型设置。首先,使用一个边缘保护滤波器对输入图像进行平滑;然后计算它的梯度值并传递给一个 sigmoid 滤波器。 sigmoid 滤波器的结果是图像的潜能,将用来影响微分方程的速率系数。
实例14 快速步进算法对脑部PNG图像进行二维分割
//包含用来从输入图像中去除噪声头文件
#include "itkCurvatureAnisotropicDiffusionImageFilter.h"
//这两个滤波器连在一起将产生调节描述水平集运动的微分方程中的速率系数的图像潜能。
#include "itkGradientMagnitudeRecursiveGaussianImageFilter.h"
#include "itkSigmoidImageFilter.h"

#include "itkFastMarchingImageFilter.h"
//从 FastMarchingImageFilter 得到的时间交叉图将使用 BinaryThresholdImageFilter 来进行门限处理
#include "itkBinaryThresholdImageFilter.h"
//使用 itk::ImageFileReader 和 itk::ImageFileWriter 来对图像进行读写
#include "itkImageFileReader.h"
#include "itkImageFileWriter.h"
#include "itkRescaleIntensityImageFilter.h"

static void PrintCommandLineUsage( const int argc, const char * const argv[] )
{
  std::cerr << "Missing Parameters " << std::endl;
  std::cerr << "Usage: " << argv[0];
  std::cerr << " inputImage  outputImage seedX seedY";
  std::cerr << " Sigma SigmoidAlpha SigmoidBeta TimeThreshold StoppingValue";
  std::cerr << " smoothingOutputImage gradientMagnitudeOutputImage sigmoidOutputImage" << std::endl;

  for (int qq=0; qq< argc; ++qq)
    {
    std::cout << "argv[" << qq << "] = " << argv[qq] << std::endl;
    }
}

int main( int argc, char *argv[] )
{
  /*if (argc != 13)
    {
    PrintCommandLineUsage(argc, argv);
    return EXIT_FAILURE;
    }*/

  /*现在我们使用一个像素类型和一个特殊维来定义图像类型。由于需要用到平滑滤波器,
   所以在这种情况下对像素使用浮点型数据类型*/
  typedef   float           InternalPixelType;
  const     unsigned int    Dimension = 2;
  typedef itk::Image< InternalPixelType, Dimension >  InternalImageType;
  //另一方面,输出图像被声明为二值的
  typedef unsigned char                            OutputPixelType;
  typedef itk::Image< OutputPixelType, Dimension > OutputImageType;
 //下面使用图像内在的类型和输出图像类型来对 BinaryThresholdImageFilter 的类型进行实
  //例化:
  typedef itk::BinaryThresholdImageFilter< InternalImageType,
                        OutputImageType    >    ThresholdingFilterType;
  ThresholdingFilterType::Pointer thresholder = ThresholdingFilterType::New();
  //设置阈值
  const InternalPixelType  timeThreshold = atof("100");
  /*传递给 BinaryThresholdImageFilter 的上门限将定义那个从时间交叉图得来的时间快照。
  在一个理想的应用中,用户拥有使用视觉反馈交互式的选择这个门限的能力。在这里,由于
  是一个最小限度的例子,从命令行来得到这个值*/
  thresholder->SetLowerThreshold(           0.0  );
  thresholder->SetUpperThreshold( timeThreshold  );

  thresholder->SetOutsideValue(  0  );
  thresholder->SetInsideValue(  255 );
 //下面几行我们对读写器类型进行实例化
  typedef  itk::ImageFileReader< InternalImageType > ReaderType;
  typedef  itk::ImageFileWriter<  OutputImageType  > WriterType;

  ReaderType::Pointer reader = ReaderType::New();
  WriterType::Pointer writer = WriterType::New();
  //输入图像
  reader->SetFileName("BrainProtonDensitySlice.png");
  //输出图像
  writer->SetFileName("BrainProtonDensitySlice_FastMarching.png");

  typedef itk::RescaleIntensityImageFilter<
                               InternalImageType,
                               OutputImageType >   CastFilterType;
  //使用图像内在的类型对 CurvatureAnisotropicDiffusionImageFilter 类型进行实例化
    typedef   itk::CurvatureAnisotropicDiffusionImageFilter<
                               InternalImageType,
                               InternalImageType >  SmoothingFilterType;
  //然后,通过调用 New( ) 方式来创建滤波器并将结果指向一个 itk::SmartPointer
  SmoothingFilterType::Pointer smoothing = SmoothingFilterType::New();
  /*使用图像内在的类型来对 GradientMagnitudeRecursiveGaussianImageFilter 和
   SigmoidImageFilter 的类型进行实例化*/
  typedef   itk::GradientMagnitudeRecursiveGaussianImageFilter<
                               InternalImageType,
                               InternalImageType >  GradientFilterType;
  typedef   itk::SigmoidImageFilter<
                               InternalImageType,
                               InternalImageType >  SigmoidFilterType;
  //使用 New( ) 方式来对相应的滤波器进行实例化
  GradientFilterType::Pointer  gradientMagnitude = GradientFilterType::New();
  SigmoidFilterType::Pointer sigmoid = SigmoidFilterType::New();
  /*使用 SetOutputMinimum() 和 SetOutputMaximum() 方式来定义 SigmoidImageFilter 输出的
  最小值和最大值。在我们的例子中,我们希望这两个值分别是 0.0 和 1.0 ,以便得到一个最佳
  的速率图像来给 MarchingImageFilter 。在 6.3.2 小节详细地表达了 SigmoidImageFilter 的使用方
  法。*/
  sigmoid->SetOutputMinimum(  0.0  );
  sigmoid->SetOutputMaximum(  1.0  );
  //现在我们声明 FastMarchingImageFilter 的类型:
  typedef  itk::FastMarchingImageFilter< InternalImageType,
                              InternalImageType >    FastMarchingFilterType;
  //然后我们使用 New( ) 方式结构化这个类的一个滤波器
  FastMarchingFilterType::Pointer  fastMarching
                                              = FastMarchingFilterType::New();
  //现在我们使用下面的代码在一个管道中连接这些滤波器
  smoothing->SetInput( reader->GetOutput() );
  gradientMagnitude->SetInput( smoothing->GetOutput() );
  sigmoid->SetInput( gradientMagnitude->GetOutput() );
  fastMarching->SetInput( sigmoid->GetOutput() );
  thresholder->SetInput( fastMarching->GetOutput() );
  writer->SetInput( thresholder->GetOutput() );
  /*CurvatureAnisotropicDiffusionImageFilter 类需要定义一对参数。下面是二维图像中的典
  型值。然而它们可能需要根据输入图像中存在的噪声的数量进行适当的调整。在 6.7.3 小节中
  讨论了这个滤波器*/
  smoothing->SetTimeStep( 0.125 );
  smoothing->SetNumberOfIterations(  5 );
  smoothing->SetConductanceParameter( 9.0 );
  //设置Sigma(σ )
  const double sigma = atof("1.0");
  /*执行 GradientMagnitudeRecursiveGaussianImageFilter 就等同于通过一个派生的操作符紧
  跟一个高斯核的一个回旋。这个高斯的 sigma(σ) 可以用来控制图像边缘影响的范围。在 6.4.2
  小节中讨论了这个滤波器*/
  gradientMagnitude->SetSigma(  sigma  );
  //设置SigmoidAlpha(α)   SigmoidBeta(β)
  const double alpha =  atof("-0.5");
  const double beta  =  atof("3.0");
  /*SigmoidImageFilter 类需要两个参数来定义用于 sigmoid 变量的线性变换。使用 SetAlpha()
      和 SetBeta() 方式来传递这些参数。在这个例子的背景中,参数用来强化速率图像中的高低值
      区域之间的区别。在理想情况下,解剖结构中的均匀区域内的速率应该是 1.0 而在结构边缘
      附近应该迅速地衰减到 0.0 。下面是寻找这个值的启发。在梯度量值图像中,我们将沿被分
      割的解剖结构地轮廓的最小值称为 K1 ,将结构中间的梯度强度的均值称为 K2 。这两个值表
      达了我们想要映射到速率图像中间距为[0:1] 的动态范围。我们期望 sigmoid 将 K1 映射为 0.0 ,
      K2 为 1.0 。由于 K1 的值要比 K2 更大而我们期望将它们分别映射为 0.0 和 1.0 ,所以我们对 alpha(α)
      选择一个负值以便 sigmoid 函数也做一个反转亮度映射。这个映射将产生一个速率图像,其
      中水平集将在均匀区域快速行进而在轮廓上停止。 Beta(β) 的参考值是(K1 + K2) / 2 而 α 的参考值
      是(K2 - K1) / 6 必须是一个负数。在我们的简单例子中,这些值是用户从命令行提供的。用户
      可以通过留心梯度量值图像来估计这些值*/
  sigmoid->SetAlpha( alpha );
  sigmoid->SetBeta(  beta  );
  /*FastMarchingImageFilter 需要用户提供一个轮廓扩张的种子点。用户实际上不仅要提供
      一个种子点而是一个种子点集。一个好的种子点集将增大分割一个复杂对象而不丢失数据的
      可能性。使用多种子也会减少访问整个对象所需要的时间同时减少前面访问的区域边缘的漏
      洞的风险。例如,当分割一个拉长的对象时,在其中一端设置一个种子将导致传播到另一端
      会需要很长一段时间。沿着轴线设置几个种子无疑将是确定整个对象尽早被捕获的最佳策
      略。水平集的一个重要的性质就是它们不需要任何额外辅助来融合几个起点的自然能力。使
      用多种子正是利用了这个性质。
      这些种子储存在一个容器中。在 FastMarchingImageFilter 的特性中将这个容器的类型定
      义为 NodeContainer :*/
  typedef FastMarchingFilterType::NodeContainer           NodeContainer;
  typedef FastMarchingFilterType::NodeType                NodeType;
  NodeContainer::Pointer seeds = NodeContainer::New();

  InternalImageType::IndexType  seedPosition;
  //设置种子点位置
  seedPosition[0] = atoi("99");
  seedPosition[1] = atoi("114");
  //节点作为堆栈变量来创建,并使用一个值和一个 itk::Index 位置来进行初始化
  NodeType node;
  const double seedValue = 0.0;

  node.SetValue( seedValue );
  node.SetIndex( seedPosition );
  //节点列表被初始化,然后使用 InsertElement( ) 来插入每个节点:
  seeds->Initialize();
  seeds->InsertElement( 0, node );
  //现在使用 SetTrialPoints( ) 方式将种子节点集传递给 FastMarchingImageFilter :
  fastMarching->SetTrialPoints(  seeds  );
  /*FastMarchingImageFilter 需要用户指定作为输出产生的图像的大小。使用 SetOutputSize()
      来完成。注意:这里的大小是从平滑滤波器的输出图像得到的。这个图像的大小仅仅在直接
      或间接地调用了这个滤波器的 Updata() 之后才是有效的。*/
  //writer 上的 Updata( ) 方法引发了管道的运行。通常在出现错误和抛出异议时 , 从一个
  //smoothingOutputImage
  //使用边缘保护平滑滤波器平滑滤波后的图像
  try
    {
    CastFilterType::Pointer caster1 = CastFilterType::New();
    WriterType::Pointer writer1 = WriterType::New();
    caster1->SetInput( smoothing->GetOutput() );
    writer1->SetInput( caster1->GetOutput() );
    //
    writer1->SetFileName("smoothingOutputImage.png");
    caster1->SetOutputMinimum(   0 );
    caster1->SetOutputMaximum( 255 );
    writer1->Update();
    }
  catch( itk::ExceptionObject & err )
    {
    std::cerr << "ExceptionObject caught !" << std::endl;
    std::cerr << err << std::endl;
    return EXIT_FAILURE;
    }
  // gradientMagnitudeOutputImage
  //滤波后图像的梯度强度图像
  try
    {
    CastFilterType::Pointer caster2 = CastFilterType::New();
    WriterType::Pointer writer2 = WriterType::New();
    caster2->SetInput( gradientMagnitude->GetOutput() );
    writer2->SetInput( caster2->GetOutput() );
    writer2->SetFileName("gradientMagnitudeOutputImage.png");
    caster2->SetOutputMinimum(   0 );
    caster2->SetOutputMaximum( 255 );
    writer2->Update();
    }
  catch( itk::ExceptionObject & err )
    {
    std::cerr << "ExceptionObject caught !" << std::endl;
    std::cerr << err << std::endl;
    return EXIT_FAILURE;
    }
  // sigmoidOutputImage
  //梯度强度的 sigmoid 函数图像
  try
    {
    CastFilterType::Pointer caster3 = CastFilterType::New();
    WriterType::Pointer writer3 = WriterType::New();
    caster3->SetInput( sigmoid->GetOutput() );
    writer3->SetInput( caster3->GetOutput() );
    // FastMarchingImageFilter 分割处理产生的结果图像
    writer3->SetFileName("sigmoidOutputImage.png");
    caster3->SetOutputMinimum(   0 );
    caster3->SetOutputMaximum( 255 );
    writer3->Update();
    }
  catch( itk::ExceptionObject & err )
    {
    std::cerr << "ExceptionObject caught !" << std::endl;
    std::cerr << err << std::endl;
    return EXIT_FAILURE;
    }


  fastMarching->SetOutputSize(
           reader->GetOutput()->GetBufferedRegion().GetSize() );
  //设置stoppingTime,比阈值(门限值高一点)
  const double stoppingTime = atof("103");
  /*由于表示轮廓的起点将从头到尾不断传播,一旦到达一个特定的时间就希望停止这一过
      程。这就允许我们在假定相关区域已经计算过的假设下节省计算时间。使用 SetStopping
      Value() 方式来定义停止过程的值。原则上,这个停止值应该比门限值高一点*/
  fastMarching->SetStoppingValue(  stoppingTime  );
  //  try / catch 模块调用 updata 。
  try
    {
    writer->Update();
    }
  catch( itk::ExceptionObject & excep )
    {
    std::cerr << "Exception caught !" << std::endl;
    std::cerr << excep << std::endl;
    return EXIT_FAILURE;
    }

  try
    {
    CastFilterType::Pointer caster4 = CastFilterType::New();
    WriterType::Pointer writer4 = WriterType::New();
    caster4->SetInput( fastMarching->GetOutput() );
    writer4->SetInput( caster4->GetOutput() );
    writer4->SetFileName("FastMarchingFilterOutput4.png");
    caster4->SetOutputMinimum(   0 );
    caster4->SetOutputMaximum( 255 );
    writer4->Update();
    }
  catch( itk::ExceptionObject & err )
    {
    std::cerr << "ExceptionObject caught !" << std::endl;
    std::cerr << err << std::endl;
    return EXIT_FAILURE;
    }

  typedef itk::ImageFileWriter< InternalImageType > InternalWriterType;

  InternalWriterType::Pointer mapWriter = InternalWriterType::New();
  mapWriter->SetInput( fastMarching->GetOutput() );
  mapWriter->SetFileName("FastMarchingFilterOutput4.mha");
  mapWriter->Update();

  InternalWriterType::Pointer speedWriter = InternalWriterType::New();
  speedWriter->SetInput( sigmoid->GetOutput() );
  speedWriter->SetFileName("FastMarchingFilterOutput3.mha");
  speedWriter->Update();

  InternalWriterType::Pointer gradientWriter = InternalWriterType::New();
  gradientWriter->SetInput( gradientMagnitude->GetOutput() );
  gradientWriter->SetFileName("FastMarchingFilterOutput2.mha");
  gradientWriter->Update();

  return EXIT_SUCCESS;
}
现在我们使用目录 Examples/Data 中提供的 BrainProtonDensitySlice.png 作为输入图像来运行这个例子。我们可以通过选取适当的位置作为种子来很便捷地对主要的解剖学结构进行分割。表 9-6 所示表达了一些结构使用的参数。
使用的终止值都为 100 。如图 9-16 所示表达了图 9-15 所示中阐述的流程的中间输出。从左到右分别是:各向异性扩散滤波器的输出,平滑后图像的梯度强度和最后作为 FastMarchingImageFilter 的速率图像使用的梯度强度的 sigmoid 。
输入图像 使用边缘保护平滑滤波器平滑滤波后的图像 滤波后图像的梯度强度图像 梯度强度的 sigmoid 函数图像
基于 FastMarchingImageFilter 分割处理产生的结果:
左脑室分割图像 右脑室分割图像 白质分割图像 灰质分割图像
注意:图像中的灰质部分并没有被完全分割,这就阐述了在对被分割的解剖结构并没有占据图像的延伸区域进行分割时水平集方法的弱点。这在当结构的宽度和梯度滤波器所产生的衰减带的大小做比较时显得尤为真实。对这个限制可行的一个工作区是沿着拉长的对象使用多种子分布,然而,白质相对于灰质分割来说是一个价值不高的工作,可能需要一个比这个简单例子中使用的更精细的方法。
3.2 测量主动轮廓分割
如图 9-21 所示展示了一个分割任务中与 GeodesicActiveContourLevelSetImageFilter 的应用有关的主要成员。这个传递途径和 9.3.2 小节中 ShapeDetectionLevelSetImageFilter 使用的途径非常相似。这个传递途径的第一阶段是使用 itk::CurvatureAnisotropicDiffusionImageFilter 来进行平滑。将平滑后的图像作为输入传递给itk::GradientMagnitudeRecursiveGaussianImageFilter ,并且再传递给 itk::SigmoidImageFilter 以便产生潜在图像的边缘。一系列用户提供的种子传递给FastMarchingImageFilter 以便计算距离映射。从这个映射中减去一个常数以便得到一个水平集,其中零水平集表示最初的轮廓。这个水平集作为输入传递给 GeodesicActiveContourLevelSetImageFilter 。最后,将 GeodesicActiveContourLevelSetImageFilter 产生的水平集传递给一个 BinaryThresholdImageFilter 以便创建一个二值模板来表达分割对象。
现在我们使用 BrainProtonDensitySlice.png 作为输入图像来运行这个例子。我们可以通过选取适当的位置作为种子来很便捷地对主要的解剖学结构进行分割。下表表达了一些结构使用的参数:
实例15 测量主动轮廓算法对脑部PNG图像进行二维分割
#include "itkGeodesicActiveContourLevelSetImageFilter.h"

#include "itkCurvatureAnisotropicDiffusionImageFilter.h"
#include "itkGradientMagnitudeRecursiveGaussianImageFilter.h"
#include "itkSigmoidImageFilter.h"
#include "itkFastMarchingImageFilter.h"
#include "itkRescaleIntensityImageFilter.h"
#include "itkBinaryThresholdImageFilter.h"
#include "itkImageFileReader.h"
#include "itkImageFileWriter.h"
//程序第一阶段是使用 itk::CurvatureAnisotropicDiffusionImageFilter 来进行平
//滑。将平滑后的图像作为输入传递给 itk::GradientMagnitudeRecursiveGaussianImageFilter ,并
//且再传递给 itk::SigmoidImageFilter 以便产生潜在图像的边缘。一系列用户提供的种子传递给
//FastMarchingImageFilter 以便计算距离映射。从这个映射中减去一个常数以便得到一个水平
//集,其中零水平集表示最初的轮廓。这个水平集作为输入传递给 GeodesicActiveContourLevel
//SetImageFilter 。
//最后,将 GeodesicActiveContourLevelSetImageFilter 产生的水平集传递给一个 Binary
//ThresholdImageFilter 以便创建一个二值模板来表达分割对象。

int main( int argc, char *argv[] )
{
  //现在我们使用一个特殊的像素类型和一个维来定义图像类型。由于需要用到平滑滤波
  //    器,这种情况下对像素使用浮点型数据类型
  typedef   float           InternalPixelType;
  const     unsigned int    Dimension = 2;
  typedef itk::Image< InternalPixelType, Dimension >  InternalImageType;
 //接下来几行对的类型进行实例化。并使用 New( ) 方式创建这个类型的一个对象
  typedef unsigned char                            OutputPixelType;
  typedef itk::Image< OutputPixelType, Dimension > OutputImageType;
  typedef itk::BinaryThresholdImageFilter<
                        InternalImageType,
                        OutputImageType    >       ThresholdingFilterType;

  ThresholdingFilterType::Pointer thresholder = ThresholdingFilterType::New();

  thresholder->SetLowerThreshold( -1000.0 );
  thresholder->SetUpperThreshold(     0.0 );

  thresholder->SetOutsideValue(  0  );
  thresholder->SetInsideValue(  255 );


  typedef  itk::ImageFileReader< InternalImageType > ReaderType;
  typedef  itk::ImageFileWriter<  OutputImageType  > WriterType;

  ReaderType::Pointer reader = ReaderType::New();
  WriterType::Pointer writer = WriterType::New();
  //设置读取文件路径
  reader->SetFileName("BrainProtonDensitySlice.png");
  //设置保存文件路径
  writer->SetFileName("BrainProtonDensitySlice_G_ActiveContour.png");

  typedef itk::RescaleIntensityImageFilter<
                               InternalImageType,
                               OutputImageType >   CastFilterType;

  typedef   itk::CurvatureAnisotropicDiffusionImageFilter<
                               InternalImageType,
                               InternalImageType >  SmoothingFilterType;

  SmoothingFilterType::Pointer smoothing = SmoothingFilterType::New();


  typedef   itk::GradientMagnitudeRecursiveGaussianImageFilter<
                               InternalImageType,
                               InternalImageType >  GradientFilterType;
  typedef   itk::SigmoidImageFilter<
                               InternalImageType,
                               InternalImageType >  SigmoidFilterType;

  GradientFilterType::Pointer  gradientMagnitude = GradientFilterType::New();

  SigmoidFilterType::Pointer sigmoid = SigmoidFilterType::New();

  sigmoid->SetOutputMinimum(  0.0  );
  sigmoid->SetOutputMaximum(  1.0  );


  typedef  itk::FastMarchingImageFilter<
                              InternalImageType,
                              InternalImageType >    FastMarchingFilterType;


  FastMarchingFilterType::Pointer  fastMarching = FastMarchingFilterType::New();

  typedef  itk::GeodesicActiveContourLevelSetImageFilter< InternalImageType,
                InternalImageType >    GeodesicActiveContourFilterType;
  GeodesicActiveContourFilterType::Pointer geodesicActiveContour =
                                     GeodesicActiveContourFilterType::New();
  //设置扩展系数
  const double propagationScaling = atof("10.0" );
  /*对于 GeodesicActiveContourLevelSetImageFilter ,缩放比例参数用来对传播(膨胀) 系数、
    曲率(平滑) 系数和水平对流系数之间进行交替换位。这些参数使用 SetPropagationScaling() 、
    SetCurvatureScaling() 和 SetAdvectionScaling() 方式来设置。在这个例子中,我们将设置曲率
    和水平对流缩放比例作为一个参数并把传播缩放比例设置为一个命令行变量*/
  //传播 ( 膨胀 ) 系数
  geodesicActiveContour->SetPropagationScaling( propagationScaling );
  //曲率(平滑) 系数
  geodesicActiveContour->SetCurvatureScaling( 1.0 );
  //水平对流系数
  geodesicActiveContour->SetAdvectionScaling( 1.0 );

  geodesicActiveContour->SetMaximumRMSError( 0.02 );
  geodesicActiveContour->SetNumberOfIterations( 800 );
  //现在使用接下来的几行代码将这些滤波器连接到图 9-21 所示的一个流程:
  smoothing->SetInput( reader->GetOutput() );
  gradientMagnitude->SetInput( smoothing->GetOutput() );
  sigmoid->SetInput( gradientMagnitude->GetOutput() );

  geodesicActiveContour->SetInput(  fastMarching->GetOutput() );
  geodesicActiveContour->SetFeatureImage( sigmoid->GetOutput() );

  thresholder->SetInput( geodesicActiveContour->GetOutput() );
  writer->SetInput( thresholder->GetOutput() );

  smoothing->SetTimeStep( 0.125 );
  smoothing->SetNumberOfIterations(  5 );
  smoothing->SetConductanceParameter( 9.0 );
  //设置σ
  const double sigma = atof("0.5");
  gradientMagnitude->SetSigma(  sigma  );


  //设置α
  const double alpha =  atof("-0.3");
  //设置β
  const double beta  =  atof("2.0");

  sigmoid->SetAlpha( alpha );
  sigmoid->SetBeta(  beta  );


  typedef FastMarchingFilterType::NodeContainer  NodeContainer;
  typedef FastMarchingFilterType::NodeType       NodeType;

  NodeContainer::Pointer seeds = NodeContainer::New();

  InternalImageType::IndexType  seedPosition;
  //设置种子点
  seedPosition[0] = atoi("40");
  seedPosition[1] = atoi("90");

  //设置间距
  const double initialDistance = atof("5.0");

  NodeType node;

  const double seedValue = - initialDistance;

  node.SetValue( seedValue );
  node.SetIndex( seedPosition );


  seeds->Initialize();
  seeds->InsertElement( 0, node );


  fastMarching->SetTrialPoints(  seeds  );

  fastMarching->SetSpeedConstant( 1.0 );


  CastFilterType::Pointer caster1 = CastFilterType::New();
  CastFilterType::Pointer caster2 = CastFilterType::New();
  CastFilterType::Pointer caster3 = CastFilterType::New();
  CastFilterType::Pointer caster4 = CastFilterType::New();

  WriterType::Pointer writer1 = WriterType::New();
  WriterType::Pointer writer2 = WriterType::New();
  WriterType::Pointer writer3 = WriterType::New();
  WriterType::Pointer writer4 = WriterType::New();

  caster1->SetInput( smoothing->GetOutput() );
  writer1->SetInput( caster1->GetOutput() );
  writer1->SetFileName("GeodesicActiveContourImageFilterOutput1.png");
  caster1->SetOutputMinimum(   0 );
  caster1->SetOutputMaximum( 255 );
  writer1->Update();

  caster2->SetInput( gradientMagnitude->GetOutput() );
  writer2->SetInput( caster2->GetOutput() );
  writer2->SetFileName("GeodesicActiveContourImageFilterOutput2.png");
  caster2->SetOutputMinimum(   0 );
  caster2->SetOutputMaximum( 255 );
  writer2->Update();

  caster3->SetInput( sigmoid->GetOutput() );
  writer3->SetInput( caster3->GetOutput() );
  writer3->SetFileName("GeodesicActiveContourImageFilterOutput3.png");
  caster3->SetOutputMinimum(   0 );
  caster3->SetOutputMaximum( 255 );
  writer3->Update();

  caster4->SetInput( fastMarching->GetOutput() );
  writer4->SetInput( caster4->GetOutput() );
  writer4->SetFileName("GeodesicActiveContourImageFilterOutput4.png");
  caster4->SetOutputMinimum(   0 );
  caster4->SetOutputMaximum( 255 );

  fastMarching->SetOutputSize(
           reader->GetOutput()->GetBufferedRegion().GetSize() );

  //Writer 上的 Updata( ) 方法触发流程的运行。通常在出现错误和抛出异议时,从一个
  //try / catch 模块调用 updata :
  try
    {
    writer->Update();
    }
  catch( itk::ExceptionObject & excep )
    {
    std::cerr << "Exception caught !" << std::endl;
    std::cerr << excep << std::endl;
    return EXIT_FAILURE;
    }

  std::cout << std::endl;
  std::cout << "Max. no. iterations: " << geodesicActiveContour->GetNumberOfIterations() << std::endl;
  std::cout << "Max. RMS error: " << geodesicActiveContour->GetMaximumRMSError() << std::endl;
  std::cout << std::endl;
  std::cout << "No. elpased iterations: " << geodesicActiveContour->GetElapsedIterations() << std::endl;
  std::cout << "RMS change: " << geodesicActiveContour->GetRMSChange() << std::endl;

  writer4->Update();


  typedef itk::ImageFileWriter< InternalImageType > InternalWriterType;

  InternalWriterType::Pointer mapWriter = InternalWriterType::New();
  mapWriter->SetInput( fastMarching->GetOutput() );
  mapWriter->SetFileName("GeodesicActiveContourImageFilterOutput4.mha");
  mapWriter->Update();

  InternalWriterType::Pointer speedWriter = InternalWriterType::New();
  speedWriter->SetInput( sigmoid->GetOutput() );
  speedWriter->SetFileName("GeodesicActiveContourImageFilterOutput3.mha");
  speedWriter->Update();

  InternalWriterType::Pointer gradientWriter = InternalWriterType::New();
  gradientWriter->SetInput( gradientMagnitude->GetOutput() );
  gradientWriter->SetFileName("GeodesicActiveContourImageFilterOutput2.mha");
  gradientWriter->Update();

  return EXIT_SUCCESS;
}
左脑室、右脑室、白质和灰质分别得到的输出窗口:
输入图像 使用边缘保护平滑滤波器平滑滤波后的图像 滤波后图像的梯度强度图像 梯度强度的 sigmoid 函数图像
左脑室分割图像 右脑室分割图像 白质分割图像 灰质分割图像
注意:分割白质部分需要一个相关的更大的传播缩放比例。有两个原因:白质边界的低对比和组织结构的复杂形状。不幸的是这些缩放比例参数的最优值仅仅通过实验来得到。在一个真实的应用中,我们可以可以想象一个通过用户管理轮廓运动的交互式机制从而调节这些参数。
3.3 阈值水平集分割
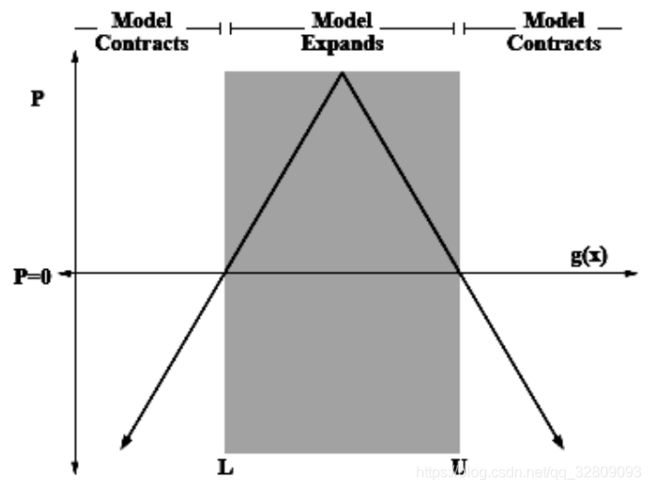
itk::ThresholdSegmentationLevelSetImageFilter 是对阈值连接成员分割在水平集框架上的一个拓展。目标是定义一个亮度值的范围来对相关的组织类型继续分类,然后求出对那个亮度范围基于水平集等式上的传播系数。使用水平集方法,进化的表面的平滑可以被用来阻止在连接成员方案中常见的“漏泄”。依照下面的公式可以从 FeatureImage 输入 g(x) 同 UpperThreshold 值 U 和 LowerThreshold 值 L 计算出下等式的传播系数 P(x) :
上式阐述了传播系数函数P(x),在g中的亮度值在L和H之间是正数值P,而在亮度范围之外是负数值P。
从公式(9-4)得到的基于阈值水平集分割的传播系数
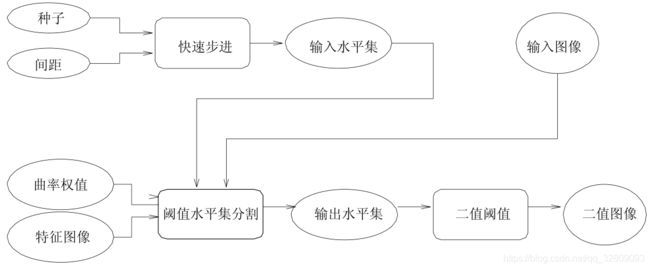
ThresholdSegmentationFilter需要两个输入,第一个是itk::Image形式的一个最初的水平集,第二个是一个特征图像。对于许多应用,这个滤波器需要很少甚至不需要处理它的输入。平滑输入图像并不一定非要产生合理的解答,在一些情况下也是许可的。如下图所示展示了图像处理途径结构。使用快速行进滤波器来生成最初的表面。分割滤波器的输出传递给一个itk::BinaryThresholdImageFilter来创建一个被分割对象的二值表示。
现在我们使用和9.1.1小节中itk::ConnectedThresholdImageFilter例子中使用的相同的数据和参数来运行这个例子。我们将使用一个数值为5的值来作为表面到种子点的最初距离。这个算法对这个初始化感觉相对迟缓。把图9-26所示中的结果和图9-1所示的结果相比较。注意:表面的平滑约束是如何阻止分割泄露进入两个脑室的,还有灰质部分的分割局部化到了一个更小的部分中。如表9-9所示为分割使用的参数。

实例16 阈值水平集算法对脑部PNG图像进行二维分割
#include "itkImage.h"
#include "itkThresholdSegmentationLevelSetImageFilter.h"

#include "itkFastMarchingImageFilter.h"
#include "itkBinaryThresholdImageFilter.h"
#include "itkImageFileReader.h"
#include "itkImageFileWriter.h"
#include "itkZeroCrossingImageFilter.h"


int main( int argc, char *argv[] )
{
  /*if( argc < 8 )
    {
    std::cerr << "Missing Parameters " << std::endl;
    std::cerr << "Usage: " << argv[0];
    std::cerr << " inputImage  outputImage";
    std::cerr << " seedX seedY InitialDistance";
    std::cerr << " LowerThreshold";
    std::cerr << " UpperThreshold";
    std::cerr << " [CurvatureScaling == 1.0]";
    std::cerr << std::endl;
    return EXIT_FAILURE;
    }*/
    /*现在我们使用一个特殊的像素类型和维来定义图像类型。在这种情况下我们将使用二维
        浮点型图像*/
  typedef   float           InternalPixelType;
  const     unsigned int    Dimension = 2;
  typedef itk::Image< InternalPixelType, Dimension >  InternalImageType;
  //接下来的几行使用New()方式实例化一个ThresholdSegmentationLevelSetImageFilter:
  typedef unsigned char                            OutputPixelType;
  typedef itk::Image< OutputPixelType, Dimension > OutputImageType;
  typedef itk::BinaryThresholdImageFilter
                                                   ThresholdingFilterType;

  ThresholdingFilterType::Pointer thresholder = ThresholdingFilterType::New();

  thresholder->SetLowerThreshold( -1000.0 );
  thresholder->SetUpperThreshold(     0.0 );

  thresholder->SetOutsideValue(  0  );
  thresholder->SetInsideValue(  255 );

  typedef  itk::ImageFileReader< InternalImageType > ReaderType;
  typedef  itk::ImageFileWriter<  OutputImageType  > WriterType;

  ReaderType::Pointer reader = ReaderType::New();
  WriterType::Pointer writer = WriterType::New();
  //输入图像
  reader->SetFileName( "BrainProtonDensitySlice.png" );
  //保存图像
  writer->SetFileName( "naoshi_Threshold_LevelSet.png" );

  typedef  itk::FastMarchingImageFilter< InternalImageType, InternalImageType >
  FastMarchingFilterType;

  FastMarchingFilterType::Pointer  fastMarching = FastMarchingFilterType::New();

  typedef  itk::ThresholdSegmentationLevelSetImageFilter< InternalImageType,
    InternalImageType > ThresholdSegmentationLevelSetImageFilterType;
  ThresholdSegmentationLevelSetImageFilterType::Pointer thresholdSegmentation =
    ThresholdSegmentationLevelSetImageFilterType::New();
  /*对于ThresholdSegmentationLevelSetImageFilter,缩放比例参数用来平衡从等式(9 - 3)
      中的传播(膨胀)和曲率(表面平滑)系数的影响。这个滤波器中不使用水平对流系数。使用
      SetPropagationScaling()和SetCurvatureScaling()方式来设置这些系数。在这个例子中这两个
      系数都设置为1.0*/
  thresholdSegmentation->SetPropagationScaling( 1.0 );
  /*if ( argc > 8 )
    {
    thresholdSegmentation->SetCurvatureScaling( atof(argv[8]) );
    }
  else
    {*/
    thresholdSegmentation->SetCurvatureScaling( 1.0 );
  /*  }*/

    thresholdSegmentation->SetMaximumRMSError( 0.02 );
    thresholdSegmentation->SetNumberOfIterations( 1200 );
  /*  收敛标准MaximumRMSError和MaximumIterations设置的和前面例子中的一样。现在我
        们设置上下门限U和L,以及在初始化模型时使用的等值面值*/
    //上门限值(U)
  thresholdSegmentation->SetUpperThreshold( ::atof("250") );
  //下门限值(L)
  thresholdSegmentation->SetLowerThreshold( ::atof("210") );
  thresholdSegmentation->SetIsoSurfaceValue(0.0);

  thresholdSegmentation->SetInput( fastMarching->GetOutput() );
  thresholdSegmentation->SetFeatureImage( reader->GetOutput() );
  thresholder->SetInput( thresholdSegmentation->GetOutput() );
  writer->SetInput( thresholder->GetOutput() );

  typedef FastMarchingFilterType::NodeContainer           NodeContainer;
  typedef FastMarchingFilterType::NodeType                NodeType;

  NodeContainer::Pointer seeds = NodeContainer::New();

  InternalImageType::IndexType  seedPosition;
  //设置种子点位置
  seedPosition[0] = atoi("81");
  seedPosition[1] = atoi("112");
  //表面到种子点的最初距离
  const double initialDistance = atof("5");

  NodeType node;

  const double seedValue = - initialDistance;

  node.SetValue( seedValue );
  node.SetIndex( seedPosition );

  seeds->Initialize();
  seeds->InsertElement( 0, node );

  fastMarching->SetTrialPoints(  seeds  );

  fastMarching->SetSpeedConstant( 1.0 );
  /*调用writer上的Updata()方法引发了管道的运行。通常在出现错误和抛出异议时,从一
      个try / catch模块调用updata:*/
  try
    {
    reader->Update();
    const InternalImageType * inputImage = reader->GetOutput();
    fastMarching->SetOutputRegion( inputImage->GetBufferedRegion() );
    fastMarching->SetOutputSpacing( inputImage->GetSpacing() );
    fastMarching->SetOutputOrigin( inputImage->GetOrigin() );
    fastMarching->SetOutputDirection( inputImage->GetDirection() );
    writer->Update();
    }
  catch( itk::ExceptionObject & excep )
    {
    std::cerr << "Exception caught !" << std::endl;
    std::cerr << excep << std::endl;
    return EXIT_FAILURE;
    }

  std::cout << std::endl;
  std::cout << "Max. no. iterations: " << thresholdSegmentation->GetNumberOfIterations() << std::endl;
  std::cout << "Max. RMS error: " << thresholdSegmentation->GetMaximumRMSError() << std::endl;
  std::cout << std::endl;
  std::cout << "No. elpased iterations: " << thresholdSegmentation->GetElapsedIterations() << std::endl;
  std::cout << "RMS change: " << thresholdSegmentation->GetRMSChange() << std::endl;

  typedef itk::ImageFileWriter< InternalImageType > InternalWriterType;
  //fastMarching快速步进输出水平集
  InternalWriterType::Pointer mapWriter = InternalWriterType::New();
  mapWriter->SetInput( fastMarching->GetOutput() );
  mapWriter->SetFileName("fastMarchingImage.mha");
  mapWriter->Update();
  //阈值水平集分割的速度(传播系数P)图像
  InternalWriterType::Pointer speedWriter = InternalWriterType::New();
  speedWriter->SetInput( thresholdSegmentation->GetSpeedImage() );
  speedWriter->SetFileName("speedTermImage.mha");
  speedWriter->Update();

  return EXIT_SUCCESS;
}
左脑室分割结果(种子点(81,112)):
输入图像 左脑室分割图像 快速步进生产输入水平集 传播系数P(x)图像 打印输出
白质分割结果1(取左边种子点(60,116)):
左白质水平集分割图像 快速步进生产输入水平集 传播系数P(x)图像 打印输出
白质分割结果2(取右边种子点(60,116)):
右白质水平集分割图像 快速步进生产输入水平集 传播系数P(x)图像
右脑室分割结果(种子点(129,116)): 灰质分割结果(种子点(107,69)、(94,190)):
结论:此方法对脑室分割效果较好,但对于灰质和白质,效果不是很好
实例17 阈值水平集算法对脑部MHA文件进行三维分割
#include "itkImage.h"
#include "itkThresholdSegmentationLevelSetImageFilter.h"

#include "itkFastMarchingImageFilter.h"
#include "itkBinaryThresholdImageFilter.h"
#include "itkImageFileReader.h"
#include "itkImageFileWriter.h"
#include "itkZeroCrossingImageFilter.h"


int main( int argc, char *argv[] )
{
  /*if( argc < 8 )
    {
    std::cerr << "Missing Parameters " << std::endl;
    std::cerr << "Usage: " << argv[0];
    std::cerr << " inputImage  outputImage";
    std::cerr << " seedX seedY InitialDistance";
    std::cerr << " LowerThreshold";
    std::cerr << " UpperThreshold";
    std::cerr << " [CurvatureScaling == 1.0]";
    std::cerr << std::endl;
    return EXIT_FAILURE;
    }*/
    /*现在我们使用一个特殊的像素类型和维来定义图像类型。在这种情况下我们将使用二维
        浮点型图像*/
  typedef   float           InternalPixelType;
  const     unsigned int    Dimension = 3;
  typedef itk::Image< InternalPixelType, Dimension >  InternalImageType;
  //接下来的几行使用New()方式实例化一个ThresholdSegmentationLevelSetImageFilter:
  typedef unsigned char                            OutputPixelType;
  typedef itk::Image< OutputPixelType, Dimension > OutputImageType;
  typedef itk::BinaryThresholdImageFilter
                                                   ThresholdingFilterType;

  ThresholdingFilterType::Pointer thresholder = ThresholdingFilterType::New();

  thresholder->SetLowerThreshold( -1000.0 );
  thresholder->SetUpperThreshold(     0.0 );

  thresholder->SetOutsideValue(  0  );
  thresholder->SetInsideValue(  255 );

  typedef  itk::ImageFileReader< InternalImageType > ReaderType;
  typedef  itk::ImageFileWriter<  OutputImageType  > WriterType;

  ReaderType::Pointer reader = ReaderType::New();
  WriterType::Pointer writer = WriterType::New();
  //输入图像
  reader->SetFileName( "BrainProtonDensity3Slices.mha" );
  //保存图像
  writer->SetFileName( "naoshi_Threshold_LevelSet.mha" );

  typedef  itk::FastMarchingImageFilter< InternalImageType, InternalImageType >
  FastMarchingFilterType;

  FastMarchingFilterType::Pointer  fastMarching = FastMarchingFilterType::New();

  typedef  itk::ThresholdSegmentationLevelSetImageFilter< InternalImageType,
    InternalImageType > ThresholdSegmentationLevelSetImageFilterType;
  ThresholdSegmentationLevelSetImageFilterType::Pointer thresholdSegmentation =
    ThresholdSegmentationLevelSetImageFilterType::New();
  /*对于ThresholdSegmentationLevelSetImageFilter,缩放比例参数用来平衡从等式(9 - 3)
      中的传播(膨胀)和曲率(表面平滑)系数的影响。这个滤波器中不使用水平对流系数。使用
      SetPropagationScaling()和SetCurvatureScaling()方式来设置这些系数。在这个例子中这两个
      系数都设置为1.0*/
  thresholdSegmentation->SetPropagationScaling( 1.0 );
  /*if ( argc > 8 )
    {
    thresholdSegmentation->SetCurvatureScaling( atof(argv[8]) );
    }
  else
    {*/
    thresholdSegmentation->SetCurvatureScaling( 1.0 );
  /*  }*/

    thresholdSegmentation->SetMaximumRMSError( 0.02 );
    thresholdSegmentation->SetNumberOfIterations( 1200 );//设置最大迭代次数
  /*  收敛标准MaximumRMSError和MaximumIterations设置的和前面例子中的一样。现在我
        们设置上下门限U和L,以及在初始化模型时使用的等值面值*/
    //上门限值(U)
  thresholdSegmentation->SetUpperThreshold( ::atof("250") );
  //下门限值(L)
  thresholdSegmentation->SetLowerThreshold( ::atof("210") );
  thresholdSegmentation->SetIsoSurfaceValue(0.0);

  thresholdSegmentation->SetInput( fastMarching->GetOutput() );
  thresholdSegmentation->SetFeatureImage( reader->GetOutput() );
  thresholder->SetInput( thresholdSegmentation->GetOutput() );
  writer->SetInput( thresholder->GetOutput() );

  typedef FastMarchingFilterType::NodeContainer           NodeContainer;
  typedef FastMarchingFilterType::NodeType                NodeType;

  NodeContainer::Pointer seeds = NodeContainer::New();

  InternalImageType::IndexType  seedPosition;
  //设置种子点位置
  seedPosition[0] = atoi("84");
  seedPosition[1] = atoi("126");
  seedPosition[2] = atoi("2");
  //表面到种子点的最初距离
  const double initialDistance = atof("5");//5

  NodeType node;

  const double seedValue = - initialDistance;

  node.SetValue( seedValue );
  node.SetIndex( seedPosition );

  seeds->Initialize();
  seeds->InsertElement( 0, node );

  fastMarching->SetTrialPoints(  seeds  );

  fastMarching->SetSpeedConstant( 1.0 );
  /*调用writer上的Updata()方法引发了管道的运行。通常在出现错误和抛出异议时,从一
      个try / catch模块调用updata:*/
  try
    {
    reader->Update();
    const InternalImageType * inputImage = reader->GetOutput();
    fastMarching->SetOutputRegion( inputImage->GetBufferedRegion() );
    fastMarching->SetOutputSpacing( inputImage->GetSpacing() );
    fastMarching->SetOutputOrigin( inputImage->GetOrigin() );
    fastMarching->SetOutputDirection( inputImage->GetDirection() );
    writer->Update();
    }
  catch( itk::ExceptionObject & excep )
    {
    std::cerr << "Exception caught !" << std::endl;
    std::cerr << excep << std::endl;
    return EXIT_FAILURE;
    }

  std::cout << std::endl;
  std::cout << "Max. no. iterations: " << thresholdSegmentation->GetNumberOfIterations() << std::endl;
  std::cout << "Max. RMS error: " << thresholdSegmentation->GetMaximumRMSError() << std::endl;
  std::cout << std::endl;
  std::cout << "No. elpased iterations: " << thresholdSegmentation->GetElapsedIterations() << std::endl;
  std::cout << "RMS change: " << thresholdSegmentation->GetRMSChange() << std::endl;

  typedef itk::ImageFileWriter< InternalImageType > InternalWriterType;
  //fastMarching快速步进输出水平集
  InternalWriterType::Pointer mapWriter = InternalWriterType::New();
  mapWriter->SetInput( fastMarching->GetOutput() );
  mapWriter->SetFileName("fastMarchingImage.mha");
  mapWriter->Update();
  //阈值水平集分割的速度(传播系数P)图像
  InternalWriterType::Pointer speedWriter = InternalWriterType::New();
  speedWriter->SetInput( thresholdSegmentation->GetSpeedImage() );
  speedWriter->SetFileName("speedTermImage.mha");
  speedWriter->Update();

  return EXIT_SUCCESS;
}
输入三维图像(BrainProtonDensity3Slices.mha):
切片1 切片2 切片3
输出三维脑室图像(naoshi_Threshold_LevelSet.mha):
切片1 切片2 切片3
fastMarching快速步进输出水平集(fastMarchingImage.mha):
切片1 切片2 切片3
阈值水平集分割的速度(传播系数P)图像(speedTermImage.mha):
切片1 切片2 切片3
3.4 Canny 边缘水平集分割
itk::CannySegmentationLevelSetImageFilter定义了一个速率系数用来最小化一个图像中Canny边缘的距离。最初的水平集移动穿越一个梯度水平对流领域直到它锁定在这些边缘上。这个滤波器在精炼存在的分割时比作为一个区域生长算法更合适。

CannySegmentatioLevelSetImageFilter 应用在分割任务中的流程图
为CannySegmentationLevelSetImageFilter定义的两个系数是从下等式中的水平对流系数和传播系数而来。水平对流系数是通过最小化从Canny边缘变换而来的平方距离来结构化的。
其 中 距 离 变 换 D 是 使 用 itk::DanielssonDistanceMapImageFilter 来 计 算 的 , 应 用 于itk::CannyEdgeDetectionImageFilter的输出。在一些情况下一些表面扩展是允许的,可能为传播系数设置一个非零值。这个传播系数仅仅是D。同ITK中所有的水平集分割一样,这个曲率系数控制表面的平滑度。CannySegmentationLevelSetImageFilter需要两个输入,第一个是itk::Image形式的一个最初的水平集,第二个是一个特征图像,从这个图像可以计算出传播系数和曲率系数。通常要对这个特征图像做一些处理来去除噪声。如图9-27所示展示了图像处理途径结构。我们读取两个图像:即将分割的图像和包含最初的表面的图像。目标是精炼从第二个图像来的最初的模式并不从种子点生长出新的分割。使用一个各向异性扩散滤波器的一些迭代器对特征图像进行预处理。
我们能使用这个滤波器对前面例子中使用itk::ThresholdSegmentationLevelSetImageFilter得到的脑室分割做一些精细的处理。
使用Examples/Data/BrainProtonDensitySlice.png和Examples/Data/VentricleModel.png作为输入,阈值为7.0,变量variance为0.1,水平对流量为10.0和一个最初的等值面值为127.5来运行这个应用。一种情况是运行15个迭带器,第二种情况运行到收敛。比较图9-28所示最右边两幅图像的结果和图9-26所示中间显示的脑室分割图像。锯齿状的边缘已经被拉直并且在模板右手边上面的小spur已经被移除。


