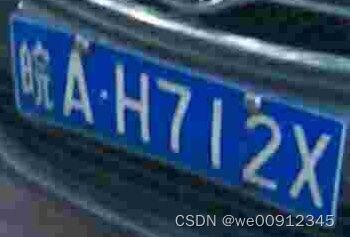
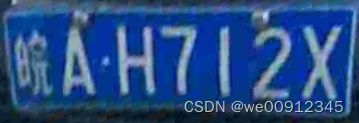
车牌识别算法 基于yolov5的车牌检测+crnn中文车牌识别 支持12种中文车牌识别
车牌识别算法,支持12种中文车牌类型 基于yolov5的车牌检测 车牌矫正以及 基于CRNN的车牌识别
1.单行蓝牌 2.单行黄牌 3.新能源车牌 4.白色警用车牌 5 教练车牌 6 武警车牌 7 双层黄牌 8 双层武警 9 使馆车牌 10 港澳牌车 11 双层农用车牌 12 民航车牌
效果如下:
基于yolov5车牌检测
车牌检测+关键点定位
1.第一步是目标检测,目标检测大家都很熟悉,常见的yolo系列,这里的话我用的是我修改后的yolov5系列),用yolov5训练的车牌检测效果如下:

如果对上面这样图片进行识别的话,那么干扰信息很多,会造成误识别,这里就是为什么要进行关键点识别,假设我们得到车牌的四个角点坐标:
通过透视变换,透视变换即可得到下图:

这样的图片进行识别的话就会非常容易了
所以在检测的同时,我们需要进行关键点定位
透视变换代码:
def four_point_transform(image, pts):
    # obtain a consistent order of the points and unpack them
    # individually
    rect = order_points(pts)
    (tl, tr, br, bl) = rect

    # compute the width of the new image, which will be the
    # maximum distance between bottom-right and bottom-left
    # x-coordiates or the top-right and top-left x-coordinates
    widthA = np.sqrt(((br[0] - bl[0]) ** 2) + ((br[1] - bl[1]) ** 2))
    widthB = np.sqrt(((tr[0] - tl[0]) ** 2) + ((tr[1] - tl[1]) ** 2))
    maxWidth = max(int(widthA), int(widthB))

    # compute the height of the new image, which will be the
    # maximum distance between the top-right and bottom-right
    # y-coordinates or the top-left and bottom-left y-coordinates
    heightA = np.sqrt(((tr[0] - br[0]) ** 2) + ((tr[1] - br[1]) ** 2))
    heightB = np.sqrt(((tl[0] - bl[0]) ** 2) + ((tl[1] - bl[1]) ** 2))
    maxHeight = max(int(heightA), int(heightB))

    # now that we have the dimensions of the new image, construct
    # the set of destination points to obtain a "birds eye view",
    # (i.e. top-down view) of the image, again specifying points
    # in the top-left, top-right, bottom-right, and bottom-left
    # order
    dst = np.array([
        [0, 0],
        [maxWidth - 1, 0],
        [maxWidth - 1, maxHeight - 1],
        [0, maxHeight - 1]], dtype = "float32")

    # compute the perspective transform matrix and then apply it
    M = cv2.getPerspectiveTransform(rect, dst)
    warped = cv2.warpPerspective(image, M, (maxWidth, maxHeight))

    # return the warped image
    return warped
2.这里关键点定位我们利用和人脸识别类似的方法进行,人脸是5个点,而车牌我们仅仅需要四个点就可以了。
车牌检测训练数据集可以主要利用了CRPD 和CCPD数据集,这里有我训练的代码,数据我也转换好了,直接训练就可以了
https://github.com/we0091234/Chinese_license_plate_detection_recognition
车牌识别
拿到车牌区域的图片后就可以利用crnn进行车牌识别了
整理了一些数据,包括12种车牌的训练数据集,以及训练步骤
车牌识别代码:my_demo_new.py
from plateNet import myNet_ocr
import torch
import torch.nn as nn
import cv2
import numpy as np
import os
import time
import argparse
def cv_imread(path):   #读取中文路径的图片
    img=cv2.imdecode(np.fromfile(path,dtype=np.uint8),-1)
    return img

def allFilePath(rootPath,allFIleList):
    fileList = os.listdir(rootPath)
    for temp in fileList:
        if os.path.isfile(os.path.join(rootPath,temp)):
            allFIleList.append(os.path.join(rootPath,temp))
        else:
            allFilePath(os.path.join(rootPath,temp),allFIleList)

# plateName="#京沪津渝冀晋蒙辽吉黑苏浙皖闽赣鲁豫鄂湘粤桂琼川贵云藏陕甘青宁新学警港澳挂使领民深危险品0123456789ABCDEFGHJKLMNPQRSTUVWXYZ"
plateName=r"#京沪津渝冀晋蒙辽吉黑苏浙皖闽赣鲁豫鄂湘粤桂琼川贵云藏陕甘青宁新学警港澳挂使领民航深0123456789ABCDEFGHJKLMNPQRSTUVWXYZ"
mean_value,std_value=(0.588,0.193)
def decodePlate(preds):
    pre=0
    newPreds=[]
    for i in range(len(preds)):
        if preds[i]!=0 and preds[i]!=pre:
            newPreds.append(preds[i])
        pre=preds[i]
    return newPreds

def image_processing(img,device):
    img = cv2.resize(img, (168,48))
    img = np.reshape(img, (48, 168, 3))

    # normalize
    img = img.astype(np.float32)
    img = (img / 255. - mean_value) / std_value
    img = img.transpose([2, 0, 1])
    img = torch.from_numpy(img)

    img = img.to(device)
    img = img.view(1, *img.size())
    return img

def get_plate_result(img,device,model):
    # img = cv2.imread(image_path)
    input = image_processing(img,device)
    preds = model(input)
    # print(preds)
    preds=preds.view(-1).detach().cpu().numpy()
    newPreds=decodePlate(preds)
    plate=""
    for i in newPreds:
        plate+=plateName[i]
    return plate

def init_model(device,model_path):
    check_point = torch.load(model_path,map_location=device)
    model_state=check_point['state_dict']
    cfg = check_point['cfg']
    model = myNet_ocr(num_classes=78,export=True,cfg=cfg)        #export  True 用来推理
    model.load_state_dict(model_state)
    model.to(device)
    model.eval()
    return model

if __name__ == '__main__':
    parser = argparse.ArgumentParser()
    parser.add_argument('--model_path', type=str, default='output/360CC/crnn/2022-09-26-21-30/checkpoints/checkpoint_11_acc_0.9657.pth', help='model.pt path(s)')
    parser.add_argument('--image_path', type=str, default='images', help='source')
    device = torch.device("cuda" if torch.cuda.is_available() else "cpu")
    # device =torch.device("cpu")
    opt = parser.parse_args()
    model = init_model(device,opt.model_path)
    if os.path.isfile(opt.image_path):
        right=0
        begin = time.time()
        img = cv_imread(opt.image_path)
        if img.shape[-1]!=3:
            img = cv2.cvtColor(img,cv2.COLOR_BGRA2BGR)
        plate=get_plate_result(img, device,model)
        print(plate)
    else:
            file_list=[]
            allFilePath(opt.image_path,file_list)
            for pic_ in file_list:
                try:
                    pic_name = os.path.basename(pic_)
                    img = cv_imread(pic_)
                    if img.shape[-1]!=3:
                        img = cv2.cvtColor(img,cv2.COLOR_BGRA2BGR)
                    plate=get_plate_result(img,device,model)
                    print(plate,pic_name)
                except:
                    print("error")
有问题可以加入qq qun:871797331