在集群上使用ERA5数据驱动WRF模式---一层嵌套记录
- 在学院上使用ERA5数据驱动WRF模式,使用一层嵌套网格
- 数据时间范围为:2004年6月19日–2004年6月30日
- 经纬度范围:南北纬45°左右,经度全部包括。中心经度为180°,中心纬度为0°
- 输出的数据时间间隔为:每6小时一次
- 分辨率为:36000x36000
步骤还是老样子,先进行WPS前处理,再运行WRF模式
WPS前处理
1、链接运行数据的类型变量
cd命令调整到WPS目录下,先链接到ERA5驱动的Vtable,运行完,会发现在当前目录下得到Vtable文件
ln -sf ungrib/Variable_Tables/Vtable.ECMWF Vtable
![]()
2、链接下载的数据
链接你下载的ERA5数据,根据你数据放置的文件夹进行链接
./link_grib.csh ./ERA5_data/*
以上两步完成后,修改namelist.wps中的参数,参数如下设置:
&share
 wrf_core = 'ARW',
 start_date = '2004-06_19_00:00:00','2004-06_24_00:00:00','2004-06_24_00:00:00',
 end_date = '2004-06_30_18:00:00','2004-06_25_00:00:00','2004-06_25_00:00:00',
 interval_seconds = 21600,   #输出文件的时间间隔
 max_dom = 1,               #嵌套层数
 io_form_geogrid = 2,        #输出文件类型,2表示nc文件
 opt_output_from_geogrid_path = '/Models/WRF4.3.1/WPS/',   #输出文件路径
/

&geogrid
 parent_id         =   1,      1,      2,  #嵌套区域名称
 parent_grid_ratio =   1,      3,      3,  #嵌套区域比例,主要与分辨率相关
 i_parent_start    =   1,     21,    27,   #起始点
 j_parent_start    =   1,     21,    26,   #起始点

 e_we                     = 1110,      574,    1471,    #根据你的经纬度间隔计算的而来
 e_sn                     = 276,      370,      889,

 geog_data_res     = 'default','default','default',
 dx = 36000, #分辨率
 dy = 36000,
 map_proj  = 'mercator', #投影方式
 ref_lat   =  0.00, #中心纬度
 ref_lon   = 180.00, #中心经度
 truelat1  =  10.0,
 truelat2  =  20.0,
 stand_lon =180.00,  #以哪个经度进行展开对称
 geog_data_path = '/Pakages/WPS_GEOG/', #存放的地理信息数据的路径
/

&ungrib
 out_format = 'WPS',
 prefix = '/Models/WRF4.3.1/WPS/ERA',   #输出路径以及前缀
/

&metgrid
 fg_name = 'ERA',
 io_form_metgrid = 2,
 opt_output_from_metgrid_path = '/Models/WRF4.3.1/WPS/',
/
3、ungrid
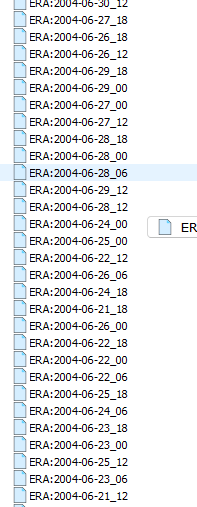
修改完成后,输入命令运行./ungrid.exe,如下运行成功,而且发现生成得到了前缀文件

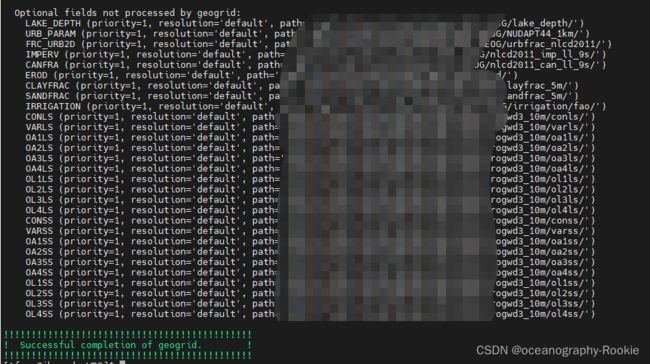
4、geogrid
同理,继续输入命令运行./geogrid.exe,同样得到如下文件:
![]()
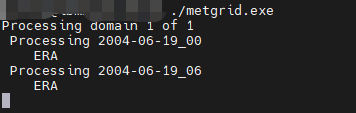
5、megrid
同理,继续输入命令运行./metgrid.exe,同样得到如下文件:
![]()
得到生产的met*.nc文件,这里WPS前处理结束。下面进行WRF模式处理即可
WRF
一样,先使用cd命令调整目录到WRF/run/下,然后链接刚刚在wps前处理下生成的met*nc文件。
然后,根据你的namelist.wps的时间设置,时间间隔,嵌套层数,等信息,调整你的namelist.input,与其保持一致。这里将需要保持一致的参数大致列一下:
 &time_control
 run_days                            = 11,
 run_hours                           = 18,
 run_minutes                         = 0,
 run_seconds                         = 0,
 start_year                          = 2004, 2022, 2022,
 start_month                         = 06,   02,   02,
 start_day                           = 19,   17,   17,
 start_hour                          = 00,   00,   00,

 end_year                            = 2004, 2022, 2022,
 end_month                           = 06,   02,   02,
 end_day                             = 30,   18,   18,
 end_hour                            = 18,   00,   00,
 interval_seconds                    = 21600,
 input_from_file                     = .true.,.true.,.true.,
 history_interval                    = 60,  60,   60,
 frames_per_outfile                  = 4, 4, 4,
 restart                             = .false.,
 restart_interval                    = 1440,
 io_form_history                     = 2
 io_form_restart                     = 2
 io_form_input                       = 2
 io_form_boundary                    = 2
 /

 &domains
 time_step                           = 60,
 time_step_fract_num                 = 0,
 time_step_fract_den                 = 1,
 max_dom                             = 1,
 i_parent_start    =   1,     21,    27,
 j_parent_start    =   1,     21,    26,
 e_we                     = 1110,      574,    1471,
 e_sn                     = 276,      370,      889,
 e_vert                              = 50,    50,   50,
 p_top_requested                     = 5000,
 num_metgrid_levels                  = 38,
 num_metgrid_soil_levels             = 4,
 dx                                  =  36000,  12000,4000,
 dy                                  =  36000,  12000,4000,

 grid_id                             = 1,     2,     3,
 parent_id         =   1,      1,      2,
 parent_grid_ratio =   1,      3,      3,

 parent_time_step_ratio              = 1,     3,     3,
 feedback                            = 1,
 smooth_option                       = 0,
其中,本次实验我修改的namelist.input如下所示:
real.exe
上述namelist.input修改好后,运行./real.exe,生成得到以下文件:
wrfbdy_d01
wrfinput_d01
可以看一下rsl.out.0000,显示success就成功了
wrf.exe
下面就是提交作业到集群上跑起来了,需要先创建一个.sh脚本,下面给出一个作业提交的例子:
#!/bin/sh
#___INFO__MARK_BEGIN__
# Welcome to use  EasyCluster V1.6 All Rights Reserved.
#
#___INFO__MARK_END__
#
#$ -S /bin/sh
#$ -N ERA5
#$ -j y
#$ -o ./
#$ -e ./
#$ -cwd
#$ -pe mpi  128
#$ -q normal.q

source ~/.bashrc
hash -r
/usr/local/mpich3.3.2.i18.ib47/bin/mpiexec -launcher rsh ./wrf.exe
通过命令:
qsub job.sh,进行提交
qstat -f ,查看运行状态
“qdel 作业ID” ,停止作业。
耐心等待即可