【深度学习环境-1】ZED2、Yolact、tensorflow、pytorch环境搭建
基础环境:ubuntu18.04+cuda11.0+cudnn8.0.5
cuda11.0+cudnn8.0.5 安装方式参考:【深度学习环境-2】nvidia驱动、cuda安装配置_WXG1011的博客-CSDN博客
1、安装工程所需的基础包
# 创建tensorflow虚拟环境
conda create -n tensorflow python==3.7
# 激活tensorflow虚拟环境
source activate tensorflow
# pytorch官网:https://pytorch.org/get-started/previous-versions/
pip install torch==1.7.1+cu110 torchvision==0.8.2+cu110 torchaudio==0.7.2 -f https://download.pytorch.org/whl/torch_stable.html
pip install opencv-python
pip install pycocotools
pip install requests
pip install scipy
pip install yacs
pip install pandas
另:ubuntu系统安装pytorch
- 常规方法:
从Previous PyTorch Versions | PyTorch选择对应版本安装。
- 通过whl安装
从https://download.pytorch.org/whl/torch_stable.html下载对应的whl文件。
pip install **.whl2、安装tensorflow
pip install tensorflow-gpu
# 测试tensorflow是否安装成功
(tensorflow) zxh@zxh-Precision-3640-Tower:~/Chengdu$ python
Python 3.7.0 (default, Oct  9 2018, 10:31:47)
[GCC 7.3.0] :: Anaconda, Inc. on linux
Type "help", "copyright", "credits" or "license" for more information.
>>> import tensorflow as tf
>>> tf.__version__
'2.8.0'
>>>
TensorFlow、cuda、cudnn版本对照表:
可能出现的错误:
Could not load dynamic library 'libcusolver.so.11'; dlerror: libcusolver.so.11: cannot open shared object file: No such file or directory; LD_LIBRARY_PATH: /usr/local/cuda-11.0/lib64:
解决方法:
创建软链接
sudo ln -s /usr/local/cuda-11.0/targets/x86_64-linux/lib/libcusolver.so.10 /usr/local/cuda-11.0/targets/x86_64-linux/lib/libcusolver.so.113、配置ZED2相机开发环境
具体参考 https://blog.csdn.net/WXG1011/article/details/128218805
# ZED2环境配置
(tensorflow) zxh@zxh-Precision-3640-Tower:~/Downloads$ chmod +x ZED_SDK_Ubuntu18_cuda11.0_v3.5.6.run
(tensorflow) zxh@zxh-Precision-3640-Tower:~/Downloads$ ./ZED_SDK_Ubuntu18_cuda11.0_v3.5.6.run
Verifying archive integrity...  100%   All good.
Uncompressing 'ZED camera SDK by Stereolabs'  100%
Ubuntu version 18.04 detected. OK
To continue you have to accept the EULA. Accept  [Y/n] ?y
Installing...
Installation path: /usr/local/zed
[sudo] password for zxh:
Checking CUDA version...
OK: Found CUDA 11.0
Detected nvidia driver 495.46, capable of running CUDA 11.5 (need 11.0)
Do you want to install the static version of the ZED SDK (AI module will still requires libsl_ai.so) [Y/n] ?y
Do you want to install the Object Detection module (recommended), cuDNN 8.0 and TensorRT 7.1 will be installed [Y/n] ?n
Install samples (recommended) [Y/n] ?y
Installation path: /usr/local/zed/samples/
Do you want to auto-install dependencies (recommended) ? following packet will be installed via the package manager : libjpeg-turbo8 libturbojpeg libusb-1.0 libopenblas-dev libarchive-dev libv4l-0 curl unzip libpng16-16 libpng-dev libturbojpeg0-dev python3-dev python3-pip python3-setuptools libglew-dev freeglut3-dev qt5-default libqt5opengl5 libqt5svg5 [Y/n] ?y
Do you want to install the Python API (recommended) [Y/n] ?y

# ZED2环境测试
(tensorflow) zxh@zxh-Precision-3640-Tower:~/Chengdu$ cd /usr/local/zed/tools/
(tensorflow) zxh@zxh-Precision-3640-Tower:/usr/local/zed/tools$ ls
ZED_Calibration   ZED_Diagnostic  ZEDfu              ZED_SVO_Editor
ZED_Depth_Viewer  ZED_Explorer    ZED_Sensor_Viewer
(tensorflow) zxh@zxh-Precision-3640-Tower:/usr/local/zed/tools$ ./ZED_Depth_Viewer
有时遇到报错:Python API 安装失败
解决方法:
cd /usr/local/zed/
python get_python_api.py
但还是报错:
可以先点击链接下载,然后再pip安装
pip install pyzed-3.5-cp36-cp36m-linux_×86_64.whl检查是否安装成功
python
import pyzed.sl as sl
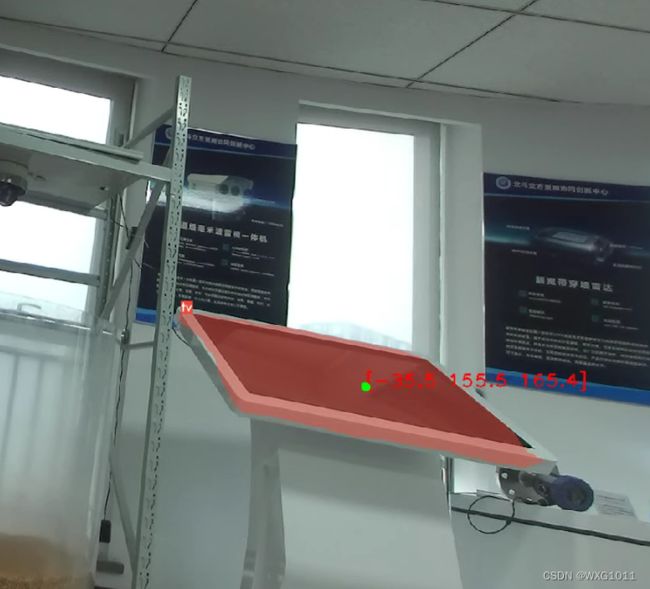
测试图:
4、实例分割——YOLACT环境配置
克隆地址:GitHub - dbolya/yolact: A simple, fully convolutional model for real-time instance segmentation.
git clone https://github.com/dbolya/yolact.git
cd yolact/external/DCNv2
python setup.py build develop
出现如下错误:
/home/zxh/Chengdu/yolact/external/DCNv2/src/cuda/dcn_v2_cuda.cu(107): error: identifier "THCState_getCurrentStream" is undefined
/home/zxh/Chengdu/yolact/external/DCNv2/src/cuda/dcn_v2_cuda.cu(279): error: identifier "THCState_getCurrentStream" is undefined
/home/zxh/Chengdu/yolact/external/DCNv2/src/cuda/dcn_v2_cuda.cu(324): error: identifier "THCudaBlas_Sgemv" is undefined
解决方法:
https://github.com/lbin/DCNv2/tree/pytorch_1.7 git对应pytorch版本的DCNv2包,替换yolact中对应的文件夹,然后进行编译,make.sh脚本内容为:
(tensorflow) zxh@zxh-Precision-3640-Tower:~/Chengdu/external/DCNv2$ ./make.sh 出现如下提示即配置成功
参考链接:yolact模型DCNv2模块编译错误解决方法_[违规账号,无法查看]的博客-CSDN博客_dcnv2编译
DCNv2编译时报错error: ‘THFloatBlas_gemv’ was not declared_开机摸鱼的博客-CSDN博客
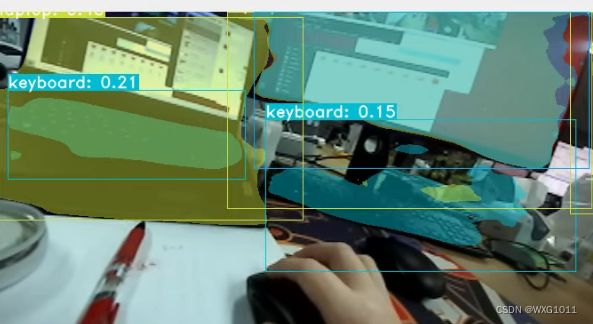
测试及运行结果图:
# 测试
python eval.py --trained_model=weights/yolact_base_54_800000.pth --score_threshold=0.15 --top_k=15 --video_multiframe=4 --video=0
5、工程运行效果图


