【环境配置】Jupyter Notebook切换虚拟conda环境(Kernel)
jupyter Notebook切换虚拟conda环境Kernel
- 一、jupyter notebook常见报错
- 二、如何将conda中不同的子环境映射为jupyter notebook 中可用的kernel
-
- 1.查看JupyterNotebook的已有的kernel及存放位置
- 2.创建用于切换的虚拟conda环境(Kernel)
- 3. linux/mac 中notebook创建用于切换的虚拟conda环境(kernel)
- 三、如何删除无用的kernel
- 四、注意:2021.7.30 最新方法
- 五、linux后台运行jupyter:使用nohup命令
-
- 5.1 简介:nohup和&后台运行,进程查看及终止
-
- (1)jobs -l
- (2)ps -ef
- (3) netstat -nap|grep 8888
- 5.2 nohup文件会累积不断增大,需要重定向
- 六 linux关闭防火墙, 用于访问linux服务器
-
- 常见问题:Unit iptables.service could not be found.(防火墙问题)
- 解决方案
-
- 1.安装iptables-services
- 2. 启动iptables
- 3.查看防火墙状态:
- 4.关闭防火墙:
- 5.打开防火墙:
- 2.firewalld 方式
- 3. firewall直接开启具体的某个端口(好用,方便,不用每次重启电脑都做一遍)
- 七 修改jupyter的默认路径
- 八、jupyter notebook基本使用方法
-
- 查看包或者方法的内容
一、jupyter notebook常见报错
- anaconda自带的jupyter notebook的基本kernel就是base哪的kernel
- python 3.8启动jupyter notebook并运行代码时会出现下面这样一个问题
TypeError   Traceback (most recent call last) /usr/lib/python3.8/codeop.py in __call__(self, source, filename, symbol)
   135     def __call__(self, source, filename, symbol):
   136         codeob = compile(source, filename, symbol, self.flags, 1)
   137         for feature in _features:
   138             if codeob.co_flags & feature.compiler_flag:
TypeError: required field "type_ignores" missing from Module
目前大家普遍认为导致这个的原因是python3.8与某些包的兼容问题,stackoverflow.com中给出了解决方案,地址如下https://stackoverflow.com/questions/63519761/python-typeerror-required-field-type-ignores-missing-from-module-in-jupyter
其中,最通用的方法就是在conda 所在的base环境中,直接升级ipython,直接可以解决问题,注意了,一定要是base中的ipython,即使base中的python版本是3.8这个问题一样可以解决。
二、如何将conda中不同的子环境映射为jupyter notebook 中可用的kernel
1.查看JupyterNotebook的已有的kernel及存放位置
在cmd中键入ipython kernelspec list:
C:\Users\goatbishop>ipython kernelspec list
[TerminalIPythonApp] WARNING | Subcommand `ipython kernelspec` is deprecated and will be removed in future versions.
[TerminalIPythonApp] WARNING | You likely want to use `jupyter kernelspec` in the future
Available kernels:
  python3      F:\software\Anaconda\lib\site-packages\ipykernel\resources
  julia-1.1    C:\Users\goatbishop\AppData\Roaming\jupyter\kernels\julia-1.1
2.创建用于切换的虚拟conda环境(Kernel)
- 激活conda子环境
- 为conda子环境安装ipython和ipykernel
pip install ipython ipykernel
- 添加该子环境为kernel内核
python -m ipykernel install --user --name other-env --display-name "Python (other-env)"
其中:内部jupyter使用–name值,这些命令将覆盖具有相同名称的任何现有内核。 --display-name是您在jupyter notebook菜单中所看到的。方便起见,只写–name这一个就行,–display-name默认和–name相同
即:
python -m ipykernel install --user --name “此处输入名字”
参考资料如下:
conda建立python2和python3两个内核
https://blog.csdn.net/weixin_42136477/article/details/112363924?utm_medium=distribute.pc_relevant.none-task-blog-baidujs_title-0&spm=1001.2101.3001.4242
3. linux/mac 中notebook创建用于切换的虚拟conda环境(kernel)
[Errno 13] Permission denied:’/usr/local/share/jupyter’
linux/mac 添加kernel与windows添加kernel的区别示范
三、如何删除无用的kernel
如何删除无用的kernel
四、注意:2021.7.30 最新方法
目前,当我们在conda子环境中安装最新版的ipykernel的时候即,首先激活我们的子环境:
conda activate 子环境名称
conda install ipykernel #此时,会自动将kernel加入jupyter notebook同时,安装配套的其他包
五、linux后台运行jupyter:使用nohup命令
5.1 简介:nohup和&后台运行,进程查看及终止
1.nohup
用途:不挂断地运行命令。
语法:nohup Command [ Arg … ] [ & ]
无论是否将 nohup 命令的输出重定向到终端,输出都将附加到当前目录的 nohup.out 文件中。
如果当前目录的 nohup.out 文件不可写,输出重定向到 $HOME/nohup.out 文件中。
如果没有文件能创建或打开以用于追加,那么 Command 参数指定的命令不可调用。
退出状态:该命令返回下列出口值:
126 可以查找但不能调用 Command 参数指定的命令。
127 nohup 命令发生错误或不能查找由 Command 参数指定的命令。
否则,nohup 命令的退出状态是 Command 参数指定命令的退出状态。
2.&
用途:在后台运行
一般两个一起用
nohup command &
eg:
nohup /usr/local/node/bin/node /www/im/chat.js >> /usr/local/node/output.log 2>&1 &
进程号7585
查看运行的后台进程
(1)jobs -l
jobs命令只看当前终端生效的,关闭终端后,在另一个终端jobs已经无法看到后台跑得程序了,此时利用ps(进程查看命令)
(2)ps -ef
a:显示所有程序
u:以用户为主的格式来显示
x:显示所有程序,不以终端机来区分
ps -aux|grep chat.js
(3) netstat -nap|grep 8888
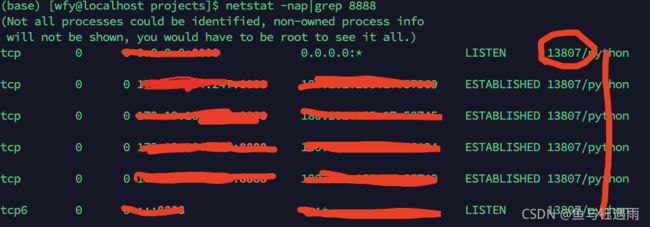
如果提示没有netstat命令 则安装一下:
sudo yum install net-tools
然后根据上买呢的进程好关闭即可:
kill -9 13807
5.2 nohup文件会累积不断增大,需要重定向
4 如果大家项目有自己的log,那么这个启动日志就不需要关注。
使用nohup 命令 > /dev/null 2>&1 &
六 linux关闭防火墙, 用于访问linux服务器
常见问题:Unit iptables.service could not be found.(防火墙问题)
解决方案
1.安装iptables-services
yum install iptables-services
2. 启动iptables
systemctl enable iptables
systemctl start iptables
现在执行查看防火墙状态,停止,启动就行了
3.查看防火墙状态:
service iptables status
4.关闭防火墙:
service iptables stop
5.打开防火墙:
service iptables start
2.firewalld 方式
启动: systemctl start firewalld
查看状态: systemctl status firewalld
禁用,禁止开机启动: systemctl disable firewalld
停止运行: systemctl stop firewalld
重启:firewall-cmd --reload
3. firewall直接开启具体的某个端口(好用,方便,不用每次重启电脑都做一遍)
linux中开放某个端口
参考 :https://blog.csdn.net/cs4380/article/details/86597127
添加端口 sudo firewall-cmd --zone=public --add-port=xxxx/tcp --permanent
(其中xxxx代表端口号)
刷新生效 sudo firewall-cmd --reload
七 修改jupyter的默认路径
https://so.csdn.net/so/search?q=%E4%BF%AE%E6%94%B9jupyterlab%E9%BB%98%E8%AE%A4%E7%9B%AE%E5%BD%95&t=&u=&utm_term=%E4%BF%AE%E6%94%B9jupyter%20notebook%E8%B7%AF%E5%BE%84&utm_medium=distribute.pc_toolbar_associateword.none-task-associate_word-opensearch_query-1-%3Cem%3E%E4%BF%AE%E6%94%B9jupyter%3C%2Fem%3E%20notebook%E8%B7%AF%E5%BE%84.nonecase&depth_1-utm_source=distribute.pc_toolbar_associateword.none-task-associate_word-opensearch_query-1-%3Cem%3E%E4%BF%AE%E6%94%B9jupyter%3C%2Fem%3E%20notebook%E8%B7%AF%E5%BE%84.nonecase&request_id=164298873716781685311215&opensearch_request_id=164298873716781685311215
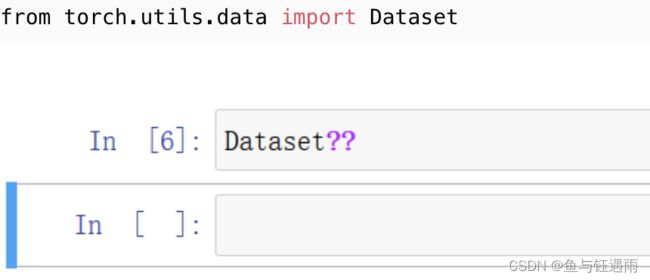
八、jupyter notebook基本使用方法
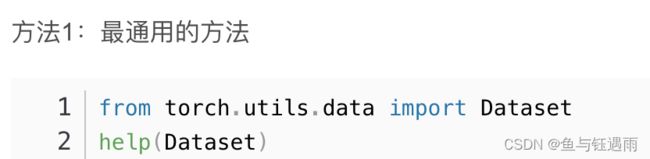
查看包或者方法的内容