Opencv项目实战:01 文字检测OCR(1)
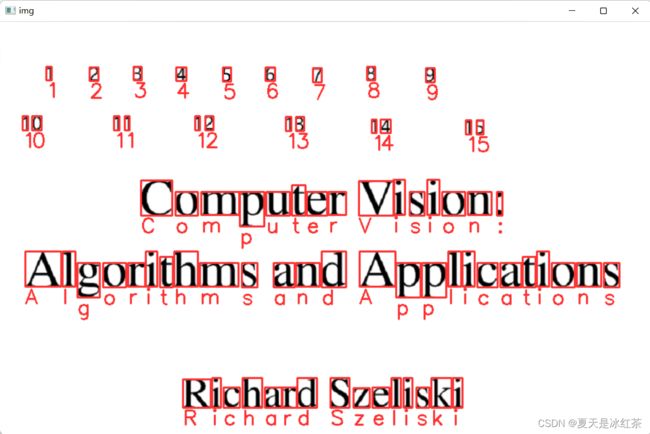
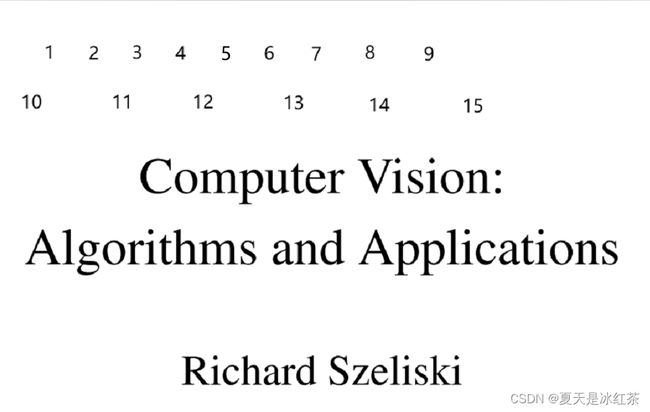
1,效果展示:
由图我们可知,对图片进行了数字和字母的识别。
2,准备阶段
(1)下载Tesseract
点击此网址:tesseract-ocr alternative download - Browse Files at SourceForge.net
我下载的是第四个版本,下载后是zip包的形式,压缩后可安装,选择路径可更改,否则会在默认的C:\\Program Files里面,没有什么大的影响。
(2)下载pytesseract
默认大家都已经下载好了opencv,方式相同,打开pycharm,进入此设置页面。
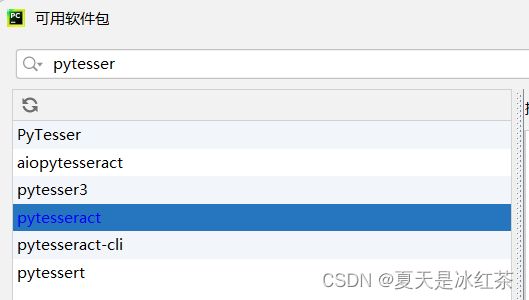
点击加号,收索软件包,选择蓝色条框进行下载,即可。
(3)pytesseract的函数讲解
# flake8: noqa: F401
from .pytesseract import ALTONotSupported
from .pytesseract import get_languages
from .pytesseract import get_tesseract_version
from .pytesseract import image_to_alto_xml
from .pytesseract import image_to_boxes
from .pytesseract import image_to_data
from .pytesseract import image_to_osd
from .pytesseract import image_to_pdf_or_hocr
from .pytesseract import image_to_string
from .pytesseract import Output
from .pytesseract import run_and_get_output
from .pytesseract import TesseractError
from .pytesseract import TesseractNotFoundError
from .pytesseract import TSVNotSupported


__version__ = '0.3.9'
我们着重讲解该项目所需的三个函数:
#1,pytesseract.image_to_string(img)
#2,pytesseract.image_to_boxes(img)
#3,pytesseract.image_to_data(img,confg=cong)
传入的参数都为img,只有用到第三个函数才会单独进行配置。
那么它们所包含的意思是什么呢?
由上至下
Returns the result of a Tesseract OCR run on the provided image to string
将在提供的图像上运行Tesseract OCR的结果返回到字符串
Returns string containing recognized characters and their box boundaries
返回包含可识别字符及其框边界的字符串
Returns string containing box boundaries, confidences,and other information.
返回包含框边界、置信度和其他信息的字符串。
3,代码的展示与讲解
import cv2
import pytesseract
import numpy as np
from PIL import ImageGrab
import time


pytesseract.pytesseract.tesseract_cmd = 'E:\pythonProject\Github\Tesseract-OCR\\tesseract.exe'
img = cv2.imread('1.png')
img = cv2.cvtColor(img, cv2.COLOR_BGR2RGB)

#################################
#### Detecting Characters  ######
#################################

print(pytesseract.image_to_string(img))
hImg, wImg, _ = img.shape
boxes = pytesseract.image_to_boxes(img)
for b in boxes.splitlines():
    print(b)
    b = b.split(' ')
    print(b)
    x, y, w, h = int(b[1]), int(b[2]), int(b[3]), int(b[4])
    cv2.rectangle(img, (x,hImg- y), (w,hImg- h), (50, 50, 255), 2)
    cv2.putText(img,b[0],(x,hImg- y+25),cv2.FONT_HERSHEY_SIMPLEX,1,(50,50,255),2)


cv2.imshow('img', img)
cv2.waitKey(0)
我先给大家讲解一下代码的思路,对于新入门的同学是极其重要的(本人同样也是)。
首先,通过 pytesseract.pytesseract.tesseract_cmd 录入我们刚刚下载Tesseract的路径,最好不要包含中文路径。
第二步,读入我们的图像,并将其转换为RGB格式,我们知道在opencv当中颜色是BGR格式,但我们的Tesseract读取的是RGB格式,故此多了一步转换。
第三步,打印 pytesseract.image_to_string(img),识别内容会出现在运行台中,可以用来检测是否将数字和字母识别正确或者识别完。注释掉无影响。
第四步,将图片的长,宽,通道数录入。用boxes 接收 pytesseract.image_to_boxes(img) 它的参数。如下:
1 68 524 76 544 0
2 132 523 145 543 0
3 197 524 209 544 0
4 260 523 275 543 0
5 329 522 341 543 0
所获取的信息为(从左到右):识别内容;x;y;宽;高 ;0(不用此参数)
第五步,根据获得的信息,对boxes做行的录入,形成列表,同时是按空格将信息分开。如下:
['1', '68', '524', '76', '544', '0']
['2', '132', '523', '145', '543', '0']
['3', '197', '524', '209', '544', '0']
['4', '260', '523', '275', '543', '0']
第六步,将x,y,宽,高录进参数当中,用cv2.rectangle()函数,画出相应的矩形框,这时候大家或许会有疑问,就是为什么不是下面这样的呢?
cv2.rectangle(img, (x,y), (x+w,y+h), (50, 50, 255), 2)而是如下所示:
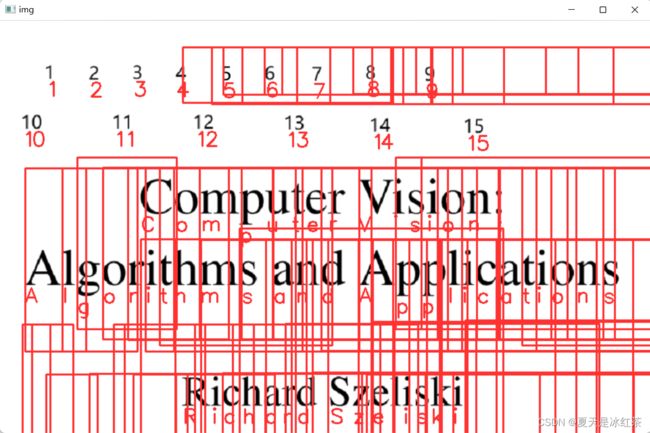
cv2.rectangle(img, (x,hImg- y), (w,hImg- h), (50, 50, 255), 2)我们先看看上面代码带来的效果:
矩形框对准的部位非常糟糕,那么不要怕,我们分析下。
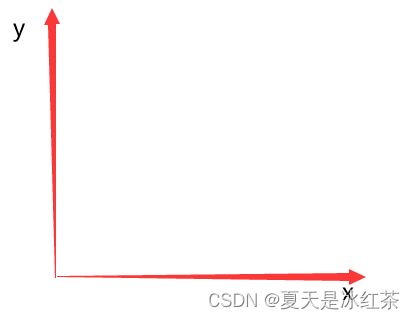
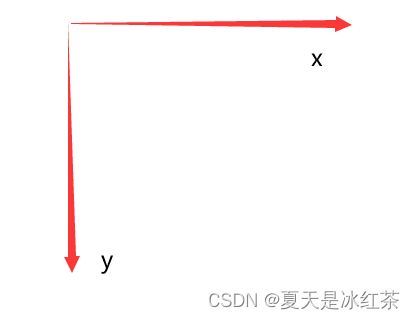
由图,我们可知,在x的方向上的信息是正确的,问题出在了y的坐标上,用pytesseract.image_to_boxes(img) 获得的信息可能是按下图的坐标轴:
而我们知道在opencv当中的坐标轴是按照如下所示:
所以大家能理解这个地方了吗?
最后一步就是,对图像添加文本,放在合适的位置,并进行窗口展示。
一些其他的内容我将在《Opencv项目实战:01 文字检测OCR(2)》中介绍,包括了,文字,字母的单独检测,pytesseract.image_to_data(img,confg=cong) 的配置问题,Tesseract的效果评估,以及此项目的总结。
图片素材,需用自取。
视频链接为(强推)OpenCV超实用实战项目_哔哩哔哩_bilibili
