02.RabbitMQ交换机基本使用
目录
交换机
Exchange
路由键(RoutingKey)
绑定键(BindingKey)
交换机类型
直连交换机:Direct exchange
直连交换机(生产者)
DirectConfig
ProviderController
主题交换机:Topic exchange
延申
主题交换机案例
生产者
TopicConfig
ProviderController
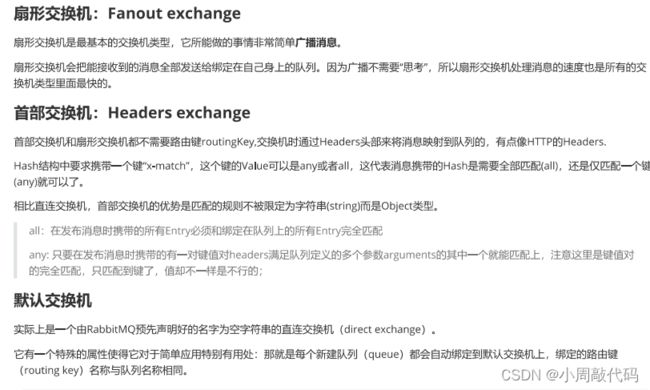
扇形交换机 Fanout exchange
交换机的属性
扇形交换机
生产者
FanoutConfig
易错点
交换机
Exchange
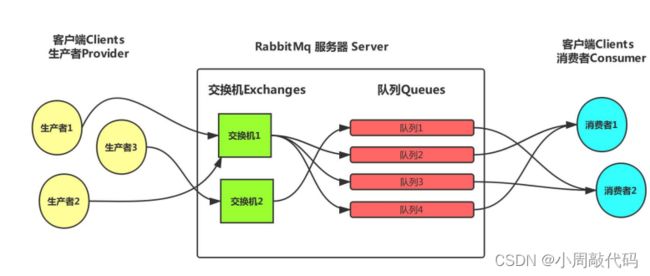
在RabbitMQ中,生产者发送消息不会直接将消息投递到队列中,而是先将消息投递到交换机中,而是先将消息投递到交换机中,在由交换机转发到具体的队列,队列再讲消息以推送或者拉取方式给消费者进行消费。
生产者将消息发送到EXchange,有Exchange再路由到一个或多个队列中
路由键(RoutingKey)
生产者将消息发送给交换机的时候,会指定RoutingKey指定路由规则
绑定键(BindingKey)
通过绑定建将交换机与队列关联起来,这样RabbitMQ就知道如何真确地将消息路由到队列
关系小结
生产者将消息发送给哪个Exchange是需要有RoutingKey决定的,生产者需要将Exchange与哪个队列绑定时需要有BindingKey决定
交换机类型
直连交换机:Direct exchange
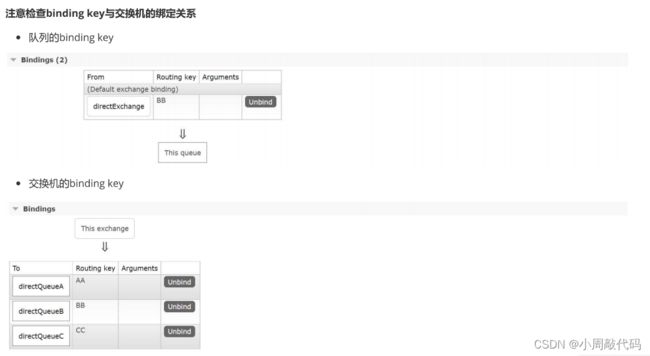
直连交换机的路由算法非常简单:将消息推送到binding key与该消息的routing key相同的队列
直连交换机x绑定了两个队列,第一个队列绑定了绑定键orange,第二个队列有两个绑定键:black和green.
在这种场景下,一个消息在布时指定了路由键orange将会只被路由到队列Q1,路由键为black和green的消息都将被路由到队列Q2,其他的消息都将被丢失。
同一个绑定键可以绑定到不同的队列上去,可以增加一个交换机X与队列Q2的绑定键,在这种情况下,直连交换机将会和广播交换机有着相同的行为,将消息推送到所有匹配的队列。一个路由键为black的消息将会同时被推送到队列Q1和Q2.
直连交换机(生产者)
DirectConfig
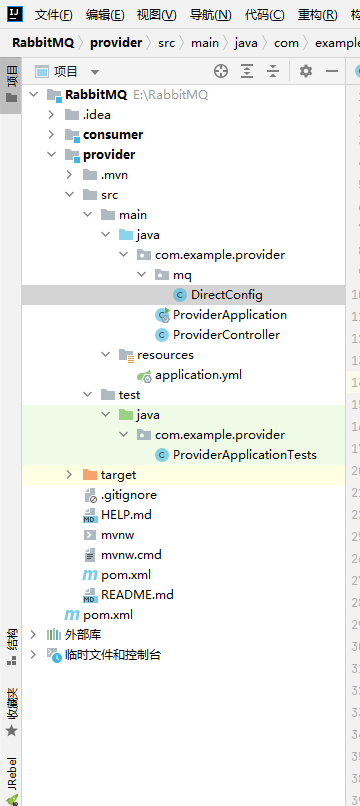
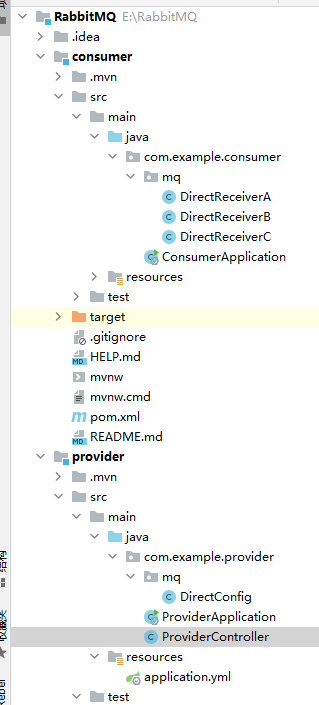
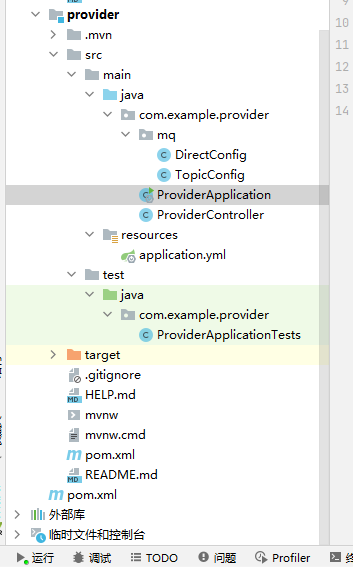
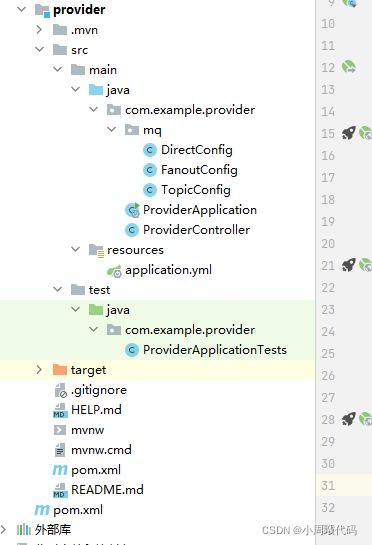
注:注意类放置的位置
package com.example.provider.mq;

import org.springframework.amqp.core.Binding;
import org.springframework.amqp.core.BindingBuilder;
import org.springframework.amqp.core.DirectExchange;
import org.springframework.amqp.core.Queue;
import org.springframework.context.annotation.Bean;
import org.springframework.context.annotation.Configuration;

@Configuration
public class DirectConfig {

    /**
     * 创建直连交换机队列
     */
    @Bean
    public Queue directQueueA(){
        return new Queue("directQueueA",true);
    }

    @Bean
    public Queue directQueueB(){
        return new Queue("directQueueB",true);
    }

    @Bean
    public Queue directQueueC(){
        return new Queue("directQueueC",true);
    }

    /**
     * 创建交换机
     */
    @Bean
     public DirectExchange directExchange(){
         return new DirectExchange("directExchange");
     }

    /**
     * 进行交换机和队列的绑定:设置bindingkey
     */

    @Bean
    public Binding BindingA(){
        return BindingBuilder.bind(directQueueA()).to(directExchange()).with("AA");
    }

    @Bean
    public Binding BindingB(){
        return BindingBuilder.bind(directQueueB()).to(directExchange()).with("BB");
    }

    @Bean
    public Binding BindingC(){
        return BindingBuilder.bind(directQueueC()).to(directExchange()).with("CC");
    }


}
ProviderController
package com.example.provider;

import org.springframework.amqp.rabbit.core.RabbitTemplate;
import org.springframework.beans.factory.annotation.Autowired;
import org.springframework.web.bind.annotation.RequestMapping;
import org.springframework.web.bind.annotation.RestController;

@RestController
public class ProviderController {

    @Autowired
    public RabbitTemplate template;

    //直接交换机
    @RequestMapping("/directSend")
    public String directSend(String routingKey){
        template.convertAndSend("directExchange",routingKey,"Hello World");
        return "yes";
    }

}
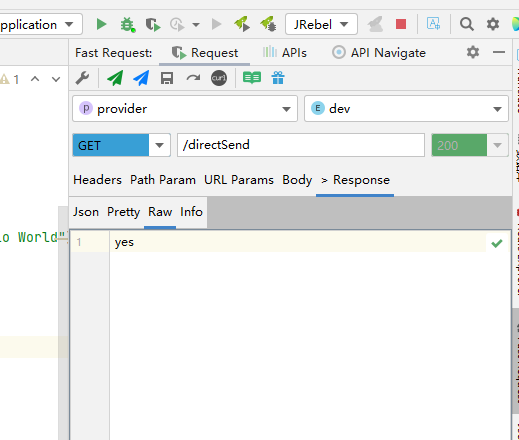
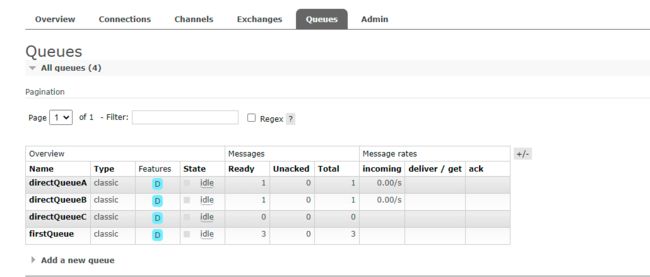
注:运行效果如下(温馨提示:直连交换机是通过值传递的哦~)
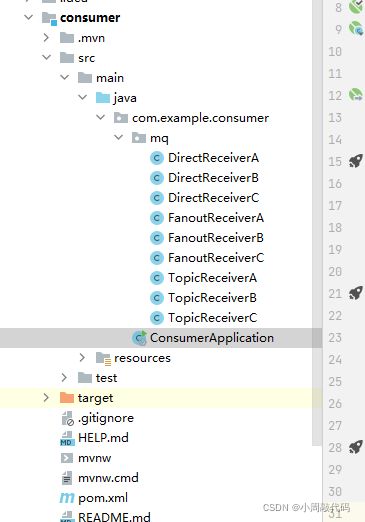
消费者
package com.example.consumer.mq;

import lombok.extern.slf4j.Slf4j;
import org.springframework.amqp.rabbit.annotation.RabbitHandler;
import org.springframework.amqp.rabbit.annotation.RabbitListener;
import org.springframework.stereotype.Controller;

@Controller
@RabbitListener(queues = "directQueueA")
@Slf4j
public class DirectReceiverA {

    @RabbitHandler
    public  void process(String message){
        log.info("A接到"+message);
    }
}
package com.example.consumer.mq;

import lombok.extern.slf4j.Slf4j;
import org.springframework.amqp.rabbit.annotation.RabbitHandler;
import org.springframework.amqp.rabbit.annotation.RabbitListener;
import org.springframework.stereotype.Controller;

@Controller
@RabbitListener(queues = "directQueueB")
@Slf4j
public class DirectReceiverB {

    @RabbitHandler
    public  void process(String message){
        log.info("B接到"+message);
    }
}
package com.example.consumer.mq;

import lombok.extern.slf4j.Slf4j;
import org.springframework.amqp.rabbit.annotation.RabbitHandler;
import org.springframework.amqp.rabbit.annotation.RabbitListener;
import org.springframework.stereotype.Controller;

@Controller
@RabbitListener(queues = "directQueueC")
@Slf4j
public class DirectReceiverC {

    @RabbitHandler
    public  void process(String message){
        log.info("C接到"+message);
    }
}
注:先开启生产者再开启消费者的启动类,不然会报错,运行效果如下:
主题交换机:Topic exchange
直接交换机的缺点
直接交换机的routing_key方案非常简单,如果我们希望一条消息发送给多个队列,那么这个交换机需要绑定上非常多的routing_key,假设每个交换机上都绑定一堆的routing_key连接到各个队列上,那么消息的管理就会异常地困难。
主题交换机的特点
发送到主题交换机的消息不能有任意的routing key,必须是由点号分开的一串单词,这些单词可以是任意的,但通产是与消息相关的一些特征。
比如以下是几个有效的routing key: "stock.usd.nyse","nyse.vmw","quick.orange.rabbit", routing key的单词可以有很多,最大限制是255 bytes。
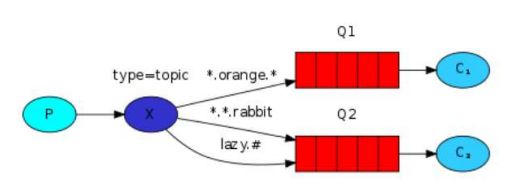
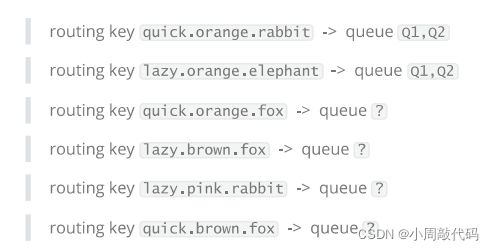
Topic交换机的逻辑与direct交换机有点相似,使用特定路由键发送的消息将发送到所有使用匹配绑定键绑定的队列,然而,绑定键有两个特殊的情况。
* 表示匹配任意一个单词
# 表示匹配任意一个或多个单词
延申
当一个队列的绑定键是"#",它将会接受所有的消息,而不再考虑所接受消息的路由键
当一个队列的绑定键没有用到"#"和"*"时,它又像direct交换一样工作。
主题交换机案例
生产者
TopicConfig
package com.example.provider.mq;

import org.springframework.amqp.core.Binding;
import org.springframework.amqp.core.BindingBuilder;
import org.springframework.amqp.core.TopicExchange;
import org.springframework.amqp.core.Queue;
import org.springframework.context.annotation.Bean;
import org.springframework.context.annotation.Configuration;

@Configuration
public class TopicConfig {

    private static final String KEY_A="*.orange.*";
    private static final String KEY_B="*.*.rabbit";
    private static final String KEY_C="lazy.#";


    /**
     * 创建直连交换机队列
     */
    @Bean
    public Queue topicQueueA(){
        return new Queue("topicQueueA",true);
    }

    @Bean
    public Queue topicQueueB(){
        return new Queue("topicQueueB",true);
    }

    @Bean
    public Queue topicQueueC(){
        return new Queue("topicQueueC",true);
    }

    /**
     * 创建交换机
     */
    @Bean
     public TopicExchange topicExchange(){
         return new TopicExchange("topicExchange");
     }

    /**
     * 进行交换机和队列的绑定:设置bindingkey
     */

    @Bean
    public Binding TopicA(){
        return BindingBuilder.bind(topicQueueA()).to(topicExchange()).with(KEY_A);
    }

    @Bean
    public Binding TopicB(){
        return BindingBuilder.bind(topicQueueB()).to(topicExchange()).with(KEY_B);
    }

    @Bean
    public Binding TopicC(){
        return BindingBuilder.bind(topicQueueC()).to(topicExchange()).with(KEY_C);
    }


}
ProviderController
package com.example.provider;

import org.springframework.amqp.rabbit.core.RabbitTemplate;
import org.springframework.beans.factory.annotation.Autowired;
import org.springframework.web.bind.annotation.RequestMapping;
import org.springframework.web.bind.annotation.RestController;

@RestController
public class ProviderController {

    @Autowired
    public RabbitTemplate template;


 //直接交换机
    @RequestMapping("/directSend")
    public String directSend(String routingKey){
        template.convertAndSend("directExchange",routingKey,"Hello World");
        return "yes";
    }
//主题交换机
    @RequestMapping("/topicSend")
    public String topicSend(String routingKey){
        template.convertAndSend("topicExchange",routingKey,"Hello World");
        return "yes";
    }

}
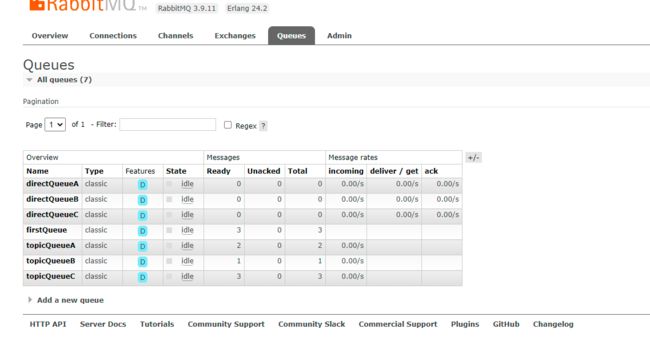
注:运行效果如下(主题交换机是根据条件进行发送数据的,如果条件不符则不会发送,直接丢弃)
 消费者
消费者
package com.example.consumer.mq;

import lombok.extern.slf4j.Slf4j;
import org.springframework.amqp.rabbit.annotation.RabbitHandler;
import org.springframework.amqp.rabbit.annotation.RabbitListener;
import org.springframework.stereotype.Controller;

@Controller
@RabbitListener(queues = "topicQueueA")
@Slf4j
public class TopicReceiverA {

    @RabbitHandler
    public  void process(String message){
        log.warn("A接到"+message);
    }
}
package com.example.consumer.mq;

import lombok.extern.slf4j.Slf4j;
import org.springframework.amqp.rabbit.annotation.RabbitHandler;
import org.springframework.amqp.rabbit.annotation.RabbitListener;
import org.springframework.stereotype.Controller;

@Controller
@RabbitListener(queues = "topicQueueB")
@Slf4j
public class TopicReceiverB {

    @RabbitHandler
    public  void process(String message){
        log.warn("B接到"+message);
    }
}
package com.example.consumer.mq;

import lombok.extern.slf4j.Slf4j;
import org.springframework.amqp.rabbit.annotation.RabbitHandler;
import org.springframework.amqp.rabbit.annotation.RabbitListener;
import org.springframework.stereotype.Controller;

@Controller
@RabbitListener(queues = "topicQueueC")
@Slf4j
public class TopicReceiverC {

    @RabbitHandler
    public  void process(String message){
        log.warn("C接到"+message);
    }
}
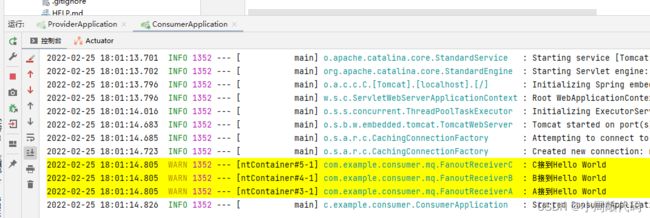
注:运行效果如下,先开启生产者再开启消费者启动类
扇形交换机 Fanout exchange
扇形交换机
生产者
FanoutConfig
package com.example.provider.mq;

import org.springframework.amqp.core.Binding;
import org.springframework.amqp.core.BindingBuilder;
import org.springframework.amqp.core.FanoutExchange;
import org.springframework.amqp.core.Queue;
import org.springframework.context.annotation.Bean;
import org.springframework.context.annotation.Configuration;

@Configuration
public class FanoutConfig {

    /**
     * 创建直连交换机队列
     */
    @Bean
    public Queue fanoutQueueA(){
        return new Queue("fanoutQueueA",true);
    }

    @Bean
    public Queue fanoutQueueB(){
        return new Queue("fanoutQueueB",true);
    }

    @Bean
    public Queue fanoutQueueC(){
        return new Queue("fanoutQueueC",true);
    }

    /**
     * 创建交换机
     */
    @Bean
     public FanoutExchange fanoutExchange(){
         return new FanoutExchange("fanoutExchange");
     }

    /**
     * 进行交换机和队列的绑定:设置bindingkey
     */

    @Bean
    public Binding FanoutA(){
        return BindingBuilder.bind(fanoutQueueA()).to(fanoutExchange());
    }

    @Bean
    public Binding FanoutB(){
        return BindingBuilder.bind(fanoutQueueB()).to(fanoutExchange());
    }

    @Bean
    public Binding FanoutC(){
        return BindingBuilder.bind(fanoutQueueC()).to(fanoutExchange());
    }


}
ProviderController
package com.example.provider;

import org.springframework.amqp.rabbit.core.RabbitTemplate;
import org.springframework.beans.factory.annotation.Autowired;
import org.springframework.web.bind.annotation.RequestMapping;
import org.springframework.web.bind.annotation.RestController;

@RestController
public class ProviderController {

    @Autowired
    public RabbitTemplate template;

    //直接交换机
    @RequestMapping("/directSend")
    public String directSend(String routingKey){
        template.convertAndSend("directExchange",routingKey,"Hello World");
        return "yes";
    }

    //主题交换机
    @RequestMapping("/topicSend")
    public String topicSend(String routingKey){
        template.convertAndSend("topicExchange",routingKey,"Hello World");
        return "yes";
    }


    //扇形交换机
    @RequestMapping("/fanoutSend")
    public String fanoutSend(String routingKey){
        template.convertAndSend("fanoutExchange",null,"Hello World");
        return "yes";
    }

}
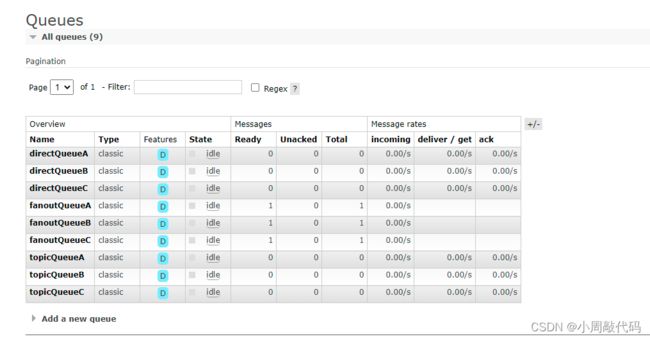
注:运行效果如下
消费者
package com.example.consumer.mq;

import lombok.extern.slf4j.Slf4j;
import org.springframework.amqp.rabbit.annotation.RabbitHandler;
import org.springframework.amqp.rabbit.annotation.RabbitListener;
import org.springframework.stereotype.Controller;

@Controller
@RabbitListener(queues = "fanoutQueueA")
@Slf4j
public class FanoutReceiverA {

    @RabbitHandler
    public  void process(String message){
        log.warn("A接到"+message);
    }
}
package com.example.consumer.mq;

import lombok.extern.slf4j.Slf4j;
import org.springframework.amqp.rabbit.annotation.RabbitHandler;
import org.springframework.amqp.rabbit.annotation.RabbitListener;
import org.springframework.stereotype.Controller;

@Controller
@RabbitListener(queues = "fanoutQueueC")
@Slf4j
public class FanoutReceiverC {

    @RabbitHandler
    public  void process(String message){
        log.warn("C接到"+message);
    }
}
注:先开启生产者再开启消费者启动类,运行效果如下:
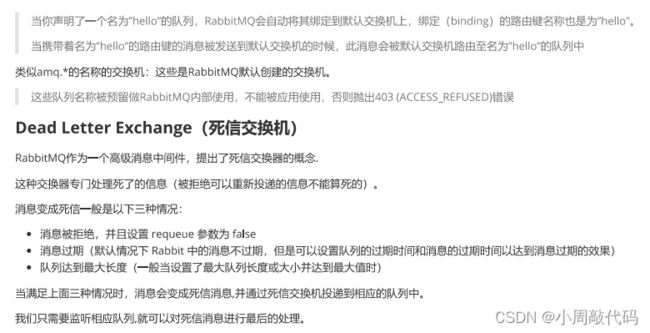
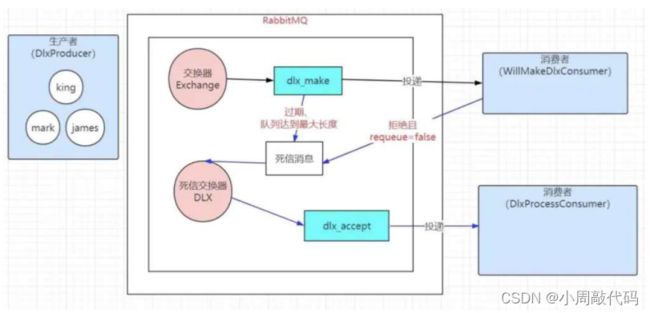
Dead Letter Exchange(死信交换机)
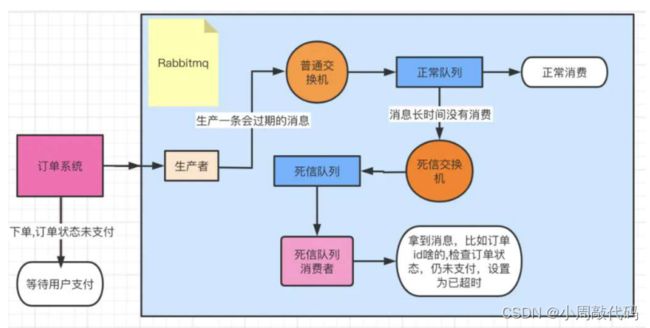
订单的超时处理
生产者生产一条1分钟超时的订单消息到正常交换机exchange-a中,消息匹配到队列queue-a,但一分钟后仍未消费。消息会投递到死心交换机dlx-exchange中,并发送到私信队列中。
死信队列dlx-queue的消费者拿到消息后,根据消息去查询订单的状态,如果仍然是未支付状态,将订单更新为超时状态。
交换机的属性
Name:交换机名称
Type:交换机类型,direct, topic ,fanout headers
Durability:是否需要持久化,如果持久性,则RabbitMQ重启后,交换机还存在
Auto Delete:当最后一个绑定到Exchange上的队列删除后,自动删除该Exchange
Internal:当前Exchange是否用于RabbitMQ内部使用,默认为False
Arguments:扩展参数,用于扩展AMQP协议定制化使用
代码编写
Map < String , Object > config = new HashMap <> ();config . put ( "x-message-ttl" , 10000 ); //message 在该队列 queue 的存活时间最大为 10 秒config . put ( "x-dead-letter-exchange" , "deadExchange" ); //x-dead-letter-exchange 参数是设置该队列的死信交换器( DLX )config . put ( "x-dead-letter-routing-key" , "deadQueue" ); //x-dead-letter-routing-key 参数是给这个 DLX 指定路由键new Queue ( "normalQueue" , true , true , false , config );
案列:生产者
DeadConfig
package com.example.provider.mq;

import org.springframework.amqp.core.Binding;
import org.springframework.amqp.core.BindingBuilder;
import org.springframework.amqp.core.DirectExchange;
import org.springframework.amqp.core.Queue;
import org.springframework.context.annotation.Bean;
import org.springframework.context.annotation.Configuration;

import javax.management.Query;
import java.util.HashMap;
import java.util.Map;

@Configuration
public class DeadConfig {
    //1.需要正常的交换机
    //2.正常队列发出消息
    //3.具备死信交换机和队列

    @Bean
    public Queue normalQueue(){
        Map config =new HashMap<>();
        //过期时间
        config.put("x-message-ttl", 10000);
        //message在该队列queue的存活时间最大为10秒
        //死信交换机
        config.put("x-dead-letter-exchange", "deadExchange");
        //x-dead-letter-exchange参数是设置该队列的死信交换器(DLX)
        //死信routing key
        config.put("x-dead-letter-routing-key", "EE");
        //x-dead-letter-routing-key参数是给这个DLX指定路由键

        return new Queue("normalQueue",true,true,false,config);
    }

    @Bean
    public Queue deadQueue(){
        return new Queue("deadQueue",true);
    }

    @Bean
    public DirectExchange normalExchange(){
        return new DirectExchange("normalExchange");
    }

    @Bean
    public DirectExchange deadExchange(){
        return new DirectExchange("deadExchange");
    }

    @Bean
    public Binding normalBinding(){
     return BindingBuilder.bind(normalQueue()).to(normalExchange()).with("DD");
    }

    @Bean
    public Binding deadBinding(){
        return BindingBuilder.bind(deadQueue()).to(deadExchange()).with("EE");
    }

}
package com.example.provider;

import lombok.extern.slf4j.Slf4j;
import org.springframework.amqp.rabbit.core.RabbitTemplate;
import org.springframework.beans.factory.annotation.Autowired;
import org.springframework.web.bind.annotation.RequestMapping;
import org.springframework.web.bind.annotation.RestController;

@RestController
@Slf4j
public class ProviderController {

    @Autowired
    public RabbitTemplate template;

    //直接交换机
    @RequestMapping("/directSend")
    public String directSend(String routingKey){
        template.convertAndSend("directExchange",routingKey,"Hello World");
        return "yes";
    }

    //主题交换机
    @RequestMapping("/topicSend")
    public String topicSend(String routingKey){
        template.convertAndSend("topicExchange",routingKey,"Hello World");
        return "yes";
    }


    //扇形交换机
    @RequestMapping("/fanoutSend")
    public String fanoutSend(String routingKey){
        template.convertAndSend("fanoutExchange",null,"Hello World");
        return "yes";
    }


    //死信交换机
    @RequestMapping("/deadSend")
    public String deadSend(String routingKey){
        log.warn("该订单已经保存");
        template.convertAndSend("normalExchange","DD","12343");
        return "yes";
    }

}
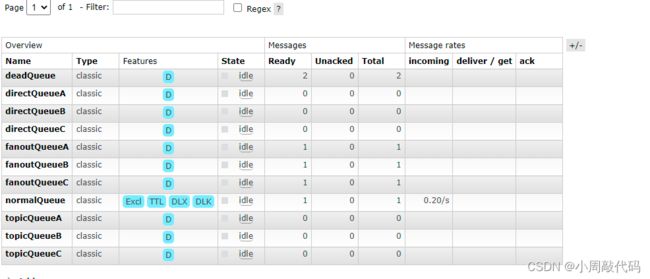
注:运行效果如下
注:10秒过期以后的效果如下:
消费者
package com.example.consumer.mq;

import lombok.extern.slf4j.Slf4j;
import org.springframework.amqp.rabbit.annotation.RabbitHandler;
import org.springframework.amqp.rabbit.annotation.RabbitListener;
import org.springframework.stereotype.Controller;

@Controller
@RabbitListener(queues = "deadQueue")
@Slf4j
public class DeadReceiver {

    @RabbitHandler
    public  void process(String message){
        log.info(message+"该订单已经过期");
    }
}
