win10 + mmdetection 新电脑配置教程
近期因为项目需要,需要配置mmdetection这个开源的目标检测库。
之前读论文看源码时就发现很多论文复现是基于这个库的,里面包含多种视觉检测的核心模块,通过组合能快速搭建好自己的网络,能大大加快研究效率,目前都有YOLOX框架。
首先,在官网 https://github.com/open-mmlab/mmdetection查看mmdetection的安装过程,
在docs/get_started.md中详细说明了linux和macos下的安装条件和过程,但windows系统还处在实验性支持阶段。
Prerequisites
- Linux or macOS (Windows is in experimental support)
- Python 3.6+
- PyTorch 1.3+
- CUDA 9.2+ (If you build PyTorch from source, CUDA 9.0 isalso compatible)
- GCC 5+
- MMCV
然后在网上浏览了一下win10下的配置过程,步骤繁琐,发现大家会遇到各种各样的问题,看评论发现还出现问题,少则两三天才解决,着实把我吓退了。已经在考虑要不要装个linux双系统,但是考虑到组内其他人linux不熟练,还是自己动手配置一下吧。
使用的版本情况
系统:Windows10
cuda:10.2
cudnn:7.6.5
pytorch:1.8.0
torchvision:0.9.0
mmcv:1.3.9
mmdetection:2.15.0
cuda和cudnn 安装
这个安装就按照之前的文章来:https://blog.csdn.net/shuaijieer/article/details/106150135
anconda 安装
官网下载安装包后,直接安装
创建conda虚拟环境
点击开始菜单,找到Anaconda3下的Anaconda Prompt,右键- -更多–以管理员身份运行。

创建名为mmd虚拟环境
conda create -n mmd python=3.7
激活虚拟环境
conda activate mmd
安装pytorch和torchvision
直接安装pytorch可能会因为网络问题中断,我是下载的离线的安装包,把下载链接复制到IDM下载器中超级快。
pytorch下载链接:https://download.pytorch.org/whl/cu102/torch-1.8.0-cp37-cp37m-win_amd64.whl
torchvision下载链接:https://download.pytorch.org/whl/cu102/torchvision-0.9.0-cp37-cp37m-win_amd64.whl
pytorch和torchvision版本要对应起来。
设置conda下载等待时间
在安装环境过程中会在线下载一下几十兆左右的安装包,为了避免下载失败,延长等待时间。
conda config --set remote_read_timeout_secs 100.0
安装vs2017/2019
勾选c++环境,因为是在一台新电脑配置的,不安装的话会在编译mmdetection环境时提示下面错误
error: Microsoft Visual C++ 14.0 or greater is required.
安装mmcv
pip install mmcv-full==1.3.9 -f https://download.openmmlab.com/mmcv/dist/cu102/torch1.8.0/index.html
安装mmdetection
MMDetection 和 MMCV 的版本要兼容

参考https://blog.csdn.net/ECHOSON/article/details/119449845?spm=1001.2101.3001.6650.2&utm_medium=distribute.pc_relevant.none-task-blog-2%7Edefault%7ECTRLIST%7Edefault-2.no_search_link&depth_1-utm_source=distribute.pc_relevant.none-task-blog-2%7Edefault%7ECTRLIST%7Edefault-2.no_search_link
直接安装最新版的。
# install mmdetection
git clone https://github.com/open-mmlab/mmdetection.git
cd mmdetection
pip install -r requirements/build.txt
pip install -v -e .
demo测试
下载faster_rcnn_r50_fpn_1x_coco的预训练模型:https://download.openmmlab.com/mmdetection/v2.0/faster_rcnn/faster_rcnn_r50_fpn_1x_coco/faster_rcnn_r50_fpn_1x_coco_20200130-047c8118.pth
保存到mmdetection路径下。
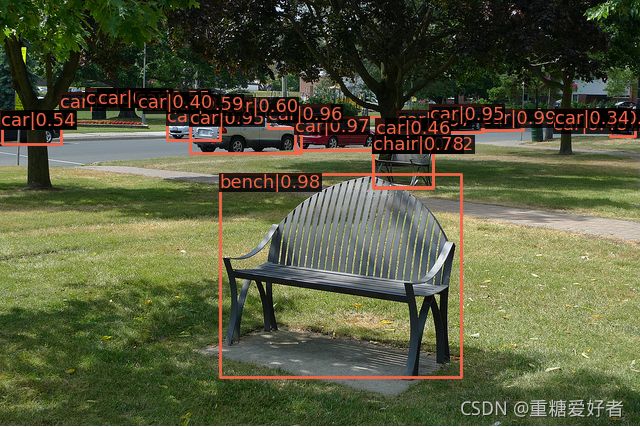
运行下面代码,显示图片
python demo/image_demo.py demo/demo.jpg configs/faster_rcnn/faster_rcnn_r50_fpn_1x_coco.py faster_rcnn_r50_fpn_1x_coco_20200130-047c8118.pth
至此,win10 下配置成功!
