mmdetection
零、官方教程文档
1.官方教程文档
不得不知的 MMDetection 学习路线
中文解读文案汇总
2.轻松掌握 MMDetection 中常用算法(二):Faster R-CNN|Mask R-CNN
3.框架解读
轻松掌握 MMDetection 整体构建流程(一)
轻松掌握 MMDetection 整体构建流程(二)
轻松掌握 MMDetection 中 Head 流程
4.YOLOX 在 MMDetection 中复现全流程解析
一、参考链接
0.CUDA Toolkit Archive:https://developer.nvidia.com/cuda-toolkit-archive
torch:https://download.pytorch.org/whl/torch_stable.html
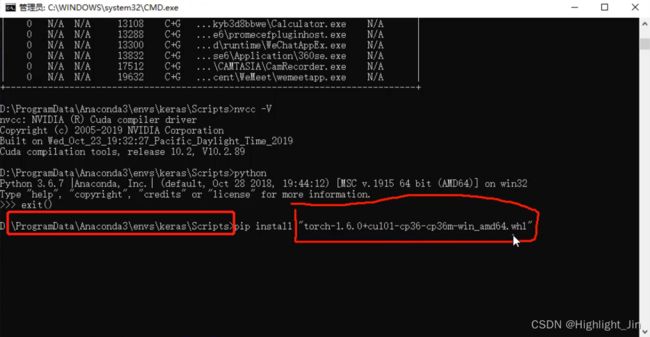
下载到Scripts下面。
mmdetection源码笔记汇总(一个博客专栏)
mmcv和mmdet源码注释版
3.https://github.com/open-mmlab/mmdetection
https://github.com/open-mmlab
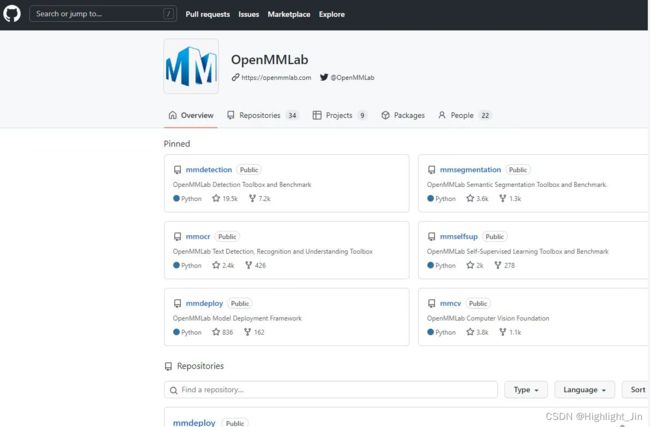
4.https://github.com/hhaAndroid/mmdetection-mini
5.open-mmlab (segmentation) 开源框架
6.https://download.openmmlab.com/mmcv/dist/cu113/torch1.10.0/index.html
https://mmdetection.readthedocs.io/en/latest/
二、安装记录
参考链接: MMDetection亲测安装教程
mmdetection安装教程
开源算法平台OpenMMLab来了,Gitee深度学习CV领域再添一员猛将(发布于 2022-05-06 17:51)
前提: 需版本对应,安装 MMDetection 需要提前安装 MMCV(面向计算机视觉的基础库)。
在官方链接中有一段话:

1.在之前配置好的pytorch的环境中,安装对应版本的mmcv-full,在此链接中找到对应的版本下载,然后pip install xxxx.whl
2.把mmdetection的git clone下来,然后在mmdetection的目录下执行下面两条命令
pip install -r requirements/build.txt
pip install -v -e .
3.测试mmdetection是否安装成功
在mmdetection目录下新建test.py和checkpoints文件夹,打开网址下载好权重文件放在checkpoints文件夹下,运行以下代码即可。
from mmdet.apis import init_detector, inference_detector

config_file = 'configs/faster_rcnn/faster_rcnn_r50_fpn_1x_coco.py'
# 从 model zoo 下载 checkpoint 并放在 `checkpoints/` 文件下
# 网址为: http://download.openmmlab.com/mmdetection/v2.0/faster_rcnn/faster_rcnn_r50_fpn_1x_coco/faster_rcnn_r50_fpn_1x_coco_20200130-047c8118.pth
checkpoint_file = 'checkpoints/faster_rcnn_r50_fpn_1x_coco_20200130-047c8118.pth'
device = 'cuda:0'
# 初始化检测器
model = init_detector(config_file, checkpoint_file, device=device)
# 推理演示图像
inference_detector(model, 'demo/demo.jpg')
三、安装相应的包报错查询
1.ValueError: check_hostname requires server_hostname
网络代理的问题,关调重新安装即可解决问题。
四、记录
1.数据集标注与标签获取
1.使用labelme进行数据的标注。
标注为矩形框,多边形框。
矩形框的标注从左上到右下。
2.数据格式
-
COCO数据标注格式(使用得多)
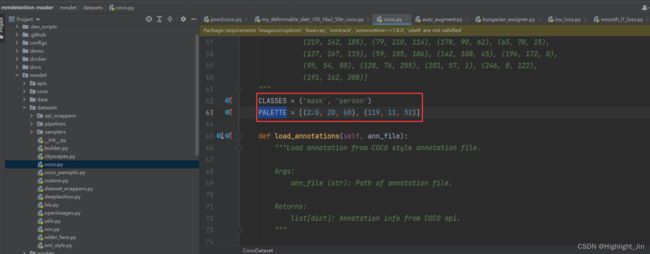
通过脚本将数据从labelme打标签生成的label文件(json文件)转化成COCO格式。- 修改自己的类别
- (1)mmdet/datasets/coco.py中将cocodatasets中的内容改成自己的
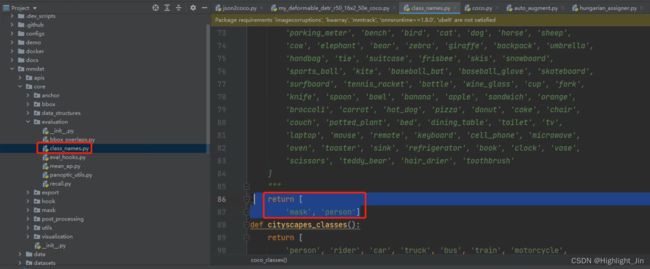
- (2)mmdet/core/evaluation/classnames.py中将coco_classes中的内容改成自己的
- (3)num_classes改成自己的(修改配置文件,通过运行train.py生成一个整合的配置文件,然后修改其中的num_classes)

如何生成一个完整的配置文件?
指定所选模型的路径,在mmdectection的目录下,如D:\E\mmlab\mmdetection-master\tools\train.py,指定train.py中参数的路径,比如D:\E\mmlab\mmdetection-master\configs\deformable_detr\deformable_detr_r50_16x2_50e_coco.py,运行一下train.py,执行之后会在此处D:\E\mmlab\mmdetection-master\tools\work_dirs\deformable_detr_r50_16x2_50e_coco\deformable_detr_r50_16x2_50e_coco.py生成配置文件。复制到D:\E\mmlab\mmdetection-master\configs\deformable_detr路径下,并将其命名为my_deformable_detr_r50_16x2_50e_coco.py。
如果要用deformable_detr,mmcv的版本要是1.4.2,官方说的。自己这里进行测试使用的是1.5.0版本。运行train.py时报错:RuntimeError: Index put requires the source and destination dtypes match, got Long for the destination and Int for the source.
解决方法:在D:\E\mmlab\mmdetection-master\mmdet\core\bbox\assigners\hungarian_assigner.py文件中进行修改如下:
参考链接
-
VOC 数据标注格式
3.配置文件数据增强策略分析
train_pipeline = [                  # 训练的流程
    dict(type='LoadImageFromFile'),                     # 读数据
    dict(type='LoadAnnotations', with_bbox=True),       # 读标签
    dict(type='RandomFlip', flip_ratio=0.5),            # 数据增强--随机裁剪
    dict(
        type='AutoAugment',                             # 自动数据增强. 下面的策略随机选择一个
        policies=[[{
            'type':
            'Resize',
            'img_scale': [(480, 1333), (512, 1333), (544, 1333), (576, 1333),   # 并不是resize到1333
                          (608, 1333), (640, 1333), (672, 1333), (704, 1333),
                          (736, 1333), (768, 1333), (800, 1333)],
            'multiscale_mode':
            'value',                                    # value表示上面img_scale中的随便选一个;如果是range是按顺序取
            'keep_ratio':                               # True的时候以h和w中比例差异小的为基准倍数,对h和w按照相同比例resize(保持原有长宽比)
            True                                        # False时直接按照上面大小resize
        }],
                  [{
                      'type': 'Resize',
                      'img_scale': [(400, 4200), (500, 4200), (600, 4200)],
                      'multiscale_mode': 'value',
                      'keep_ratio': True
                  }, {
                      'type': 'RandomCrop',
                      'crop_type': 'absolute_range',
                      'crop_size': (384, 600),
                      'allow_negative_crop': True
                  }, {
                      'type':
                      'Resize',
                      'img_scale': [(480, 1333), (512, 1333), (544, 1333),
                                    (576, 1333), (608, 1333), (640, 1333),
                                    (672, 1333), (704, 1333), (736, 1333),
                                    (768, 1333), (800, 1333)],
                      'multiscale_mode':
                      'value',
                      'override':                       # 没什么实际含义,重写img_scale加上不报错
                      True,
                      'keep_ratio':
                      True
                  }]]),
    dict(
        type='Normalize',
        mean=[123.675, 116.28, 103.53],
        std=[58.395, 57.12, 57.375],
        to_rgb=True),
    dict(type='Pad', size_divisor=1),
    dict(type='DefaultFormatBundle'),
    dict(type='Collect', keys=['img', 'gt_bboxes', 'gt_labels'])        # 读图像、读标注框、读类别id
]
4.训练完之后
预训练模型的下载地址:https://github.com/open-mmlab/mmdetection中点击Model Zoo

(1)训练完之后,先不评估,先在D:\E\mmlab\mmdetection-master\demo\image_demo.py地方进行单张图片的测试。
指定参数img、config、checkpoint的值,然后运行image_demo.py,得到结果。
(2)测试,运行test.py
指定参数config、checkpoint、--eval、--out、--show。
../configs/deformable_detr/my_deformable_detr_r50_16x2_50e_coco.py
./work_dirs/deformable_detr_r50_16x2_50e_coco/latest.pth
--eval bbox
--out ./work_dirs/deformable_detr_r50_16x2_50e_coco/test.pkl
--show
(3)可视化分析模块tools/analysis_tools/confusion_matrix.py
指定参数config、prediction_path、save_dir、(--show、)--show-dir、--eval-options。
(4)制作数据集之后,通过这个文件进行查看D:\E\mmlab\mmdetection-master\tools\misc\browse_dataset.py
在训练之前先去瞅一眼。指定参数config。
(5)在第(3)(4)中介绍的小工具,在官方文档中有介绍:英文文档
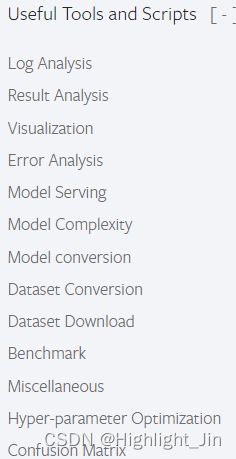
(6)算模型的参数量,文件D:\E\mmlab\mmdetection-master\tools\analysis_tools\get_flops.py,输入参数量,每层的参数量、计算量。需要指定输入图像的大小,输入图像的大小决定。指定参数config,config和上面所指定的内容一样。
(7)mmdetection中的评价指标和COCO官方的评价指标略有不同
如下图中所示,在mmdetection-master/mmdet/datasets/coco.py文件中将proposal_nums修改一下,然后就能得到和官方评估结果。
def evaluate(self,
             results,
             metric='bbox',
             logger=None,
             jsonfile_prefix=None,
             classwise=False,
             proposal_nums=(1, 10, 100), # (100, 300, 1000),                                                # 此处这里修改一下proposal_nums的个数
             iou_thrs=None,
             metric_items=None):
参考学习资料
1.mmdetection系列教程合集(B站视频)
2.使用mmdetection训练和评估自定义数据集
评估时的命令介绍可以参考,把图片的测试结果直接绘制保存下来,生成指标结果,并打印每个类别的结果