【目标检测】Detectron2环境配置与安装
Detectron2环境配置与安装
- 1. 系统与GPU
- 2. 软件与平台
- 3. 环境配置
-
- 创建并激活detectron2环境
- 安装pytorch、torchvision、cudatoolkit
- 安装Opencv
- 安装cython
- 安装pycocotools
- 4. detectron2安装
-
- 数据集准备
- Detectron2测试
- 参考资料
1. 系统与GPU
- Ubuntu系统 (16.04)
- 英伟达显卡P2000
2. 软件与平台
- 环境管理软件:Anaconda
- 代码调试软件:Pycharm
- 物体检测平台:Detectron2
Anaconda介绍、安装及使用教程
3. 环境配置
创建并激活detectron2环境
conda create --name detectron2 python=3.6
conda activate detectron2
安装pytorch、torchvision、cudatoolkit
conda install pytorch==1.6.0 torchvision==0.7.0 cudatoolkit=10.1 -c pytorch
问题:
安装总是中断。
解决方法:
命令-c pytorch意味着从官方源下载安装,由于网络原因易中断。
添加国内源解决网络问题,依次执行以下命令:
conda config --add channels https://mirrors.tuna.tsinghua.edu.cn/anaconda/pkgs/free/
conda config --add channels https://mirrors.tuna.tsinghua.edu.cn/anaconda/pkgs/main/
conda config --add channels https://mirrors.tuna.tsinghua.edu.cn/anaconda/cloud/pytorch/
conda config --set show_channel_urls yes
执行完毕后,删除-c pytorch,再次安装,问题解决。
# CUDA 10.1
conda install pytorch==1.6.0 torchvision==0.7.0 cudatoolkit=10.1
import torch报错:
ImportError: /home/zjh/anaconda3/envs/detectron2/lib/python3.6/site-packages/torch/lib/libtorch_python.so: undefined symbol: PySlice_Unpack
错误原因:detectron环境中使用的Python版本是3.6.0,这个版本与pytorch1.6.0有冲突
解决办法:将pyhton从3.6.0升级到3.6.2,在detectron2环境下,执行下面这句命令问题解决。
conda install python=3.6.2
安装Opencv
conda install --channel https://conda.anaconda.org/menpo opencv3
安装cython
pip install cython
安装pycocotools
pip install -U 'git+https://github.com/cocodataset/cocoapi.git#subdirectory=PythonAPI'
报错:
ERROR: Command errored out with exit status 128:8: git clone -q https://github.com/cocodataset/cocoapi.git /tmp/pip-req-build-zjbhnxod Check the logs for full command output.
解决:网络原因,多次尝试或切换手机热点,解决问题。
4. detectron2安装
detectron2 github链接:https://github.com/facebookresearch/detectron2
git clone https://github.com/facebookresearch/detectron2.git
python -m pip install -e detectron2
注意:clone 好代码库后,不要 cd 进 detectron2,否则会报错can not find file setup.py!!!
报错:
ERROR: Command errored out with exit status 1: /home/***/anaconda3/envs/detectron2/bin/python3 -c 'import sys, setuptools, tokenize; sys.argv[0] = '"'"'/media/***/69e2e9e1-ea82-4581-8f2c-28660f9a5a91/zjh/detectron2/setup.py'"'"'; __file__='"'"'/media/**/69e2e9e1-ea82-4581-8f2c-28660f9a5a91/zjh/detectron2/setup.py'"'"';f=getattr(tokenize, '"'"'open'"'"', open)(__file__);code=f.read().replace('"'"'\r\n'"'"', '"'"'\n'"'"');f.close();exec(compile(code, __file__, '"'"'exec'"'"'))' develop --no-deps Check the logs for full command output.
错误原因:gcc版本问题。
解决办法:重新安装gcc
编译错误的原因!!!
cuda版本和gcc版本不匹配,之前也尝试安装其他版本gcc,但是采用的安装方式不正确,亲测有效的正确的解决方案如下:
sudo apt-get install gcc-6 g++-6 g++-6-multilib gfortran-6

sudo update-alternatives --install /usr/bin/gcc gcc /usr/bin/gcc-6 60 --slave /usr/bin/g++ g++ /usr/bin/g++-6

sudo update-alternatives --config gcc
但是由ppa源安装太慢极易中断,使用下面的方法解决:
# 使用apt-fast 来加速你的Ubuntu 的apt
sudo add-apt-repository ppa:apt-fast/stable

sudo apt-get update

sudo apt-get install apt-fast
以上gcc安装方法参考自:
https://blog.csdn.net/chen645096127/article/details/111563985
https://www.jianshu.com/p/e4889c7e257b
如果源码编译实在无法通过,可以选择使用pre-built方式尝试安装detectron2。
根据CUDA和pytorch版本选择安装命令:

python -m pip install detectron2 -f \
  https://dl.fbaipublicfiles.com/detectron2/wheels/cu101/torch1.6/index.html
安装成功!

数据集准备
数据集下载(迅雷下载):
http://images.cocodataset.org/zips/train2017.zip
http://images.cocodataset.org/zips/val2017.zip
http://images.cocodataset.org/zips/test2017.zip
http://images.cocodataset.org/annotations/stuff_annotations_trainval2017.zip
http://images.cocodataset.org/annotations/annotations_trainval2017.zip
http://images.cocodataset.org/annotations/image_info_test2017.zip
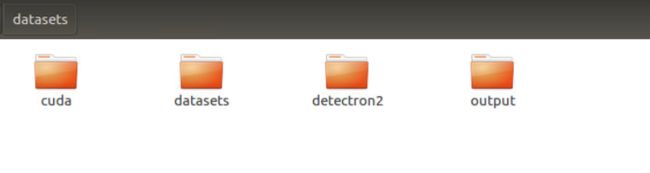
解压选中的COCO数据集,并按照截图所示放置文件位置。


Detectron2测试
- 单张图片测试
# 激活环境
conda activate detectron2
# 进去demo目录·
cd ./detectron2/demo
# 执行测试demo.py
python demo.py --config-file ../configs/COCO-Detection/retinanet_R_50_FPN_1x.yaml --input 000000000016.jpg [--otheroptions] --opts MODEL.WEIGHTS detectron2://COCO-Detection/retinanet_R_50_FPN_1x/190397773/model_final_bfca0b.pkl
- 测试模型在COCO验证集上的mAP
# 进去demo目录·
cd ./detectron2
# 执行测试
python ./tools/train_net.py --config-file ./configs/COCO-Detection/retinanet_R_50_FPN_1x.yaml --eval-only MODEL.WEIGHTS detectron2://COCO-Detection/retinanet_R_50_FPN_1x/190397773/model_final_bfca0b.pkl
如果需要测试其他模型在Model Zoo里面选择对应模型链接,替换命令里的链接。
实际测试时,会报错 can not import name '_C'
按照官网的说法,可能需要换一个路径再执行
cd到上一级,并在detectron2同级创建datasets,直接将解压好的数据集link过来就行。


python ./detectron2/tools/train_net.py --config-file ./detectron2/configs/COCO-Detection/retinanet_R_50_FPN_1x.yaml --eval-only MODEL.WEIGHTS detectron2://COCO-Detection/retinanet_R_50_FPN_1x/190397773/model_final_bfca0b.pkl
评估完了之后又报错!

编译问题暂未解决,采用pip安装detectron2包,编写代码调用相关函数完成评测。
评测完整代码calculate_ap.py
from detectron2 import model_zoo
from detectron2.engine import DefaultPredictor
from detectron2.config import get_cfg

from detectron2.data import DatasetCatalog, MetadataCatalog, build_detection_test_loader
from detectron2.evaluation import COCOEvaluator, inference_on_dataset

from detectron2.engine import DefaultTrainer
from detectron2.evaluation import COCOEvaluator
import os

from detectron2.checkpoint import DetectionCheckpointer

# cfg设置
cfg = get_cfg()  # 获取默认cfg

# faster_rcnn_R_50_FPN_1x.yaml
cfg.merge_from_file(model_zoo.get_config_file("./COCO-Detection/faster_rcnn_R_50_FPN_1x.yaml"))
cfg.MODEL.WEIGHTS = os.path.join(cfg.OUTPUT_DIR, 'model_final_b275ba.pkl')

# retinanet_R_50_FPN_1x.yaml
# cfg.merge_from_file(model_zoo.get_config_file("./COCO-Detection/retinanet_R_50_FPN_1x.yaml"))
# cfg.MODEL.WEIGHTS = os.path.join(cfg.OUTPUT_DIR, 'model_final_bfca0b.pkl')

trainer = DefaultTrainer(cfg)
trainer.resume_or_load(resume=True)  # resume=True means load a file cfg.OUTPUT_DIR

DetectionCheckpointer(trainer.model).load(cfg.MODEL.WEIGHTS)  # load a file, usually from cfg.MODEL.WEIGHTS

predictor = DefaultPredictor(cfg)
evaluator = COCOEvaluator("coco_2017_val", cfg, False, output_dir="./output")
val_loader = build_detection_test_loader(cfg, "coco_2017_val")
inference_on_dataset(trainer.model, val_loader, evaluator)
参考资料
推荐入门课程:
http://cs231n.github.io/
在ubuntu上安装多个版本的CUDA,并且可以随时切换
https://blog.csdn.net/ksws0292756/article/details/80120561
ubuntu16.04 安装gcc7,g++7
https://www.cnblogs.com/shuazi/p/10688992.html
Ubuntu16.04和win10双系统下对Ubuntu系统进行扩容
How to Train Detectron2 on Custom Object Detection Data